YSD_Users_E.pdf - 第105页
2-45 2 Basic operation 5 Remo ve the syringe. 1. Press the [Cylinder exchange] button. 2. Press the [Move default] button to move the head to the syringe replacement position. e 3. Press the emergency stop button and ope…
2-44
2
Basic operation
3.10 Finishing board production
To finish board production, follow these steps.
1
Stop machine operation.
There are three methods for stopping the machine.
1. Emergency stop button:
Press this button to trigger emergency stop. Do not use this button in normal operation.
e
2. [STOP] button (operation panel):
Pressing the [STOP] button stops the machine immediately. To resume operation, press the [START]
button on the operation panel.
3. [Cycle Stop] button:
Pressing this button stops the machine when dispense operation for the current board is completed.
4. [ConveyOut Stop] button:
Use this button when you want to finish production after adhesive is dispensed on the boards
currently on the conveyor. All boards on the conveyor are transferred to the downstream side after
adhesive dispensing, but new boards are not transferred from the upstream side.
c
CAUTION
Do not press the emergency stop button during operation except in case of emergency.
2
Reset the operation.
Press the [RESET] button on the operation panel. The machine stops operation immediately and returns
to the board production standby status.
e
3
Remove the back-up pins.
After pressing the emergency stop button, open the safety cover and remove the back-up pins.
4
Cancel emergency stop.
Close the safety cover, release the emergency stop button, and press the [READY] button.
2-45
2
Basic operation
5
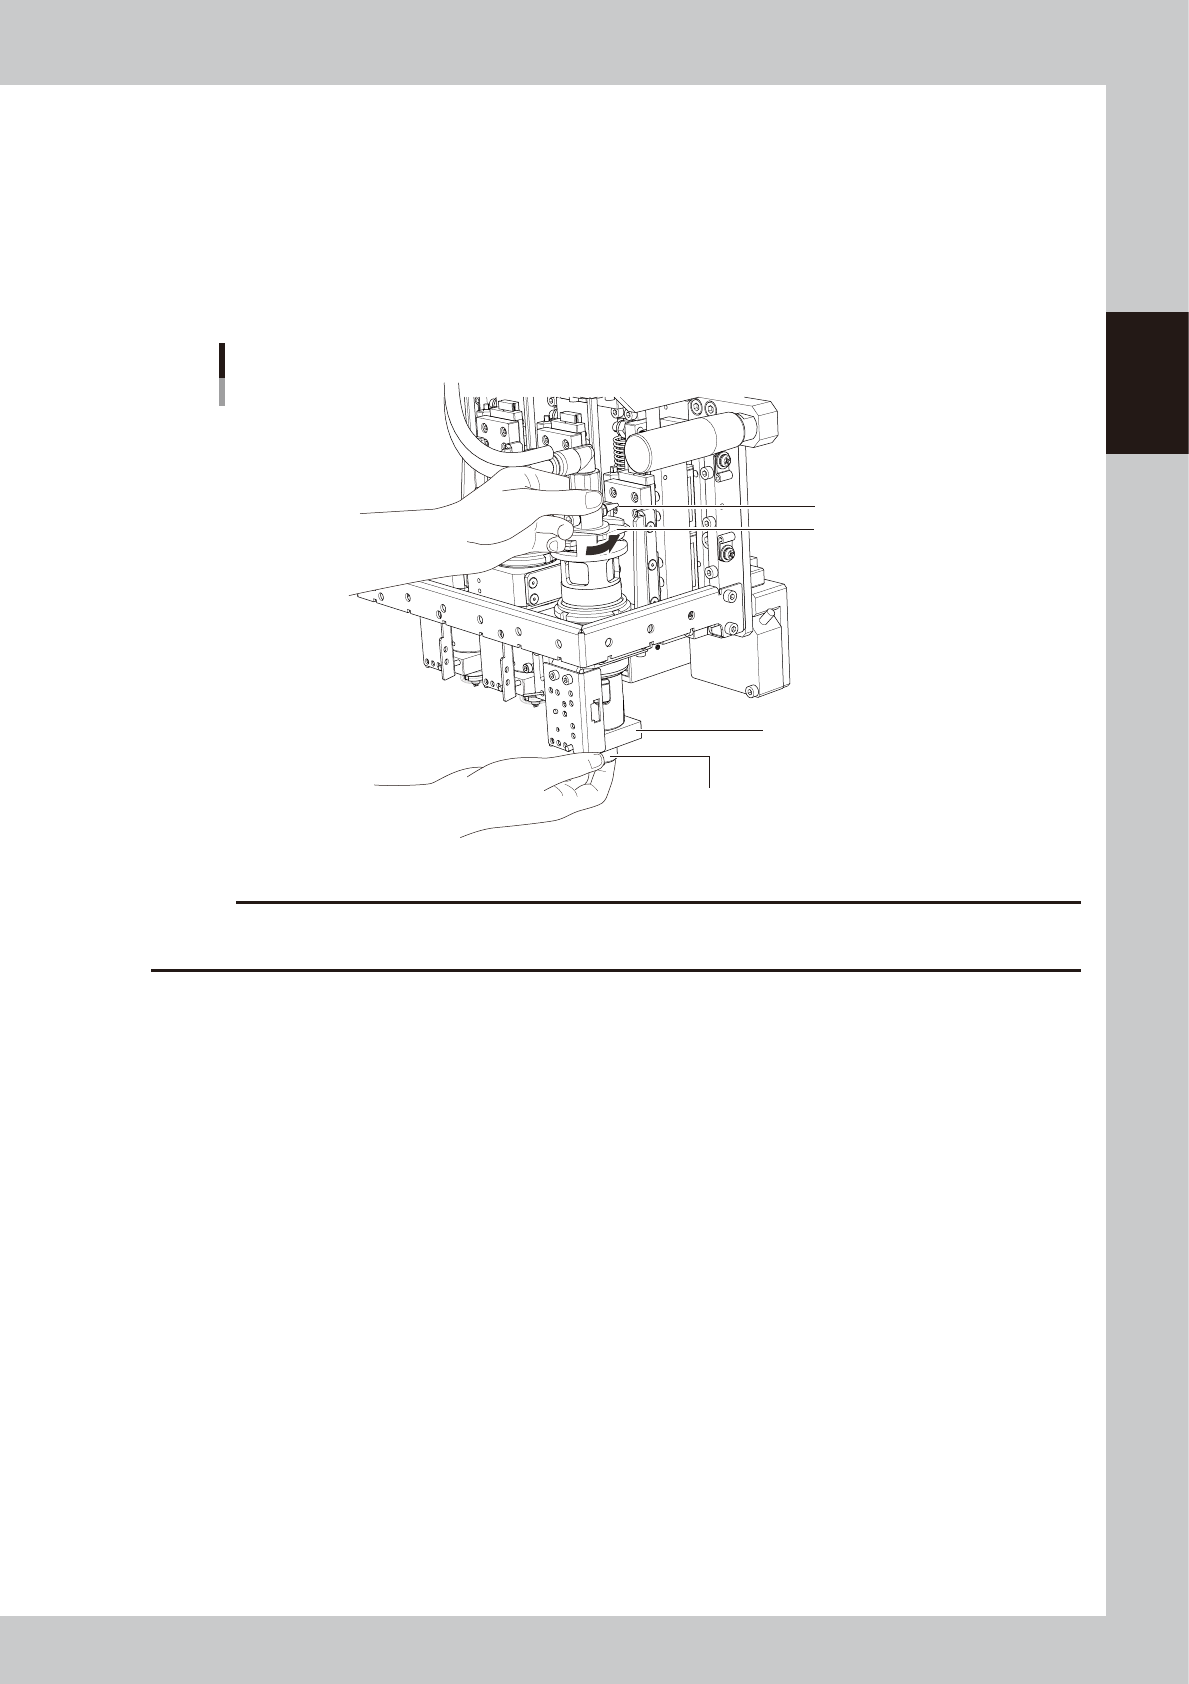
Remove the syringe.
1. Press the [Cylinder exchange] button.
2. Press the [Move default] button to move the head to the syringe replacement position.
e
3. Press the emergency stop button and open the safety cover.
4. Disconnect the air hose from the air fitting.
5. While holding the lock nut by hand, turn the adapter holder in the direction of arrow to loosen and
remove the syringe.
Removing the syringe
Lock nut
Heater
Adapter holder
Muffler
63210-N7-00
c
CAUTION
• The heater in the head is hot, so use caution.
• The muffler is likely to break, so do not touch it.
6
Clean the nozzle.
Loosen the lock nut and remove the nozzle. For instructions on how to clean the nozzles, refer to “1.1
Cleaning the nozzles” in Chapter 2 of the YSD maintenance manual.
7
Cancel emergency stop.
Close the safety cover, release the emergency stop button, and press the [READY] button.
2-46
2
Basic operation
4. Basic tasks for optional units
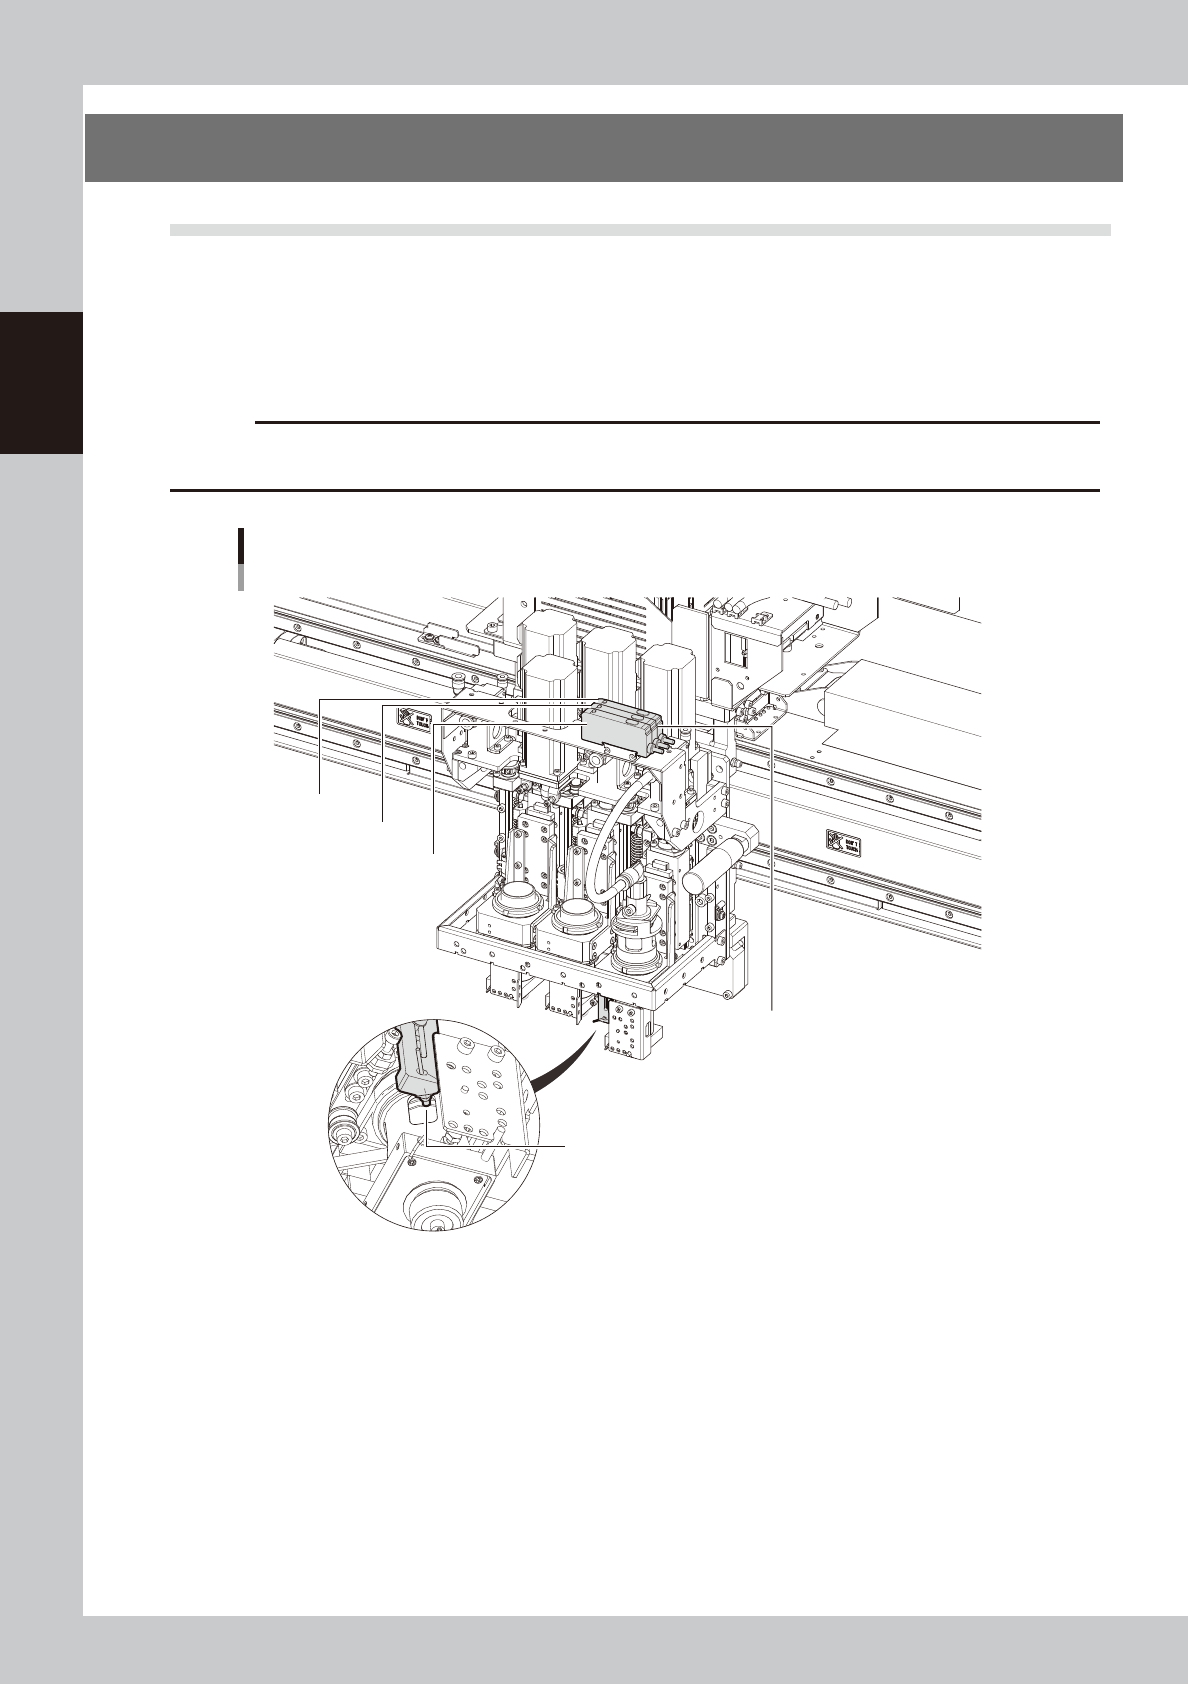
4.1 Low-liquid sensor
When the dispensing liquid inside the syringe is low, the low-liquid sensor detects it and issues a warning.
The low-liquid sensor consists of a sensor head and an amp section. The sensor head is installed at the side
of the nozzle mounting section, while the amp section is installed on the top of the dispenser head assembly.
The low-liquid sensor must be readjusted after changing the type of liquid or after replacing the low-liquid
sensor itself.
c
CAUTION
Prepare a used (empty) syringe and a syringe full of liquid before starting adjustment. Accurate adjustment will not be
possible if only an empty syringe is used.
Low-liquid sensor
Sensor amp section
For Head 3
For Head 2
For Head 1
Sensor head
63211-N7-00