YSD_Users_E.pdf - 第281页
6-12 6 Using the advanced functions 7 Adjust the teach windo w size and position. Press the [Cursor] tab to re-open the cursor teach scree n. Then adjust the teach window size and position as explained below, so that the…
6-11
6
Using the advanced functions
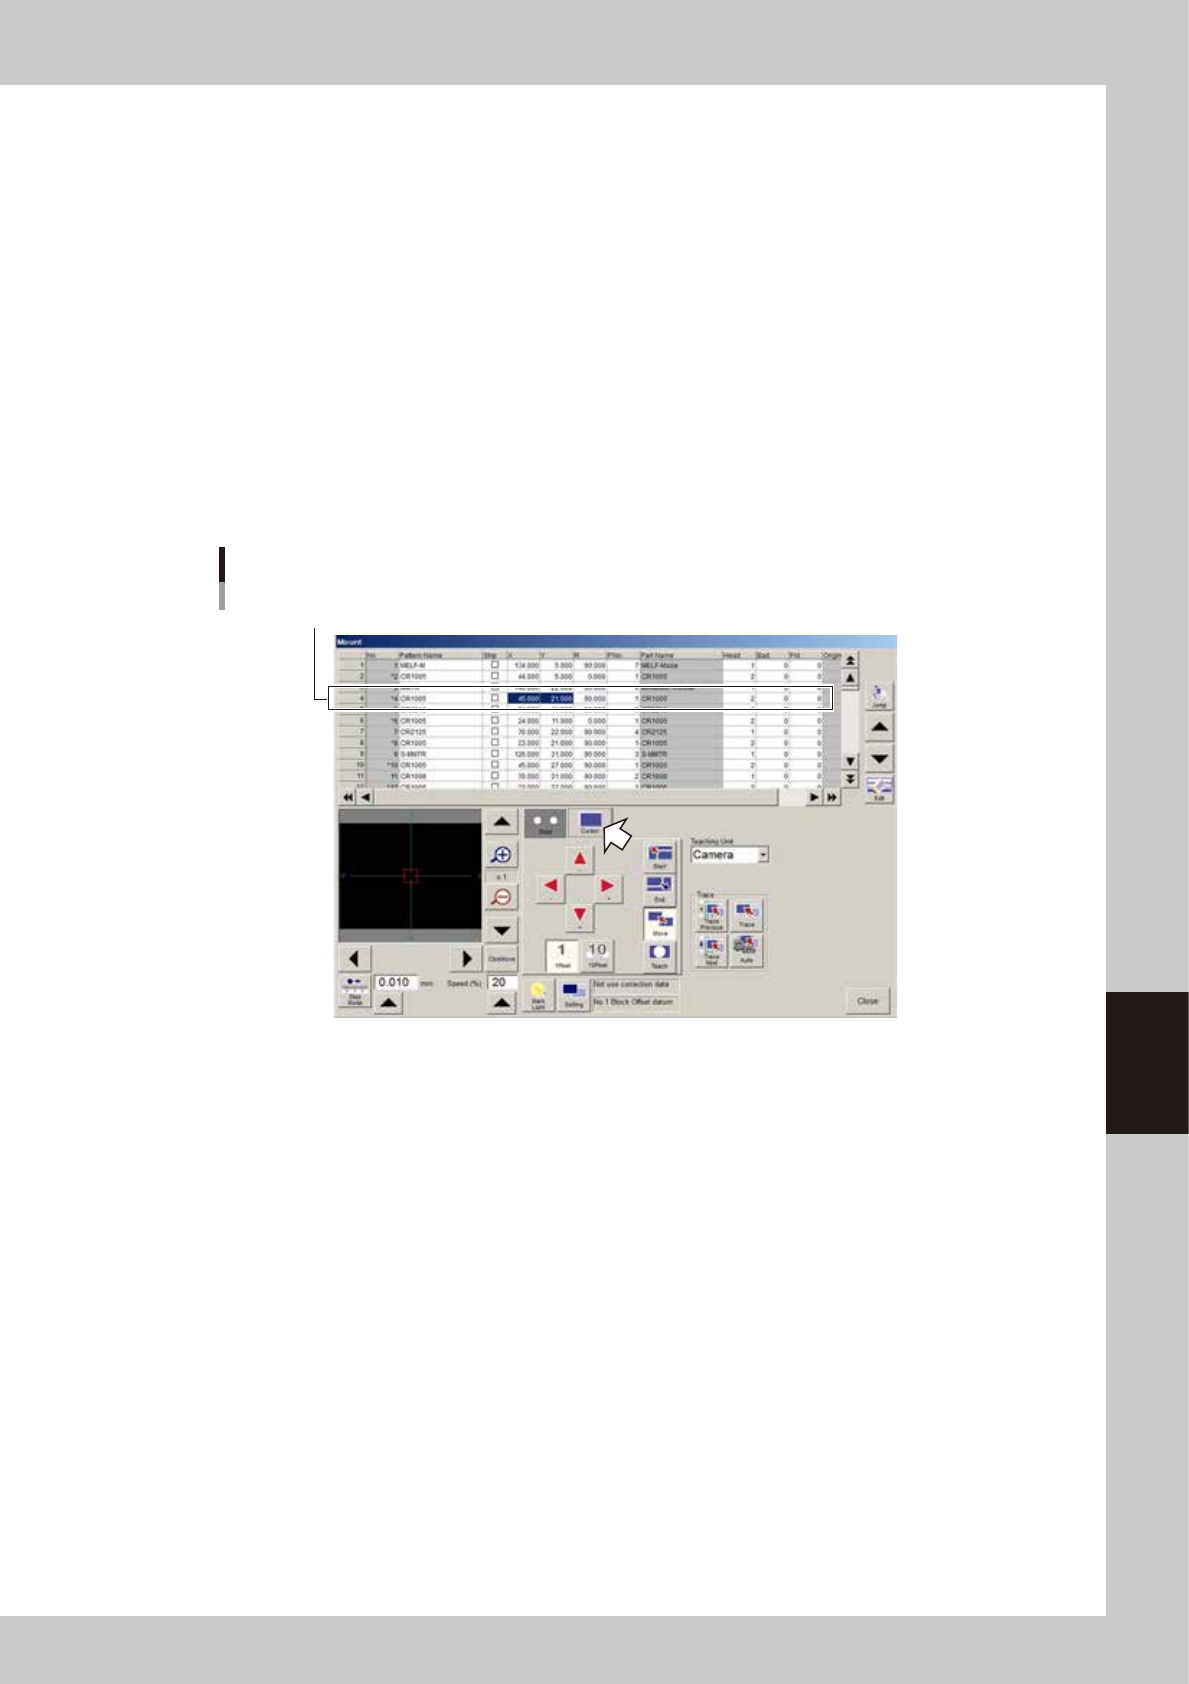
2.3.2 Cursor teaching
In cursor teaching, a teach window with any desired size is displayed on the vision monitor, and the position
data at the center of the window is obtained. The cursor teaching allows obtaining a more accurate value than
with normal teaching. Note that this function cannot be used unless the marks and patterns fit in the vision
monitor.
1
Open the cursor teach screen.
Press the [Cursor] tab to open the cursor teach screen.
2
Clamp a board.
Clamp a board on the conveyor.
3
Set the teaching conditions.
Set the "teaching unit", "speed", and "fiducial correction".
See the previous section "2.1 Trace function" for the setting methods.
4
Select the item (data) to perform teaching.
Cursor teach screen
Select data row to perform teaching.
64610-N7-00
5
Move the teaching unit (camera) to the target position.
Check safety and stay out of the axis movement range, open the [Point] tab to return to the point
teach screen, and move the teaching unit (camera) to the target position using the axis move keys.
6
Adjust the lighting levels as needed.
If the target image is not clearly displayed on the vision monitor, press the [Mark Light] button and adjust
the lighting levels.
If the "Outer Level" and "Inner Level" are OFF or set to "0", increase these lighting levels to about "+4" and
check that the target image is clearly displayed on the vision monitor. The "Coaxial Level" should be set
to "0" in this case.
6-12
6
Using the advanced functions
7
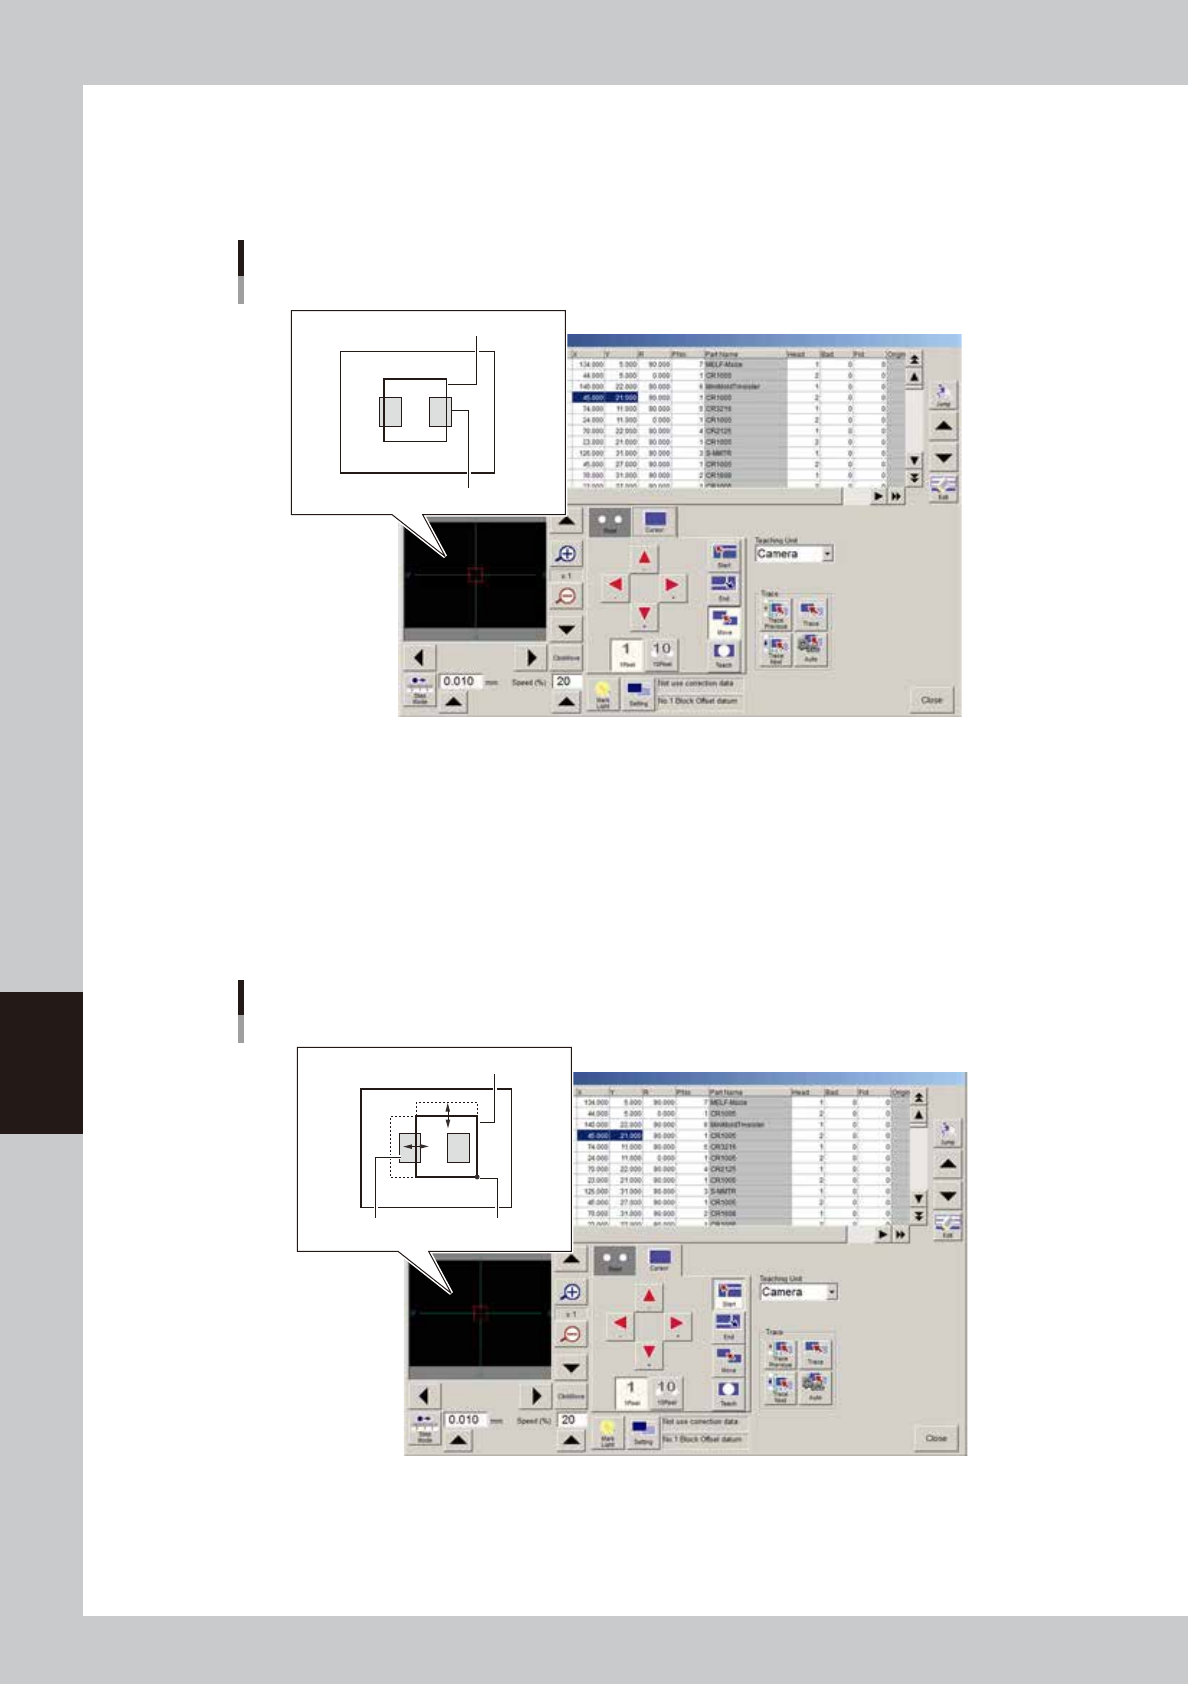
Adjust the teach window size and position.
Press the [Cursor] tab to re-open the cursor teach screen.
Then adjust the teach window size and position as explained below, so that the target patterns or marks
fit in the teach window.
Teach window display screen
Teach window
Pattern
64611-N7-00
1. Crosshairs are displayed on the vision monitor as the guide lines. The red frame displayed on the
vision monitor is the teach window. Adjust the teach window size and position using the [Start], [End],
[Move] and arrow buttons.
2. Press the [Start] button.
When this button is pressed, the top and left sides of the teach window frame changes to bold lines.
The teach window can be enlarged or reduced with the arrow keys, using the lower right corner of
the window as a stationary point. The window size can also be adjusted by dragging the mouse after
placing the mouse cursor on the frame (mouse cursor changes to a 2-way arrow).
Teach window display – Moving top and left sides
Teach window
Stationary pointPattern
64612-N7-00
6-13
6
Using the advanced functions
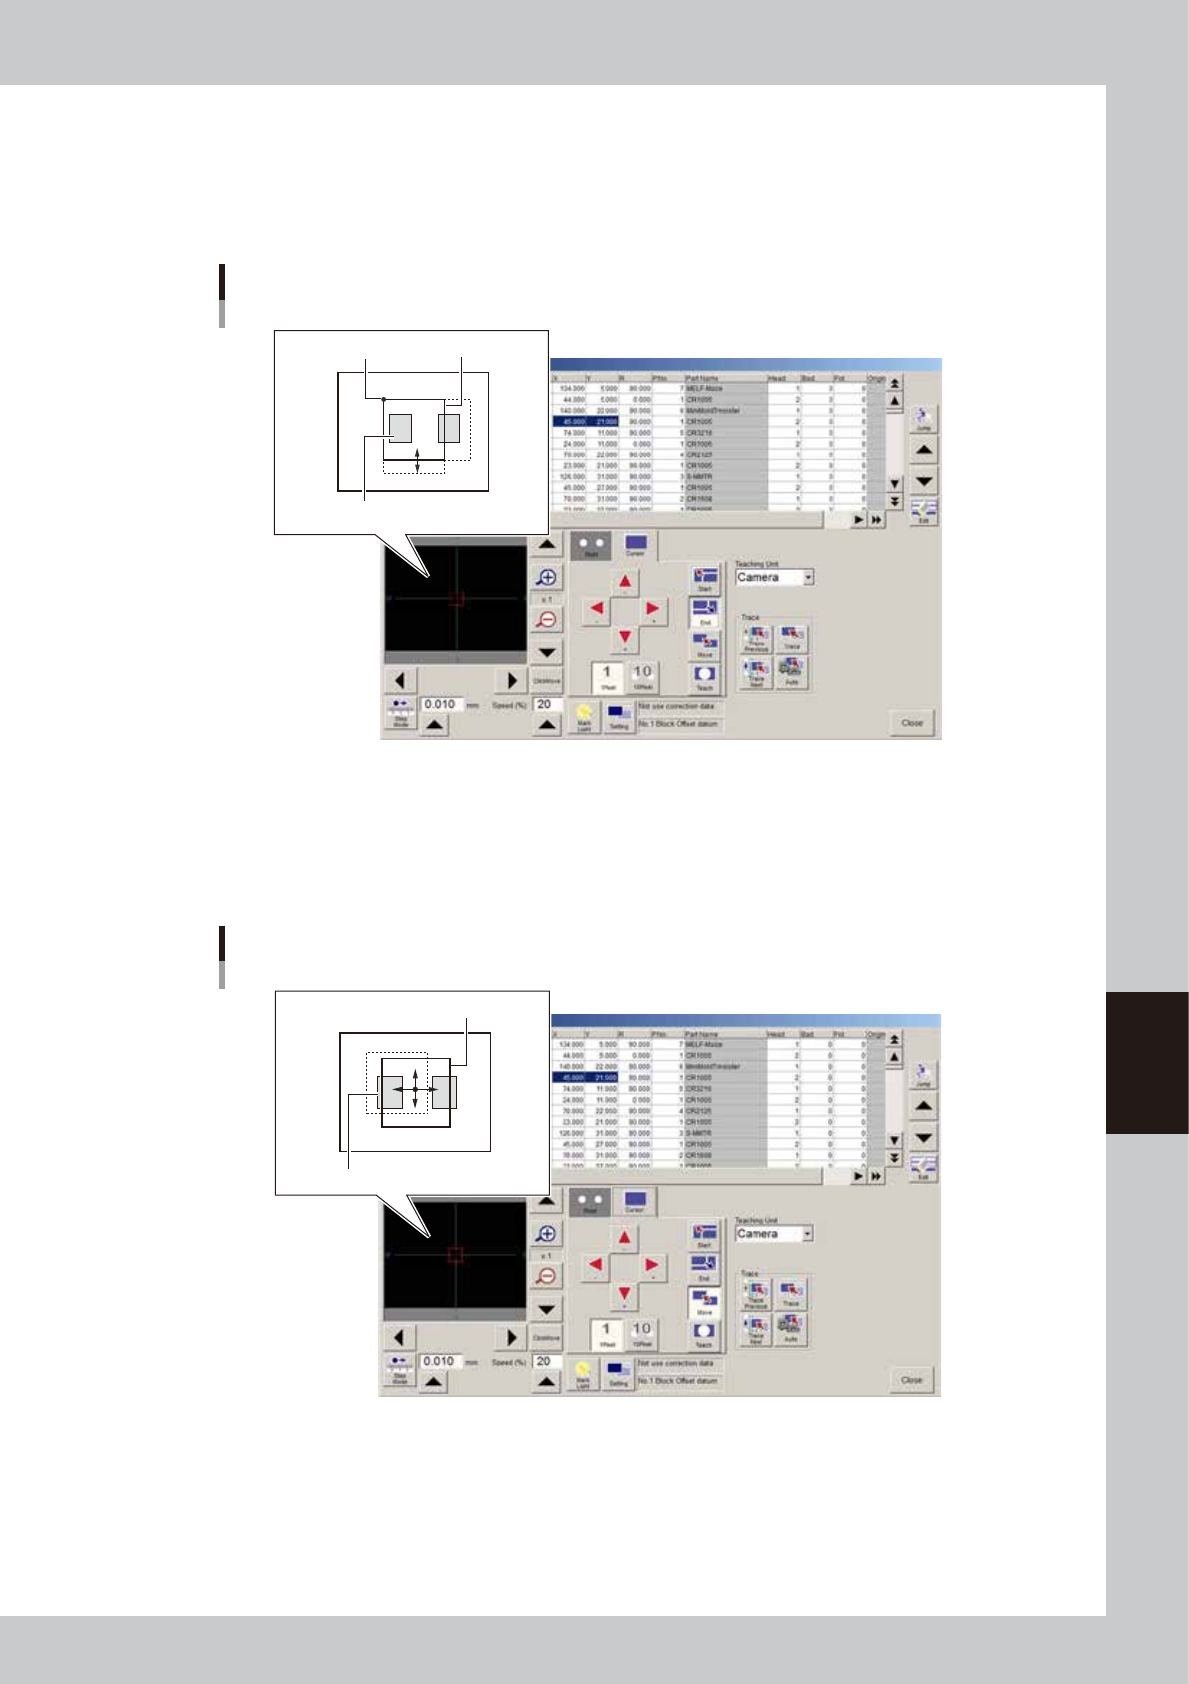
3. Press the [End] button.
When this button is pressed, the right and bottom sides of the teach window frame changes to bold
lines. The teach window can be enlarged or reduced with the arrow keys, using the upper left corner
of the window as a stationary point. The window size can also be adjusted by dragging the mouse
after placing the mouse cursor on the frame (mouse cursor changes to a 2-way arrow).
Teach window display – Moving right and bottom sides
Teach windowStationary point
Pattern
64613-N7-00
4. Press the [Move] button.
When this button is pressed, the teach window frame changes to bold lines on all sides. The entire
window can be moved with the arrow keys, or by dragging the mouse after placing the mouse
cursor in the window (mouse cursor changes to a 4-way arrow). The window size can also be
adjusted by dragging the mouse after placing the mouse cursor on the frame.
Teach window display – Moving entire window
Teach window
Pattern
64614-N7-00