YSD_Users_E.pdf - 第214页
5-25 5 Creating the board data 3. 4-point fiducial function T he “4-point fiducial” function is used to enhance the mounting position accuracy by recognizing 4 fiducial marks provided on a board. T his function is effect…
5-24
5
Creating the board data
4.4.3 Local fiducial functions
There are three kinds of local fiducial functions relating to mount data: “point fiducial”,
“local fiducial” and
“4-point fiducial” functions. These are generally called the local fiducial functions.
The local fiducial functions are used to enhance the local mounting position accuracy of individual mount
data, rather than improving the mounting position accuracy on an entire board or block as is done by the board
fiducial or block fiducial function.
1. Point fiducial function
The point fiducial function is used to enhance the mounting position accuracy only of a specific component. In general,
as the board size becomes larger, the land pattern layout tends to become inaccurate due to flexing, twist and expansion/
shrinking of the board. Therefore, the point fiducial function is effective when mounting QFP components with a fine
lead pitch on a large board. (Note that the board and block fiducial functions are not effective in this case, although they
are useful in correcting a positioning error caused by the board clamping fluctuations.) The point fiducial function uses a
set of two fiducial marks diagonally located across the land patterns on which you want to improve mounting position
accuracy. It is okay if these two marks are different in shape, but use the same marks for the same type of component.
Mounting center
Point fiducial marks
Mark 1 (X1, Y1)
Mark 2 (X2, Y2)
63511-N7-00
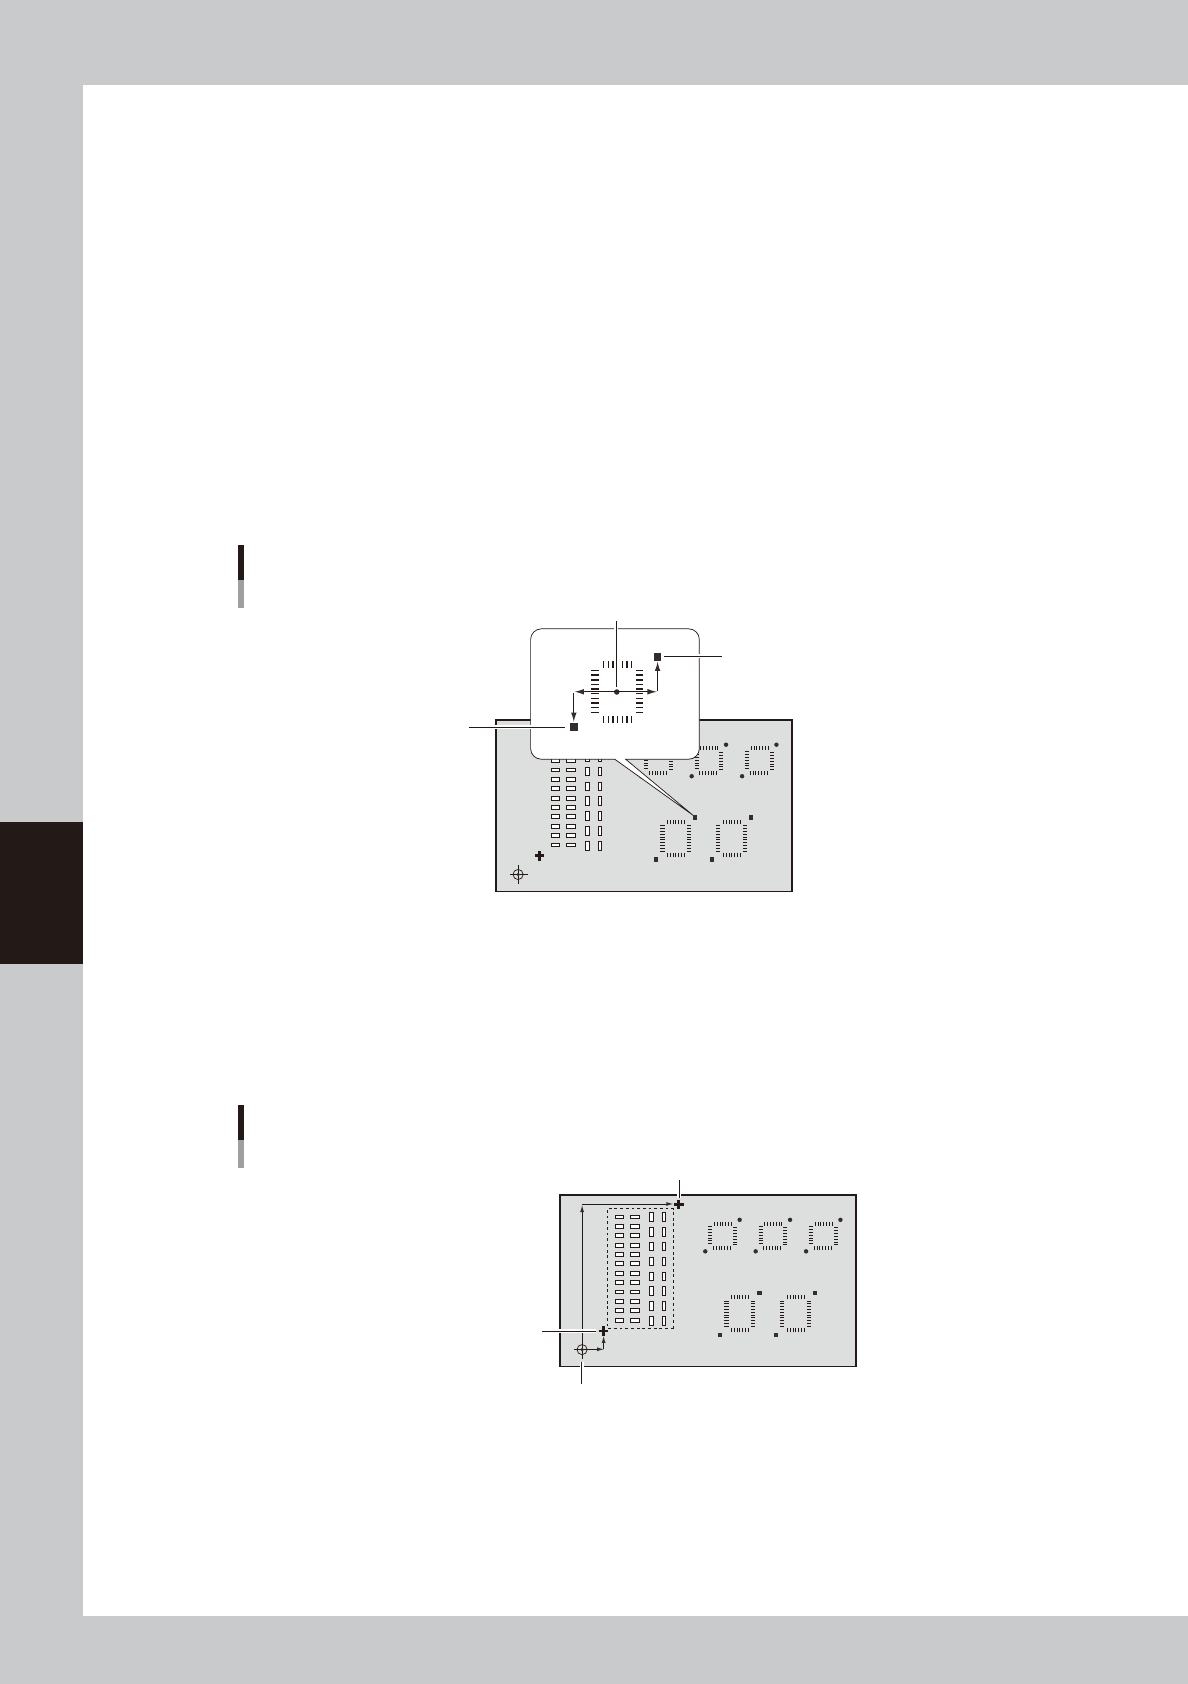
2. Local fiducial function
The local fiducial function improves the mounting position accuracy of two or more components within a specified area,
by using a pair of fiducial marks. This function is also effective in correcting the mounting position errors when two or
more different types of boards are supplied on the same transfer pallet. The local fiducial marks must be arranged
diagonally across the specified area, but can be different in shape from each other.
Board origin or block offset
Mark 1 (X1, Y1)
Local fiducial marks
Mark 2 (X2, Y2)
63512-N7-00
5-25
5
Creating the board data
3. 4-point fiducial function
The “4-point fiducial” function is used to enhance the mounting position accuracy by recognizing 4 fiducial marks
provided on a board. This function is effective in the following cases.
• boards with 4 or more fiducial marks which meet the conditions
• Large boards
• boards made of materials which tend to expand, flex or warp. (paper phenol, paper, glass epoxy, other flexible
materials)
The 4-point fiducial data settings are basically the same as those for point fiducial and local fiducial marks. However,
because the 4-point fiducial function requires 4 XY coordinate points, you must use two data lines (“4Local-M” and
“4Local-S”) on the Offset tab screen in order to register one set of 4- point fiducial marks.
(50, 10)
(200, 10)
(50, 150)
(0, 0)
(200, 200)
Mark 3
Board origin
4-point fiducial marks
Mark 2
Mark 4
Mark 1
63513-N7-00
5-26
5
Creating the board data
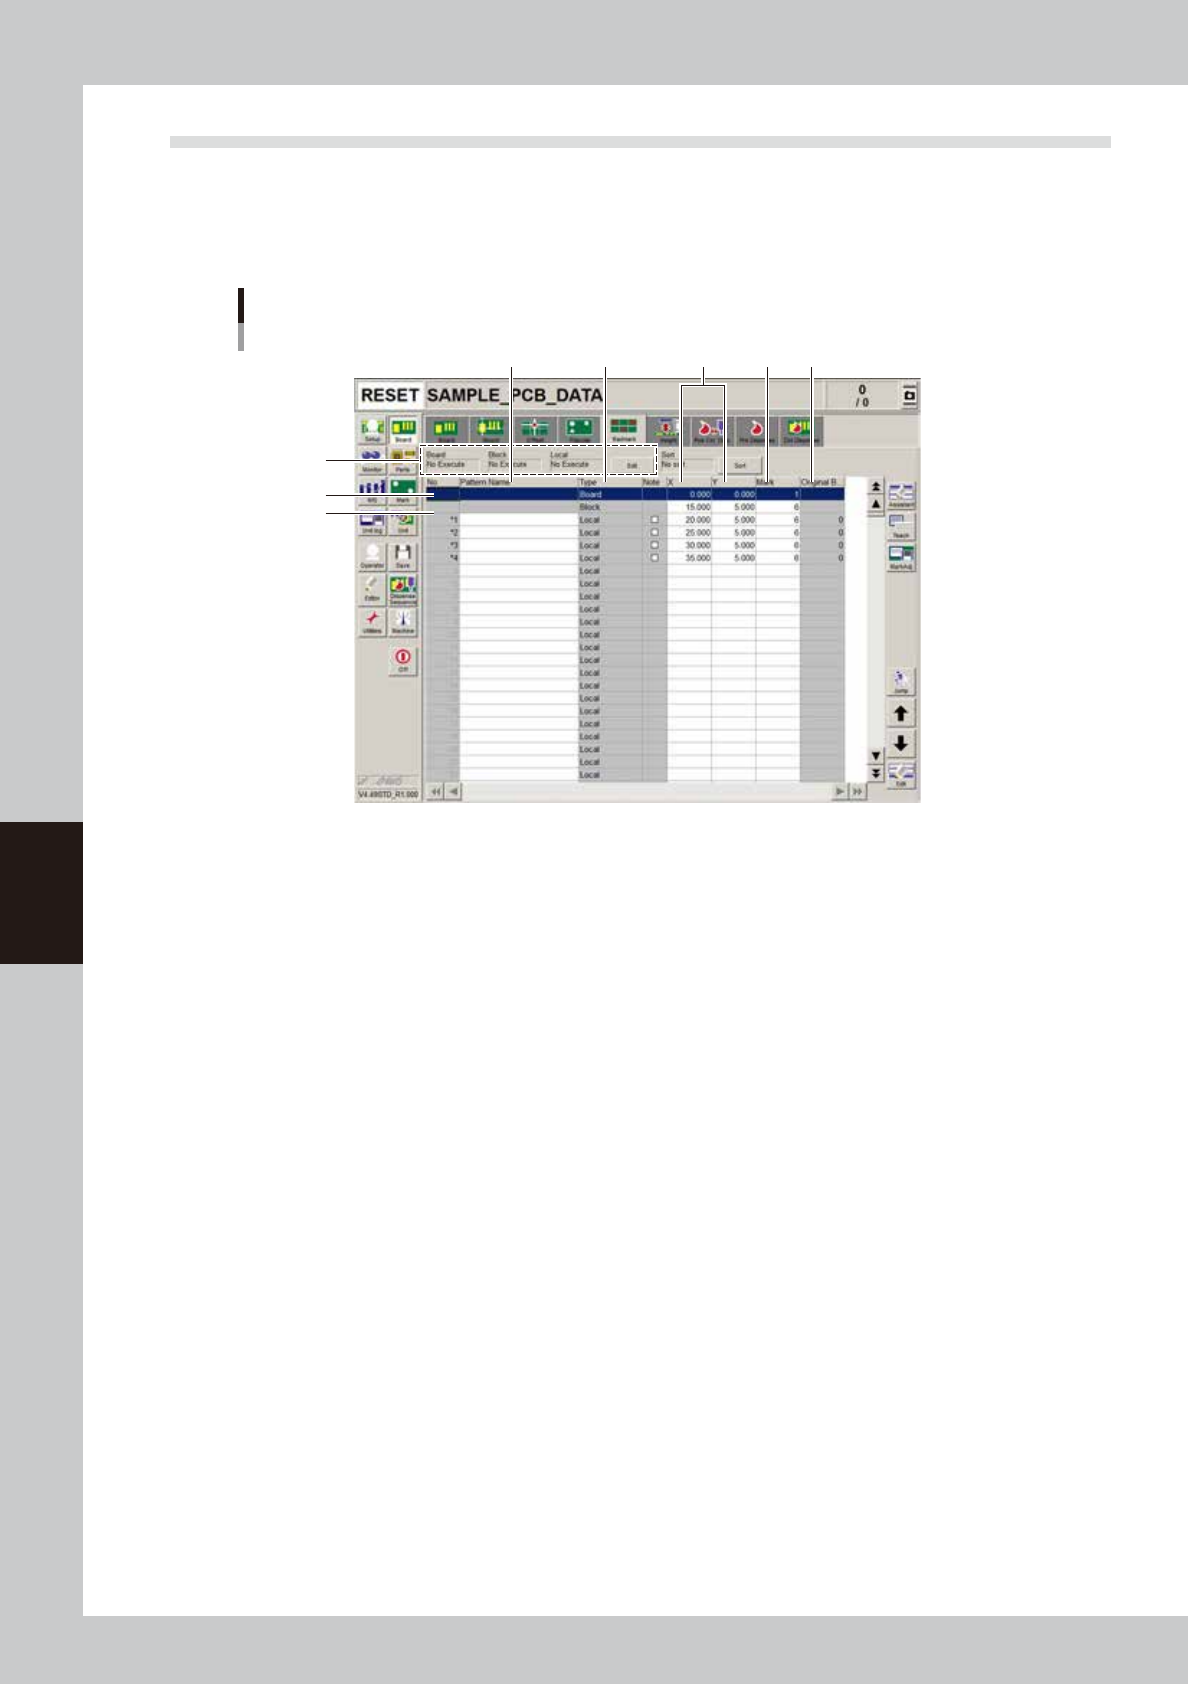
4.5 Badmark parameters
Selecting the [Badmark] tab opens the screen for setting badmark mark parameters and their coordinates. Set
these parameters as explained below when using the badmark function. Two or four badmarks are used as a
set, but it is okay if each mark is different in shape. Badmark mark data must be registered in the mark
information beforehand. (See “5. Creating the mark information” in this chapter.)
4
1
5 6 7
2
3
8
Syringe internal pressure selector
64312N7-00
1. Board, Block, Local
Badmark functions are broadly classified into three types: “Board” badmark function specified for a board, “Block”
badmark function specified for each block of a multi-block board, and “Local” badmark function related to mounting
data. The badmark function you want to use should be set to “Execute”. To change the setting, press the [Edit] button on
the right end.
2. Board
On the top line of the parameter grid set the board badmark data.
(For more details, see “3.5.1 Using the badmark function” in this section.)
3. Block
On the second line of the parameter grid set the block badmark data.
(For more details, see “3.5.1 Using the badmark function” in this section.)
4. Pattern Name
Enter the badmark name here. (No names can be entered on the top and second lines.)
5. Type
Badmark function types are specified here. (These cannot be changed.)
6. X1, Y1
Enter the XY coordinates of the badmark relative to the board origin in millimeters. You can perform teaching with the
[Teach] button.
7. Mark
Enter the mark No. for the badmark (mark No. registered as mark in the mark information).
8. Original Block No.
Shows the block No. that was automatically allocated to each block after block distribution (with note data) was
performed. For details on block distribution (with note data), refer to "2.2.1 Block offset distribution" in Chapter 7.