CM602all_EJM8AESM_Service Manual.pdf - 第1086页
EJ M8A-E- 090101-A01- 00 Page 9- 1- 1-1 1 Sof twar e Sof twar e Inst allation Once the s ystem has been i nstall ed, the m essag e on the “ System ins tall” w i ndow is chang ed (F ig . 3.9) Fi g. 3.9 Syst em ins tall sc…
EJM8A-E-090101-A01-00
Page 9-1-1-10
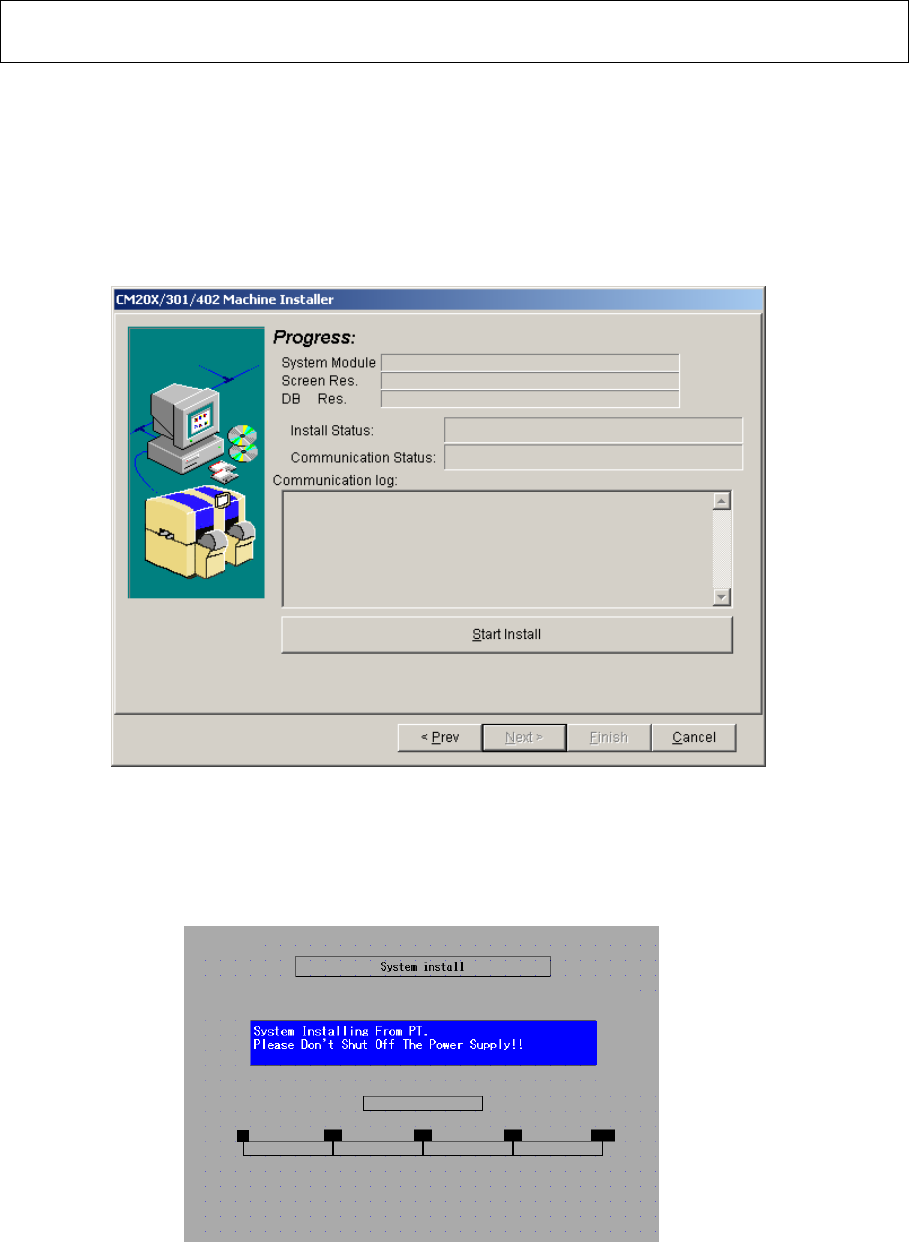
3.7 The “Progress” screen is displayed. (Fig. 3.7) Press [Start install].
・ “System Module” installation is started.【Time: 3 min. approx】
・ When the above is finished, “Screen Res.” Installation is started.
【Time: 40 min. approx】
・ When the above is finished, “DB Res.” Installation is started.
【Time: 1 min. approx.】
Fig. 3.7 Progress PT200
The “System install” window is displayed on the CM602-L touch panel. (Fig. 3.8)
Fig. 3.8 System install screen CM602-L
Software Software Installation
EJM8A-E-090101-A01-00
Page 9-1-1-11
Software Software Installation
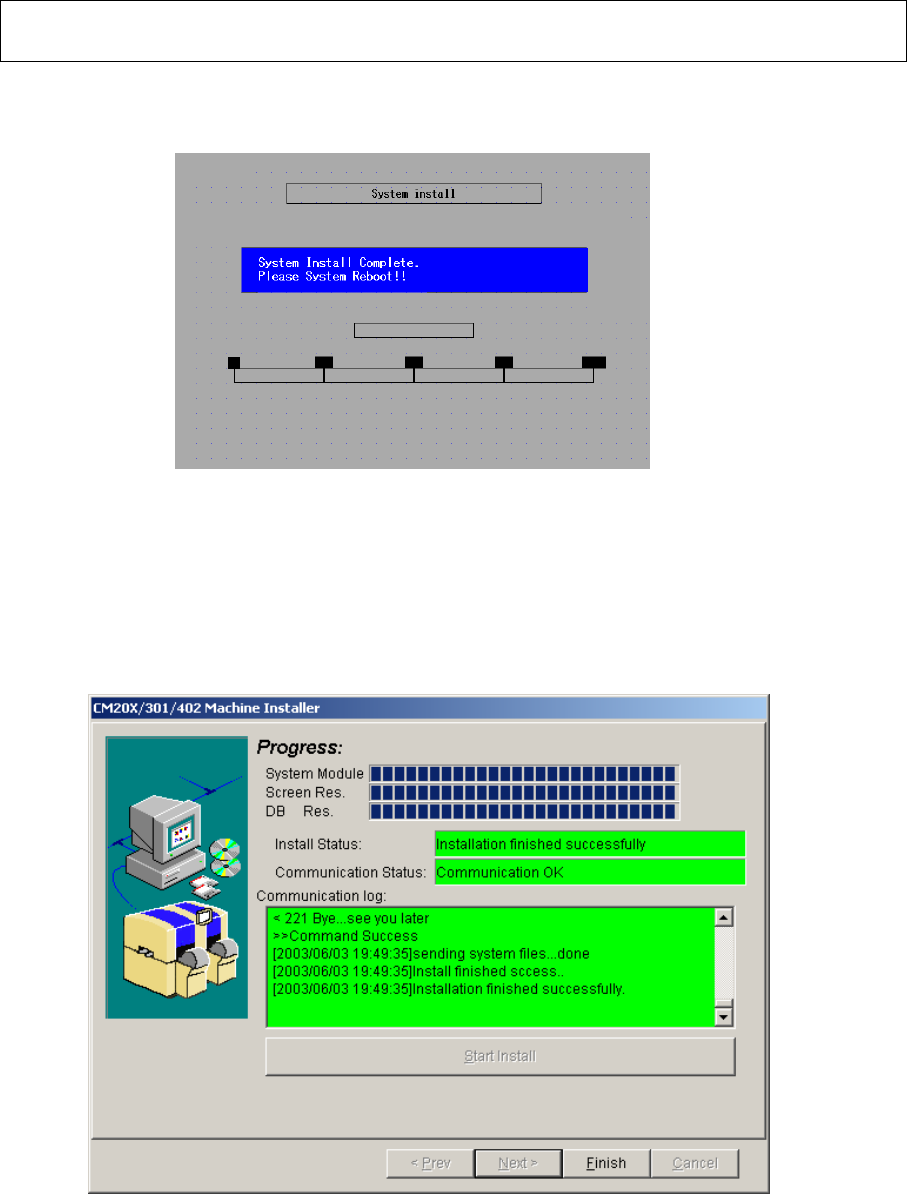
Once the system has been installed, the message on the “System install” window is
changed (Fig. 3.9)
Fig. 3.9 System install screen CM602-L
3.8 Once all items has been installed, the “Finish” button becomes active. Press that
button. After the PT200 “CM20X/301/402 installer” isinished, remove the “Install” floppy
disk from the CM602-L floppy disk drive. Power down and up the CM602-L.
Fig.3.10 PT200
EJM8A-E-090101-A01-00
Page 9-1-1-12
Software Software Installation
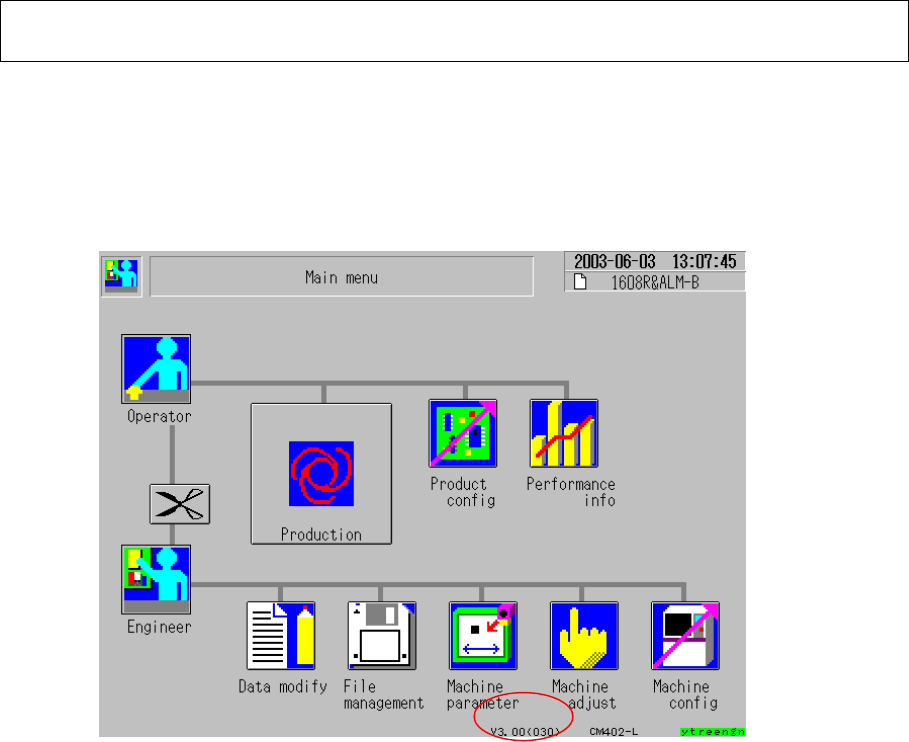
3.9 Check the system version displayed on the CM602-L touch panel. (Fig. 3.11)
Select [Machine parameter], [Machine maintenance] and [Machine information].
(Fig. 2.1) When the kernel version is V2.02.00GJ, the kernel and the machine system
have been updated successfully.
Fig. 3.11 Main menu CM602-L