CM602all_EJM8AESM_Service Manual.pdf - 第77页
Check vacuum with your finger. When the nozzle is blown, change the primary-side electric source cables and check again. Check vacuum with your finger. When the nozzle is blown, change the primary-side electric source ca…
[Tools]
Tester
[Specifications]
12.02V to 12.10V
[Tools]
Tester
[Specifications]
12.02V to 12.10V
27
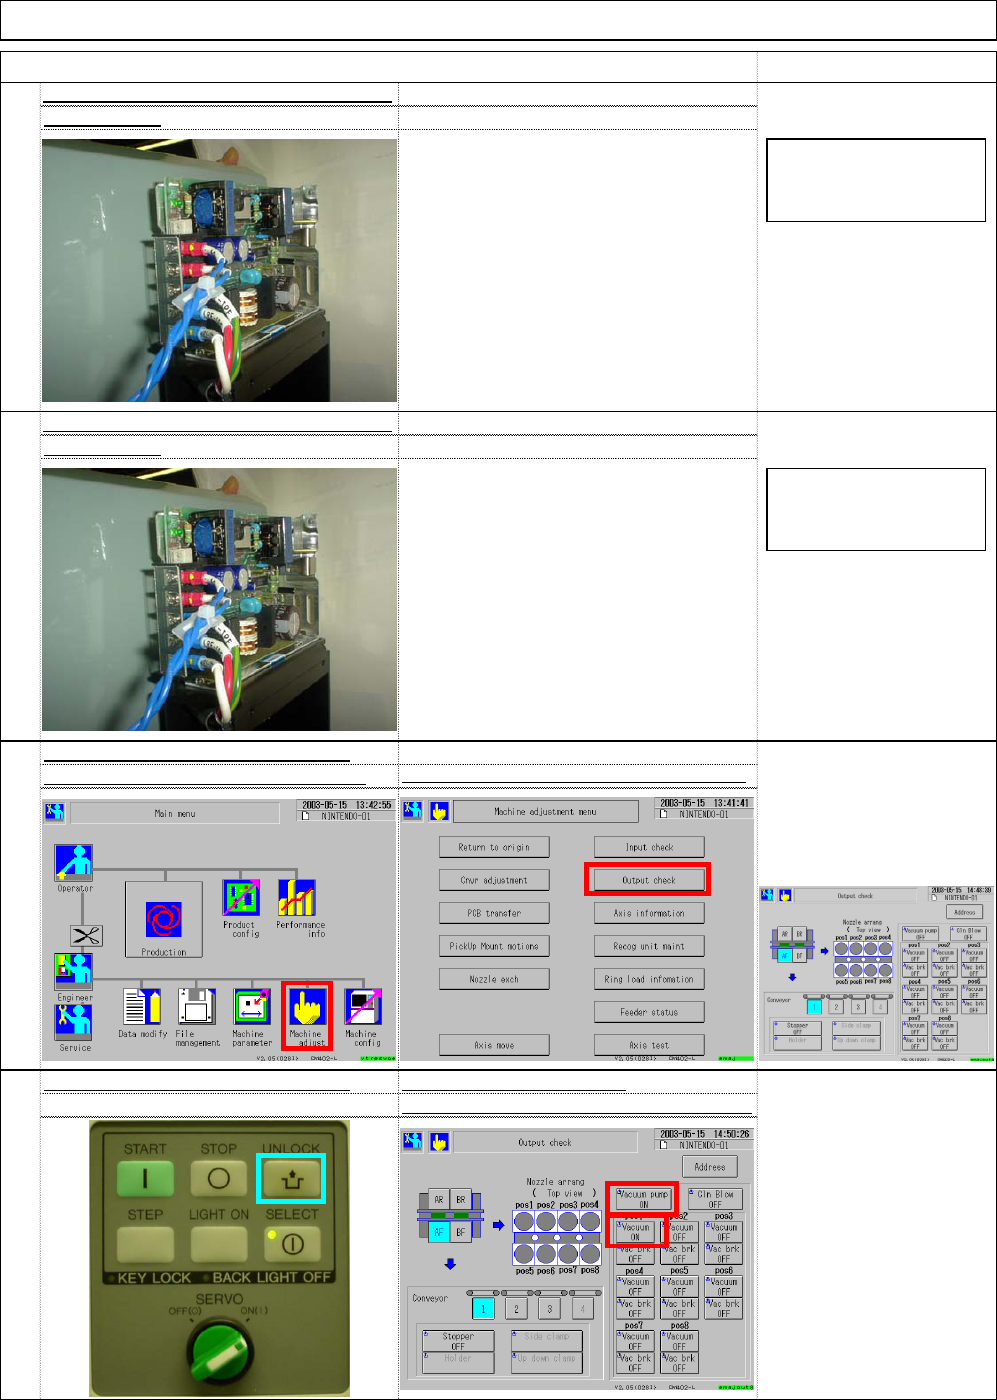
Check the direction of vacuum pump
rotation. (High-speed) Check vacuum.
Select (1) "Machine adjust" and (2) "Output check."
"Output check" window
28
(1) "UNLOCK" (2) " Vacuum pump" (3) "Vacuum"
Check the direction of vacuum pump Turn on the vacuum pump.
26
Color touch panel electric source RF-IP(Front)
Measure 12V.
Measure it, placing the tester rod on the
12V output terminal.
* If the value is outside the spec., adjust
the voltage with the volume so that it
satisfies the spec.
25
Measure 12V.
Color touch panel electric source RF-IP(Front)
Measure it, placing the tester rod on the
12V output terminal.
* If the value is outside the spec., adjust
the voltage with the volume so that it
satisfies the spec.
Installation Machine Installation
Item Remark
(1)
(2)
(1)
(2)
(3)
12V Red
GND Black
Tester DC20V range
12V Red
GND Black
Tester DC20V range
EJM8A-E-SMA020103-A01-00 Page 2-1-3-8
Check vacuum with your finger.
When the nozzle is blown, change the
primary-side electric source cables and
check again.
Check vacuum with your finger.
When the nozzle is blown, change the
primary-side electric source cables and
check again.
Machine Installation
Check vacuum
.
Select "Machine adjust" ⇒ "Output check."
Remark
Check the direction of vacuum pump.
Turn off the servo. Check vacuum of the nozzle.
Item
31
32
29
Installation
30
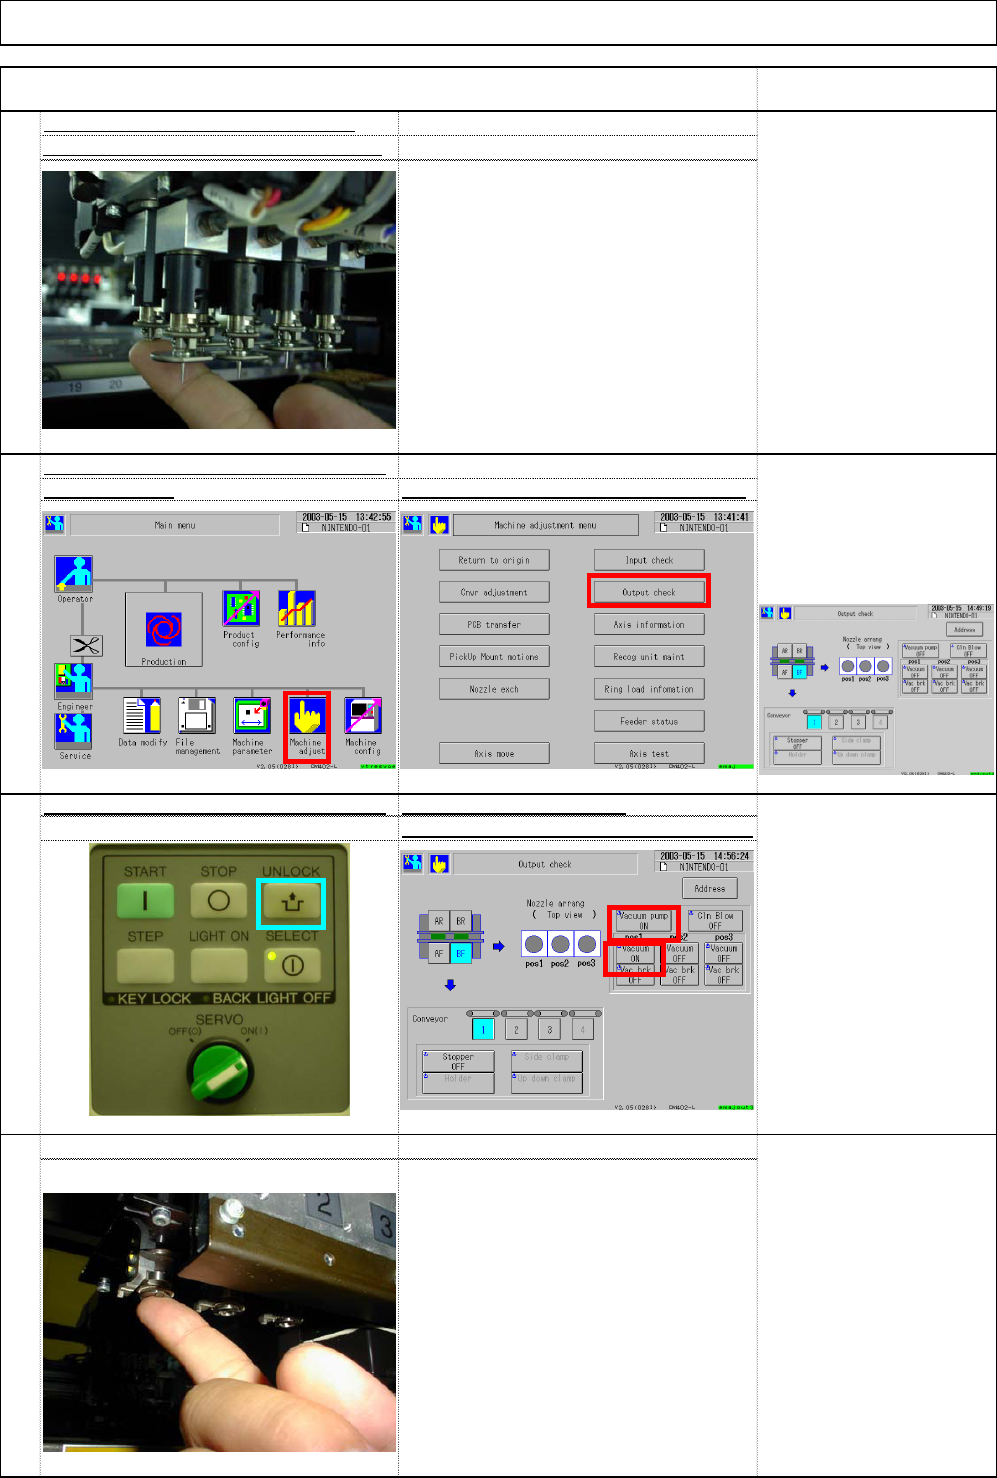
Check the direction of the vacuum pump.
"Output check" window
Check the direction of the vacuum pum
p
Turn on the vacuum pump
(1) Unlock (2) Vacuum pump (3) Vacuum
(1)
(2)
(2)
(1)
(3)
EJM8A-E-SMA020103-A01-00 Page 2-1-3-9
■ Check that the machine cover is not
damaged when transferred.
■ If the linear-rails, the ball screw, and
other parts are rusted, remove rust.
■If there are cracks on the cover,
paint it.
■Wipe out rust-preventive and grease
which were applied before delivery.
Remove oil grease
.
Remove oil grease
.
X-side level gauge mounting sectio
n
Y-side level gauge mounting sectio
n
36
Remove oil grease
.
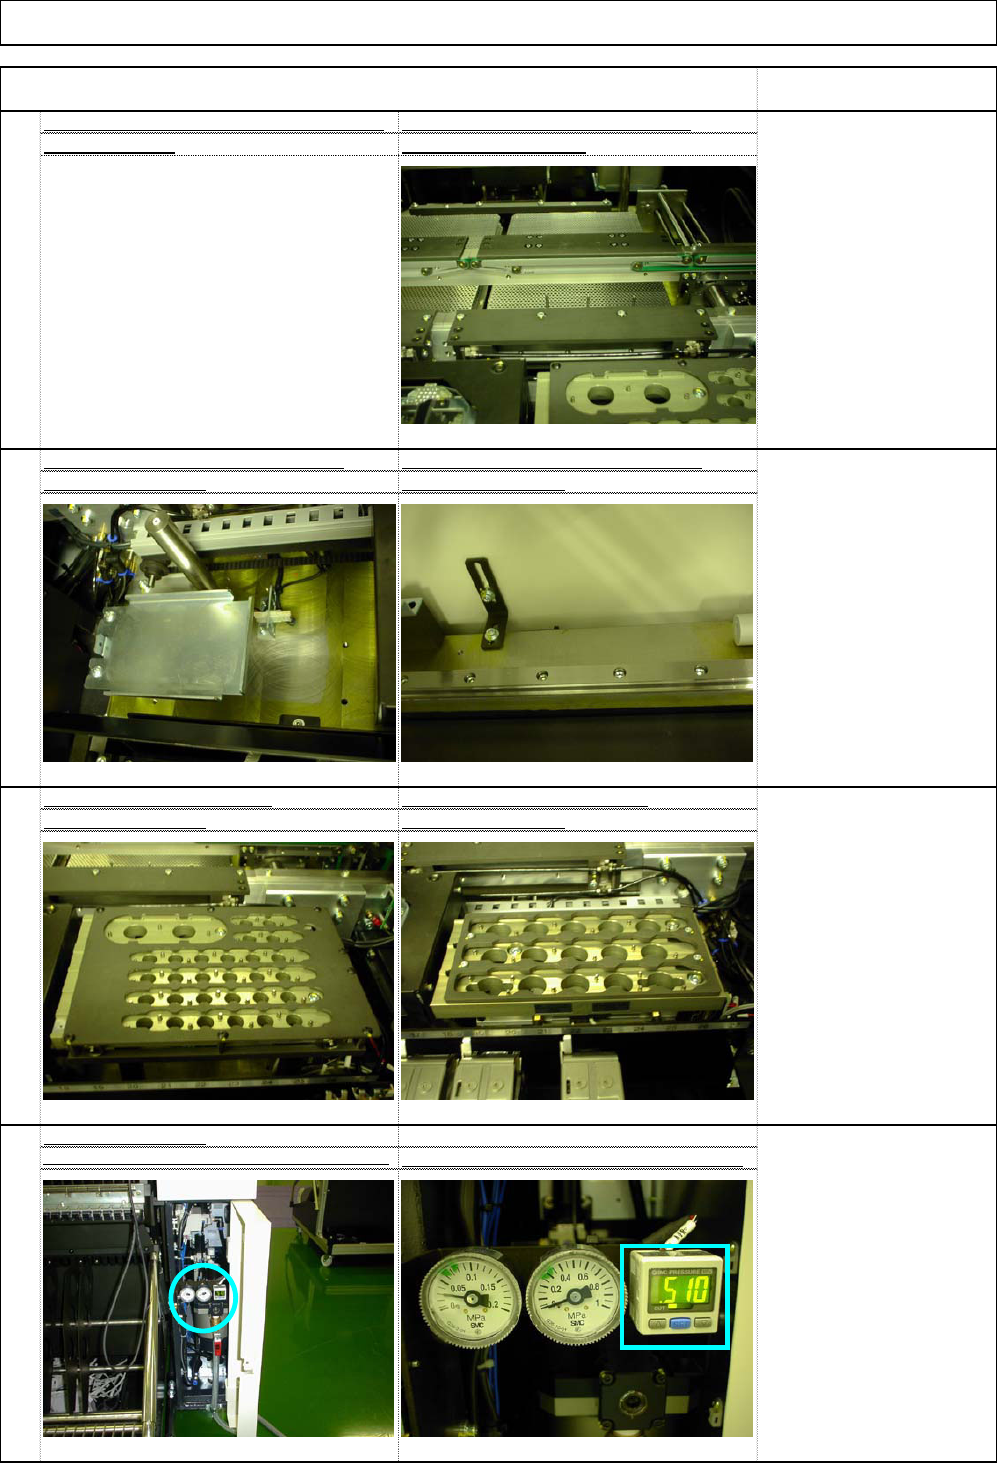
When the machine is operated: 0.50MPa to 0.55MPa
Check reading of the air pressure switc
h
[Targeted value]
Normal machine operation:
0.50MPa to 0.55 Mpa
* Air pressure changes,
depending on environment.
Adjust it, checking
operation condition.
Check air pressure
33
Installation
Item
Remove oil grease
.
35
34
High-speed nozzle change Multi-purpose nozzle change
Machine Installation
Remark
Rust is made: Check there is no damag
e
Remove oil grease from the clam
p
on appearance
.
section of each stage
.
EJM8A-E-SMA020103-A01-00 Page 2-1-3-10