CM602all_EJM8AESM_Service Manual.pdf - 第832页
Remark Component-Thickness-Measuring Unit Item Option Part and Accessory Replacement Phillips screwdriver #2 Cut off the cable ties. Nipper Open the amplifier cover. Open the connector lock. 7 6 8 5 Loosen the two M4 scr…
Remark
Turn off the power and air supply.
Remove the feeder cover.
Allen key 3 mm
Screw M4 4 pcs.
Remove the amplifier connector.
Allen key M6
Screw M6 x 60L 2 pcs.
Component-Thickness-Measuring Unit
4
Item
1
Option Part and Accessory Replacement
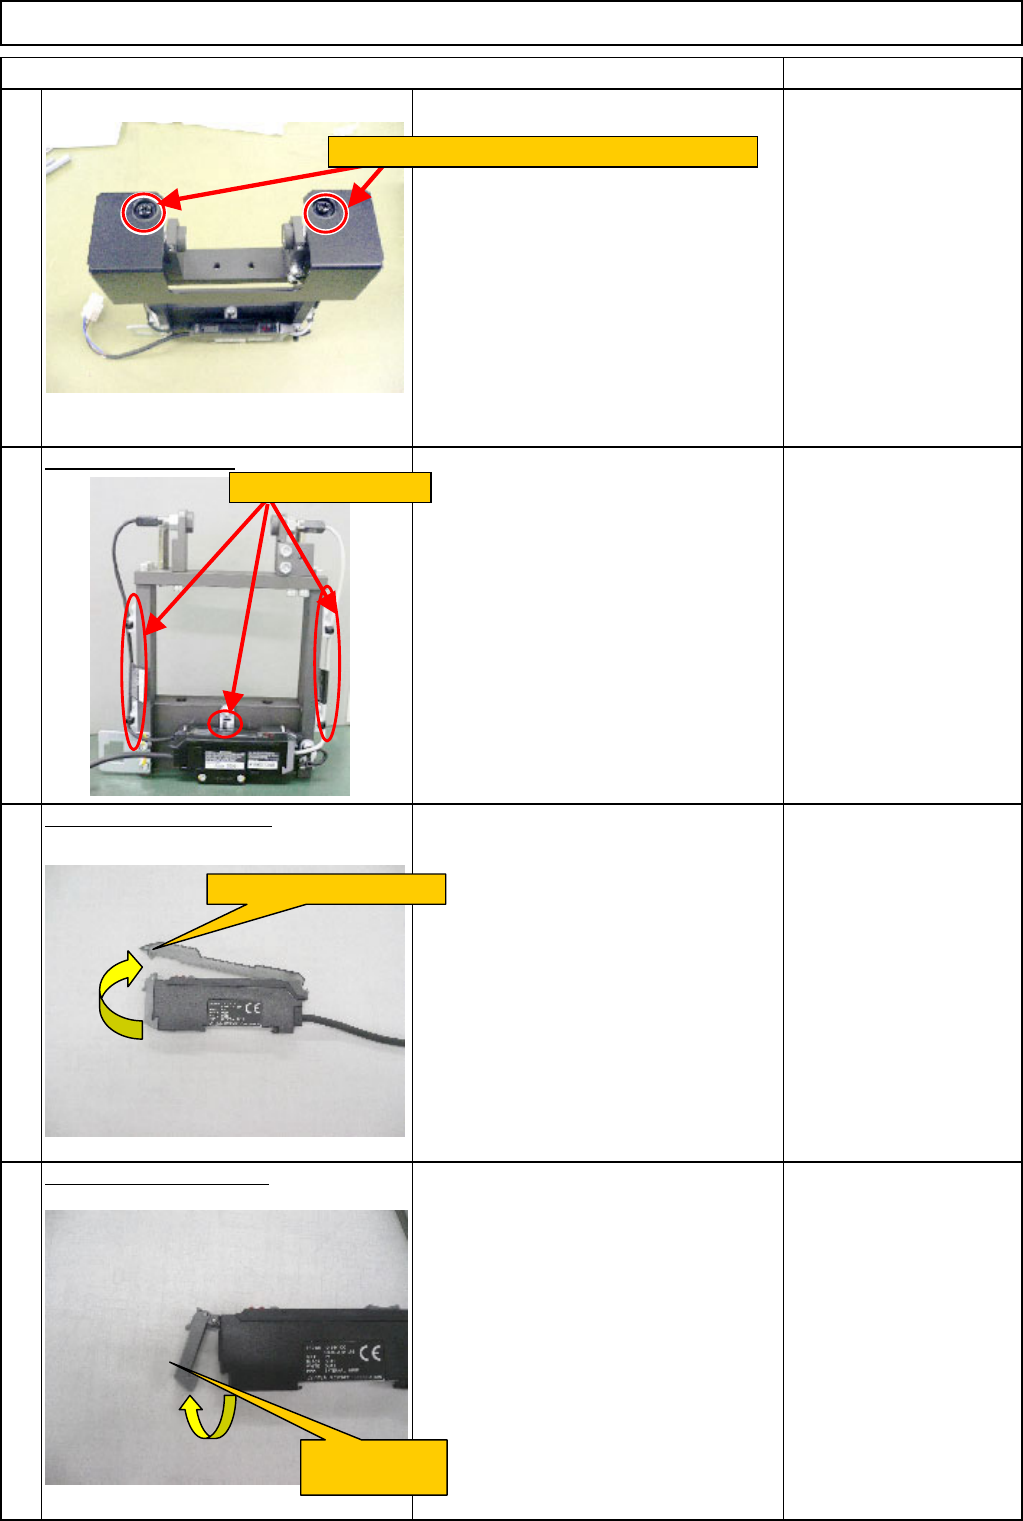
Remove the component-thickness-sensor unit.
2
3
1
2
Remove the amplifier connector.
Loosen the two M6 x 60L bolts. Remove the unit.
EJM8A-E-SMA060405-A01-00
Page 6-4-5-2
Remark
Component-Thickness-Measuring Unit
Item
Option Part and Accessory Replacement
Phillips screwdriver #2
Cut off the cable ties.
Nipper
Open the amplifier cover.
Open the connector lock.
7
6
8
5
Loosen the two M4 screws. Remove the cover.
Open the amplifier cover.
Open the
connector lock.
Cut off the cable ties.
EJM8A-E-SMA060405-A01-00
Page 6-4-5-3
Remark
Component-Thickness-Measuring Unit
Item
Option Part and Accessory Replacement
<Caution>
One bushing (See the picture at right.) is
under each Hexagon-socket-head
setscrew. Be careful not to lose the
bushing.
Wrench M3
Hexagon-socket-head
setscrew M3 x 4L
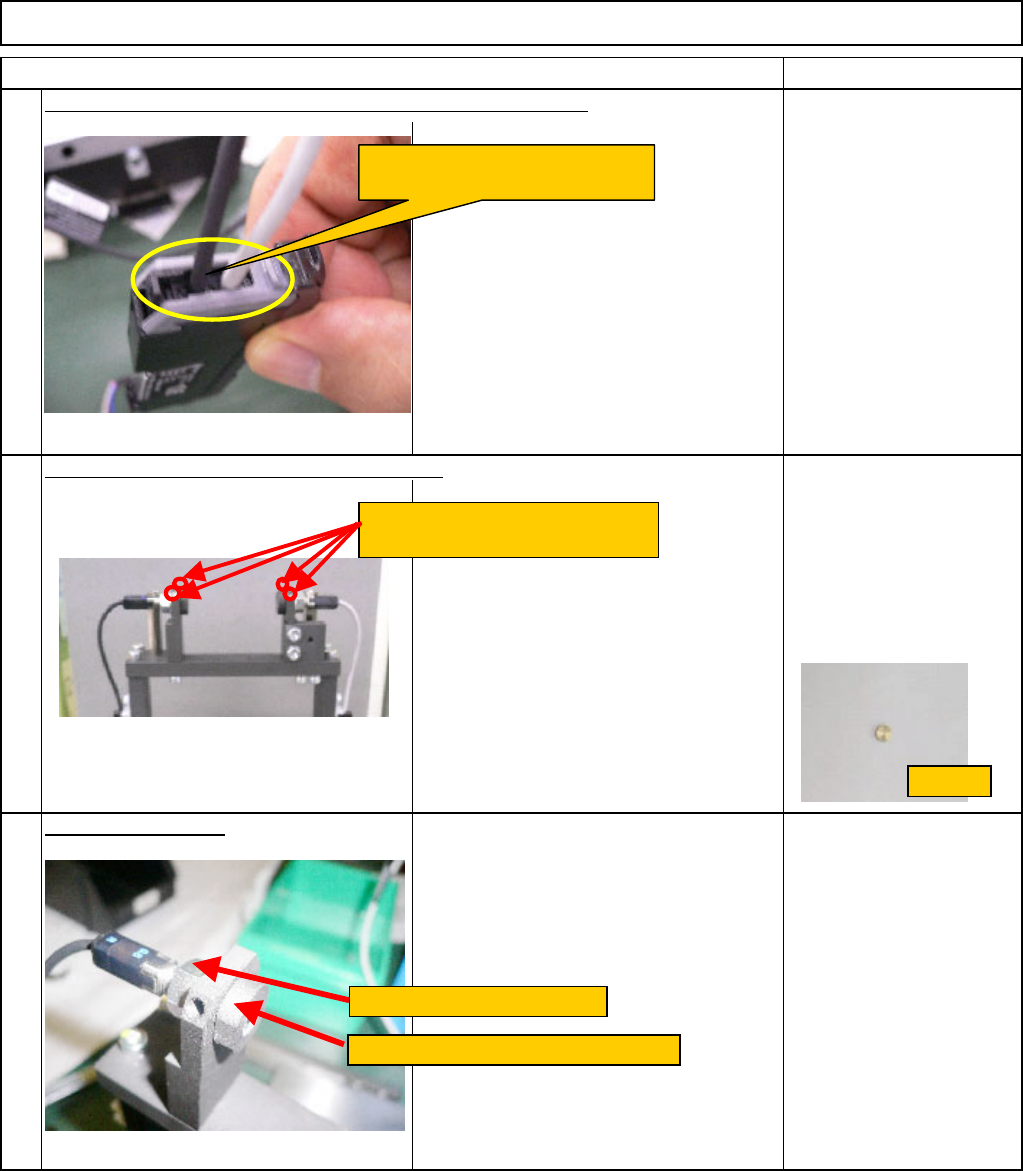
Remove the sensor.
(1) Holding the slit with an M12 wrench,
loosen the M6 nut with an M10 wrench.
(2) Turn the slit to the left. Remove it
from the sensor. Remove the sensor.
Wrench M10
Wrench M12
Nut M6
11
9
10
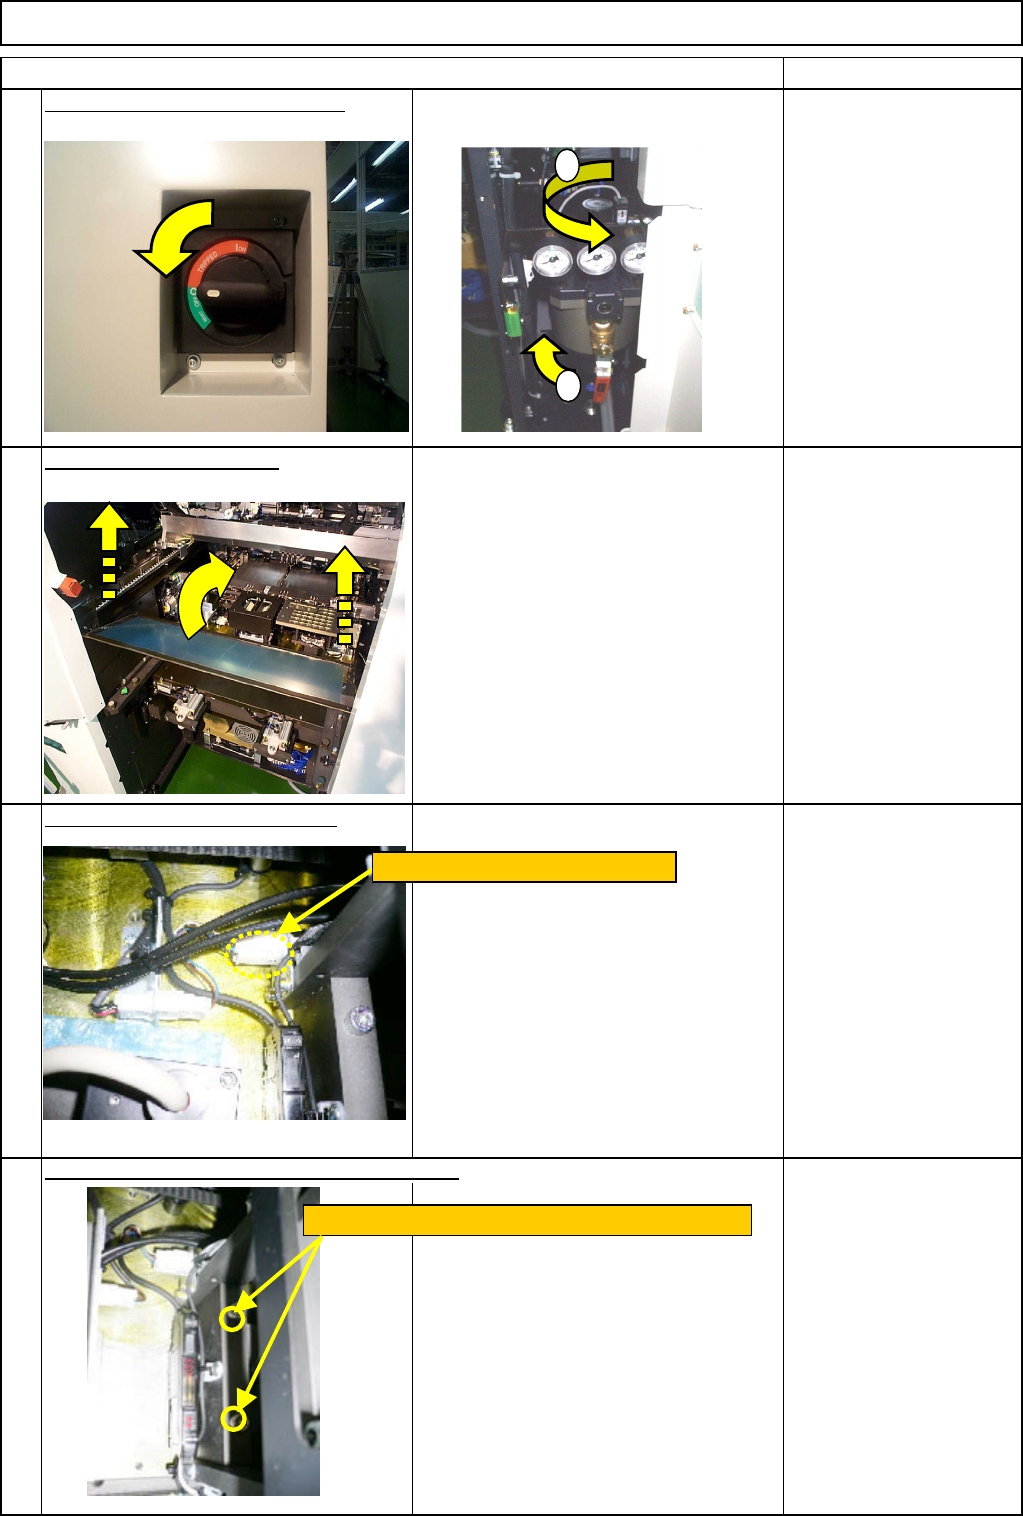
Remove the sensor cables from the amplifier connector lock.
Loosen the Hexagon-socket-head setscrews.
Remove the sensor cables from
the amplifier connector lock.
Hexagon-socket-head setscrews
M3 x 4L (2 for each)
Hold it with an M12 wrench.
Loosen the nut with an M10 wrench.
Bushing
EJM8A-E-SMA060405-A01-00
Page 6-4-5-4