CM602all_EJM8AESM_Service Manual.pdf - 第229页
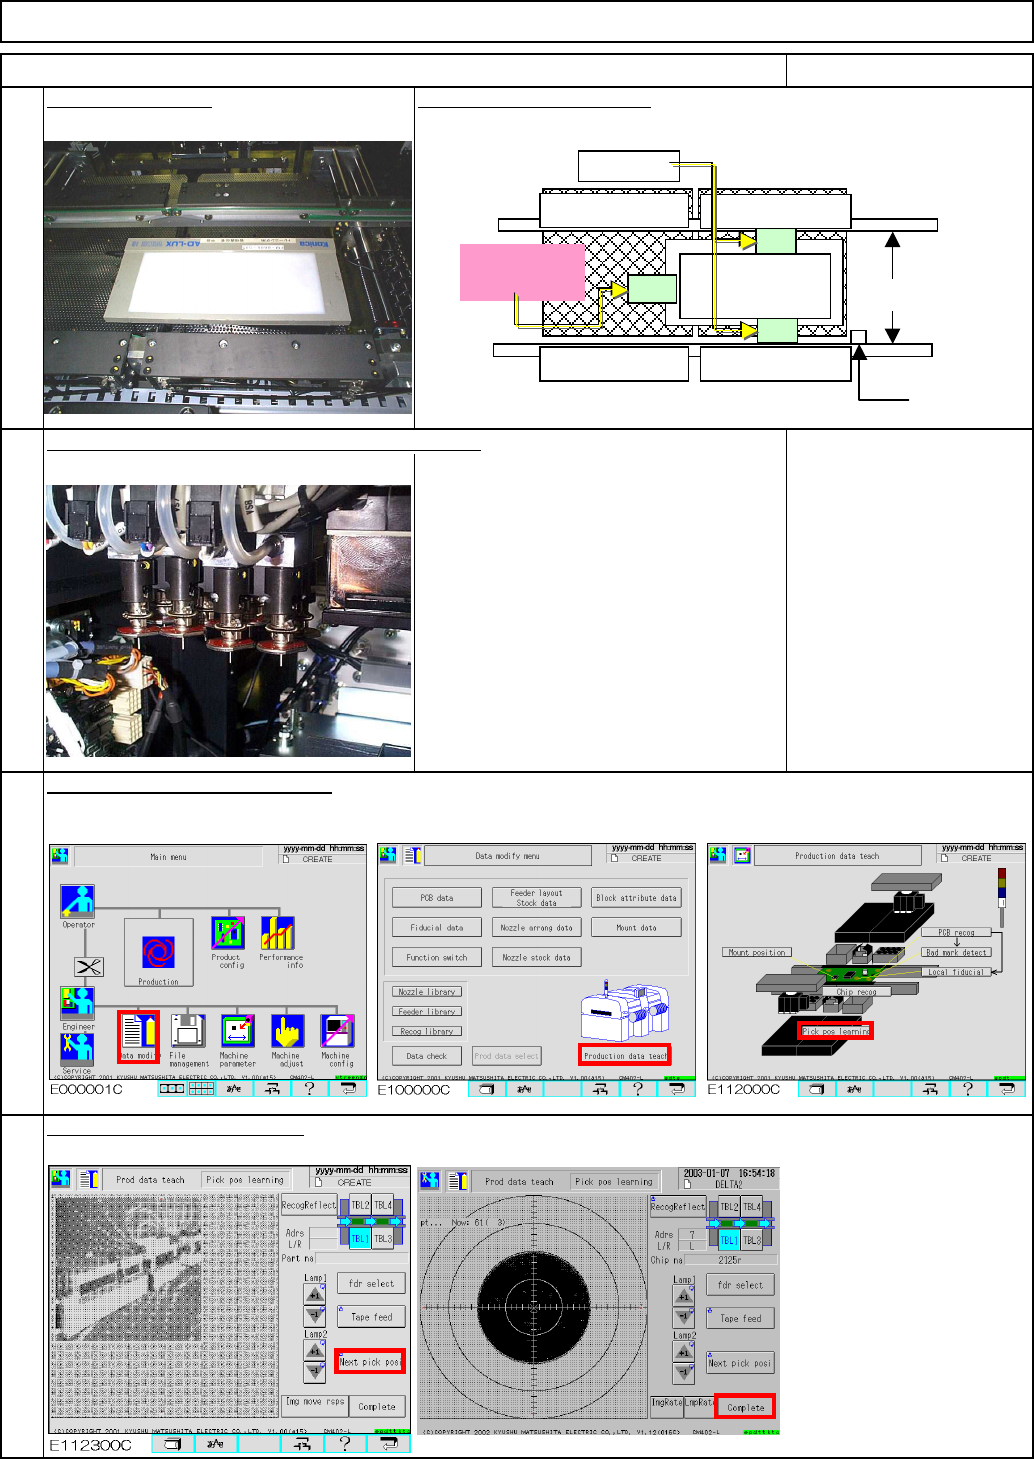
E112320C 10 9 ITEM Specify pickup position offset. 11 12 There is only one tape feeder; it is not necessary to select the feeder. See "Operating Manual Section 4-6. Pick-up Position Learning Teaching." Nozzle 1…
Component type:
1005R with sharp corners
Td4Z4C-a-SHA :Type A High-speed head shadow teaching
Td4Z4C-a-DIR :Type A High-speed head direct teaching
Td4Z4C-b-45D :Type B Multi-purpose head 45°teaching
Td4Z4C-b-90D :Type B Multi-purpose head 90°teaching
Td4Z4C-c-S45
:Type C High-speed shadow teaching, Multi-purpose head 45°teaching
Td4Z4C-c-D90
:Type C High-speed direct teaching, Multi-purpose head 90°teaching
* Type A: High-speed heads at Stages A and B
* Type B: Multi-purpose heads at Stages A and B
* Type C: High-speed head at Stage A, Multi-purpose head at Stage B
6
7
8
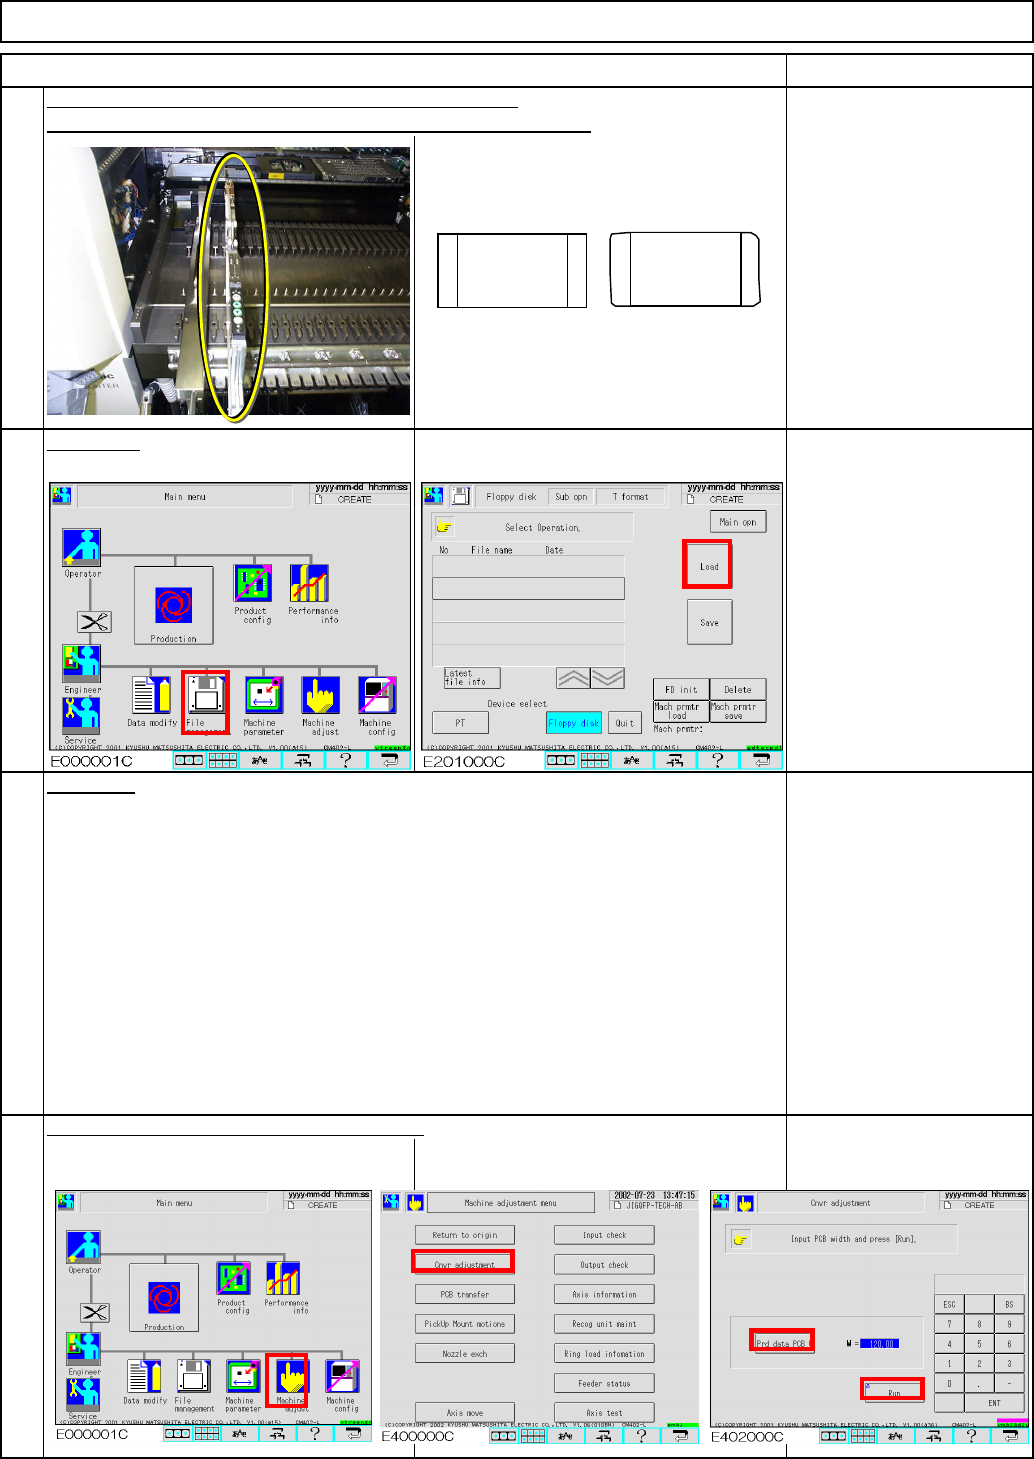
Set Component 1005 onto a 2-mm pitch tape feeders.
Adjust the width of the conveyors manually.
5
Data type:
ITEM REMARKS
Maintenance Adjustment Light Transfer-Head Assembly (8 nozzles)
Load data.
Place one feeder onto Position 5 of each side: Front and Rear.
Component 1005R: 2 reels
OK
NG
1005R
(1)
(2)
(3)
EJM8A-E-SMA040207-A01-00
Page 4-2-7-4
E112320C
10
9
ITEM
Specify pickup position offset.
11
12
There is only one tape
feeder; it is not necessary
to select the feeder.
See "Operating Manual
Section 4-6. Pick-up
Position Learning
Teaching."
Nozzle 110 x 16 pcs.
Teach "pickup position learning."
Place the light box. Be careful of tape position.
REMARKS
Light Transfer-Head Assembly (8 nozzles)Maintenance Adjustment
Fit Nozzles 110 onto both stages: Front and Rear.
Stopper
Light Box
Position the light box close to the stopper.
Middle position
Do not place
tape here!
Fixed tape
EJM8A-E-SMA040207-A01-00
Page 4-2-7-5
Maintenance Adjustment Light Transfer-Head Assembly (8 nozzles)
16
15
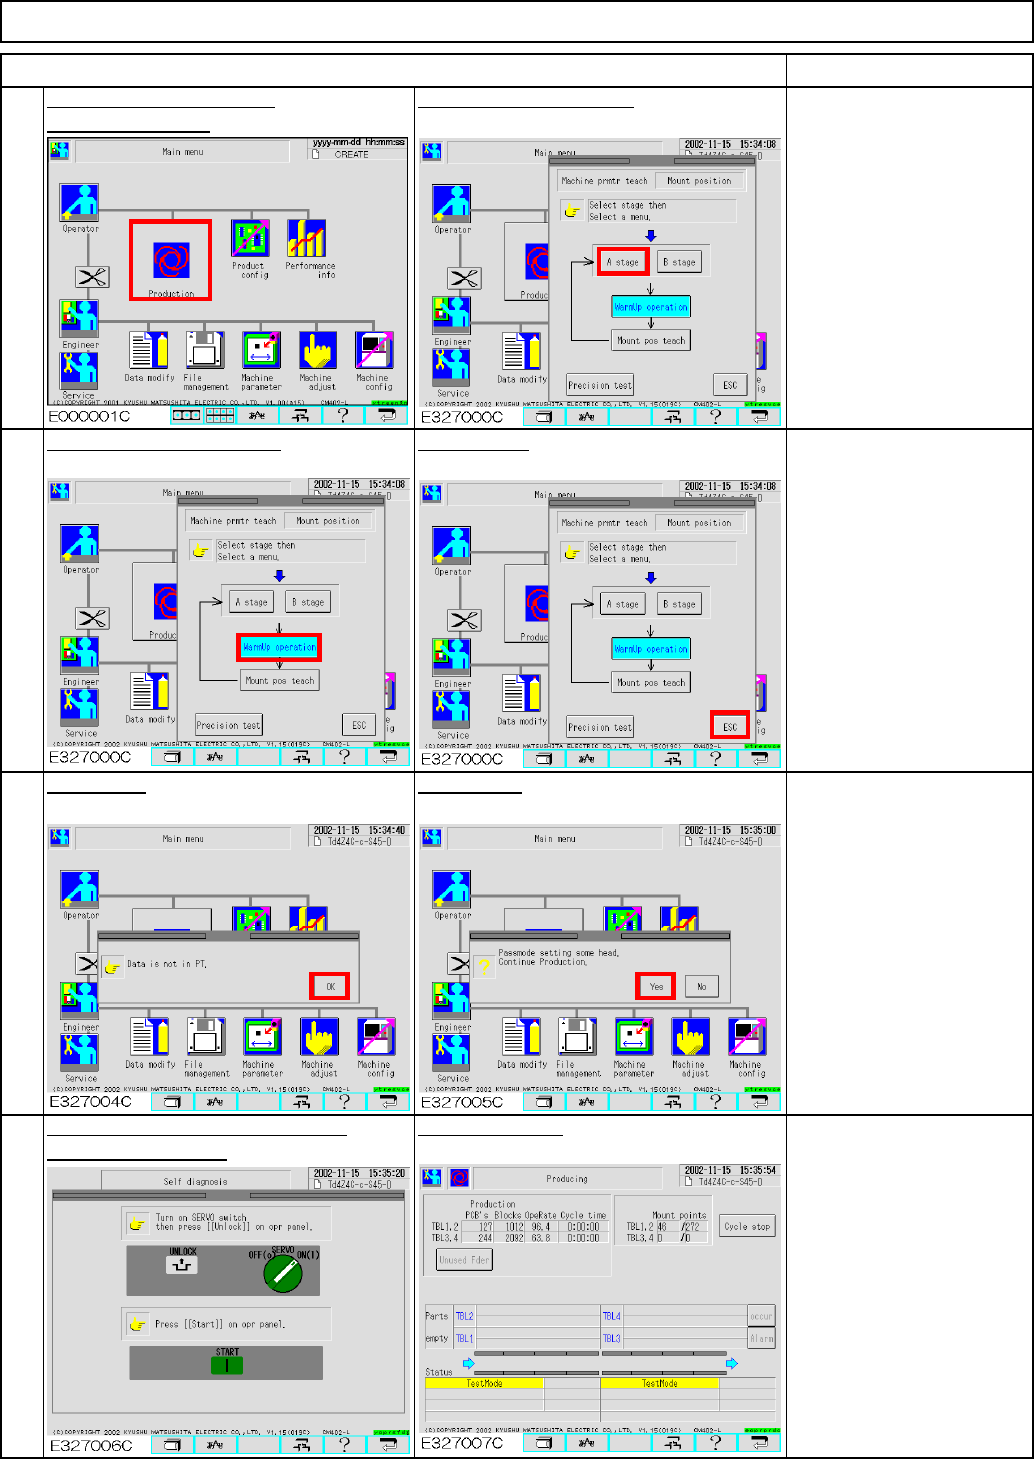
Press [OK].
ITEM
14
Pickup and recognition are
suspended and test run
starts.
Warm up the machine for
approximately 10 minutes
and press [Cycle stop] to
stop the machine.
Press the "Unlock" and the "Start"
Test Run screen
keys simultaneously.
Press [Warmup operation]. Press [ESC].
Press [Yes].
REMARKS
13
To warm up the machine,
Select the desired stage.
press [Production].
EJM8A-E-SMA040207-A01-00
Page 4-2-7-6