CM602all_EJM8AESM_Service Manual.pdf - 第800页
Remark Component-Thickness-Measuring Unit Option Part and Accessory Replacement Item Li g ht-axis ad j ustment - ( 3 ) 42 Provisionally fix the sensor (C) loosely enough to move the sensor by turning it with a special wr…
Remark
Component-Thickness-Measuring Unit
Option Part and Accessory Replacement
Item
38
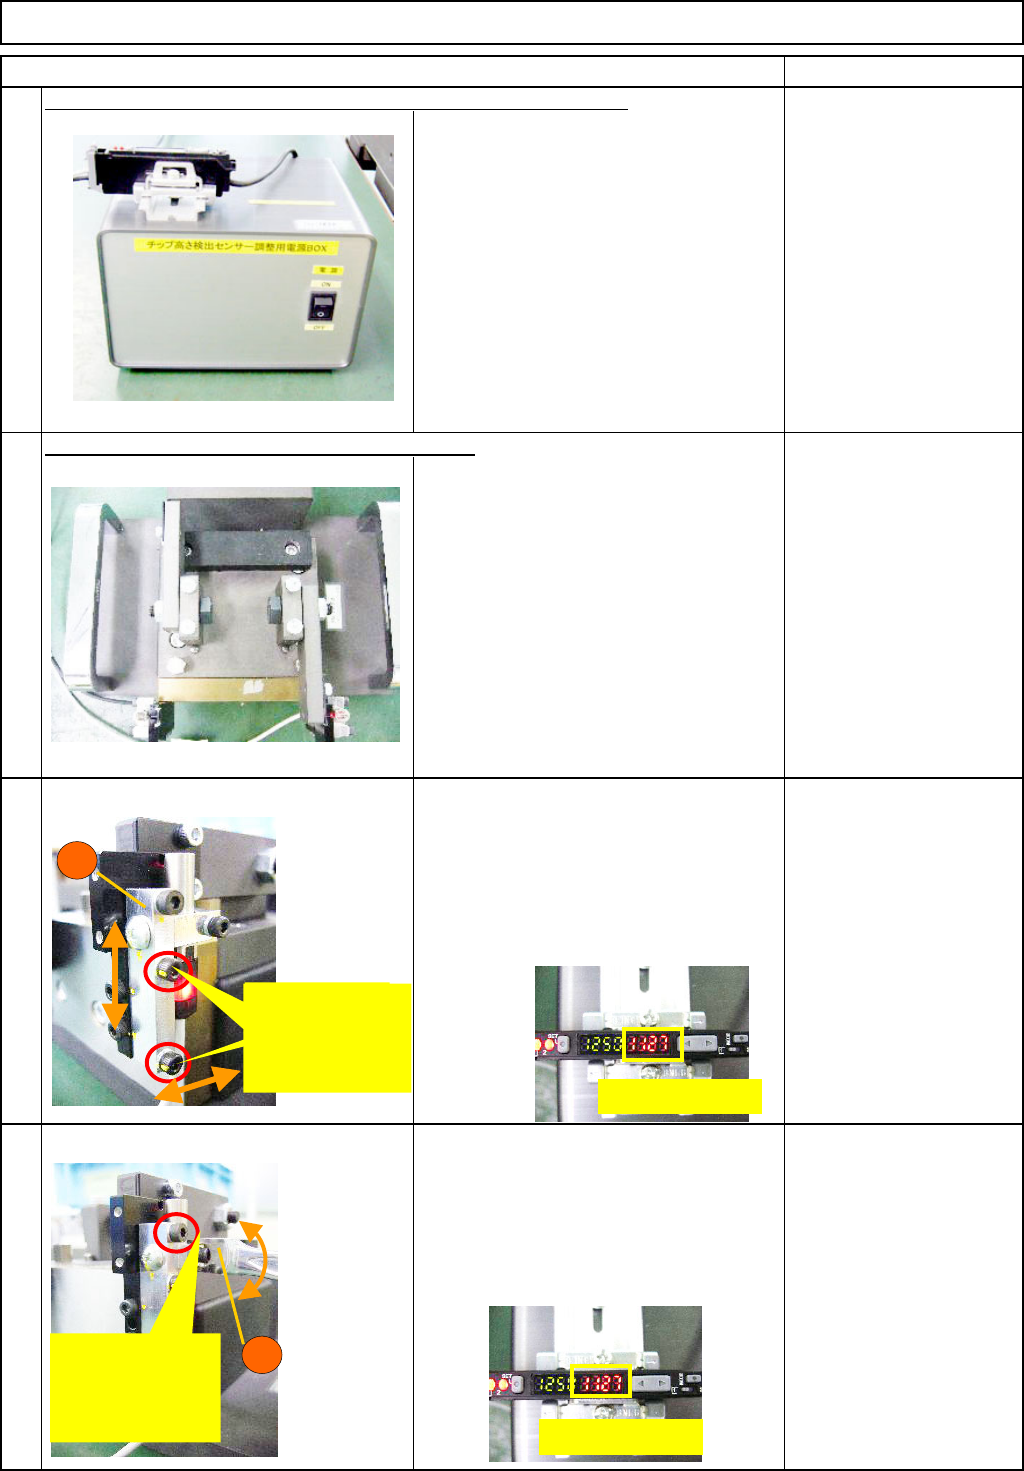
Switch on the jig. Check that a value is
displayed on the indicator of the sensor
amplifier.
FM-1853(1)
Component-height-
detection-sensor-
adjusting power source
39
Block the light of the light-emitting sensor
(Gray cable) with the jig plate with filter.
FM-1853(2)
Component-thickness-
sensor-light-axis-
adjusting jig
Li
g
ht-axis ad
j
ustment -
(
1
)
40
Provisionally fix the block (A) of the light-
emitting sensor (gray cable) loosely
enough to move the block by hand.
Moving the block in the arrow directions,
find a point at which the amplifier level
reaches maximum and provisionally fix
the block.
Allen key Long/Short
Li
g
ht-axis ad
j
ustment -
(
2
)
41
Provisionally fix the block (B) loosely
enough to move the block by turning it
with a wrench (size 6). Moving the block
in the arrow direction, find a point at
which the amplifier level reaches
maximum and provisionally fix the block.
Wrench size 6
Allen key Long/Short
Block the sensor light with the jig plate with filter.
Insert the sensor connector into the jig-power-amplifier connector.
A
滑り動く程度
に
Provisionally
fix them loosely
enough to move
them by hand.
Amplifier level
B
Provisionally
fix it loosely
enough to move
it with a wrench.
Amplifier level
EJM8A-E-SMA060402-A01-01
Page 6-4-2-12

Remark
Component-Thickness-Measuring Unit
Option Part and Accessory Replacement
Item
Li
g
ht-axis ad
j
ustment -
(
3
)
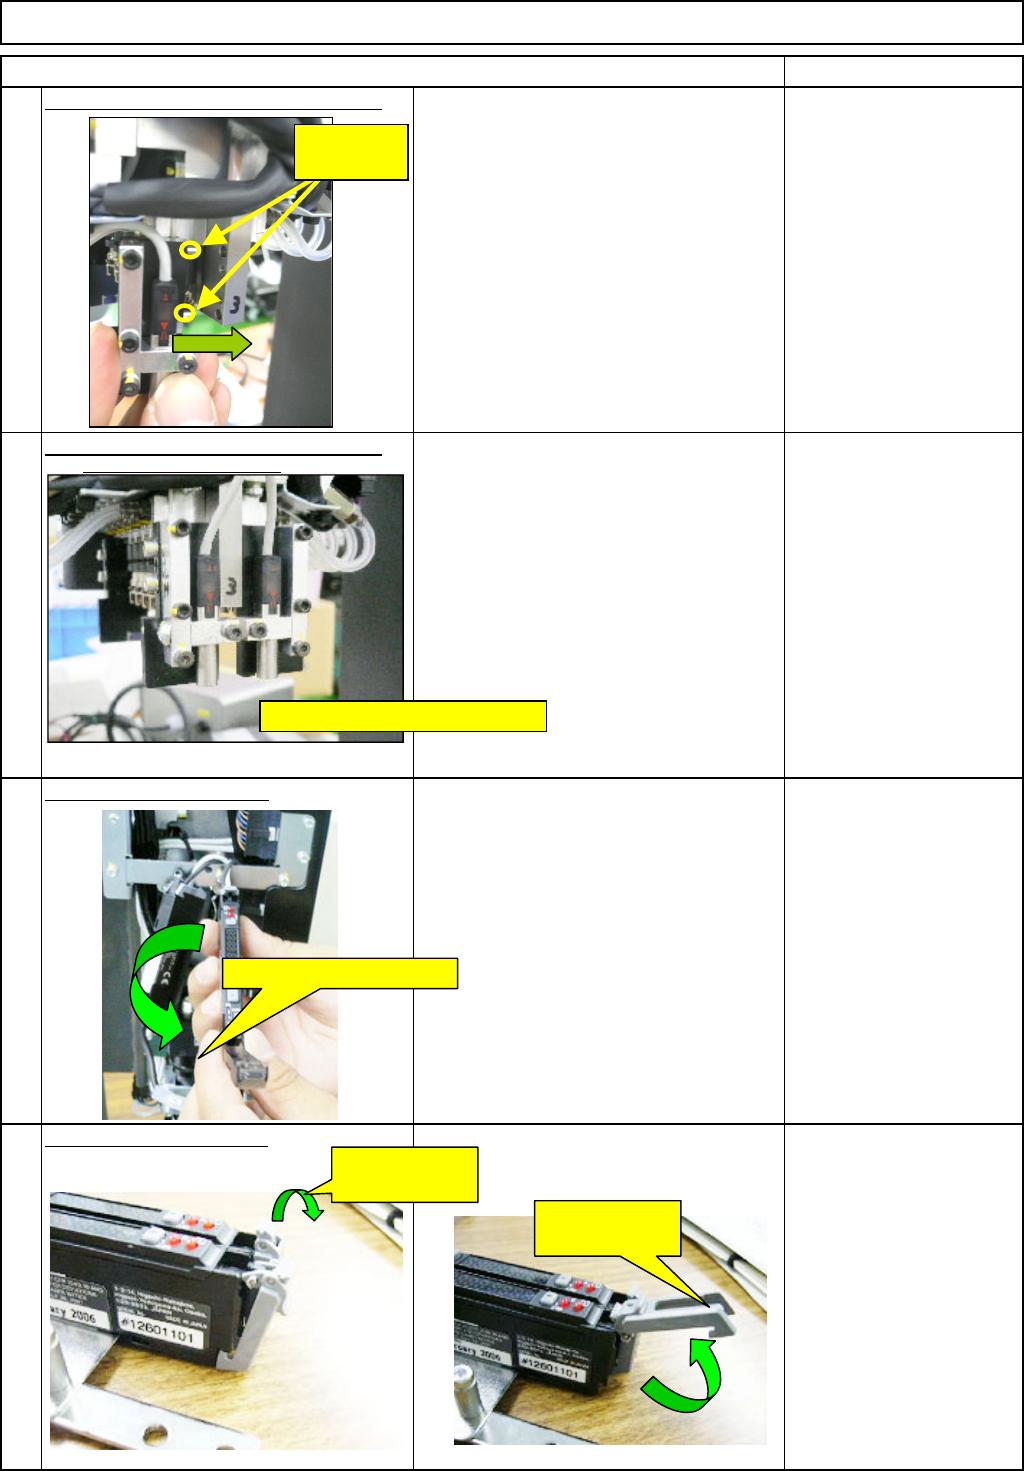
42
Provisionally fix the sensor (C) loosely
enough to move the sensor by turning it
with a special wrench. Moving the
sensor in the arrow direction, find a point
at which the amplifier level reaches
maximum and provisionally fix the
sensor.
Special wrench (size 6)
Allen key Long/Short
Securel
y
ti
g
hten the blocks A and B and
43
the sensor C.
Repeat "Light-axis adjustment (1), (2) or
(3)" until the amplifier level reaches 1000
or more. Securely tighten the blocks A
and B, and the sensor C. After securely
tightening them, check the amplifier level
is 1000 or more.
Allen key Long/Short
Securel
y
ti
g
hten the li
g
ht-sensin
g
side.
44
Securely tighten the four light-sensing-
sensor bolts. Check the amplifier level is
1000 or more.
Allen key Long/Short
Remove the
j
i
g
.
45
1. Switch off the jig. Remove the sensor
connector.
2. Remove the sensor block from the
light-axis-adjusting jig.
C
Provisionally
fix it loosely
enough to move
it with a wrench.
Special wrench (size 6)
H-shaped cut
Securely tighten them.
Securely tighten them
Amplifier level 1000 or more
Amplifier level 1000 or more
EJM8A-E-SMA060402-A01-01
Page 6-4-2-13
Remark
Component-Thickness-Measuring Unit
Option Part and Accessory Replacement
Item
Install the sensor-installin
g
block. -
(
1
)
46
The sensor is positioned with the dowel
pins. Align the hole positions and insert
the sensor straight.
(Light-emitting and -sensing sensors)
* Nozzle arrangements (1 to 6)
⇒ CN40 amplifier
Nozzle arrangements (7 to 12)
⇒ CN30 amplifier
Allen key Long/Short
Install the sensor-installin
g
block. -
(
2
)
Fix the sensor with the M2.5×20L
Hexagonal bolts (2 for each: front and
rear) (The light-emitting sensor is shown
at left. The same applies to the light-
sensing sensor.)
Allen key
* A M3 short wrench is
required.
O
p
en the am
p
lifier cover.
O
p
en the connector lock.
49
48
47
Light-emitting sensor
Open the
connector lock.
Open the
connector lock.
Dowel pins
(2 for each)
M3 Hexagonal bolt (2 for each)
Open the amplifier cover.
EJM8A-E-SMA060402-A01-01
Page 6-4-2-14