CM602all_EJM8AESM_Service Manual.pdf - 第769页
Lead Checker to the top of the sensor. Specifications: H: 174mm±0.2mm Allen key 3 mm Screw M4 2 pcs. 24 Item Phillips screwdriver #2 Truss screw 6 mm 4 pcs. (3 pcs. for AF only) Remark Optional Accessory Parts Replacemen…
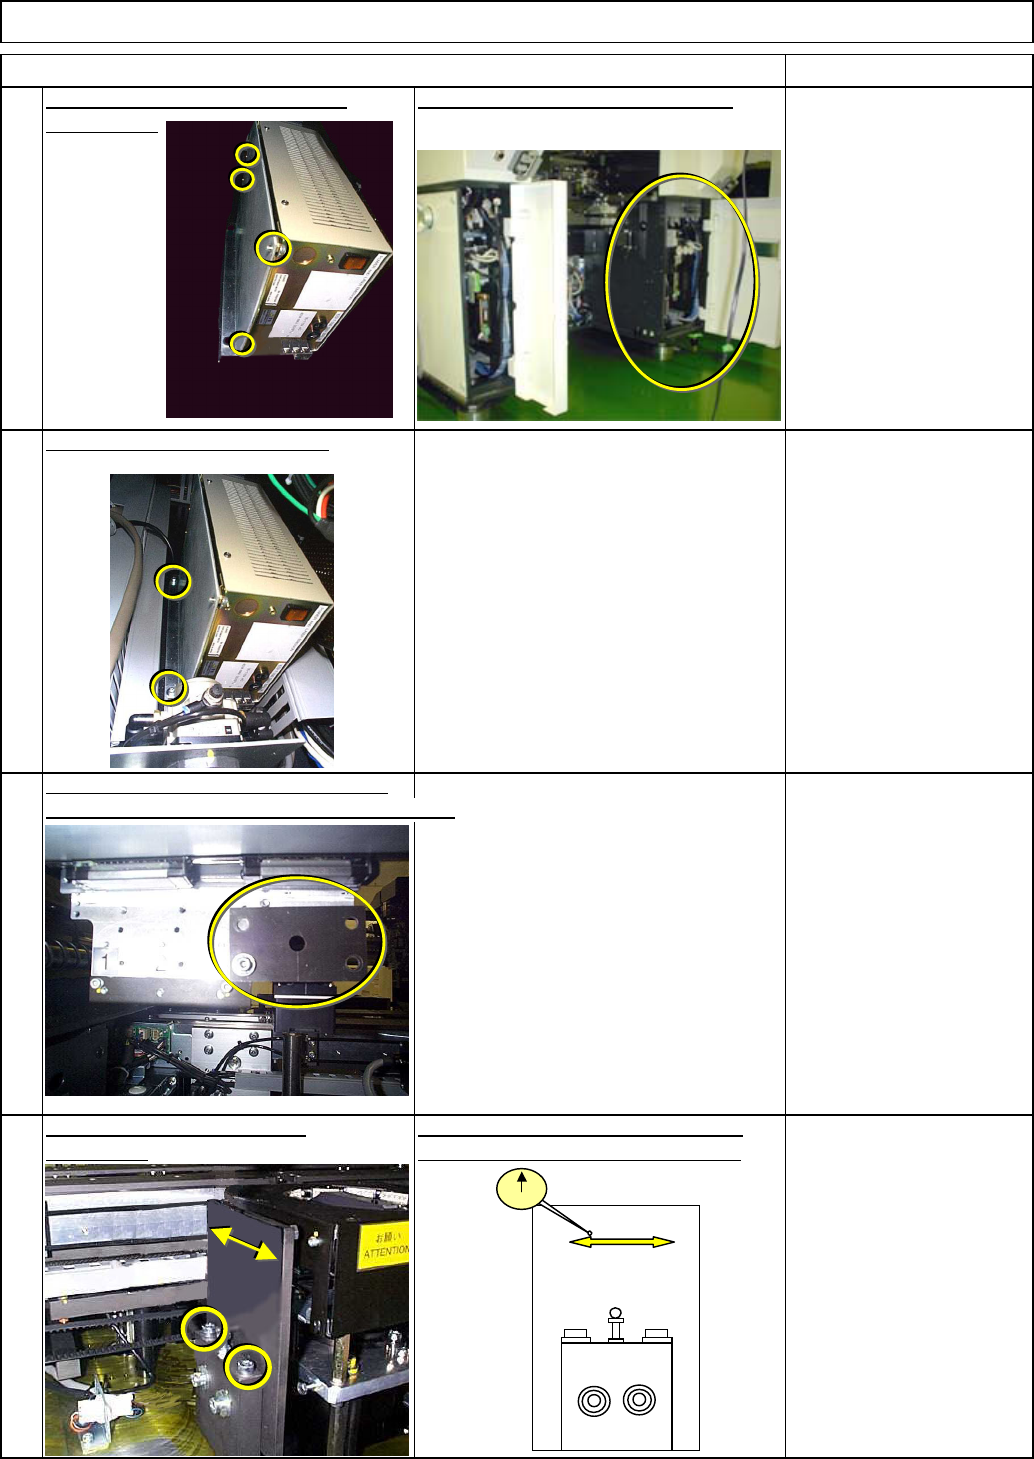
Optional Accessory Parts Replacement Lead Checker
21
Install the amplifier in the center.
Item Remark
20
Put Bracket (5) on the rear side of
Amplifier (7).
Allen key 3 mm
Screw M4 4 pcs.
Allen key 3 mm
Screw M4 1 pc.
Iron plate for holding the
magnetic stand
Place the iron plate on the head so that
the magnetic stand can be placed on the plate.
Bracket (3).
Specifications:
Parallelism:
0.02 mm or less
Allen key 3 mm
Allen key 4 mm
Screw M4 2 pcs.
Screw M5 2 pcs.
Magnetic stand
Dial gauge
Adjust the bracket so that it is parallel
to the Y-axis. Fix the bracket in place.
23
Lightly tighten Sensor Holding
22
Open the left cover on the BF stage.
Allen key 3 mm
Screw M4 2 pcs.
EJM8A-E-SMA060301-A01-00
Page 6-3-1-9
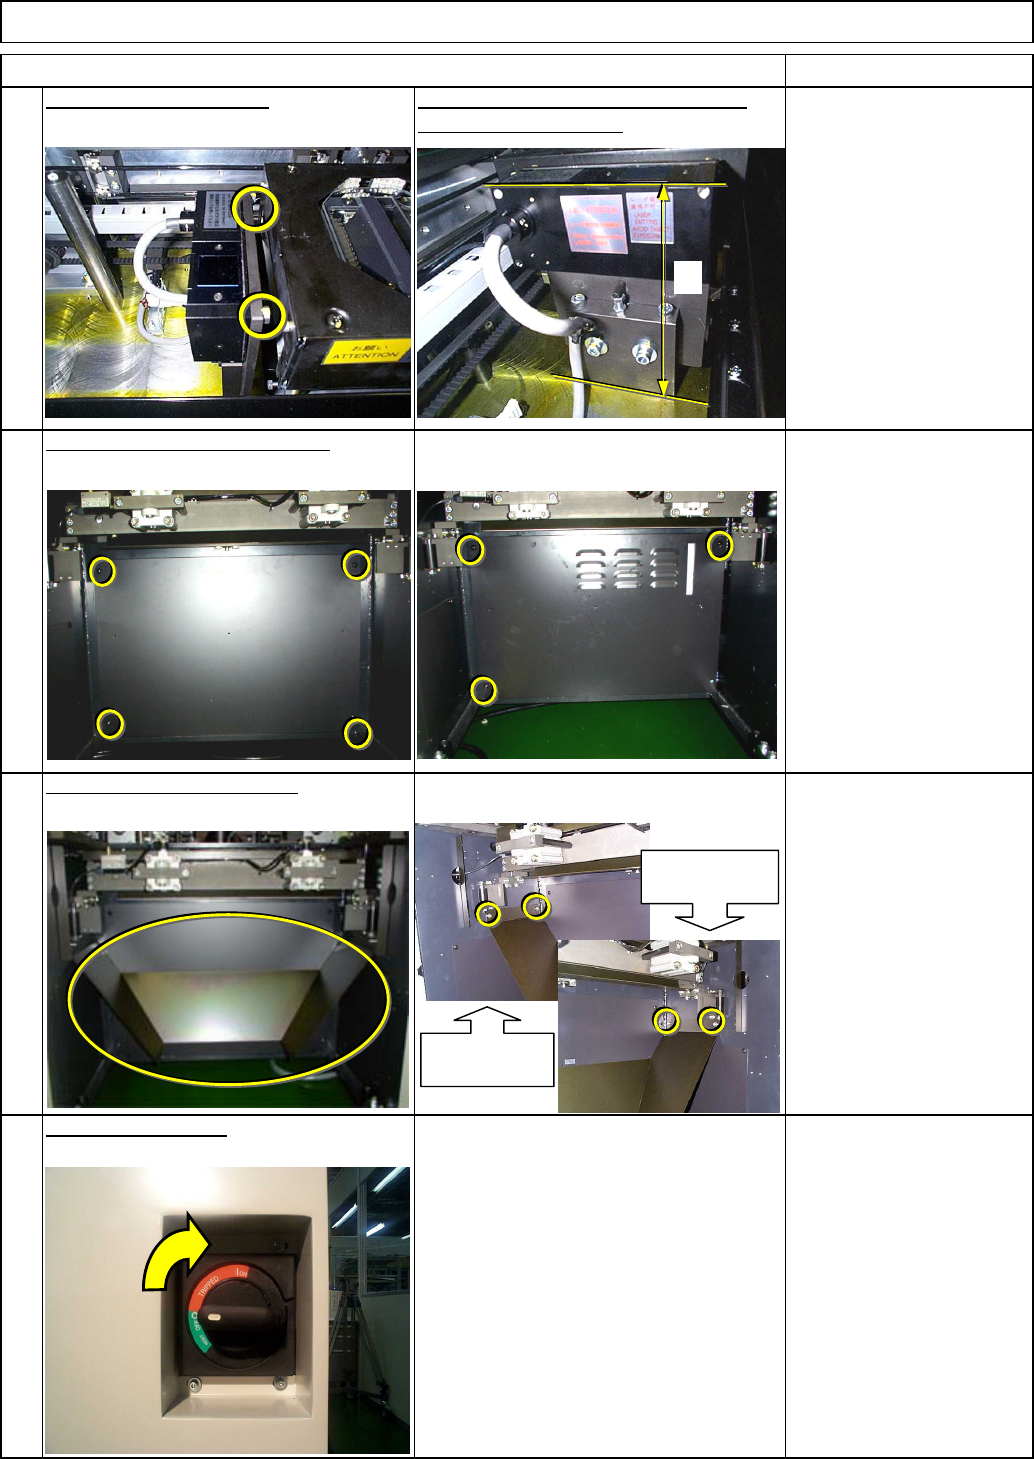
Lead Checker
to the top of the sensor.
Specifications:
H: 174mm±0.2mm
Allen key 3 mm
Screw M4 2 pcs.
24
Item
Phillips screwdriver #2
Truss screw 6 mm
4 pcs.
(3 pcs. for AF only)
Remark
Optional Accessory Parts Replacement
Lightly tighten Sensor (4). Adjust the height from the body frame
Put the lower box cover back on.
Put all lower chutes back on.
27
Switch on the power.
25
26
Allen key 4 mm
Screw M5 x 12 mm
4 pcs.
Thick washer 43 pcs.
H
Chute holding
section (Left)
Chute holding
section (Right)
EJM8A-E-SMA060301-A01-00
Page 6-3-1-10
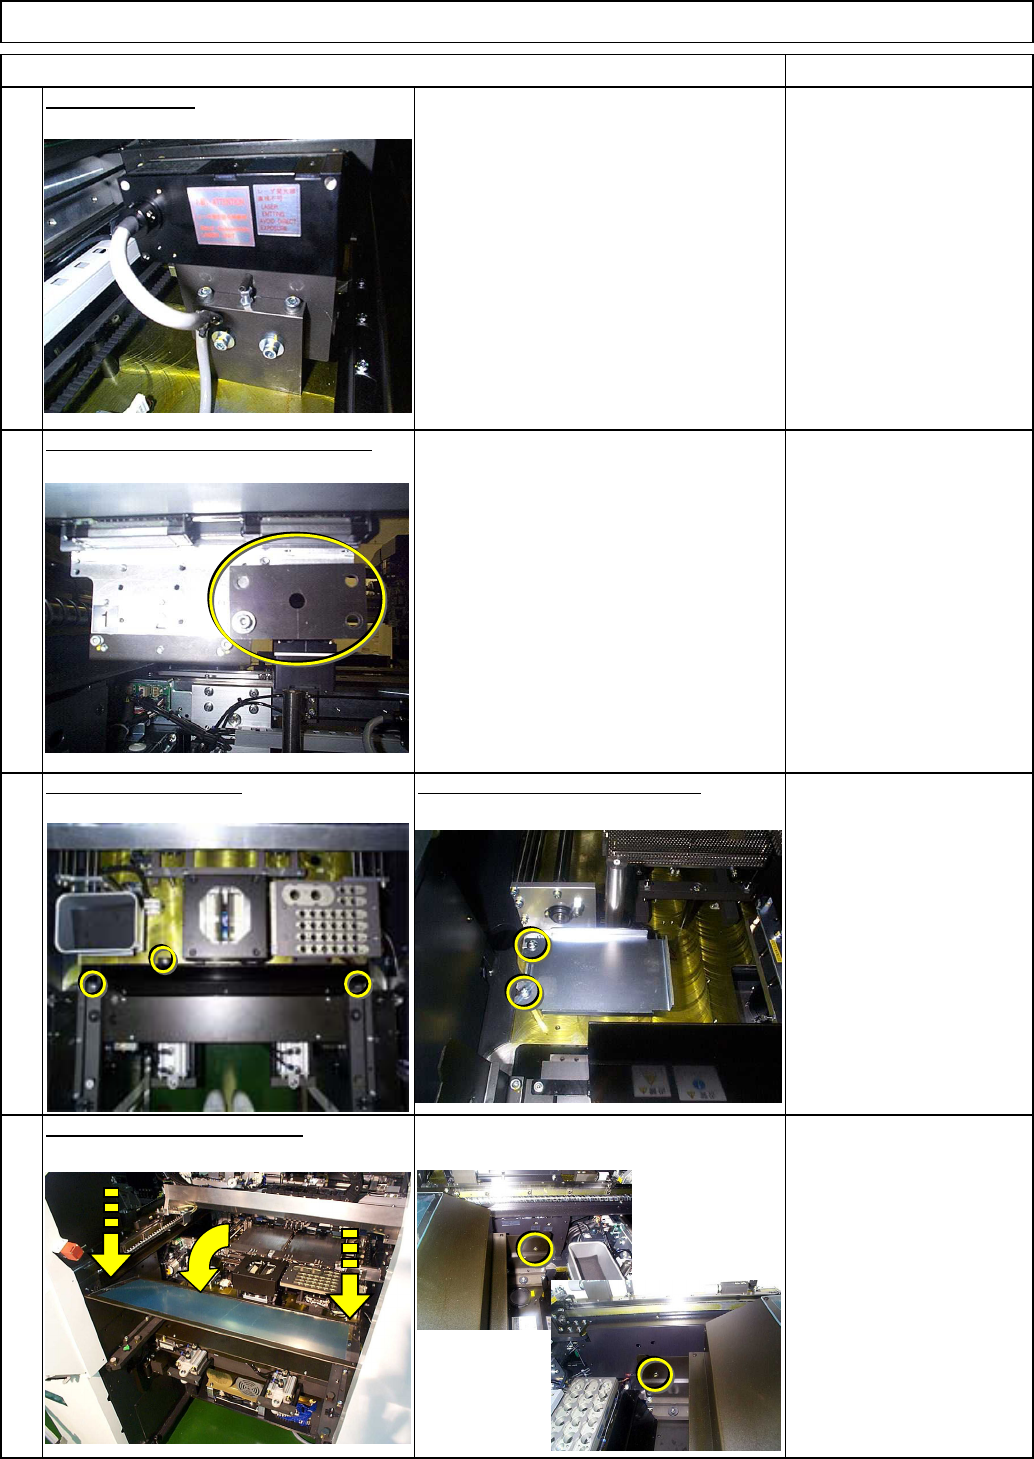
Item
Level the sensor.
Lead CheckerOptional Accessory Parts Replacement
28
Remove the iron plate from the head.
Allen key 3 mm
Screw M4 1 pc.
Iron plate for holding the
magnetic stand
Phillips screwdriver #2
Screw M4 2 pcs.
Put the NG box bracket back on.
Put the feeder cover back on.
30
31
Allen key 3 mm
Allen key 4 mm
Screw M4 x 10 3 PCs.
Thick washer 3 pcs.
Screw M5 2 pcs.
Put the chute back on.
See Section 4-1-9
"Lead Checker Height
Adjustment"
Remark
28
EJM8A-E-SMA060301-A01-00
Page 6-3-1-11