CM602all_EJM8AESM_Service Manual.pdf - 第364页
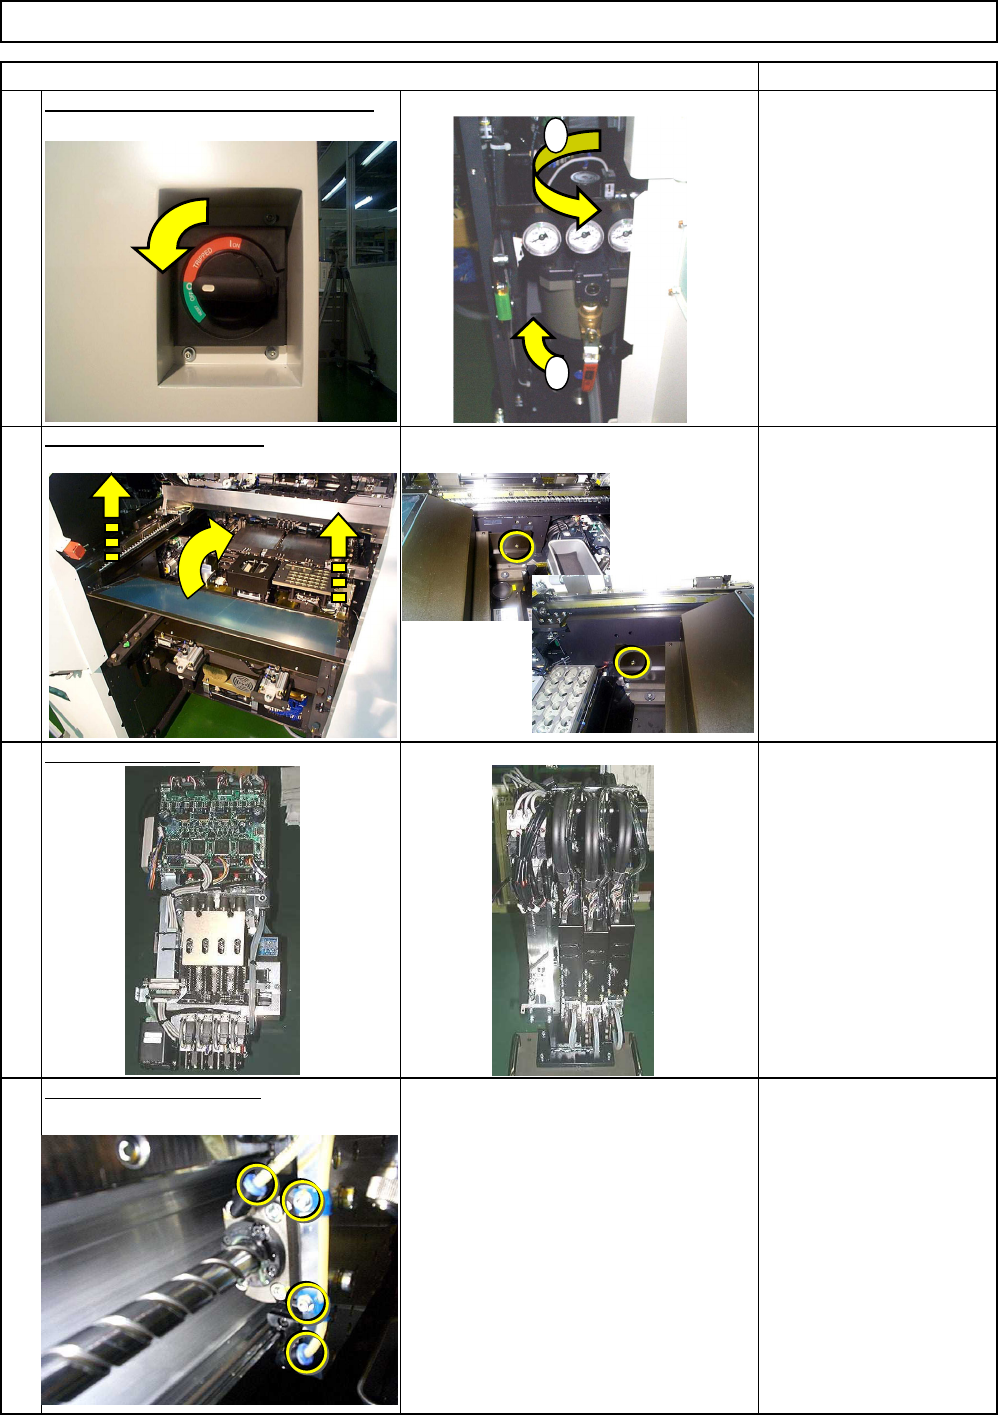
6 7 8 Remove the head plate. 項目 (ITEM) 備考 (REMARK) Machine Part Replacement Main Body 5 Remove the linear rail. Allen key 3 mm Screw M8 x 18 26 pcs. Allen key 3 mm Allen key 4 mm Screw M4 x 12 16 pcs. Small flat round M4…
For High-Speed Head, see
Section 5-3-1
"Transfer Head Assembly
Replacement."
For Multi-Purpose Head,
see Section 5-5-2
"Replacing a Set of Head
Units."
Remove the grease hose.
3
4
Allen key 3 mm
Screw M4 4 pcs.
2
1
項目(ITEM)
Remove the feeder cover
.
Machine Part Replacement Main Body
Remove the head.
Phillips screwdriver #2
Screw M4 2 pcs.
備考(REMARK)
Switch off the power and the air supply.
1
2
EJM8A-E-SMA050109-A01-00
Page 5-1-9-2
6
7
8
Remove the head plate.
項目(ITEM) 備考(REMARK)
Machine Part Replacement Main Body
5
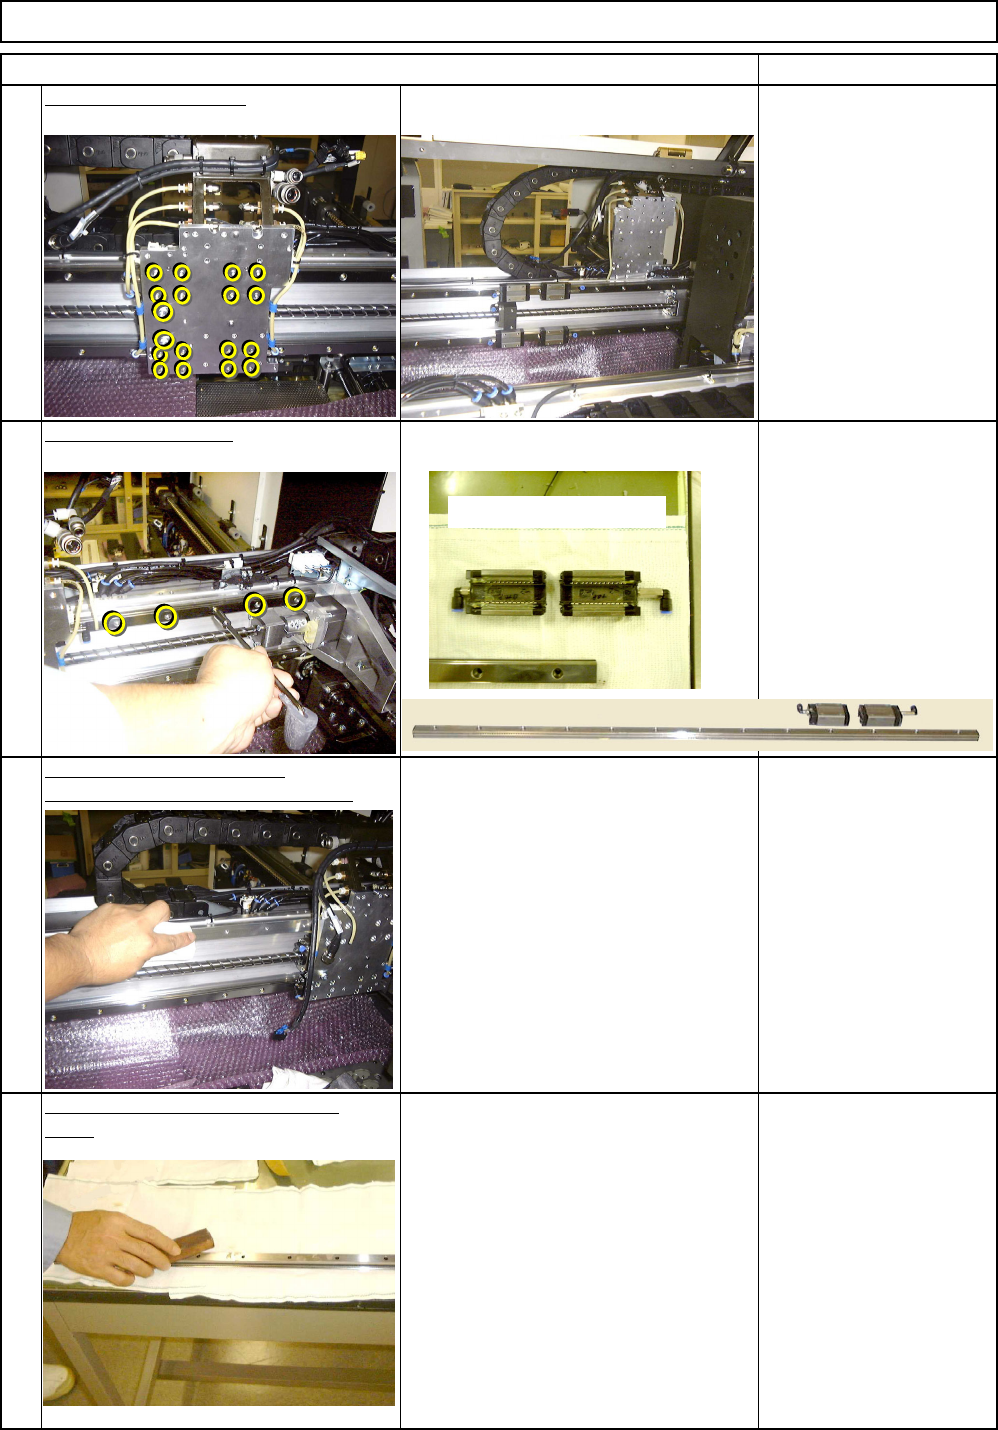
Remove the linear rail.
Allen key 3 mm
Screw M8 x 18 26 pcs.
Allen key 3 mm
Allen key 4 mm
Screw M4 x 12 16 pcs.
Small flat round M4
16 pcs.
Screw M5 2 pcs.
Cloth
Oil stone
Apply oil stone to the new linear rail
softly.
After removing the linear rail,
clean the linear rail mounting section.
Do not shock the sliders.
EJM8A-E-SMA050109-A01-00
Page 5-1-9-3
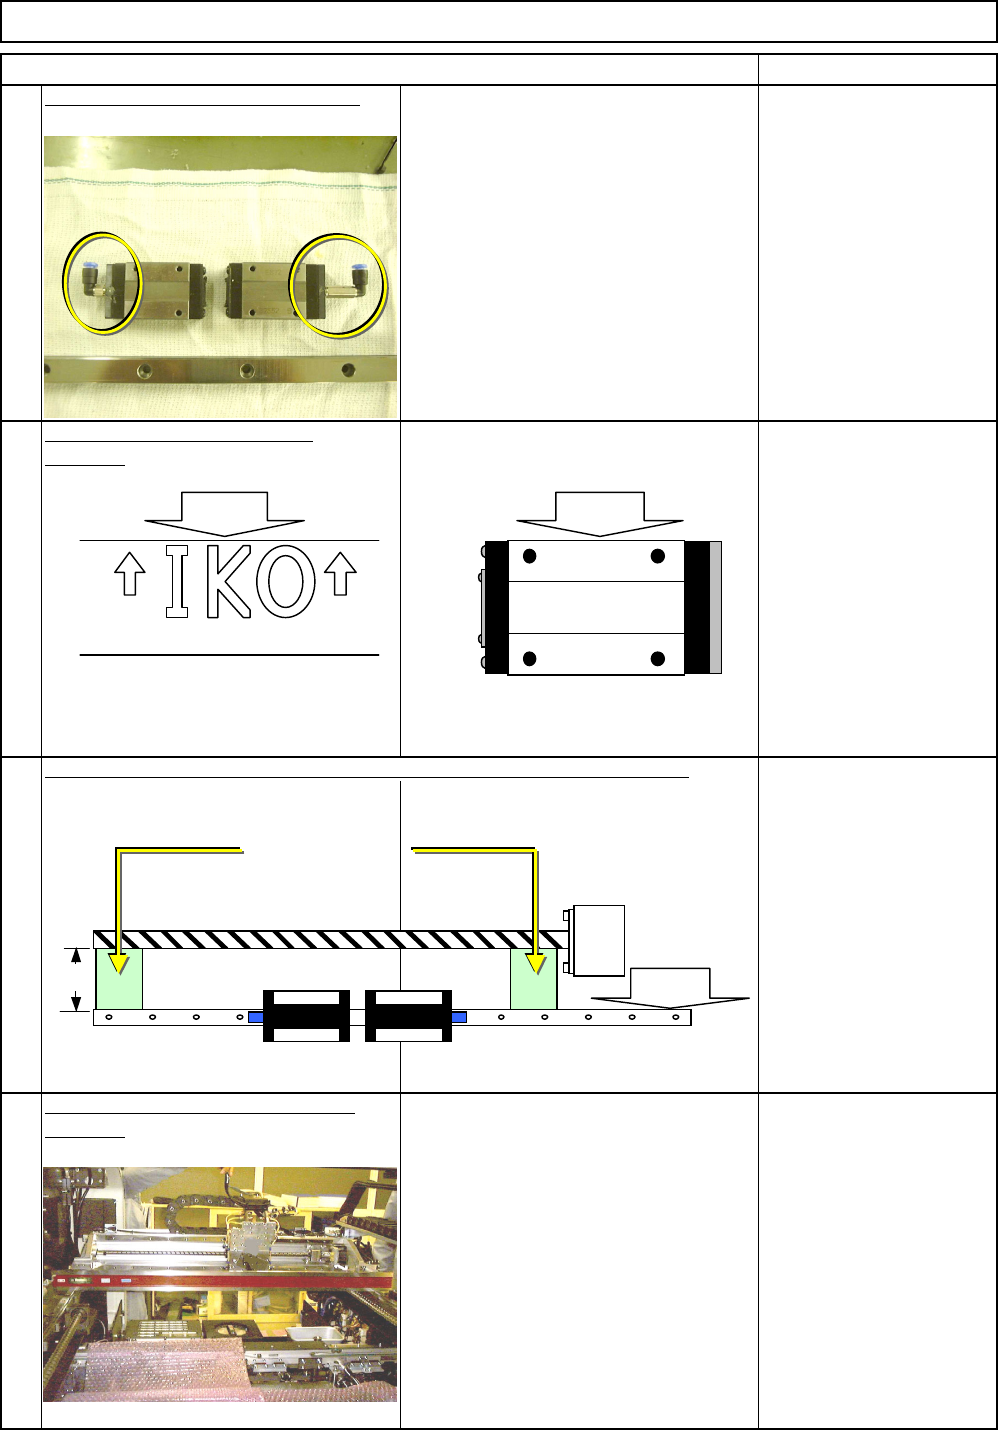
Be careful of the orientation of the
nipples and the length of the joints.
10
11
12
Block gauge 35 mm
Allen key 3 mm
Screw M4 x 18 13 pcs.
Check the reference side of the
linear rail.
9
Fit the grease nipples onto the sliders.
Position the linear rail so that it is positioned 35-mm lower than the ball screw.
Wrench 7 mm
項目(ITEM) 備考(REMARK)
Machine Part Replacement Main Body
Mount the straight edge on the Y-axis
linear rail.
Straight edge 1500 mm
E872
BZ552A
Ref. side
JAPAN LWE15
Ref. side
35 mm
35-mm block gauges
Ref. side
EJM8A-E-SMA050109-A01-00
Page 5-1-9-4