CM602all_EJM8AESM_Service Manual.pdf - 第684页
Machinery Part Replacement Remarks Press [PCB positioning Mount height]. Be sure to remove the support pins beforehand since the width of the conveyor is adjusted in this step. Select the stage to teach. (Front) Press [J…
Machinery Part Replacement
This section describes the procedures for determining the mounting height and for positioning the board.
Tools
None
Jig
FM-1074
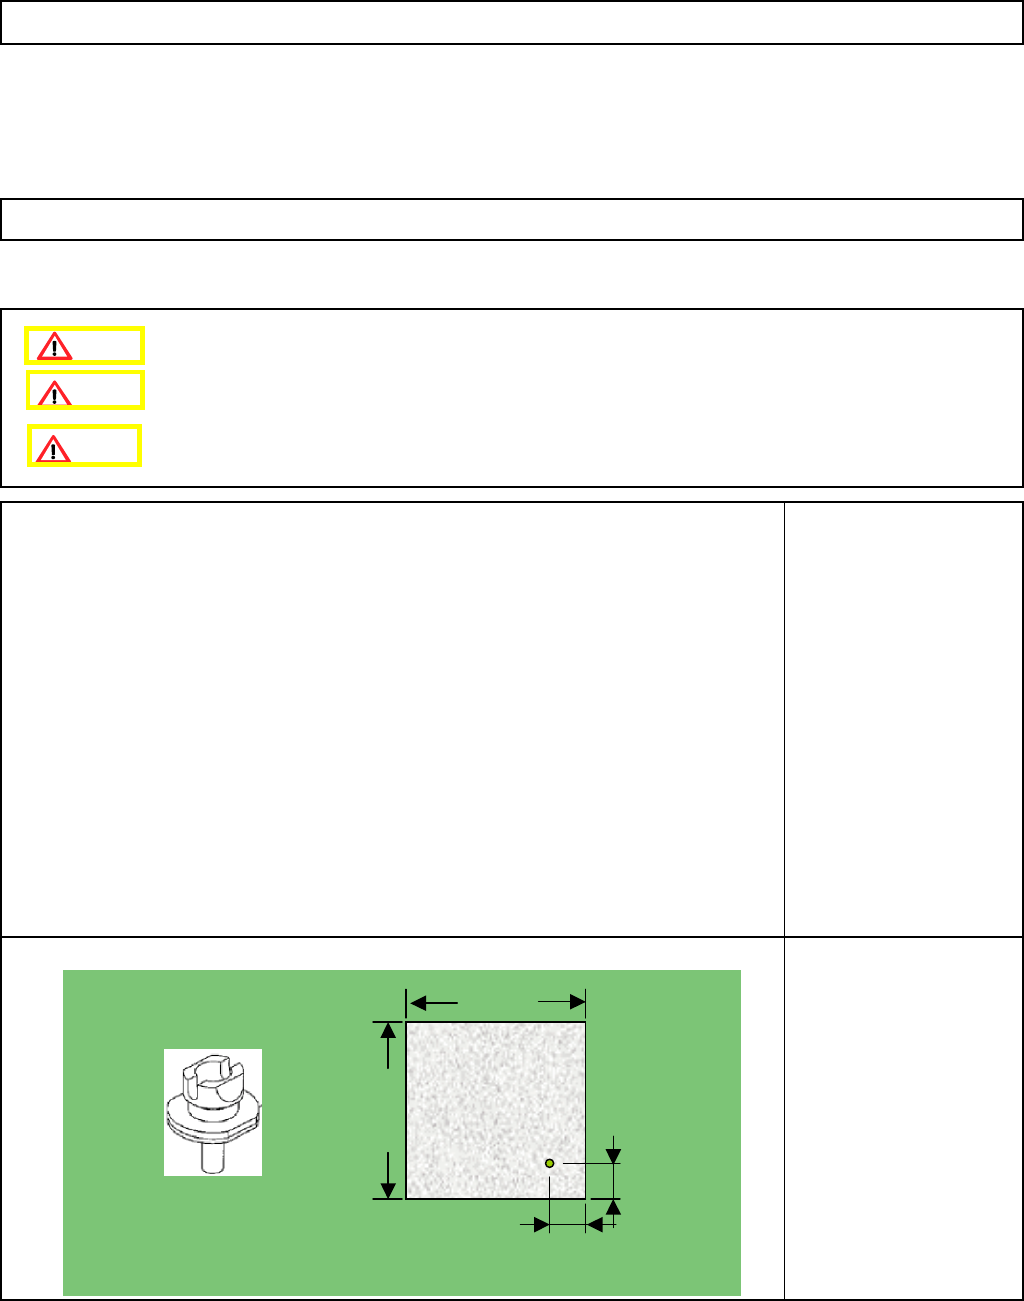
Board jig 50 mm x 50 mm
(with a hole)
Nozzle 130S
5-11-6 Determining the Mounting Height and Positioning the Board
12-Nozzle Head Teaching
Remove the support pins beforehand.
10+/-0.05mm
10+/-0.05mm
50mm
50mm
t= 3.0mm
Caution
Dange
r
Warning
EJM8A-E-SMA051106-A01-00
Page 5-11-6-1
Machinery Part Replacement
Remarks
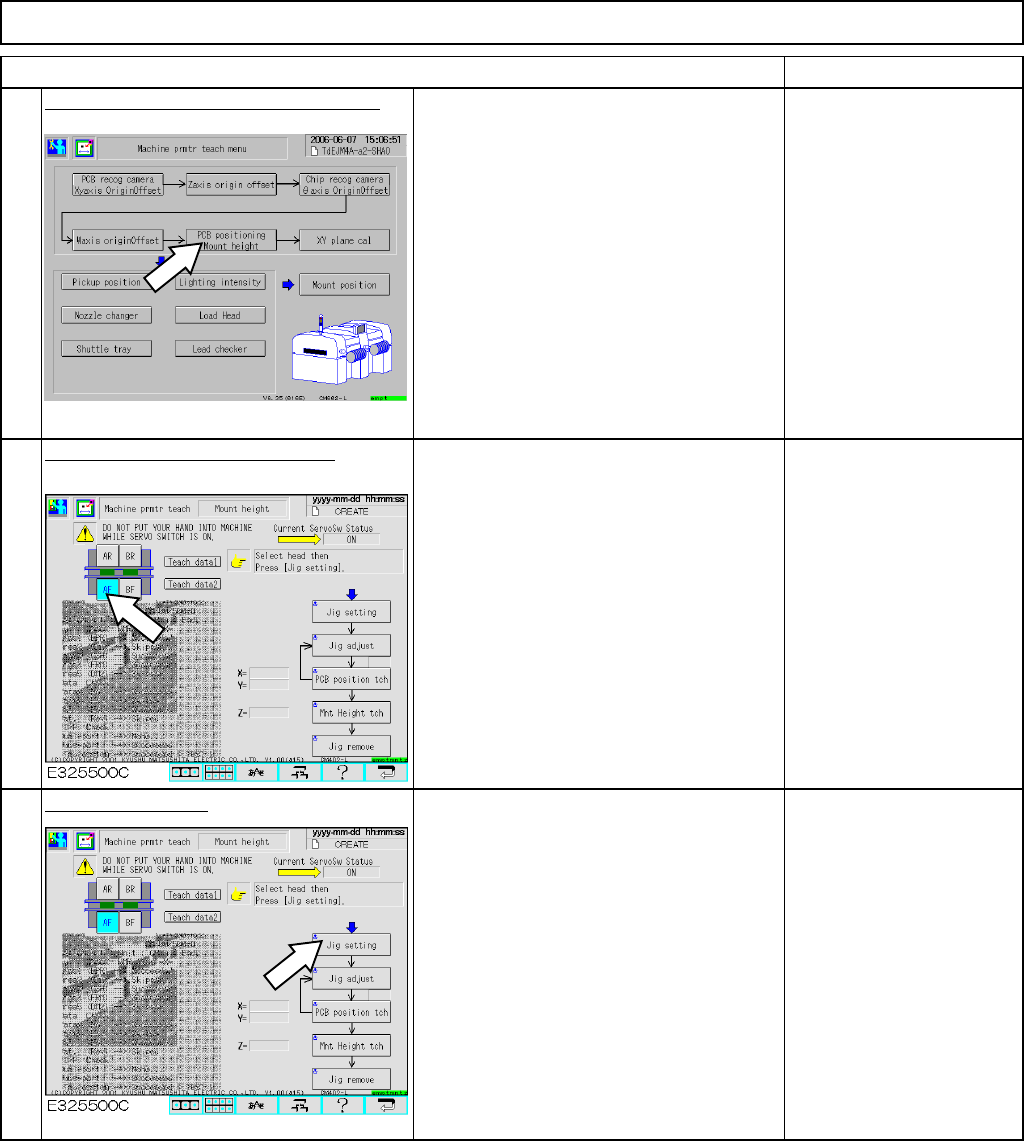
Press [PCB positioning Mount height].
Be sure to remove the
support pins beforehand
since the width of the
conveyor is adjusted in
this step.
Select the stage to teach. (Front)
Press [Jig setting].
• Fit the 130S nozzle on the number 5
nozzle holder.
12-Nozzle Head Teaching
Item
1
2
3
EJM8A-E-SMA051106-A01-00
Page 5-11-6-2

Machinery Part Replacement
Remarks
12-Nozzle Head Teaching
Item
Press [Jig adjust]
• Either "Right" or "Left" is displayed
immediately below the [Jig adjust]. Check
"Left" is displayed.
• Press the board-positioning and mount-
height jig against the board-conveyor-
holding guide and the board stopper
manually.
Press [PCB position tch] and [Mnt Height tch].
• The camera moves to the hole (1 mm)
of the board-positioning and mount-
height jig, and recognizes it.
• The nozzle 130S moves down to the
upper surface of the board-positioning
and mount-height jig and measures the
mount height.
4
5
Conve
y
or-movin
g
g
uid
e
Left Right
Conveyor-holding guide
Stoppers
Press
1-mm hole
EJM8A-E-SMA051106-A01-00
Page 5-11-6-3