Smart Graphical User Interface (SmartG) Overview_rev1.pdf - 第101页
Copyright © ViT rox All Rights Reserved . Add component description 101 Figure 87: Add component functionality This is used to show the current board number in a panel board. This is used to provide refdes name of the co…
Copyright © ViTrox All Rights Reserved.
Add Component
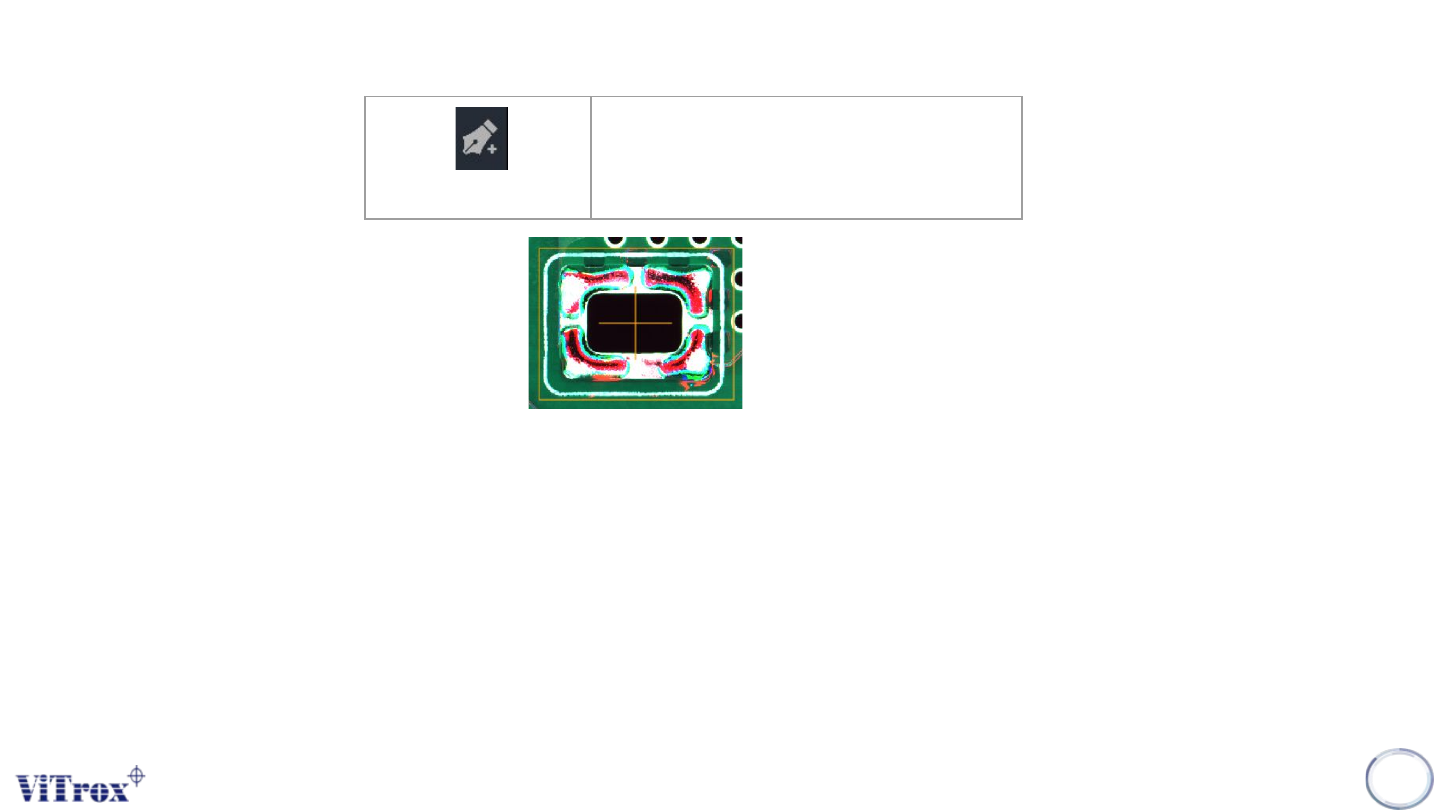
Add Component is used to add single or multiple components in camera view. This feature is helpful for customized inspection
including gold pad inspection, THT inspection, gap detector inspection, foreign material inspection, or components that are not
in cad file.
Note: User can add single or multiple component by using this feature
100
Add Component
Add component by drag and draw
Figure 86: Draw and Drag for add component
Copyright © ViTrox All Rights Reserved.
Add component description
101
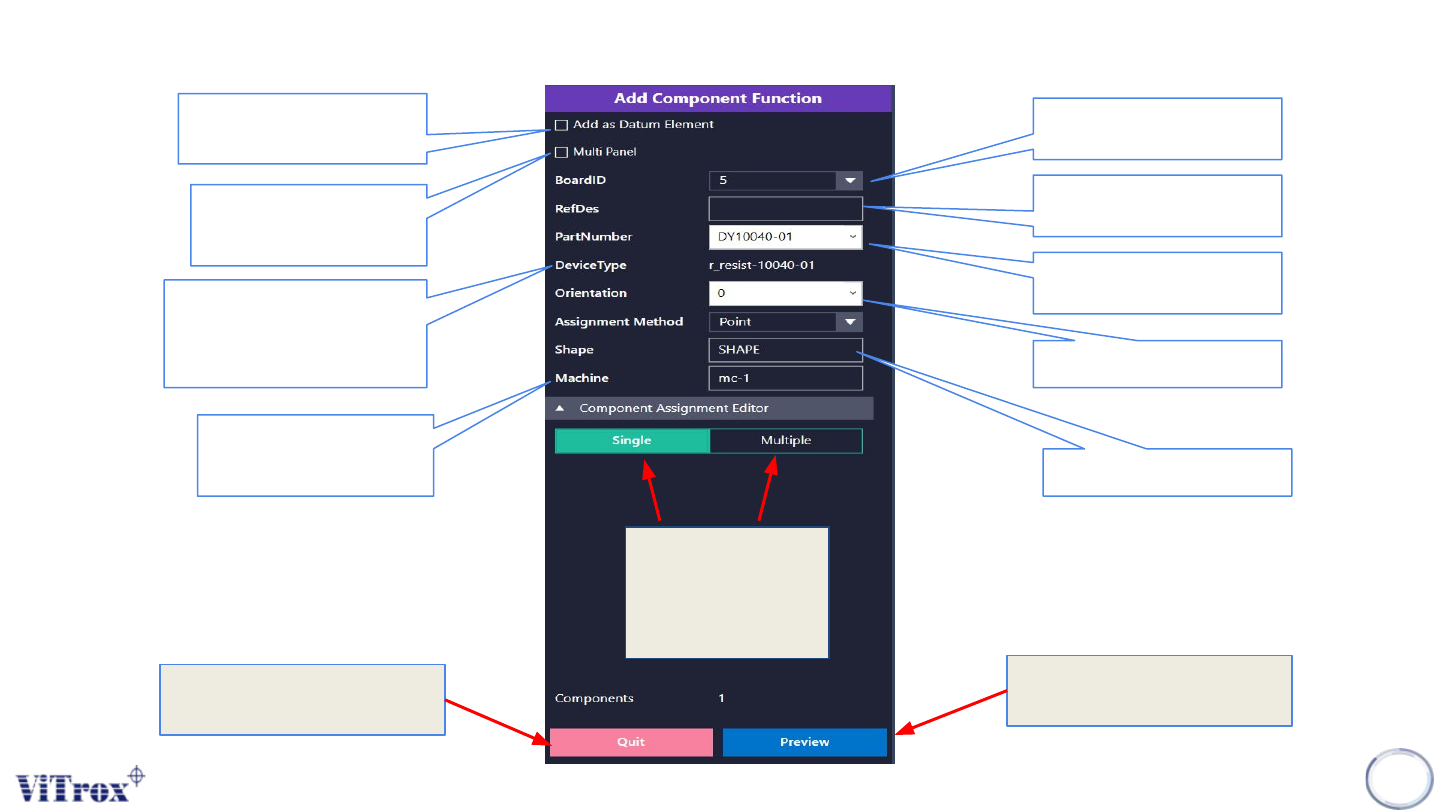
Figure 87: Add component functionality
This is used to show the
current board number in a
panel board.
This is used to provide
refdes name of the
component
To find the consistent
region to calculate the
warpage compensation.
This is used to add a
component into multiple
boards.
This is used to link the ref
des into the existing part
number.
This is used to show the
device type of the existing
part number only. For a
newly created part number, it
shows n0000
This is used to set the
component rotation.
This is used to set the
shape of component
This is used to set the
machine type. The
recommended setting is
mc-1.
This is used to add a
single component or
multiple components
at the same time. The
default setting is
single.
Preview the components
detail before done add
component
Quit the add component
configuration
Copyright © ViTrox All Rights Reserved.
Move Component
102
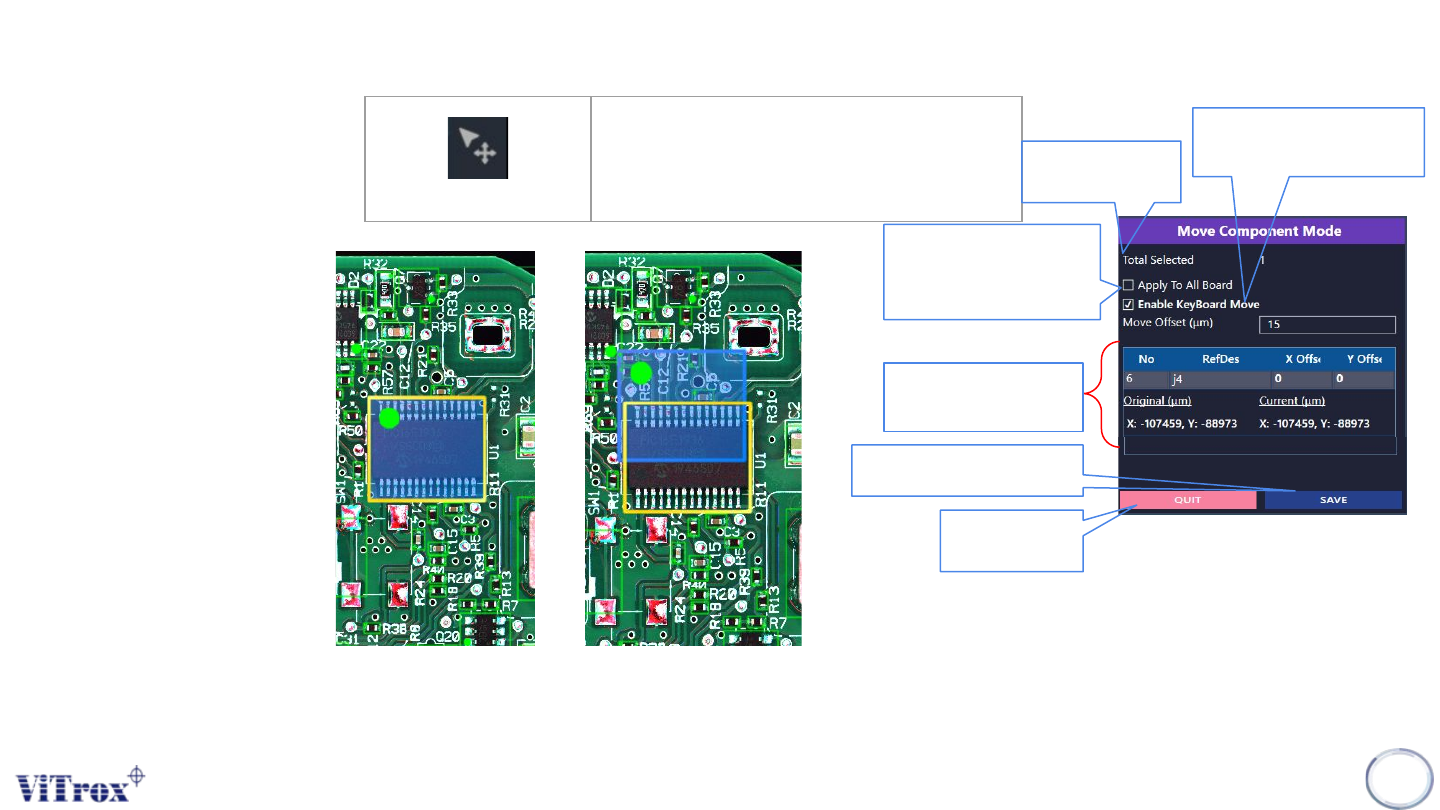
Move Component
Move component by drag and
draw
Total number of
component to be
move
This is used to apply the
move component feature
for the selected
component to all boards.
This is used to move the
component by using arrow
keyboard
The total ref des moved
and its offset parameter.
Save after move component
have been made.
Quit the add
component
configuration
Figure 89: Move Component Mode Tab
Figure 88: Before and after move component