VI User Manual.pdf - 第158页
Match Maker 6 - 24 Vision 2007 4.10 User Manu al Rev 01 5. The TST file appears. 6. Close TST file. An information displays. If you click on Then Yes - The TST file is saved (choose a directory) - The library is saved - …
Match Maker
Vision 2007 4.10 User Manual Rev 01 6 - 23
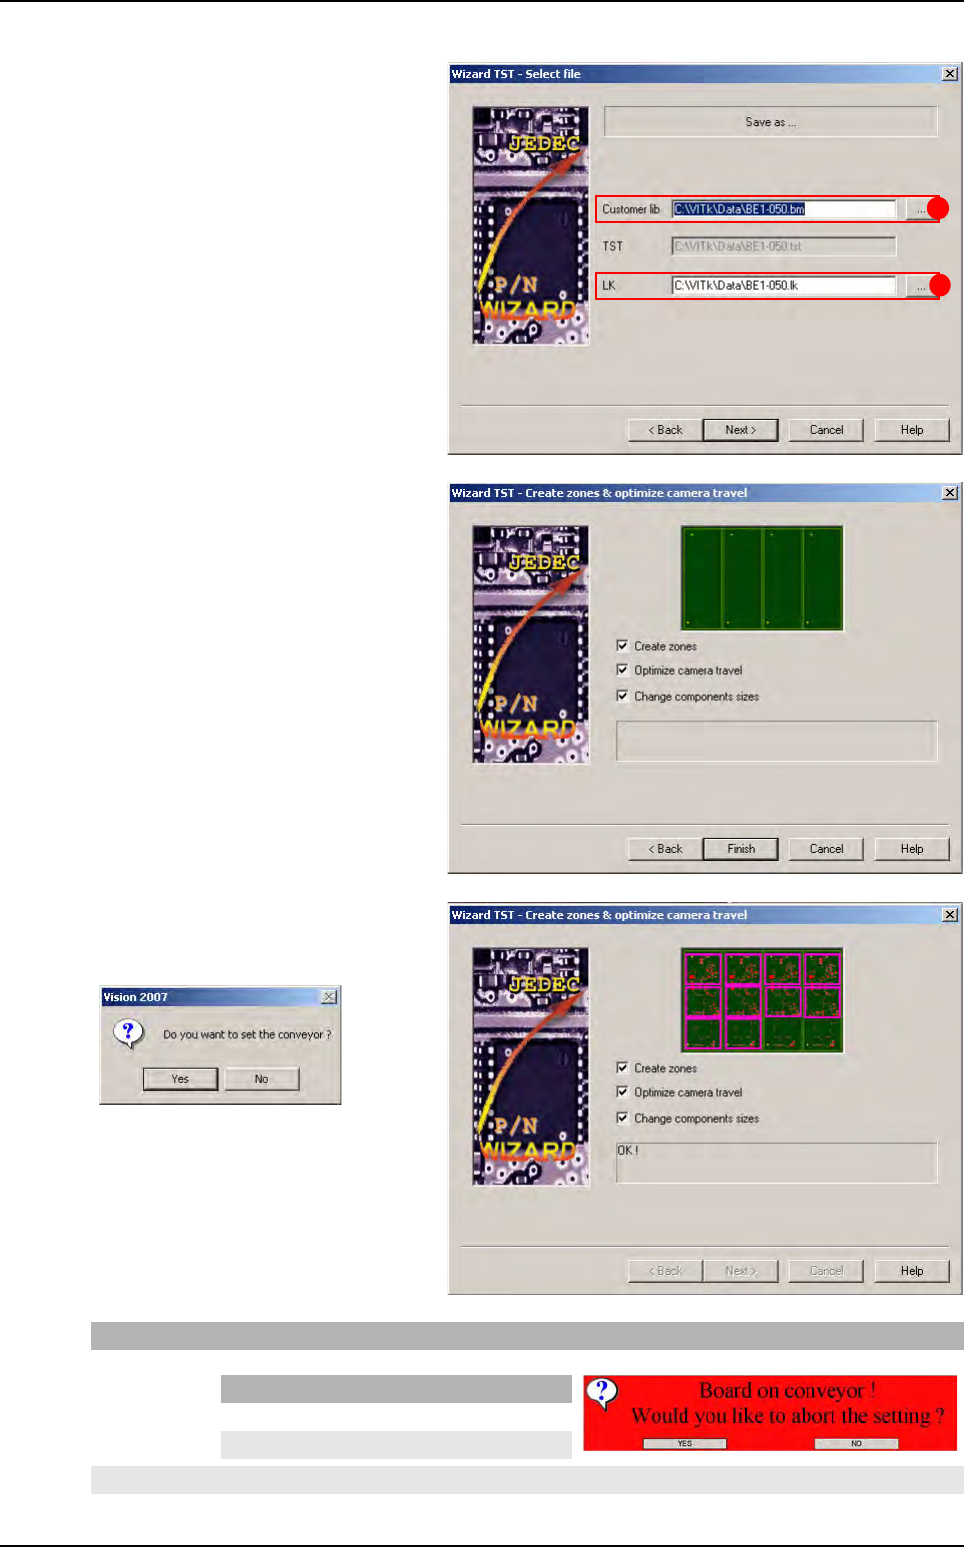
3. The Select file window appears.
Select the save files of the process.
Two fields can be selected:
A Customer Library field
B LK file field
Click on Next > button.
4. The Create zones and optimize cam-
era travel window appears.
Click on the Finish button.
A new message appears.
If you click on Then
Yes The board is ejected and an information is displayed
No The TST file displays (Step 4)
A
B
If Then
Yes The TST file displays (Step 4)
No The information stays displayed
Wizard TST after use of Match Maker
Match Maker
6 - 24 Vision 2007 4.10 User Manual Rev 01
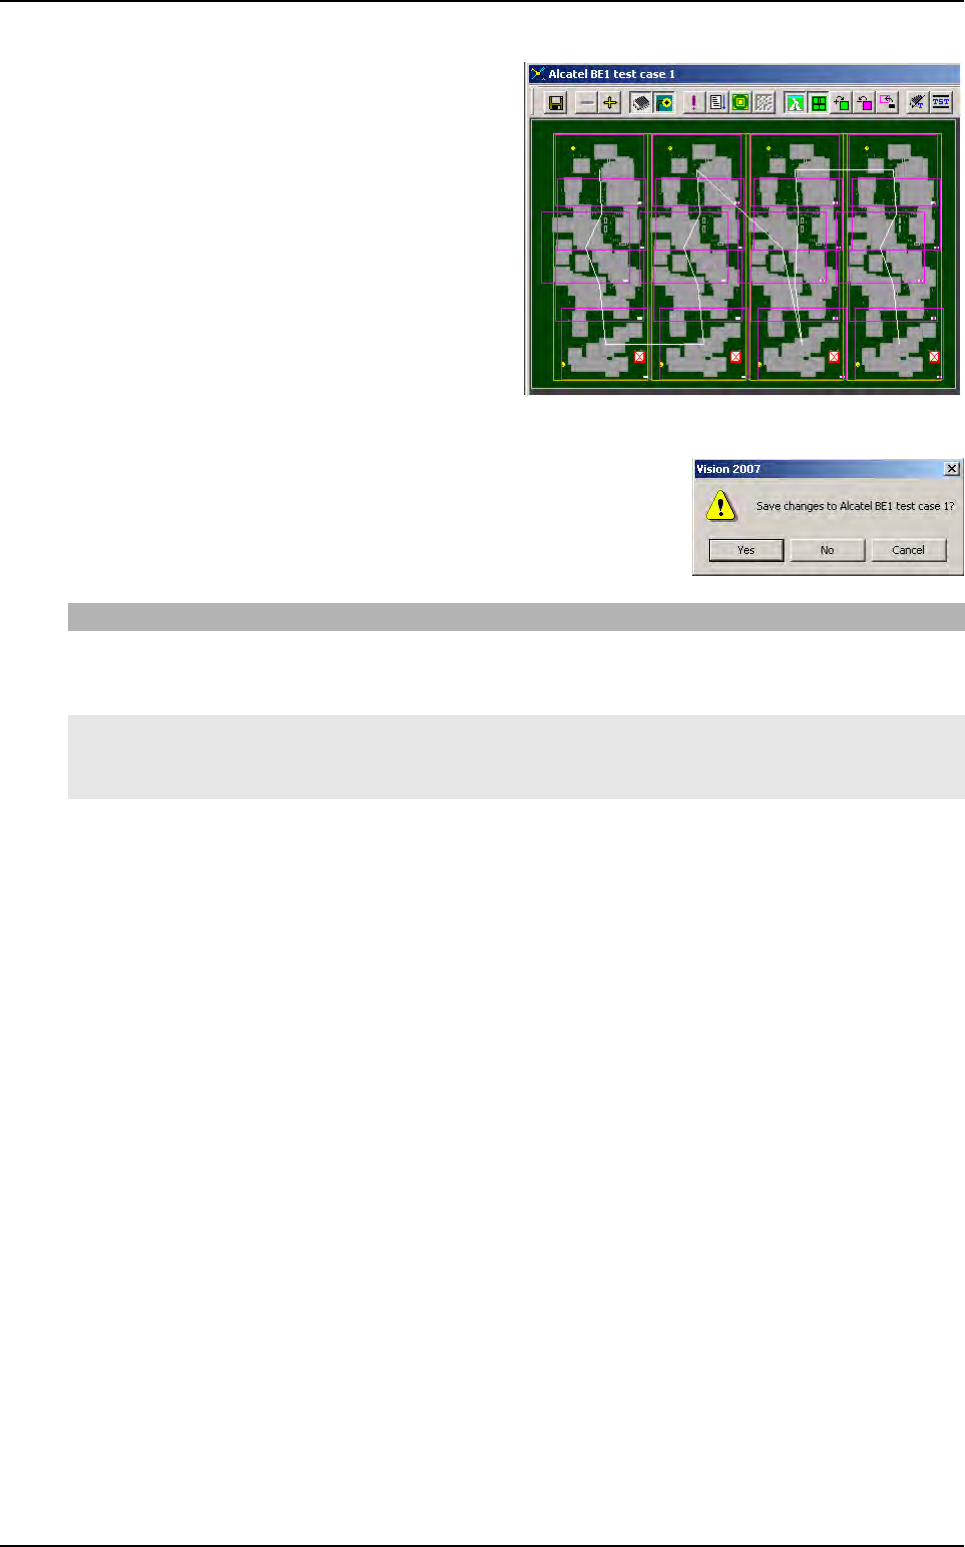
5. The TST file appears.
6. Close TST file.
An information displays.
If you click on Then
Yes - The TST file is saved (choose a directory)
- The library is saved
- The link Part Number_Jedec Standard is stored in the database BuildModel database.
No - The TST file is not saved and the process is finished
- The library is saved
- The link Part Number_Jedec Standard is stored in the database BuildModel database.
Cancel The request is cancelled.
Wizard TST after use of Match Maker
Match Maker
Vision 2007 4.10 User Manual Rev 01 6 - 25
6.6 Examples of link between Part Number and Library
The models to import are rename according to the situation:
The component is defined with a Part Number name and no Jedec Client
The component is defined with a Part Number name and a Jedec Client
The customer library already exists and new models must be imported in this library
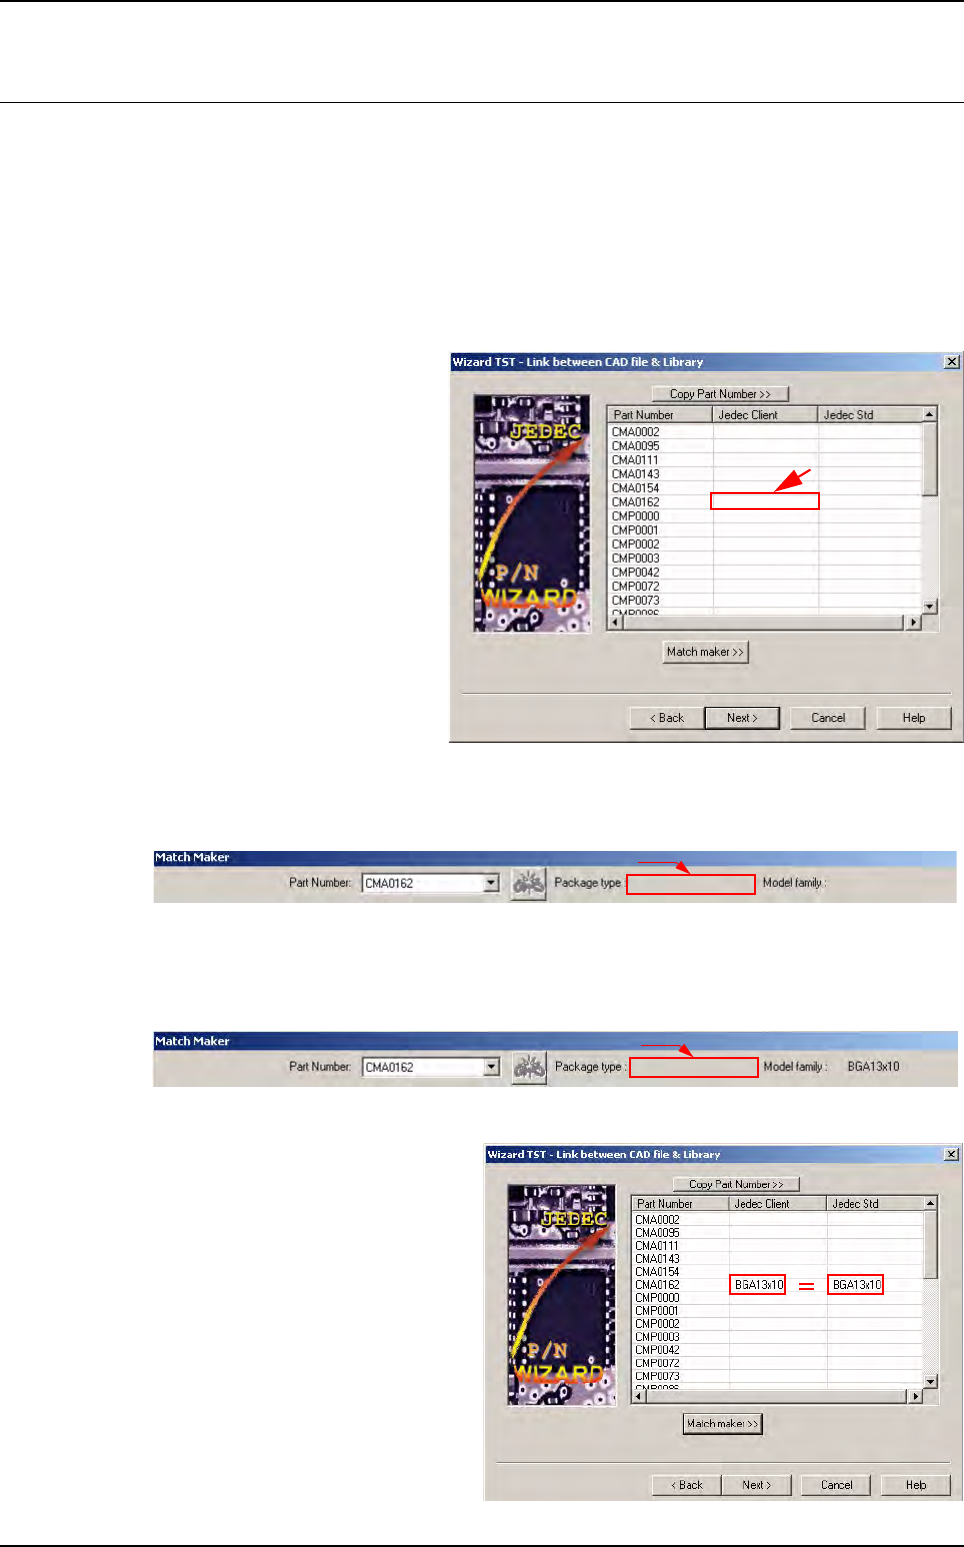
6.6.1 VIS file does not contain Jedec Client
1. Run Wizard TST.
The user can see only one col-
umn (Part Number) in the Wiz-
ard TST - Link between CAD
file & Library window.
2. Launch Match Maker. Click on the Match Maker button. The Match Maker window ap-
pears:The Part Number are indicated at the top and the Package type miss.
3. Associate a model of the Standard Library to a Part Number (see § 6.4.4 Step 3: Model se-
lection). Once a model is selected, the reference
of the
Model family
appears in the window.
4. Leave Match Maker.
Click on the Exit button.
The families appear in the window:
Link between CAD file & Library
(Jedec Client = Jedec Standard =
model in the Standard Library).
This association is recorded: on the
same line the Part Number
(CMA0162) is related to the Jedec
client (BGA13x10) and the model
to be imported will be BGA13x10.
Not filled
Not filled
Not filled