VI User Manual.pdf - 第364页
Reparation 14 - 12 Vision 2007 4.10 User Manu al Rev 01 Tick another o r several Error ( A ). Fill in the Reparation pa rt: Repair state (Not repaired, Repaired, Good) ( B ) Error comment ( C ) Operator comment ( D…
Reparation
Vision 2007 4.10 User Manual Rev 01 14 - 11
14.3.4 Operator analysis
If after analysis of the reported errors, you judge that errors are not of the good type or that
elements not appearing in error have defects, you can change the type of errors.
Access to this option while putting in the ConfigReparation.ini the parameter Enable oper-
ator analysis (0:1)=1.
Then several actions are necessary:
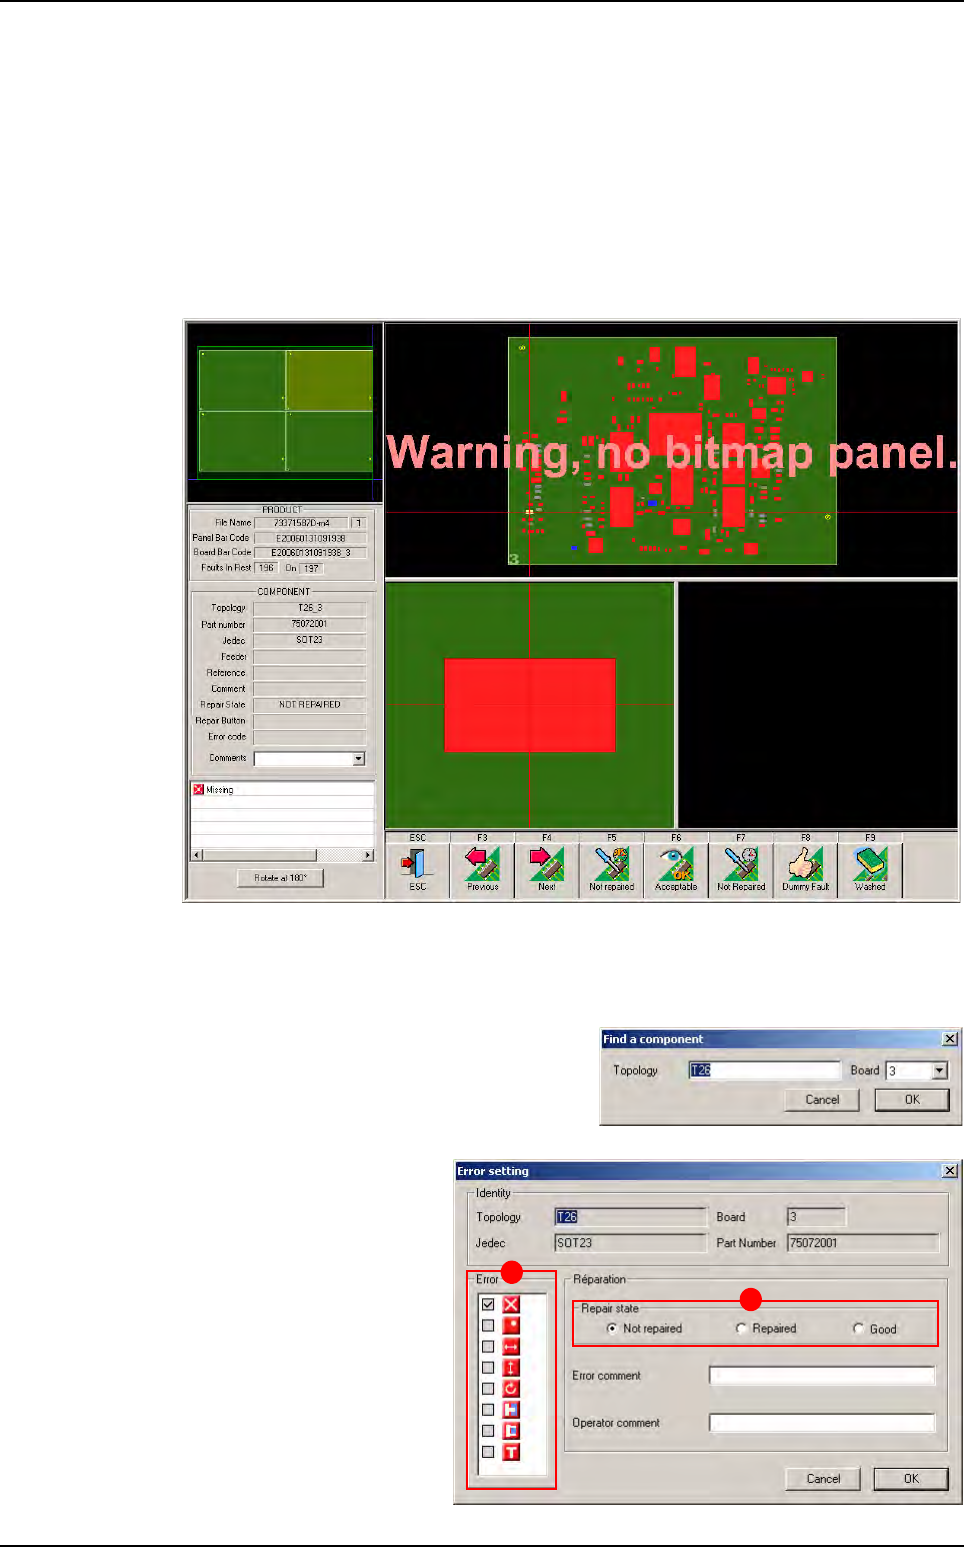
1. Launch the reparation: the Repair details screen appears. You can analyze and visualize
each component while clicking above.
In the COMPONENT part, the Repair State information (NOT REPAIRED) is displayed.
At the bottom, the type of errors is displayed.
2. Click on Ctrl + A.
The Find a component window appears.
You must define the Topology and the Board
of the element which you wish to analyze.
Click on OK button.
3. The Error setting window of
the analyzed element ap-
pears. You can see the type
of Error (A) and the Repair
state (B): Not repaired.
A
B
Reparation use
Reparation
14 - 12 Vision 2007 4.10 User Manual Rev 01
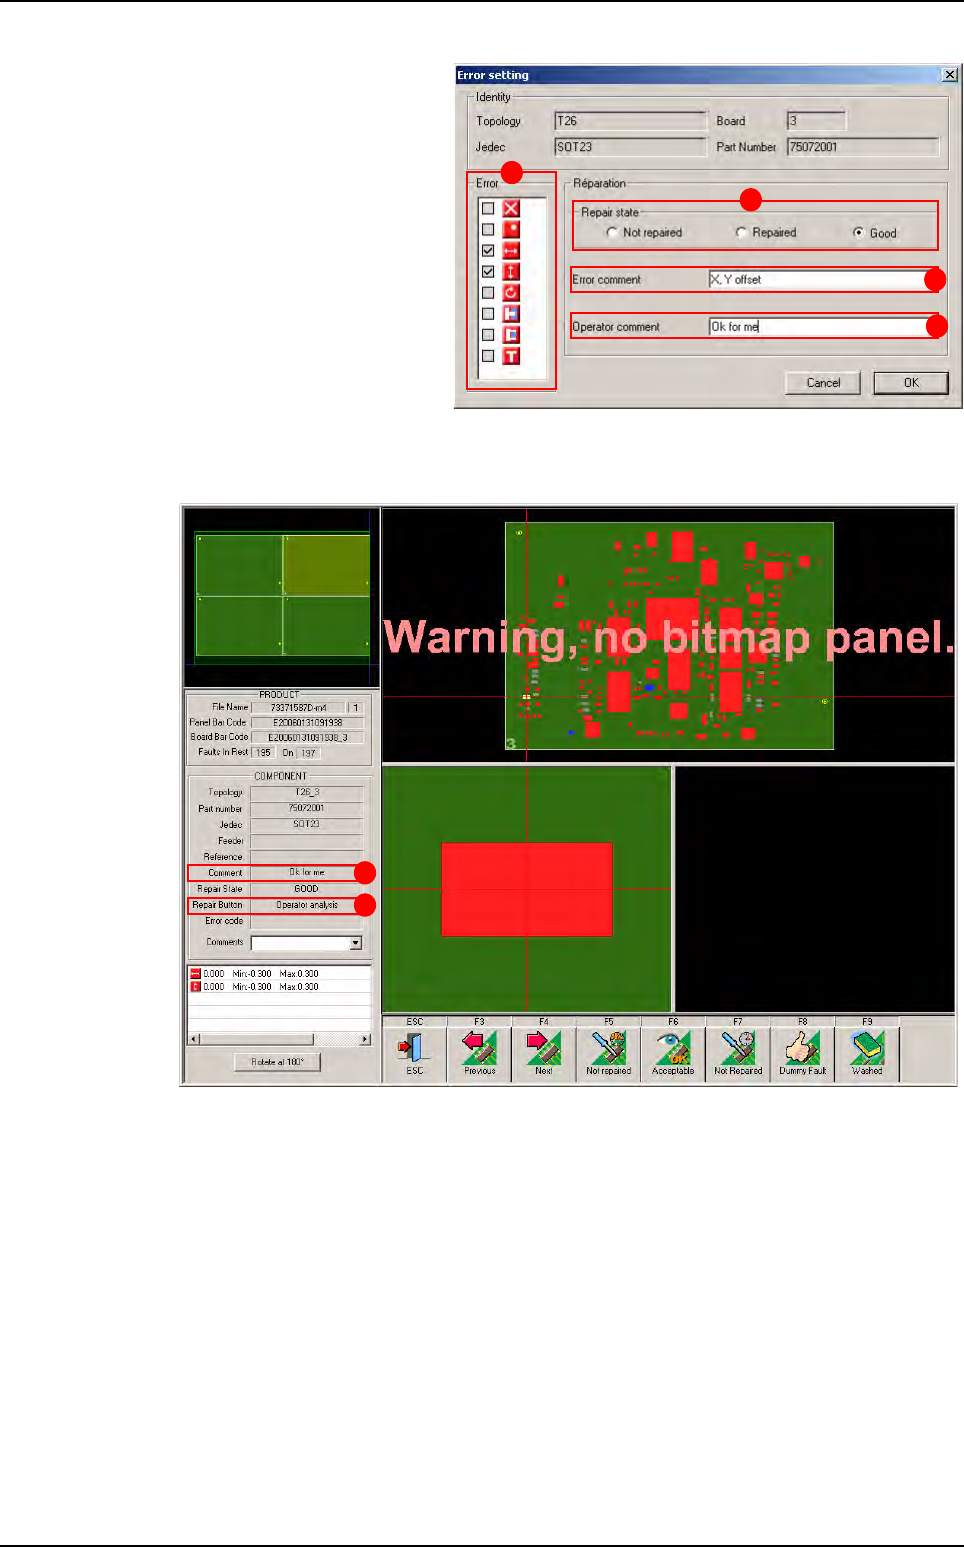
Tick another or several Error
(A).
Fill in the Reparation part:
Repair state (Not repaired,
Repaired, Good) (B)
Error comment (C)
Operator comment (D).
Click on OK button.
4. The Repair details screen appears. The analyzed element is updated according to the
modifications realized at Step 3.
In the COMPONENT part two fields are filled:
Comment (A)
Repair Button (Operator analysis) (B).
The Repair State information corresponds to the selection in the Error setting window.
At the bottom, the type of errors selected in the Error setting window are displayed.
A
B
C
D
B
A
Reparation use
Reparation
Vision 2007 4.10 User Manual Rev 01 14 - 13
14.3.5 Main menu
To access to the main menu press Alt+F4. The menu bar is accessible. Here, in Configu-
ration menu you have access to several parameters repair interface and functionality.
14.3.5.1 Orientation
This menu lets you change the page orientation for the detail screen.
Select Landscape if the X dimension of the board is bigger than the Y dimension,
and Portrait for the opposite type of board.
Select Auto for software automatic selection.
Landscape
Portrait
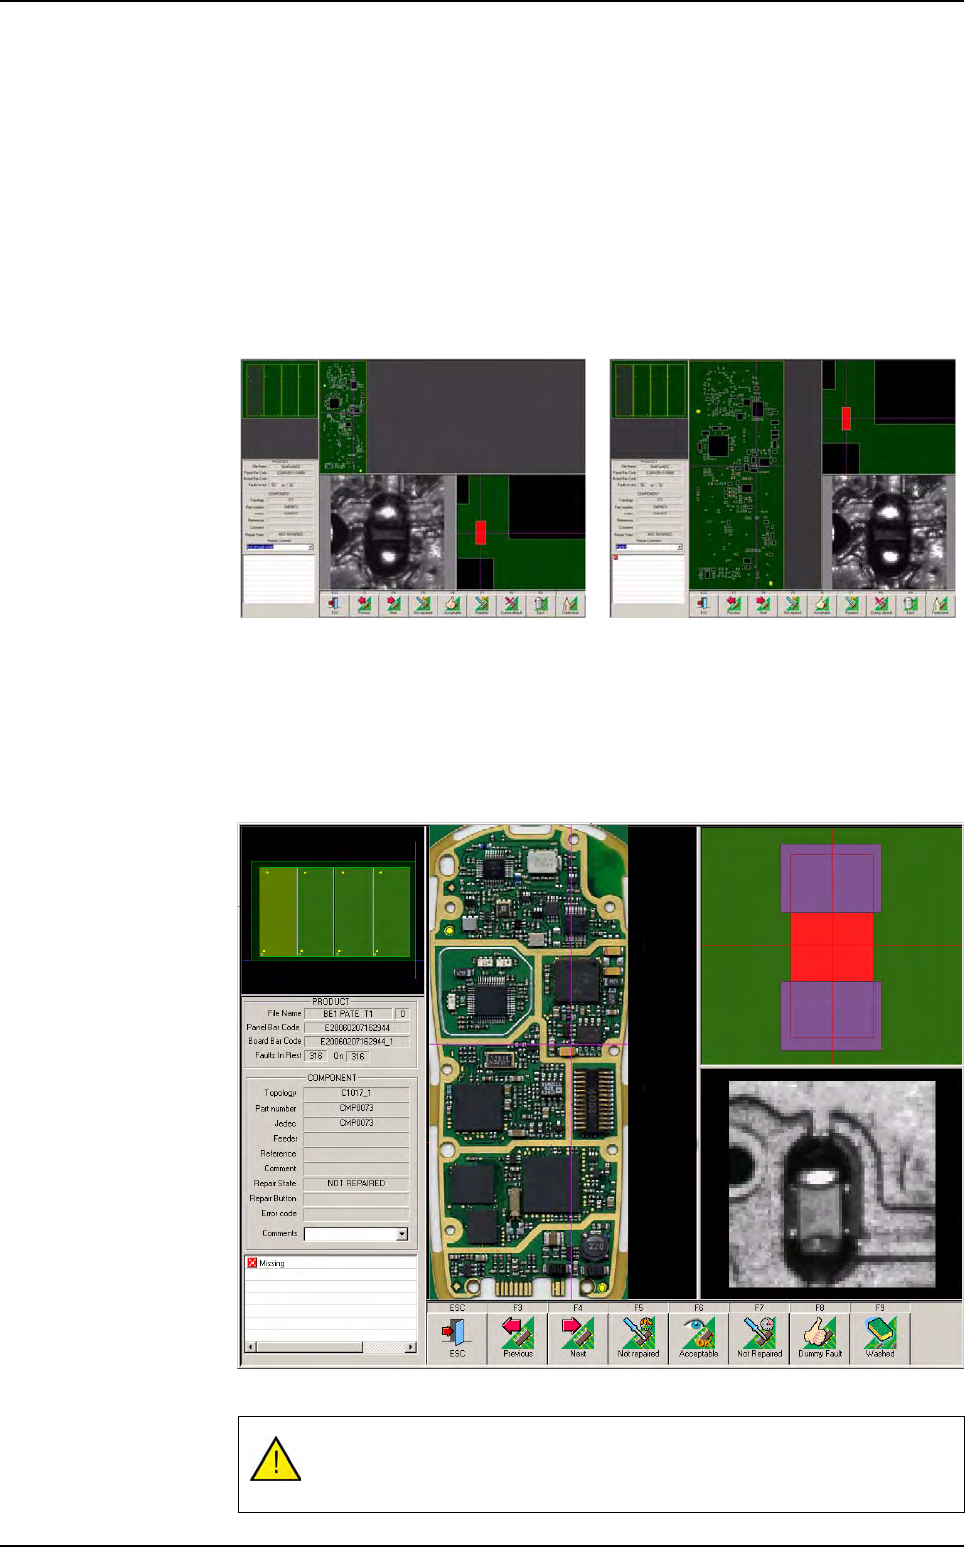
14.3.5.2 Display real images
This menu allows you to display the real picture of the board in the detail screen.
Scan your board with a scanner in order to generate a .bmp file. It must be in the
folder specified in the .ini file.
This file must have the same name as the .tst file with the extension .bmp.
Do not generate too large .bmp file (< 80Mb).
Reparation use