SL940-Install-Ops-Maintenance-7210918_B.pdf - 第102页
5- 22 Operation 5.16 Focusing t he Camera 1. Position the cam era over an eas ily rec ogniz ed featu re on the substrate . 2. Loosen the thumb screws on the f ocal ring ( Figur e 5-15). 3. Twist the focal ring unti l a s…
Operation 5-21
NOTE If you are using a circulating coating applicator, such as the SC-104HS or SC-105HS,
perform Steps e to g to circulate the material. Otherwise, skip to Step 7.
e. Close the filter drain valve.
f. Open the circulation valve by turning it counterclockwise so the circulation rate is
approximately 20 cycles/minute.
g. Purge the coating applicator several times.
NOTE A purge program is necessary to properly purge the film coater before and after use. A
purge routine is included in the software. For assistance in writing a routine, refer to the
Easy Coat User Guide or contact your Asymtek representative.
7. Clean the reservoir and fill it with new material.
8. Empty the fluid system and check the fluid filter.
9. Prime the fluid system with new material.
NOTE Check that all residual solvent was purged into the waste container by the new material.
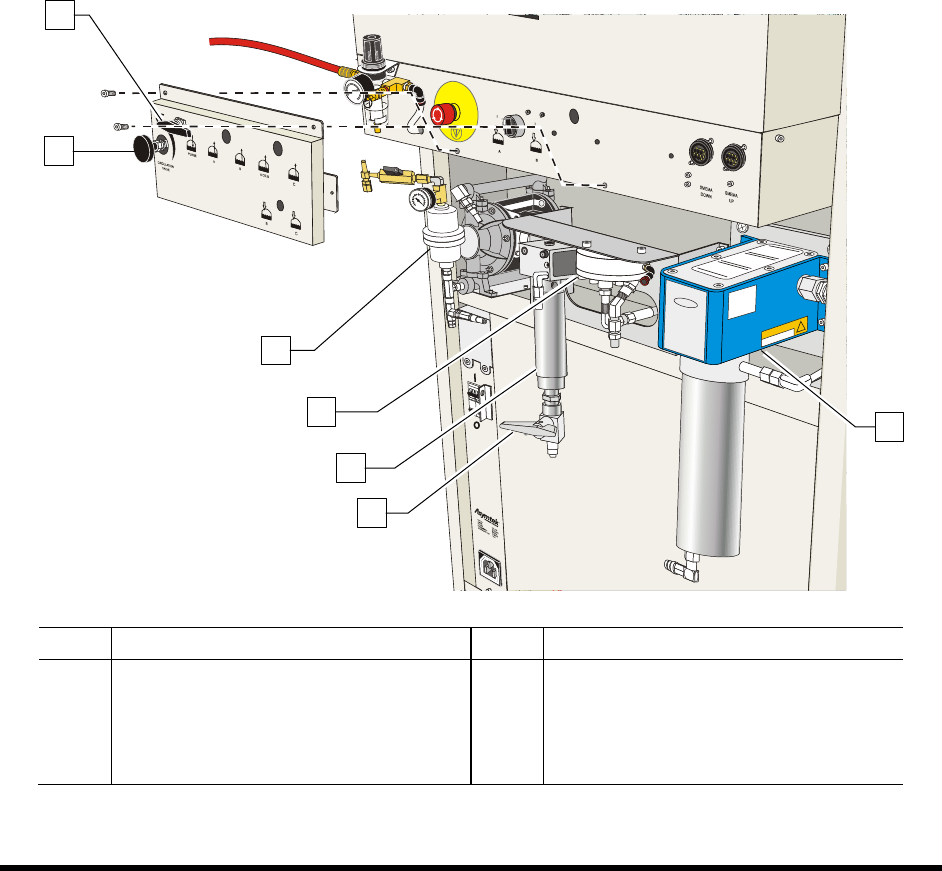
Item Description Item Description
1 Purge Valve 5 Filter Assembly
2 Circulation Valve 6 Filter Drain Valve
3 Pump 7 Fluid Heater
4 Fluid Regulator
Figure 5-14 Fluid System (VCS System shown)
5
1
3
2
7
4
6
5-22 Operation
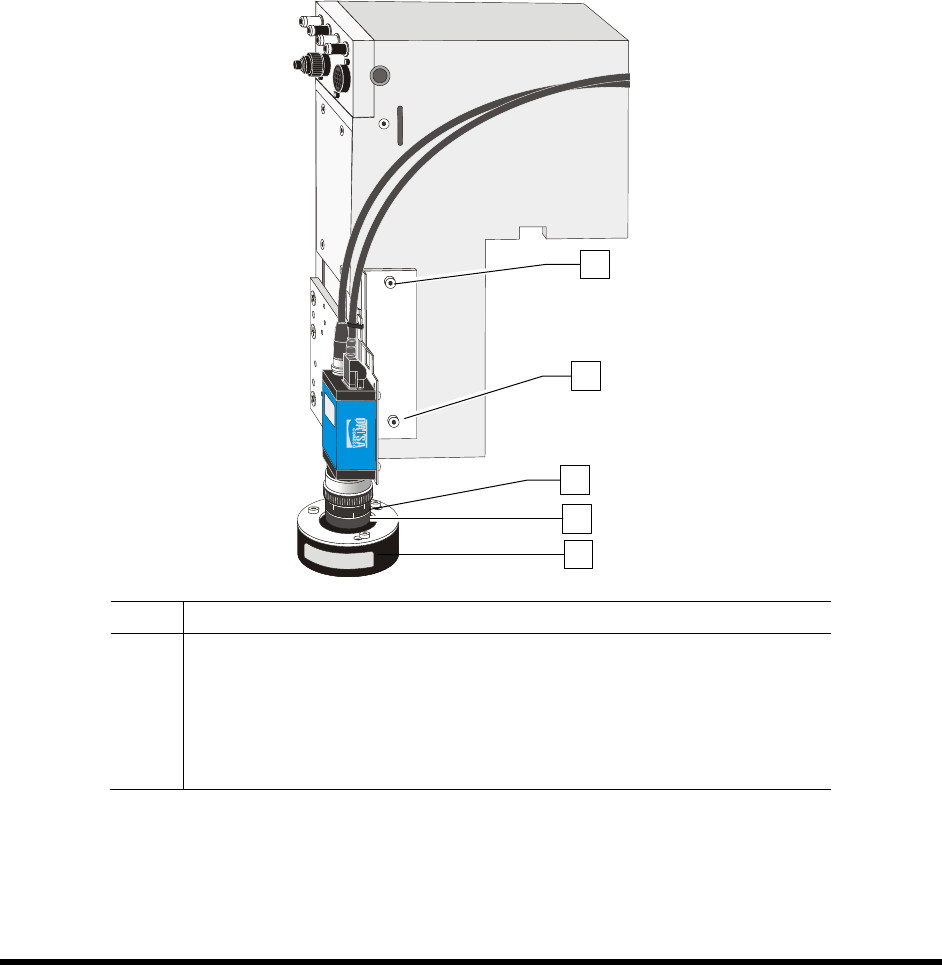
5.16 Focusing the Camera
1. Position the camera over an easily recognized feature on the substrate.
2. Loosen the thumb screws on the focal ring (Figure 5-15).
3. Twist the focal ring until a sharp image is obtained.
4. Tighten the thumb screw.
5. Loosen the thumb screws on the F-stop ring (Figure 5-15).
6. Twist the F-stop ring until the desired lighting is obtained. Twist the ring one click brighter
so that when the door closes, the lighting is correct.
7. Tighten the thumb screws.
8. The camera is now ready for use.
Item Description
1 Upper Side Screw
2 Lower Side Screw
3 F-Stop Ring
4 Focal Ring
5 Light Ring (Fiducial Find Camera Only)
Figure 5-15 Focusing the Camera
NOTE Refer to the ECXP User Guide for instructions on using the camera to teach coating
locations when creating a program.
1
2
4
3
5
Operation 5-23
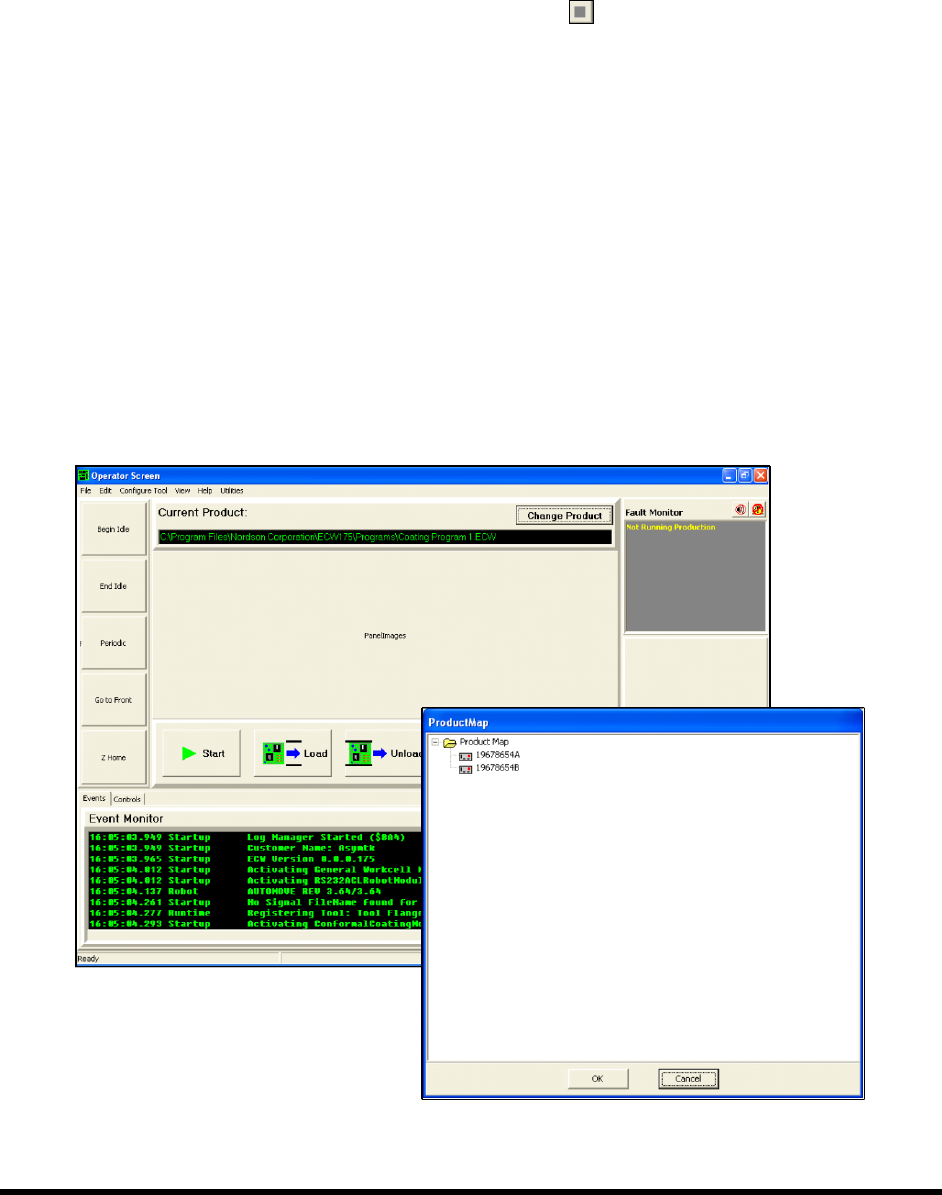
5.17 Loading a Program
Programs can be loaded from both the ECXP Operator Screen (Figure 5-16) and the ECXP Edit Screen
(Figure 5-17). Following are detailed instructions on loading a program from both screens.
To load a program from the Operator Screen:
1. If a program is currently running, click on the
Stop button.
Production stops after the currently loaded product is coated.
2. Click on the
Change Product button or double-click the Current Product field
(Figure 5-16).
The product map opens. The product map is a tree structure of the folders and subfolders
where the programs are stored.
- Click on a plus sign (+) to expand a group and view the product programs in that group.
- Click on a minus sign (-) to collapse a group.
3. Click on the desired program to select it. When selected, it is highlighted in blue.
4. Click on the
OK button to load the selected program.
NOTE Click on the Cancel button to exit the product map without loading a program.
Figure 5-16 Loading a Program - Operator Screen