SL940-Install-Ops-Maintenance-7210918_B.pdf - 第152页
9-4 Parts Replacement 9.7 Gaining A ccess to Coating System Components In orde r to gain acc ess to s om e areas o f the coa ting sy stem , it will be n ecessa ry to r emov e covers, doo rs, and acces s panels . Figur e …
Parts Replacement 9-3
9.5 Cleaning and Inspection
Always clean the area made visible after a failed part is removed from the coating system. Inspect the
area for signs of what may have caused the part to fail. This may help prevent future part damage.
While removing parts that will be reinstalled, visually inspect them for damage. If found undamaged,
retain them for reinstallation. Replace damaged parts and hardware as appropriate.
9.6 Unpacking and Inspecting Replacement Parts
Replacement parts are shipped to distributor or customer facilities in individual shipping cartons. Review
the packing slip to ensure that the correct parts were received. Contact Asymtek Technical Support if any
discrepancies are discovered.
Before unpacking your spare parts, visually inspect the carton for damage. If applicable, check the
ShockWatch and the Tip N’ Tell stickers for indications of improper shipping and handling. Inform the
freight carrier of any damage.
TIP Save shipping materials for returning failed parts.
WARNING! Parts replacement should only be performed by a trained service technician.
Asymtek assumes no liability for personal injury or property damage that may
occur as a result of spare parts being replaced by other than Asymtek-trained
technicians.
9-4 Parts Replacement
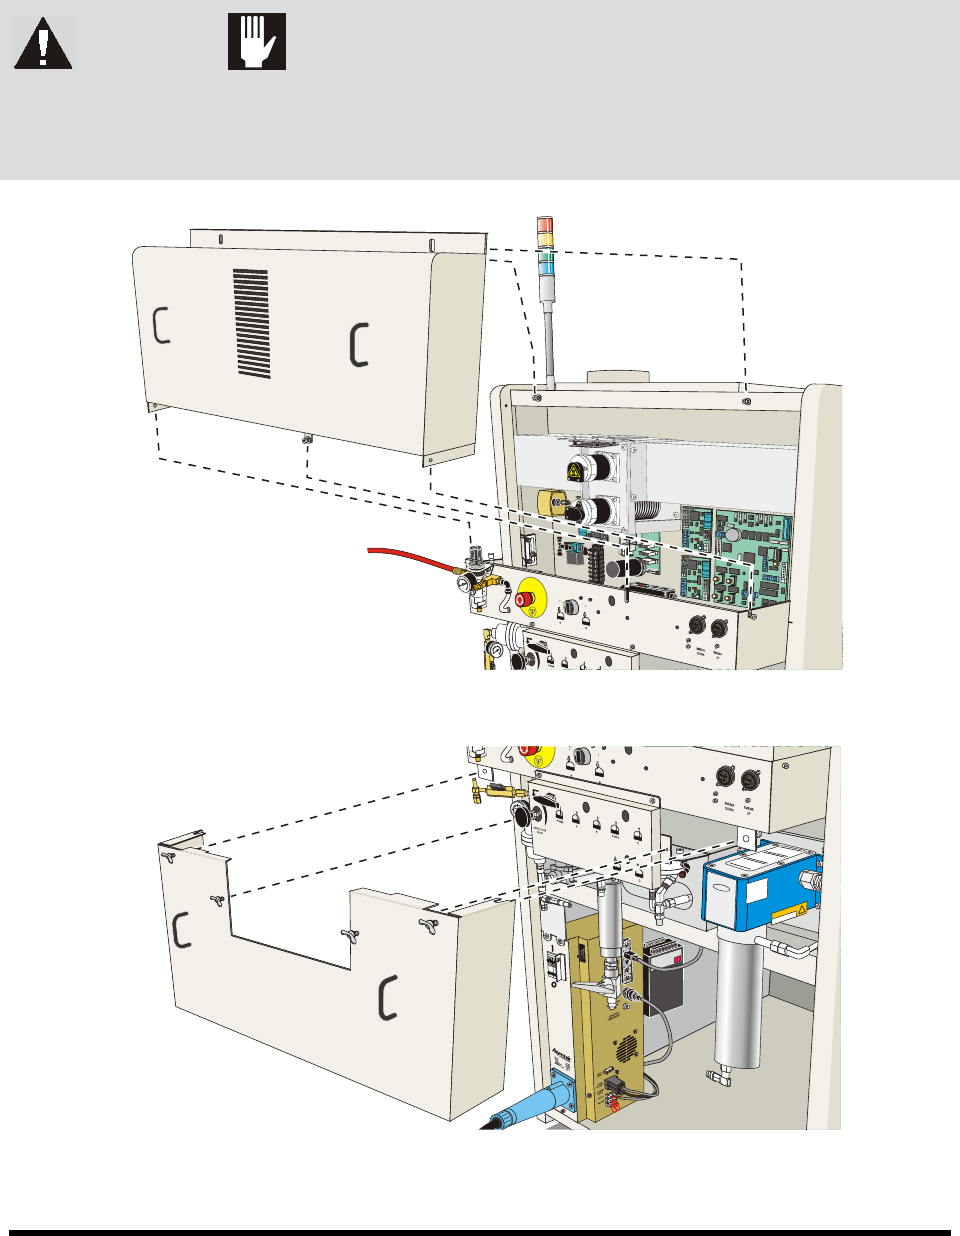
9.7 Gaining Access to Coating System Components
In order to gain access to some areas of the coating system, it will be necessary to remove covers, doors,
and access panels. Figure 9-1 shows the location of these features.
WARNING! CAUTION!
Make sure that the coating system has been completely shut down before
attempting to remove any panel. Remove doors, covers, and panels carefully to
avoid damaging underlying components.
Figure 9-1 Removing the Upper Rear Access Panel
Figure 9-2 Removing the Middle Rear Access Panel
Parts Replacement 9-5
9.8 Replacing Conveyor Chains
Checking the condition of the conveyor chains should be part of the routine maintenance schedule for the
coating system. Worn or broken chains should be replaced immediately. Refer to Appendix C for a parts
list of conveyor components.
Tools and Materials Needed:
Pliers Phillips Head Screwdriver
3/32-inch Hex Key Removable Thread Locker (P/N 40-0019)
Isopropyl Alcohol Roller Chain, #25, NP (P/N 193721)
Soft Cloth and Cotton Swabs Master Link, #25 Chain (P/N 193722)
To replace the conveyor chains:
1. Perform a service shutdown as described in 5.11.2.4 Service Shutdown.
2. Move the dispensing head to the rear of the machine.
3. Use the manual width adjust to move the rear conveyor rail to achieve an approximate eight-
inch space between the front and rear conveyor rails.
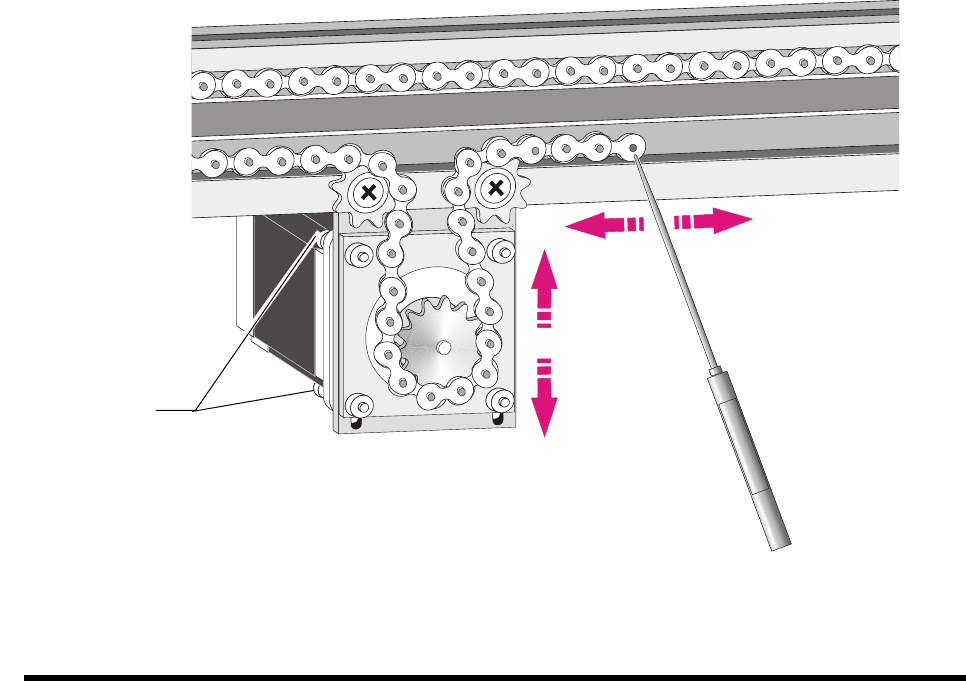
4. Create slack in the chain by loosening the four mounting screws on the back of the motor
bracket and moving the bracket up and down until the desired slack is achieved (Figure 9-3).
Figure 9-3 Creating Slack in the Chain
Motor Bracket
Screws