SL940-Install-Ops-Maintenance-7210918_B.pdf - 第141页
Maintenance 7- 11 Figure 7-8 Lubric ating t he X - Axis Linear Guides Figure 7-9 L ubric ating Y - Ax is Linear Guides (rear Y - bearings not s hown)
7-10 Maintenance
4. Remove the blue cap from the grease cartridge and place it, open end down, into the grease
gun cylinder.
5. Remove the seal from the bottom of the grease cartridge by pulling the tab.
6. Replace the top of the grease gun.
7. Screw the extension into the front side at the top of the grease gun.
8. Release the handle from the locked position.
9. Purge the air from the grease gun cartridge by dispensing grease into a waste receptacle until
a solid stream flows from the gun.
To lubricate the linear guides:
1. Perform a service shutdown as specified in 2.12 Service Shutdown.
2. Manually move the robot to the front of the dispensing area.
3. Remove the X- and Y-axis covers. See 7.9 Removing the Axis Covers.
WARNING! Use Personal Protective Equipment when working with cleaning and lubrication
materials. Refer to the applicable MSDS. Remove all spills and properly dispose
of contaminated materials.
4. Using an ammonia-based cleaner and a soft cloth, clean and wipe the X- and Y-rails.
Manually move the robot as necessary to reach all parts of the rails.
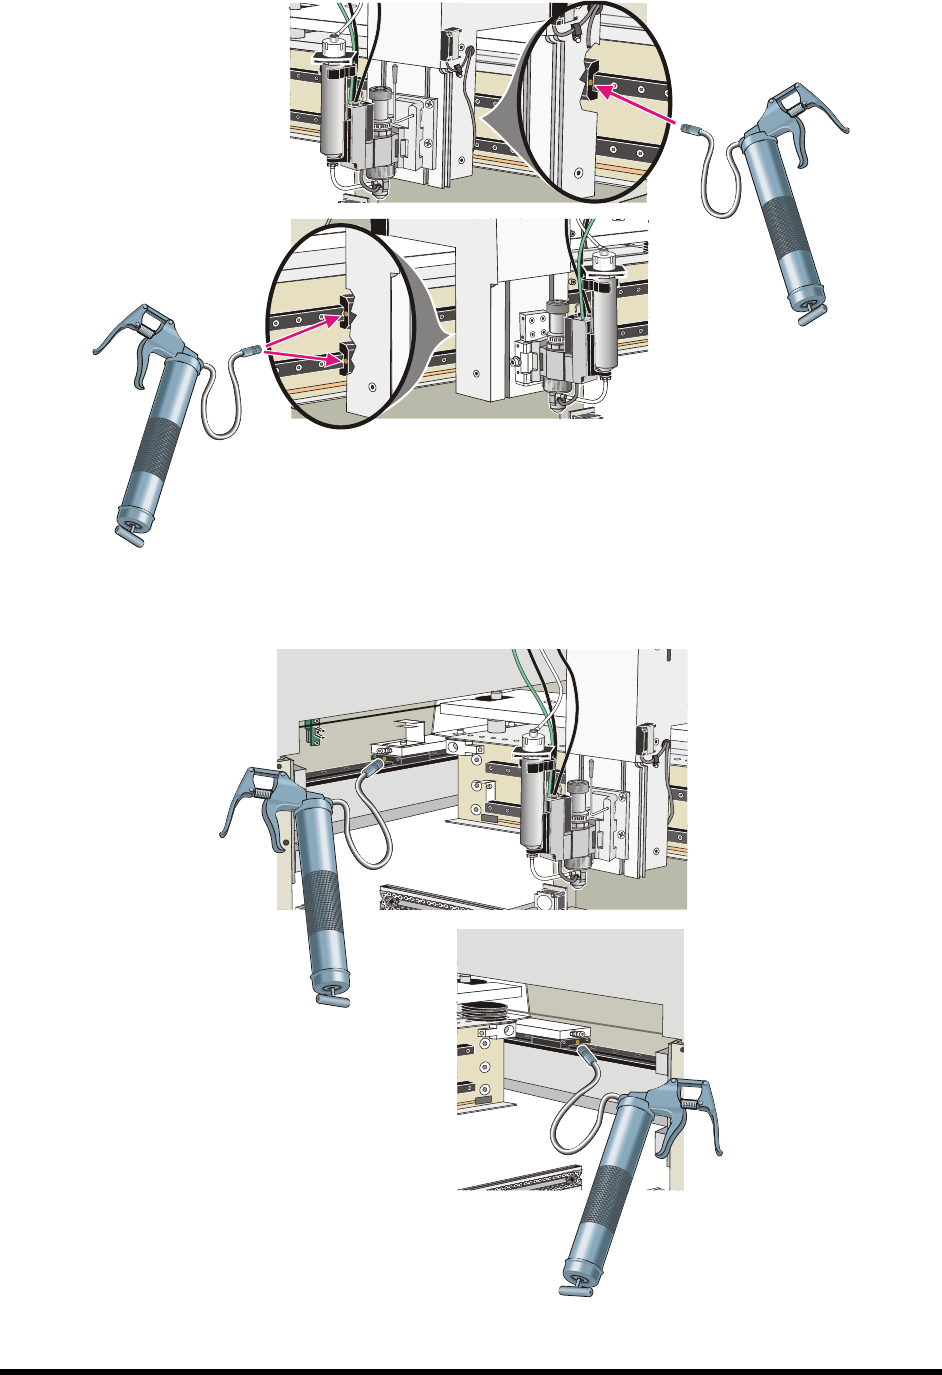
5. Locate the grease fitting on each of the four X-beam Linear Bearing Cars and four Y-rail
Linear Bearing Cars (Figure 7-8 and Figure 7-9).
6. Attach grease gun to each fitting and pull the grease gun lever one time to squirt grease into
the bearing.
7. Use a soft cloth to clean up any excess grease.
8. Replace the X- and Y-axis covers
9. Power on the coating system.
10. Use the Fluidmove position controls to move the robot back and forth in both the X-axis and
the Y-axis.
11. Open the hood and use a soft cloth to remove any excess grease along the rails.
Maintenance 7-11
Figure 7-8 Lubricating the X-Axis Linear Guides
Figure 7-9 Lubricating Y-Axis Linear Guides (rear Y-bearings not shown)
7-12 Maintenance
7.11 Tensioning the Cables
Periodic tensioning of the SL-940E/SL-941E mechanical drive cables can prevent premature failure of the
cables. For coating systems operating in a 24/7 production environment, tension the mechanical drive
cables approximately every six months. For systems operating in a single-shift environment (eight hours a
day or less), this should be done once a year.
7.11.1 Cable Tension Reminder
To ensure that required maintenance is done on schedule, programmers can set up a tension reminder in
the EXCP Maintenance Manager. The Maintenance Manager displays a reminder for the operator the next
time production is started after the expiration of the configured time period. The operator can choose to
continue production without running the appropriate maintenance program, but the reminder will continue
to appear each time production is started until the maintenance program is run.
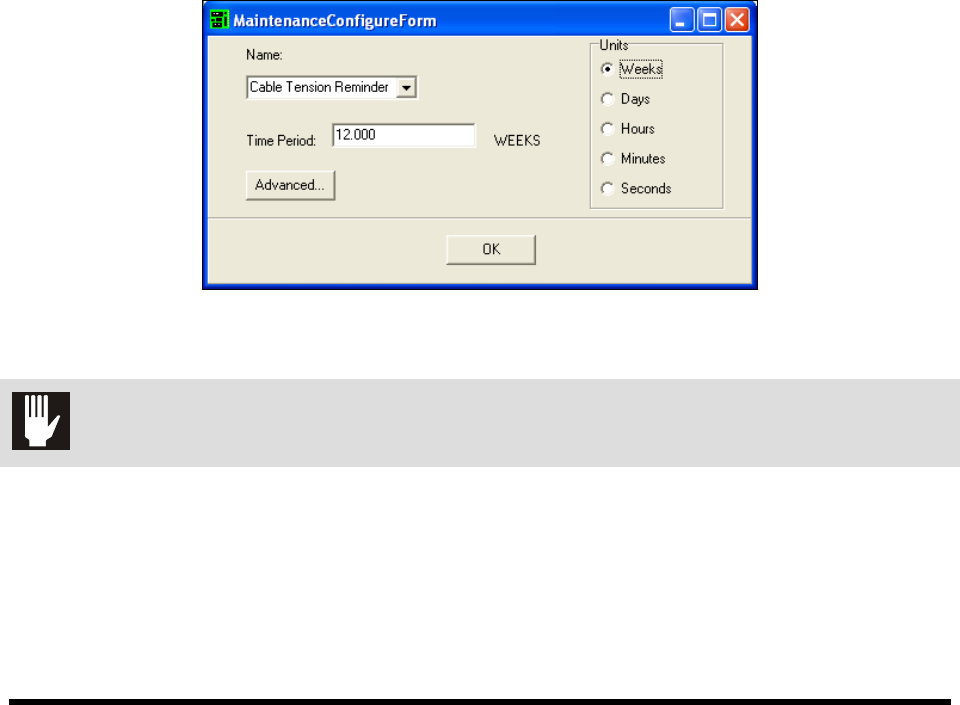
To set the cable tension reminder:
1. Click on
Configure > Maintenance Manager to open the Maintenance Manager dialog box.
2. Select
Cable Tension Reminder from the drop down list.
3. Select the desired unit.
4. Enter the time period.
5. Click
OK.
Figure 7-10 ECXP Maintenance Manager Dialog Box
CAUTION! This procedure should only be performed by a trained service technician.