SL940-Install-Ops-Maintenance-7210918_B.pdf - 第110页
6-2 Configurati on and C hara cterizat ion 6.4 ECX P Confi guration 6.4.1 ECW.INI File When EC XP is inst alled, the ECW.I N I file is cr eated. This fi le contain s sett ings f or your sy stem hardware. The first time E…

Configuration and Characterization 6-1
6 Configuration and Characterization
6.1 Overview
Your Select Coat SL-940E/SL-941E Series Conformal Coating System is configured at the Asymtek
factory prior to shipping. However, if any components have been changed or moved, it may be necessary
to reconfigure them. This section contains the following procedures:
• ECXP Configuration • Conveyor Configuration
•
Camera Configuration
•
Inverter Configuration
•
Beacon Configuration
•
Robot Configuration
•
Tool Configuration
•
Bar Code/DataMatrix Scanner Configuration
•
Fan Width Configuration
•
Characterization
•
Fixture Configuration
6.2 Safety First
Operation of the SL-940E/SL-941E involves heat, air pressure, electrical power, mechanical devices, and
the use of hazardous materials. It is essential that every person servicing or operating the coating system
fully understands all hazards, risks, and safety precautions. Refer to Section 2 - Safety for additional
information.
6.3 Record Keeping
At a minimum, the following information should be recorded in the coating system maintenance records:
• Procedure Type
• Date
• Technician Name(s)
• Post-procedure Functional Test Results
CAUTION! The procedures in this section should only be performed by a trained service
technician.
6-2 Configuration and Characterization
6.4 ECXP Configuration
6.4.1 ECW.INI File
When ECXP is installed, the ECW.INI file is created. This file contains settings for your system
hardware. The first time ECXP is run, a setup procedure runs, asking you what hardware you have and
how it is configured. Responses to each question are written into the ECW.INI file. All other settings are
performed from the
Configure menu on the Edit screen described in 6.4.2 ECXP Reconfiguration. For
more detailed information, refer to the Easy Coat User Guide or Online Help.
NOTE In most cases, ECXP arrives already installed and configured for your coating system
from the Asymtek factory.
6.4.1.1 Backup
Backup of the ECW.INI file is automatic. Each time the file is edited, the previous version is saved as
ECWyearmonthdayhourminutesecond.ini. To prevent losing your configuration once you have ECXP set
up, you can copy the ECW.INI configuration file to a CD, USB drive, or to another folder on your hard
drive. You should do this every time you make a change to your configuration. You can rename the
configuration files to distinguish one from another, but before you restore the file you must rename it as
ECW.INI.
To back up your configuration, click on
Help > Copy Configuration To Disk. ECXP looks for a disk in
the A drive. If one is present and has enough room on it, copying takes place automatically. If there is no
disk in the drive, you will be prompted to insert a disk. Insert a disk or click
Cancel to select a folder on
the hard drive, a CD, or USB Drive. Click
Save.
WARNING! Do not edit the ECW.INI file unless it is absolutely necessary and you have been
trained to do so. An error in this file can cause your system to run erratically, or
not at all. Contact your Asymtek representative before editing this file.
6.4.2 ECXP Reconfiguration
If you change system hardware, such as the tool, conveyor, inverter, or scanner you can rerun the ECXP
setup procedure with the Reconfigure feature. The changes are written to the ECW.INI file.
To reconfigure ECXP:
1. If necessary, install the ECXP software as instructed in the ECXP User Guide.
The installation process is a typical Windows XP installation with user prompts.
2. After the installation is complete, start ECXP by double clicking the
ECXP icon on the
Windows desktop.
As an alternative, you may click on the Windows
Start menu and select
Programs > ECXP to start the ECXP software.
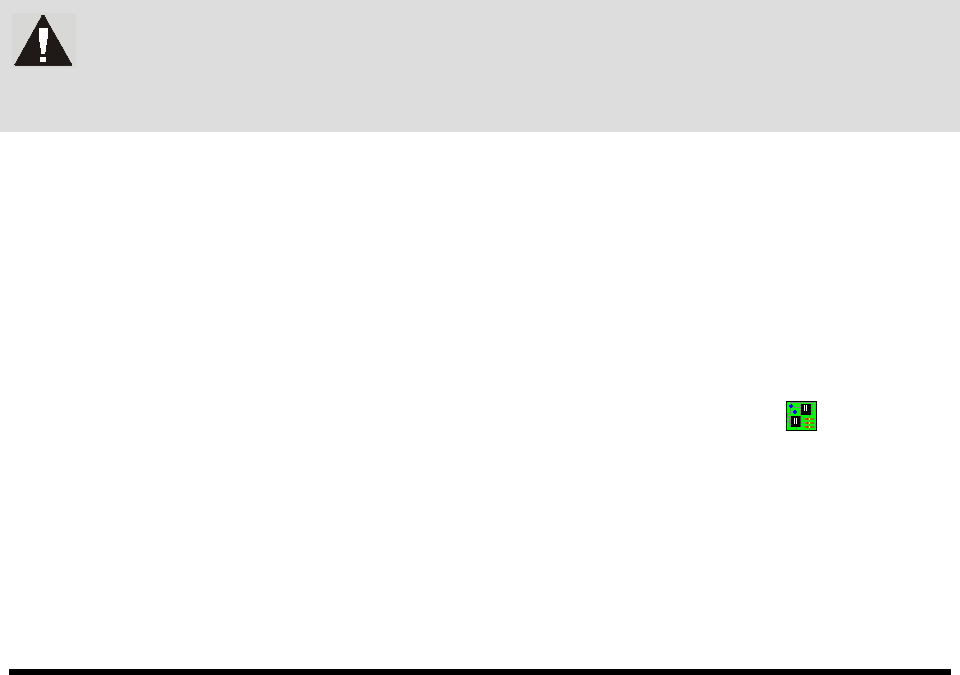
The ECXP Operator Screen (Figure 6-1) opens.
Configuration and Characterization 6-3
Figure 6-1 ECXP Operator Screen
NOTE The operator screen may vary depending upon system configuration.
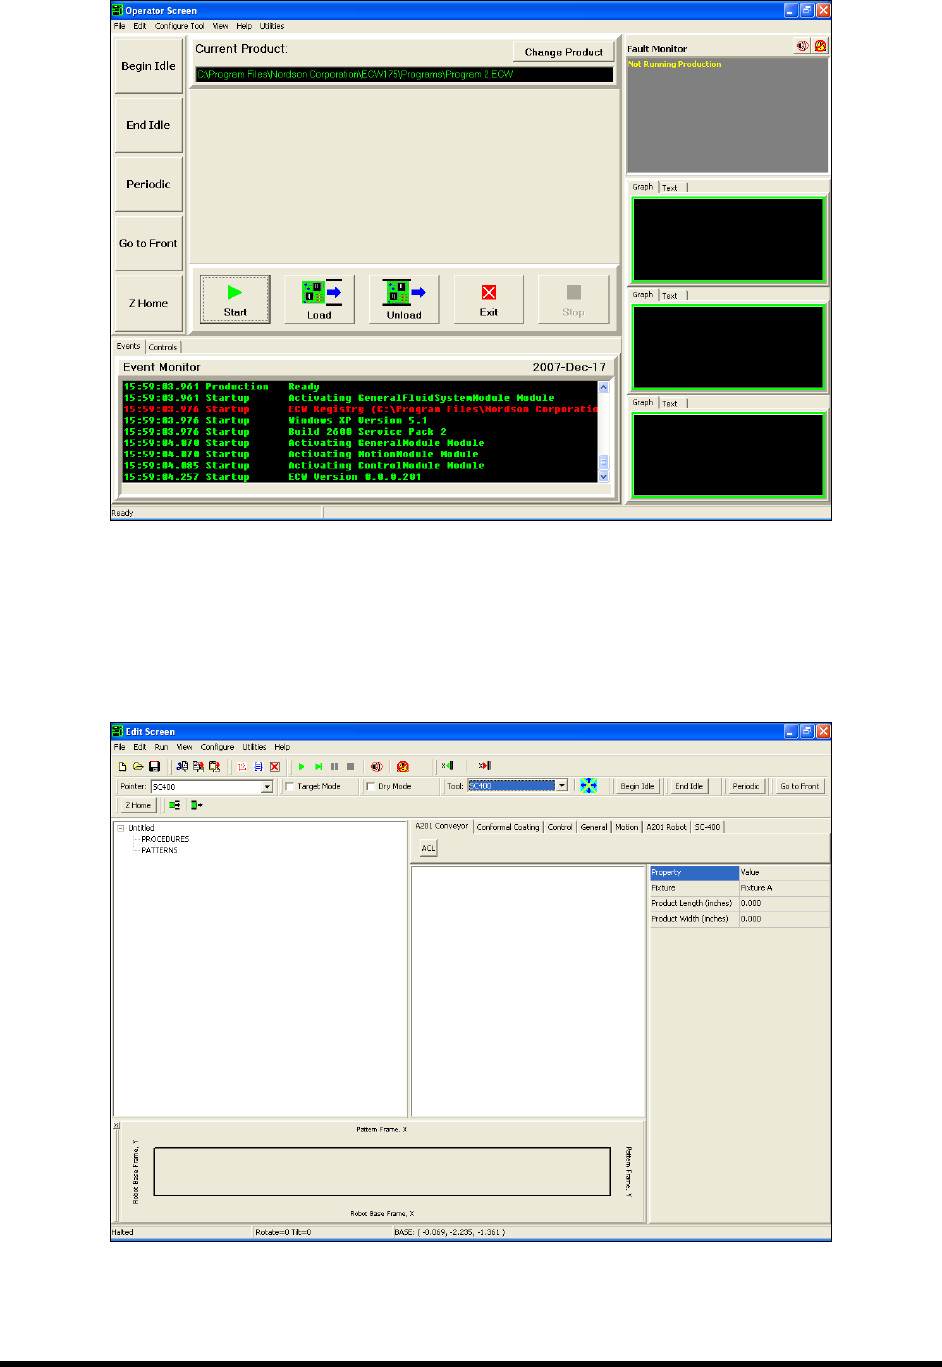
3. Select
Edit > Edit Mode from the ECXP Operator Screen menu bar to access the ECXP Edit
Screen (Figure 6-2).
Figure 6-2 ECXP Edit Screen