SL940-Install-Ops-Maintenance-7210918_B.pdf - 第54页
3-4 Inst allat ion 3.4 Unpacking the Coat ing Ar e a To unpack the Coatin g Area : 1. Rem ove all tie wrap s, tape, foam packing material, and w arning tags from the fol lowing areas : • Dispensing Head (Robot) • Conv ey…
Installation 3-3
6. When the four shipping brackets have been removed, slide the forklift forks under the front of
the coating system between the levelers (feet). Use the forklift to gently lift the coating
system off of the crate.
NOTE You may use the shipping crate for future shipping purposes or dispose of according to
local regulations. Save the shipping brackets. They can be used later for seismically
securing the coating system. See 3.9 Anchoring the Coating System or Facility
Specification SL94XE (P/N 7218847).
7. Move the coating system over the location where it will be installed
8. Slowly lower the forklift until the coating system conveyor rail is at the approximate height
of the mating upstream and downstream equipment.
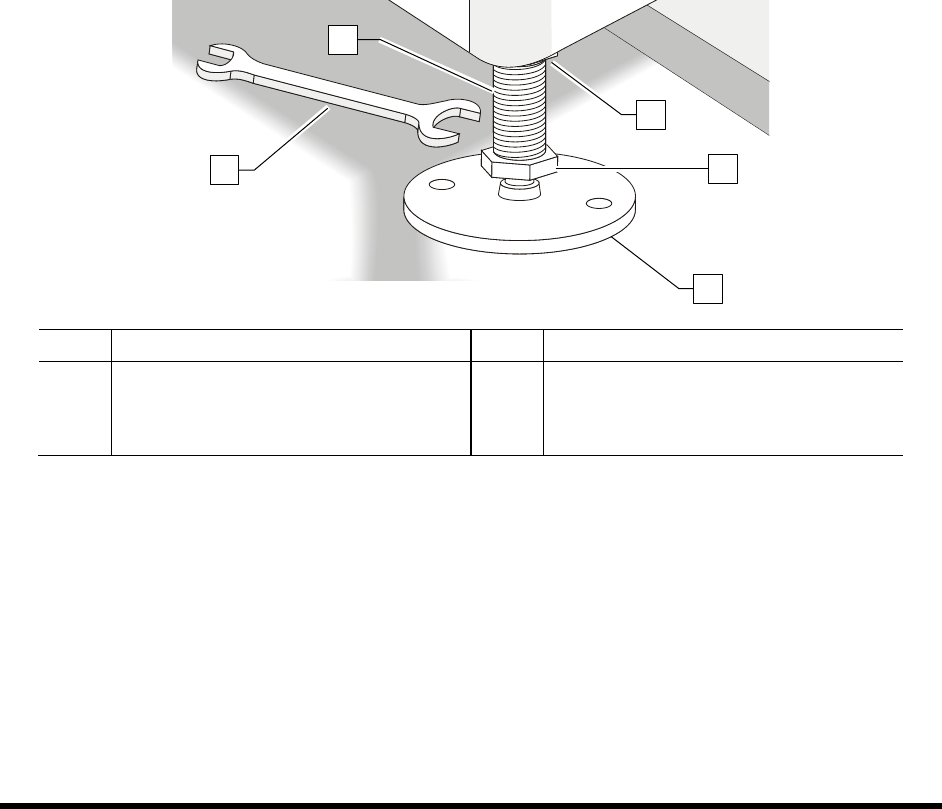
9. Raise or lower each leveler (foot) as follows until they all touch the floor:
a. Loosen the 1 ½ inch lock nut on the leveler. See Figure 3-2.
b. Adjust the 1 ½ inch post nut to raise or lower each leveler as required.
Turning the post nut clockwise lowers the leveler. Turning the post nut
counterclockwise raises the leveler.
c. Tighten the lock nut.
Item Description Item Description
1 Post 4 Post Nut
2 1 1/2-inch Wrench 5 Lock Nut
3 Leveler (foot)
Figure 3-2 Adjusting the Levelers
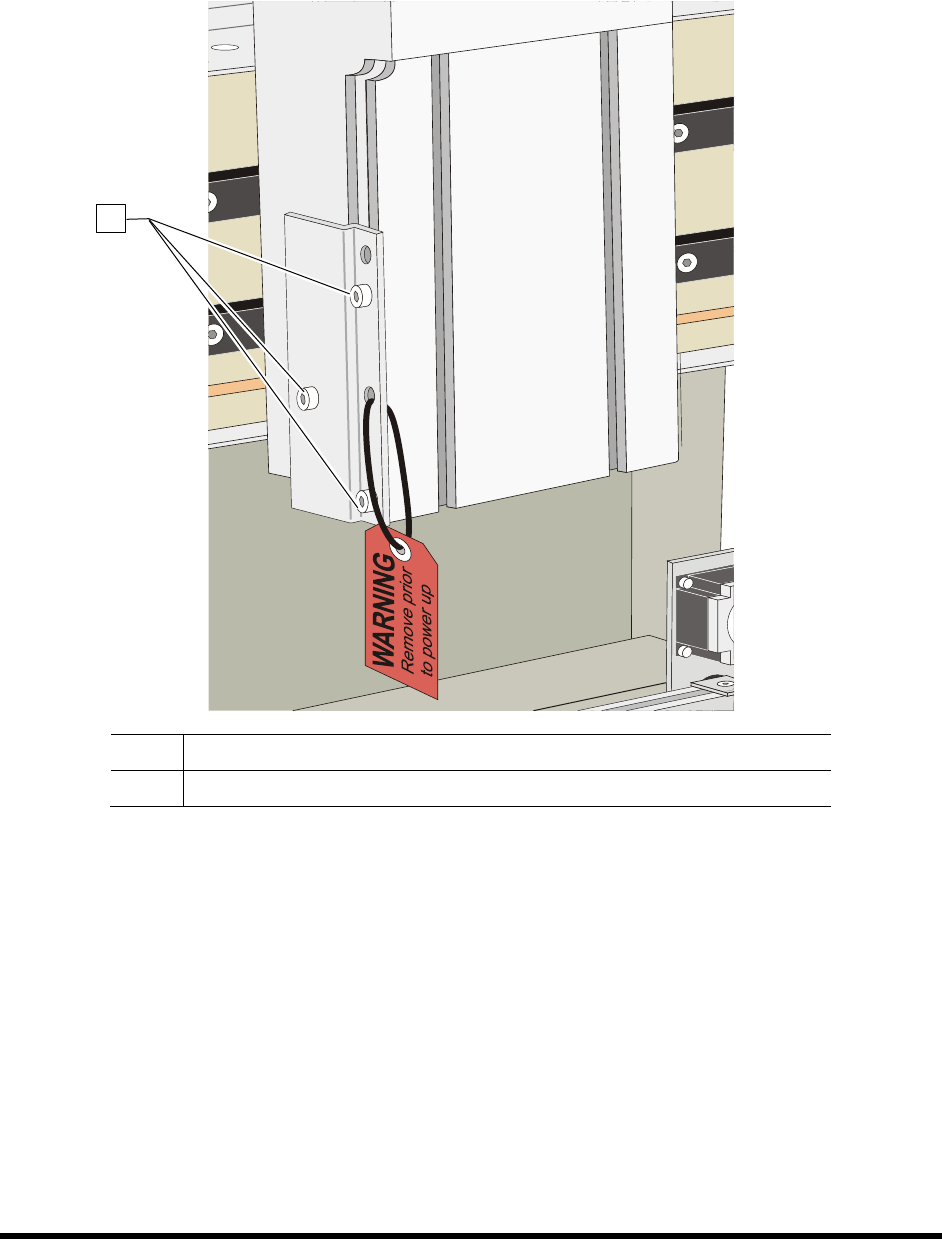
10. Remove bag and plastic wrap from the machine.
NOTE Location of packaging materials to be removed is indicated by the presence of
red warning tags.
11. Remove all shrink-wrap and other packing material from the perimeter of the coating system.
12. Remove all perimeter packaging material from the dispensing area.
NOTE Remove all shrink wrap and packing foam from the system prior to moving it to
a clean room. If necessary, clean the system thoroughly.
1
2
3
4
5
3-4 Installation
3.4 Unpacking the Coating Area
To unpack the Coating Area:
1. Remove all tie wraps, tape, foam packing material, and warning tags from the following
areas:
• Dispensing Head (Robot)
• Conveyor
NOTE Location of packaging materials to be removed is indicated by the presence of
red warning tags. The amount, type, and arrangement of packaging materials will
depend on your system’s configuration.
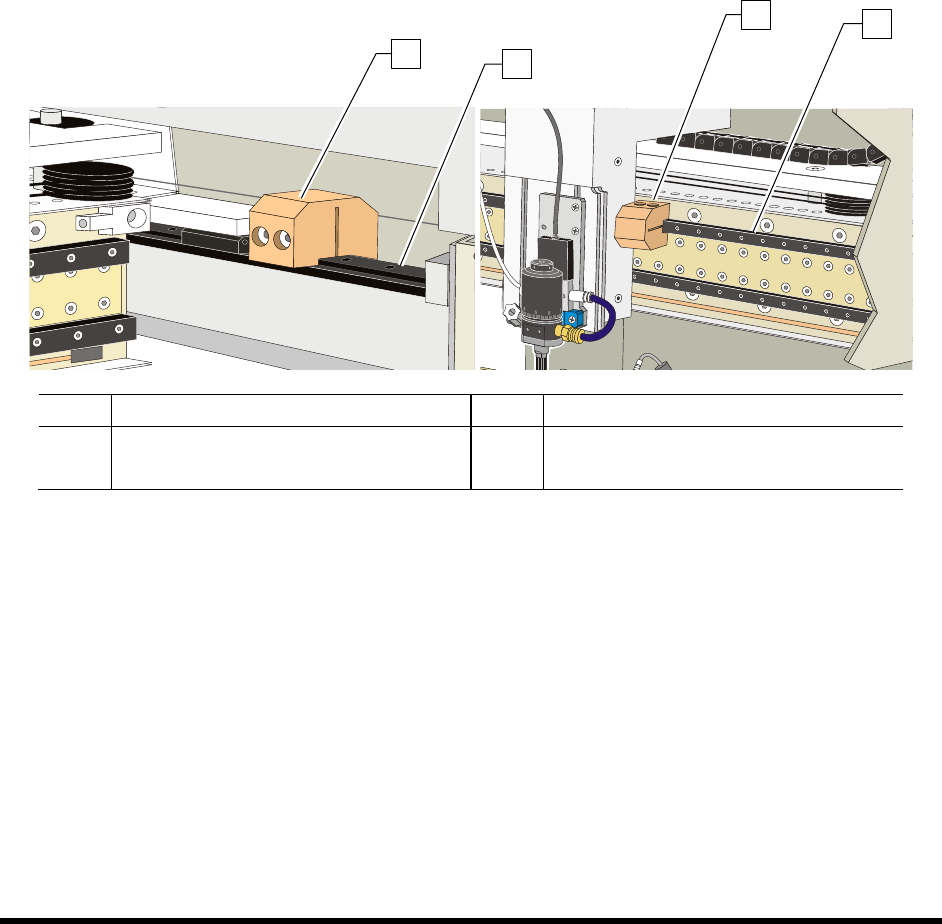
2. Loosen the 3 mm setscrews on the X- and Y-axis Dispensing Head Stoppers. See Figure 3-3.
3. Remove the stoppers and retain them in a safe place.
Item Description Item Description
1 Y-Axis Stopper 3 X-Axis Stopper
2 Y-Rail (right side) 4 X-Beam
Figure 3-3 Dispensing Head Stopper Locations
1
2
3
4