SL940-Install-Ops-Maintenance-7210918_B.pdf - 第68页
4-8 Powe r - up a nd Tes ti ng 4.10 Testi ng the S y stem Afte r init ial i nst alla tion and pow er - up, the system must be tested to ens ure that it is w orking properly . This section includes the proc edures for tes…

Power-up and Testing 4-7
4.9 Starting Easy Coat for Windows (ECXP)
To start/exit ECXP:
1. Double click the ECXP
icon on the Windows desktop.
As an alternative, you may click on the Windows
Start menu and select
Programs > ECXP to start the ECXP software.
The Dispenser will find Home in the Z-Axis, X-Axis, and Y-Axis, respectively.
The ECXP Operator Screen shown in Figure 4-4 will open.
NOTE The Operator Screen will vary slightly depending on system configuration.
Figure 4-4 Starting ECXP
NOTE If ECXP does not start, or you receive error messages during start-up, please contact
Asymtek Technical Support.
2. To exit ECXP, click on
or select File > Exit from the Operator Screen menu bar.
NOTE Refer to Section 5 - Operation for instructions on loading and running ECXP programs.
4-8 Power-up and Testing
4.10 Testing the System
After initial installation and power-up, the system must be tested to ensure that it is working properly.
This section includes the procedures for testing the following:
Robot/Conveyor I/O Conveyor Function
Pneumatics Coating System Options
Robot (Dispensing Head) Function
These procedures should be performed on initial installation and after the machine has been moved
or serviced.
CAUTION! The following procedures should only be performed by a trained service technician.
4.11 Robot/Conveyor I/O
To test the Robot I/O:
1. Follow the instructions in 4.9 Starting Easy Coat for Windows (ECXP) to start ECXP.
2. Select
Edit > Edit Mode from the ECXP Operator Screen menu bar to access the ECXP
Edit Screen.
3. Select
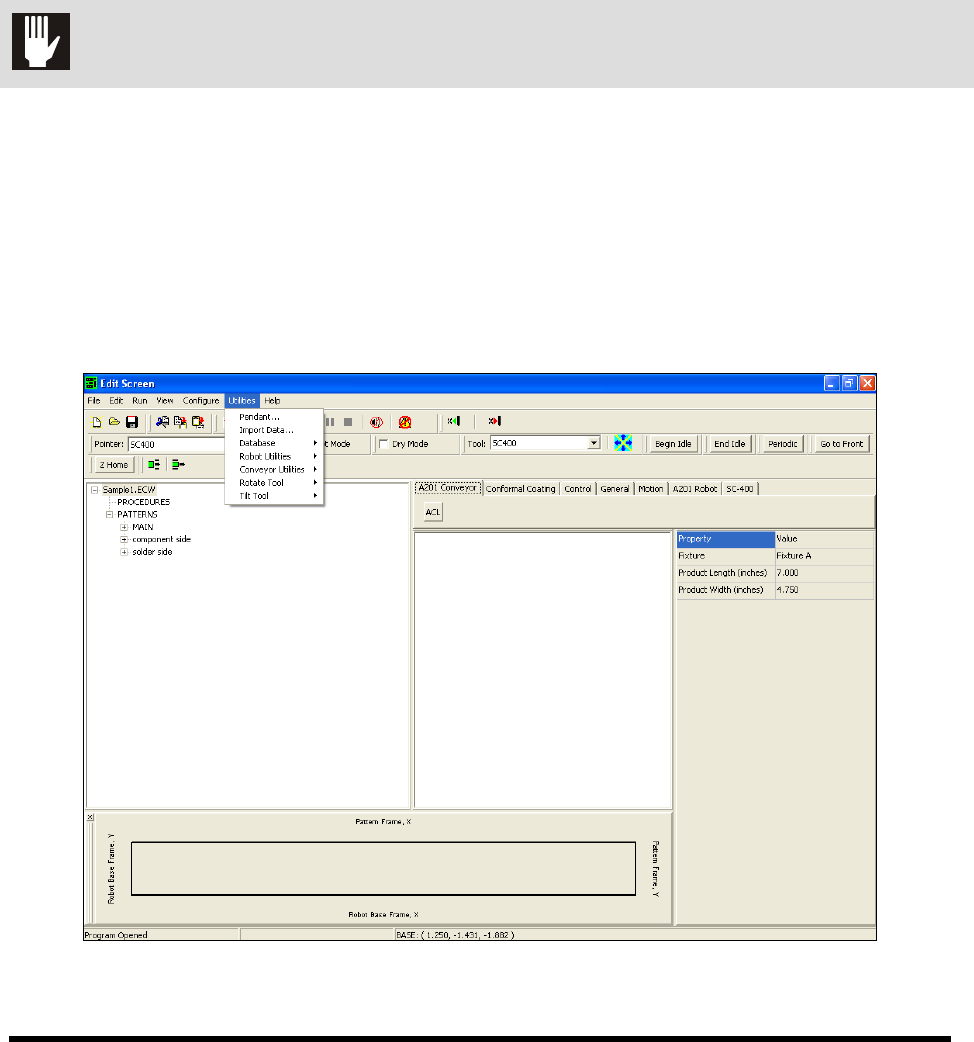
Utilities from the Edit Screen menu bar (Figure 4-5).
Figure 4-5 ECXP Edit Screen - Utilities Menu
Power-up and Testing 4-9
NOTE Menu choices may vary depending upon system configuration.
4. Select
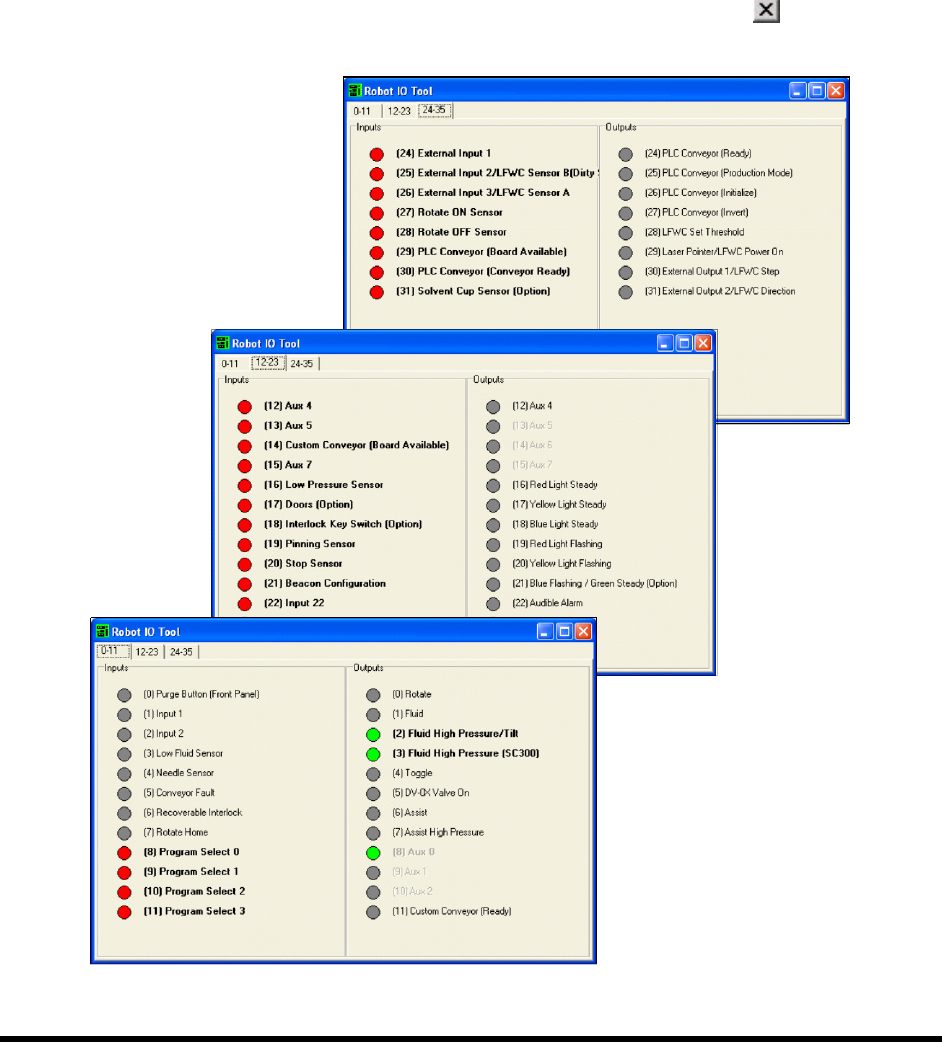
Robot Utilities > IO Tool from the Utilities menu.
A dialog box opens containing a list of Robot inputs and outputs, grouped by tabs
(Figure 4-6).
5. Click on the I/O’s to verify that they are working properly.
Clicking on an output should toggle it ON or OFF. If an item is OFF, the corresponding
button is gray. If it is ON, the corresponding button is green.
When you are done, select
File > Exit from the menu bar or click on to return to the
ECXP Operator Screen.
Figure 4-6 Robot IO Tool