编带机说明书-含图纸ttm402.pdf - 第106页
5-8 TM-403 User’s Guide Connect Vision D292105.16c.fm A Connecting to Sensor sta tus window will open. 8. Once the connection is complete, the Run /Program window will open. Step 1: Vision Setup CONNECT LAPT OP
D292105.16c.fm Connect Vision
Chapter 5: Setup 5- 7
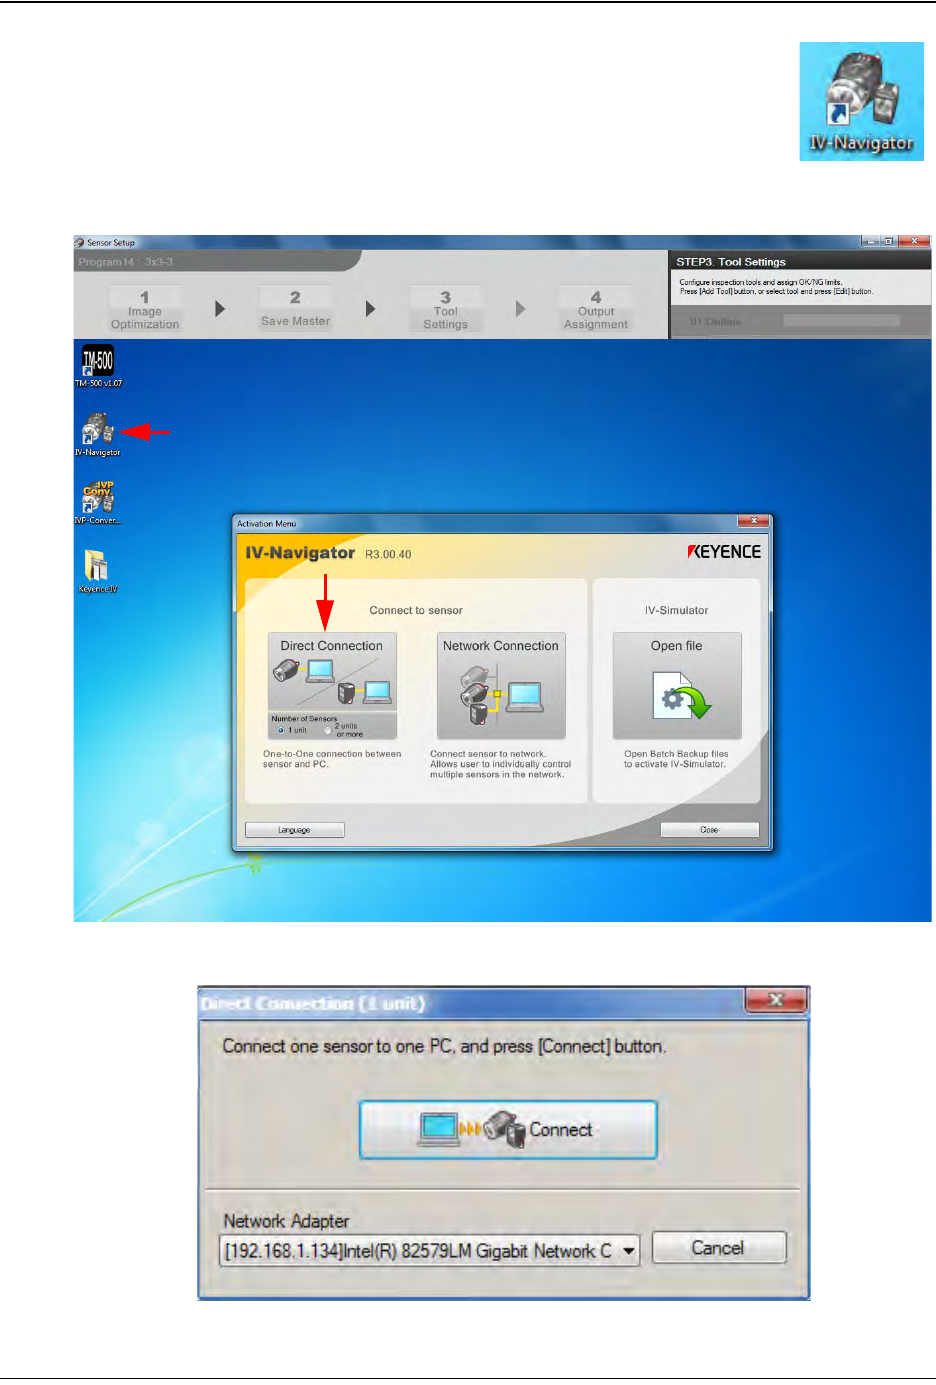
5. To select a stored inspection or configure a new inspection, open
the Keyence Inspection System software by double-clicking on
the IV Navigator icon on the desktop.
6. Select Direct Connection.
7. The following pop-up will appear. Press Connect.
Step 1:
Vision
Setup
CONNECT
LAPTOP
5-8 TM-403 User’s Guide
Connect Vision D292105.16c.fm
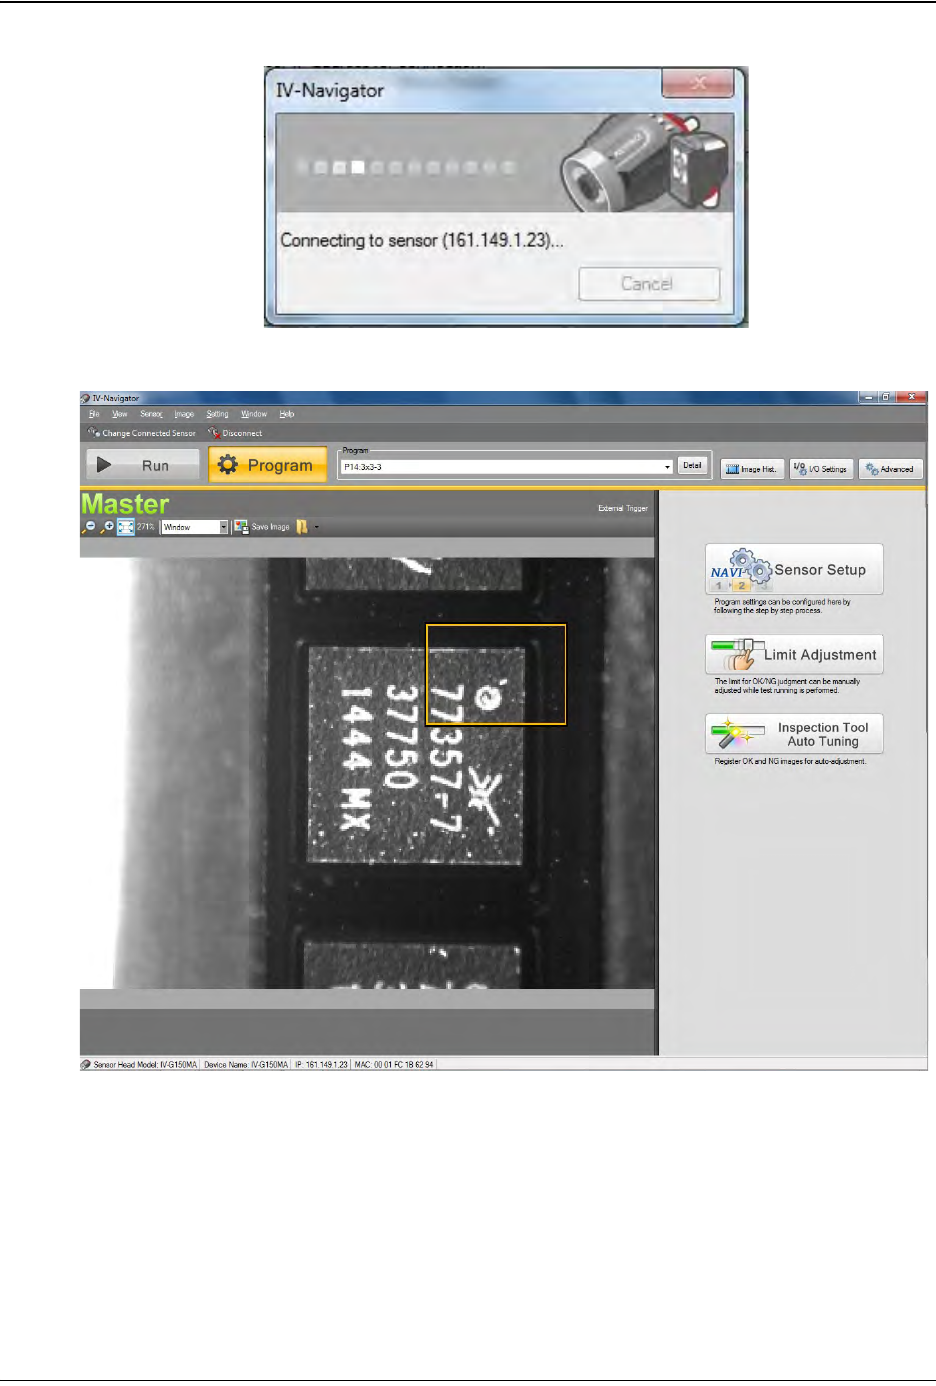
A Connecting to Sensor status window will open.
8. Once the connection is complete, the Run/Program window will open.
Step 1:
Vision
Setup
CONNECT
LAPTOP
D292105.16c.fm Connect Vision
Chapter 5: Setup 5- 9
Connect Keyence Monitor
Follow the steps below to connect the Keyence IV-G Camera to the Keyence Monitor.
(See previous section if using the Keyence computer.)
1. Connect the Monitor's Ethernet cable to the Ethernet port on the back of the TM-
402 (A).
2. Connect the Monitor's power cable to the power connection on the back of the TM-
402 (B).
3. Turn the TM-402 ON. The Keyence Monitor will automatically start and open the
Keyence software program.
4. Select Direct Connection, then press Connect to establish a connection between
the Keyence Monitor and the Keyence Camera.
Step 1:
Vision
Setup
CONNECT
MONITOR
A
B