编带机说明书-含图纸ttm402.pdf - 第182页
7-26 TM-403 User’s Guide Tips on Part Placement D292105.9b.fm 5. Adjust Blow Off T ime. Press the right Arrow button on the bottom of the second Head Ta b to move to the last Head T ab screen 6. Adjust the length of Blow…
D292105.9b.fm Tips on Part Placement
Chapter 7: Troubleshooting 7-25
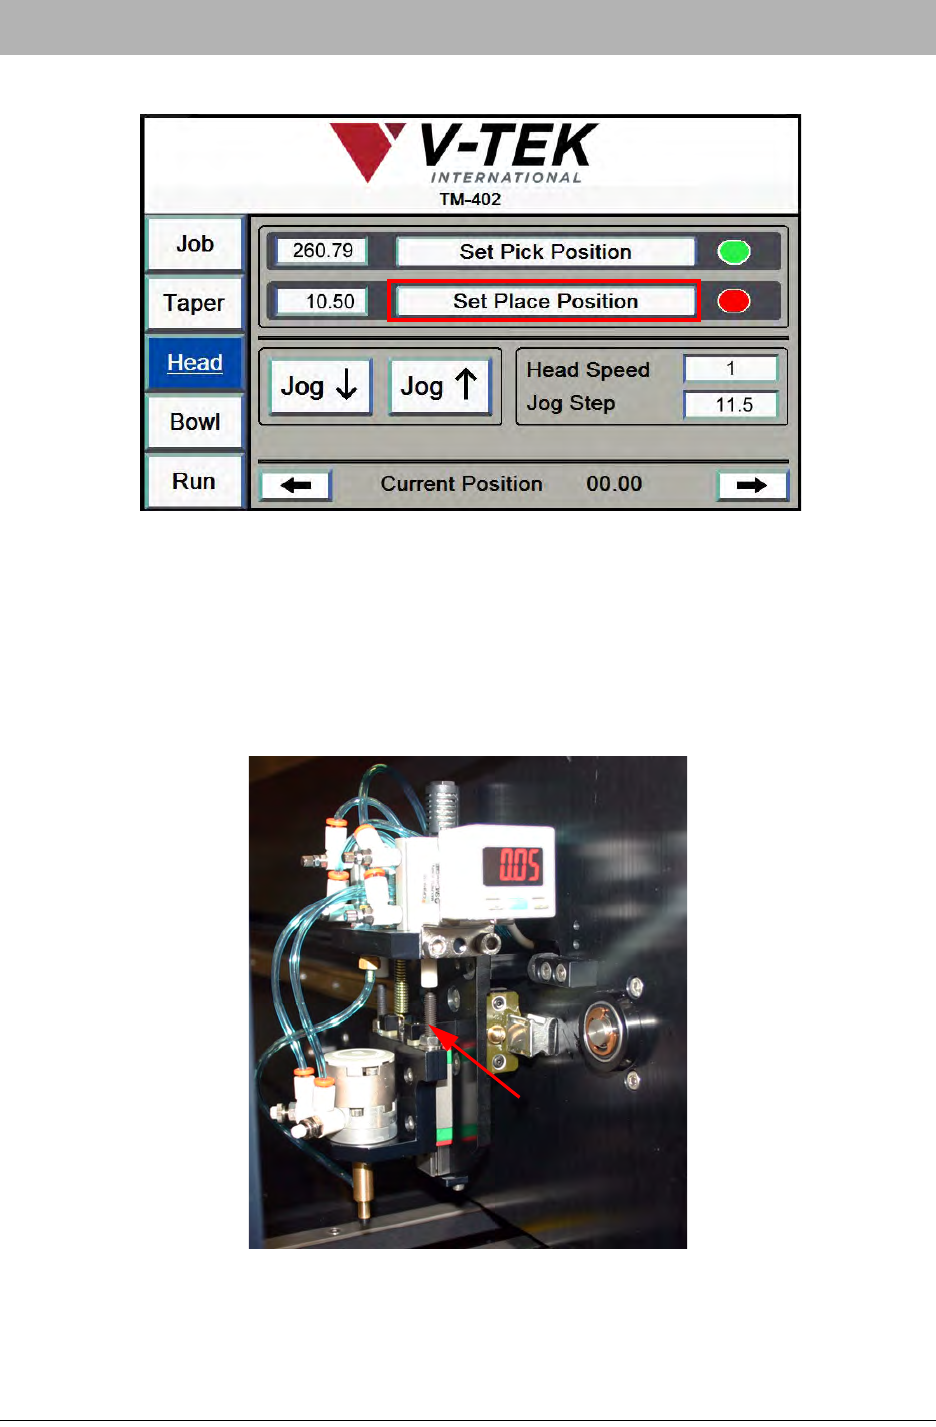
3. Press the Right Arrow to move to the next Head Tab.
Jog the head up or down until the nozzle is centered correctly over the place location.
When the nozzle is positioned correctly, press the Set Place Position button.
4. Adjust Place Position Z. Manually adjust the right Actuator Adjustment Screw up or
down until the nozzle is extended the appropriate distance above the place location. You
may need to experiment with placing a part to determine what Z Axis height works best.
When the nozzle is positioned correctly, press the Set Place Position button.
Actuator
Adjustment
Screw
7-26 TM-403 User’s Guide
Tips on Part Placement D292105.9b.fm
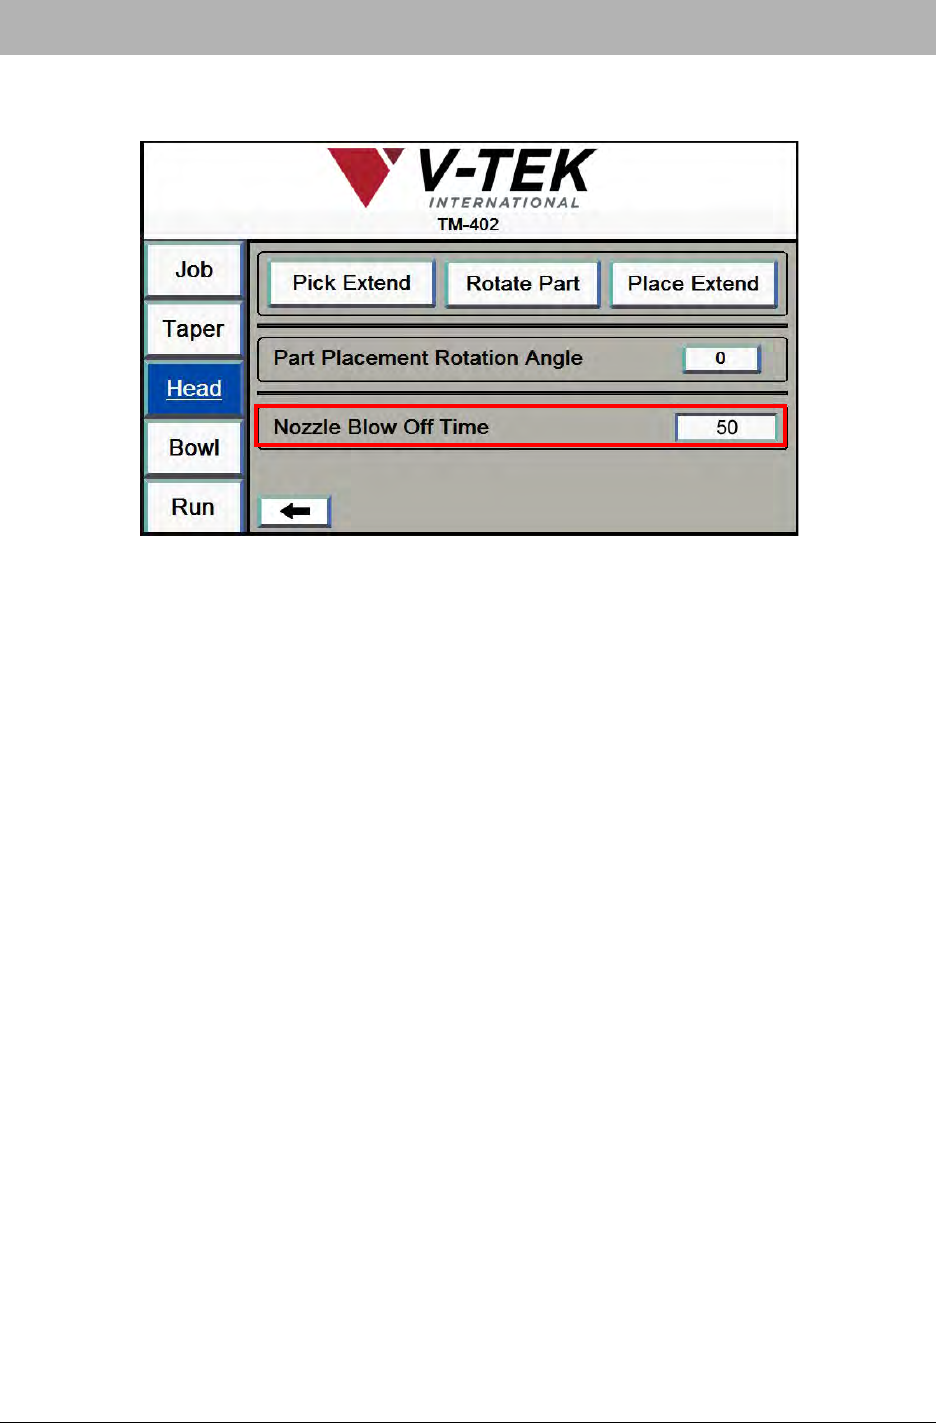
5. Adjust Blow Off Time. Press the right Arrow button on the bottom of the second Head
Tab to move to the last Head Tab screen
6. Adjust the length of Blow Off as needed to drop the part properly.
Note: If Nozzle Blow Off is set too low, the part may remain on the Nozzle Tip or “float”
down, resulting in an incorrectly placed part in the pocket.
If Nozzle Blow Off is set too high, the excess air may cause the part to bounce back out of
the pocket. Adjust the Nozzle Blow Off value until the TM-402 consistently and accurately
places parts in the carrier tape.
D292105.9b.fm Sensor Adjustments
Chapter 7: Troubleshooting 7-27
Sensor Adjustments
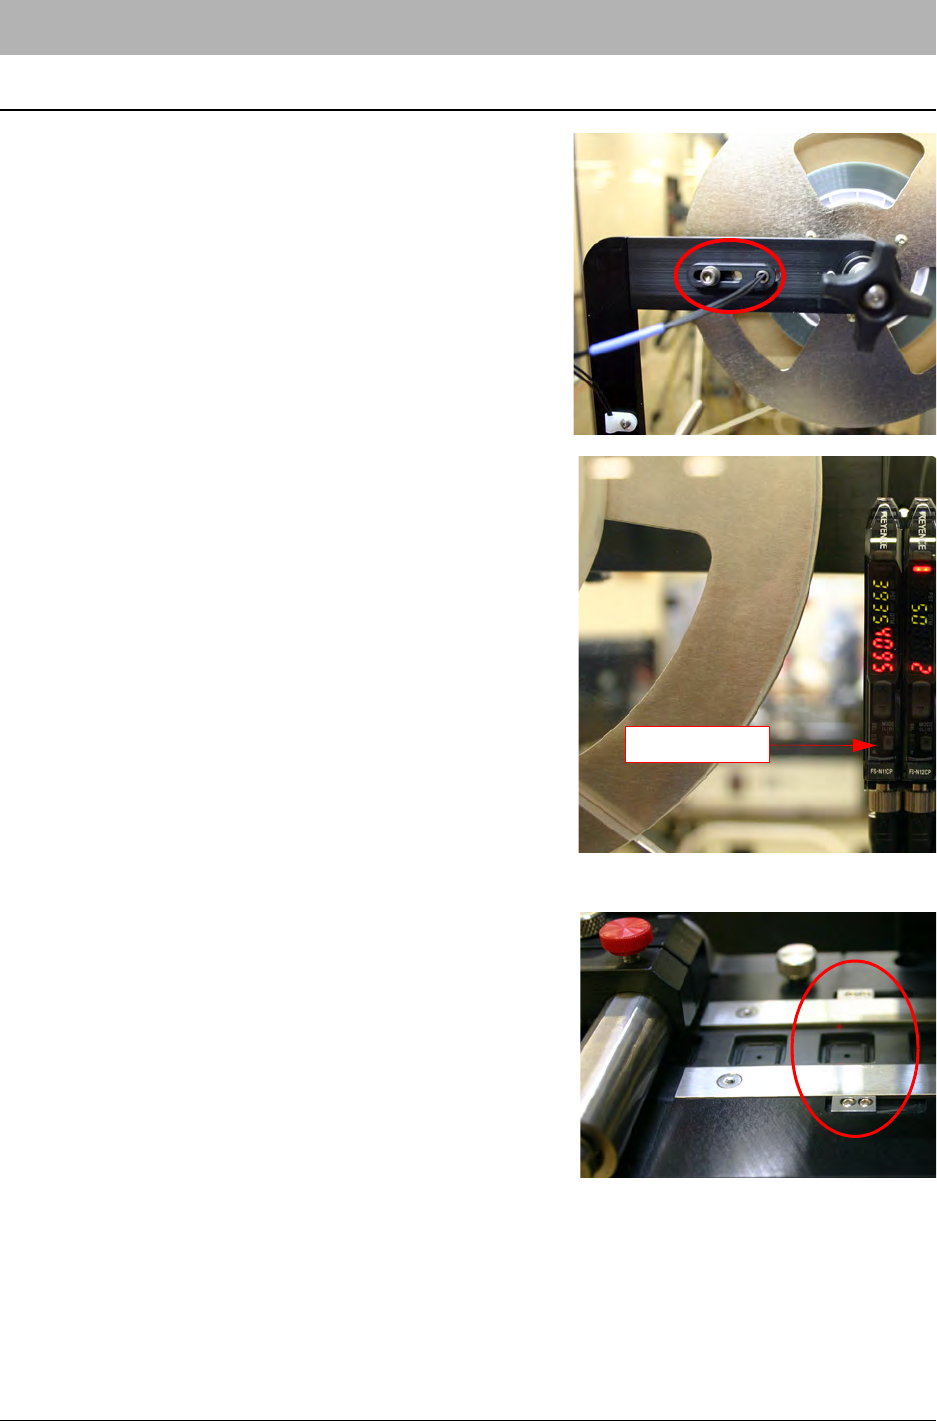
Adjusting the Low Cover Sensor
The Low Cover Sensor alerts the operator at the begin-
ning of a job if there is not enough cover tape loaded on
the Cover Tape Reel to complete the job.
Loosen the screws on the Cover Tape Low Sensor to
adjust it’s position. It should rest so the sensor light is
positioned at the minimum level of cover tape required
to complete a job.
If sensor sensitivity needs to be fine tuned, adjust the
amplifiers at the base of the Cover Tape Arm. For more
information on the sensor/amplifier, refer to Appendix
A: Sensors
No further setup is required. The Low Cover Sensor is
ready to operate.
Adjusting the Tape Jam Sensor
The Tape Jam Sensor is located on the Taper track
just before the Sealer. It detects if parts are doubled up
or incorrectly placed in a carrier tape pocket so that
the part protrudes above the level of the track and
would interfere with cover tape placement.
If sensor sensitivity needs to be fine tuned, adjust the
amplifiers at the base of the Cover Tape Arm. For
more information on the sensor/amplifier, refer to
Appendix A: Sensors.
No further setup is required. The Jam In Tape Sensor
is ready to operate.
Amplifiers