编带机说明书-含图纸ttm402.pdf - 第74页
4-2 TM-403 User’s Guide Quick Start: Setup D292105.7b.fm Quick Star t: Setup The following is an outline of the basic step s required to setup the TM-402 for operation. More detailed instructions follow in th e next sect…

Chapter 4: Setup
Contents
Quick Start: Setup . . . . . . . . . . . . . . . . . . . . . . . . . . . . . . . . . . . . . . . . . . .4-2
Power Up the System . . . . . . . . . . . . . . . . . . . . . . . . . . . . . . . . . . . . . . . .4-3
Home Motors . . . . . . . . . . . . . . . . . . . . . . . . . . . . . . . . . . . . . . . . . . . . . . .4-4
Load the Bowl Feeder . . . . . . . . . . . . . . . . . . . . . . . . . . . . . . . . . . . . . . . .4-5
Nozzle Installation . . . . . . . . . . . . . . . . . . . . . . . . . . . . . . . . . . . . . . . . . . .4-7
Selecting the Correct Nozzle & Nozzle Tip . . . . . . . . . . . . . . . . . . . . . . . . . . . 4-7
Installing Nozzle & Nozzle Tip . . . . . . . . . . . . . . . . . . . . . . . . . . . . . . . . . . . . . 4-8
Taper Setup. . . . . . . . . . . . . . . . . . . . . . . . . . . . . . . . . . . . . . . . . . . . . . . . .4-9
Load Carrier Tape . . . . . . . . . . . . . . . . . . . . . . . . . . . . . . . . . . . . . . . . . . . . . . 4-9
Load Cover Tape . . . . . . . . . . . . . . . . . . . . . . . . . . . . . . . . . . . . . . . . . . . . . . . 4-11
Load Take-up Reel. . . . . . . . . . . . . . . . . . . . . . . . . . . . . . . . . . . . . . . . . . . . . . 4-12
Configure HMI Settings . . . . . . . . . . . . . . . . . . . . . . . . . . . . . . . . . . . . . . .4-13
Test Seal . . . . . . . . . . . . . . . . . . . . . . . . . . . . . . . . . . . . . . . . . . . . . . . . . . .4-25

4-2 TM-403 User’s Guide
Quick Start: Setup D292105.7b.fm
Quick Start: Setup
The following is an outline of the basic steps required to setup the TM-402 for operation.
More detailed instructions follow in the next section of this chapter.
Caution: Users should always wear protective eye wear when operat-
ing or maintaining the TM-402.
1. Power up
• Power up the machine. Press Reset. Close all doors.
2. Home the motors
• Press Home Required and Home All Motors.
3. Load the Bowl Feeder
• Load components into the Bowl Feeder.
4. Install Nozzle
• Ensure correct nozzle size and tip are installed.
5. Load Taper
• Load carrier tape.
• Load cover tape.
• Place an empty reel on the Take-up Arm.
6. Configure HMI settings
• Go to the Job Tab and run the Job Wizard to configure job settings.
7. Test Sealer
• Perform a Seal Test to ensure a good seal, adjust Sealer settings as necessary.
8. Setup 2D Vision
• Connect
• Setup 2D Vision Inspection.
D292105.7b.fm Power Up the System
Chapter 4: Setup 4- 3
Power Up the System
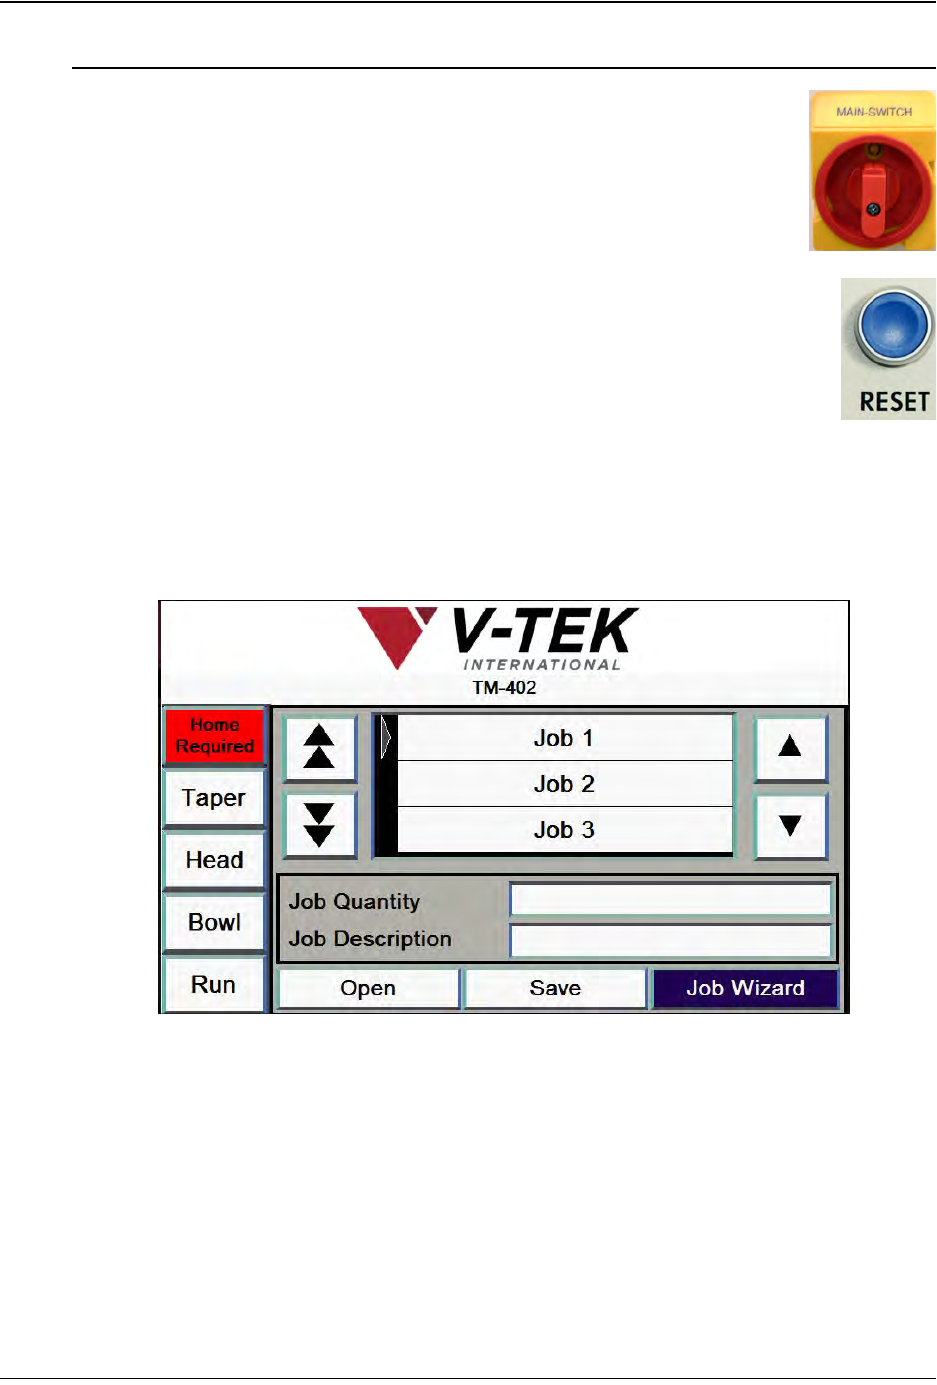
1. Power up the machine by turning the Main Power control on the
lower right side of the cabinet to the ON position.
2. Press the blue Reset Button on the left side of the machine.
There will be a brief popping sound as the Air Dump Valve
releases air to the machine. As the TM-402 powers up the PLC,
Servo Drivers and HMI Monitor will boot up. On top of the
machine, the Tower Light will flash red indicating the machine is
on but not running.
Note: The boot up process takes approximately 2 minutes.
The monitor will display the HMI Job Tab with a red Home Required message at
the top of the Tab Menu.
Step 1:
Power
Up