编带机说明书-含图纸ttm402.pdf - 第195页
D292105.10a.fm General Maintenance Tasks Chapter 8: Maintenance 8- 9 4. Clean the residues from the heat shoes by using a plastic or brass brush soaked in alco- hol to remove any residue that has built up on the lip of t…
8-8 TM-401 User’s Guide
General Maintenance Tasks D292105.10a.fm
Taping Module Maintenance
Heat Sealer
Heat sealer maintenance consists mainly of cleaning built-up debris and adhesive residues from
the heat shoes. It should be cleaned after every 120 hours of operation or as needed.
To clean the heat shoes, follow the steps below.
1. Slide the loading track all the way out.
2. If the sealer assembly is still hot, allow it to cool completely before continuing.
Note: Do not attempt to use alcohol when the sealer
is hot.
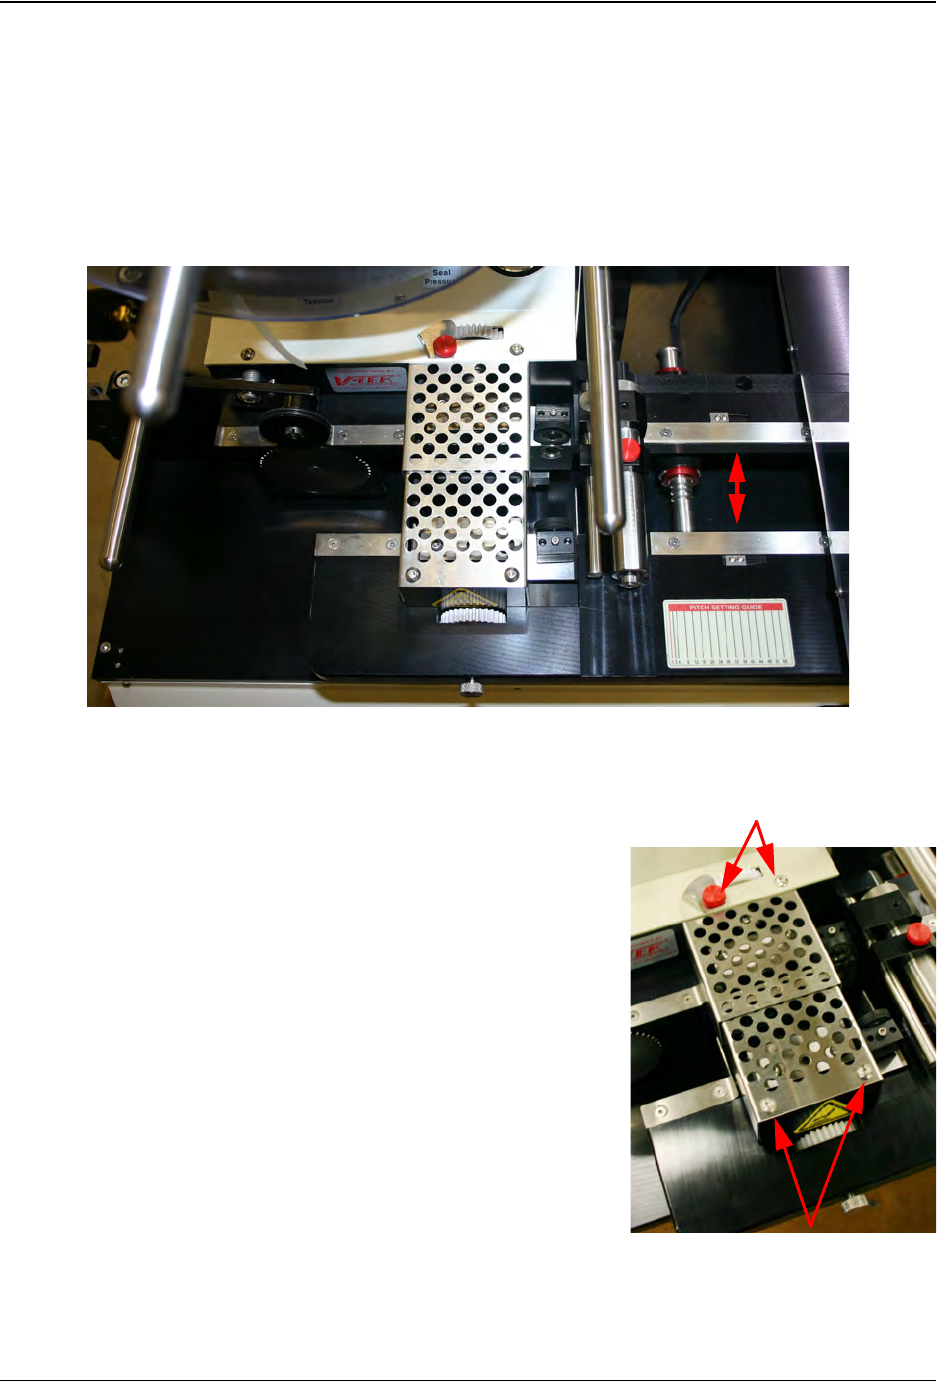
3. Using a 3/32” hex wrench, remove the (3) Button
Head Cap Screws and the red Thumb Screw from
the two sheet metal covers.
Remove
Remove
D292105.10a.fm General Maintenance Tasks
Chapter 8: Maintenance 8- 9
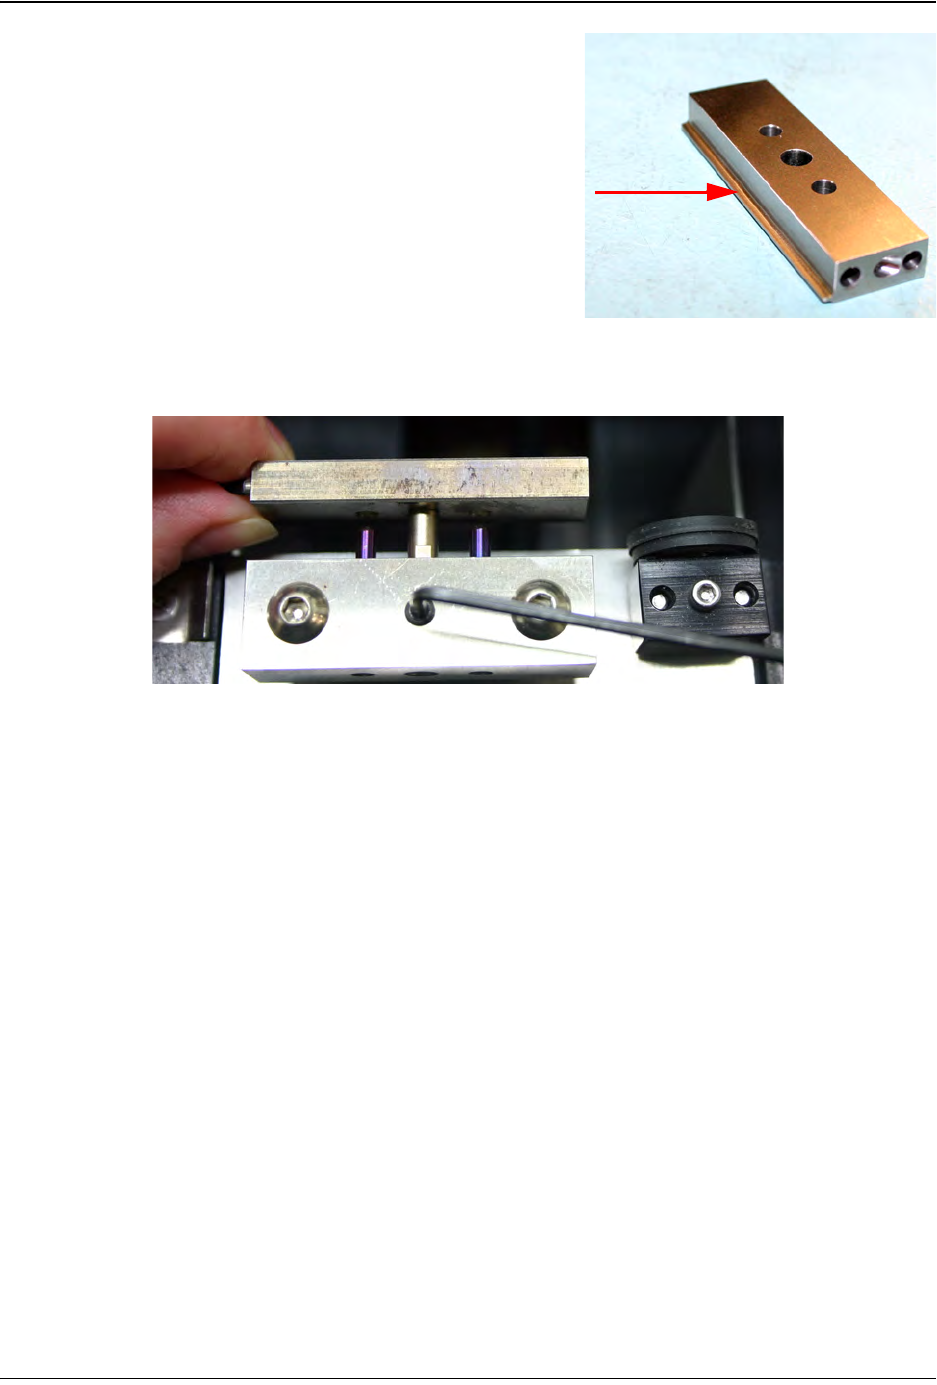
4. Clean the residues from the heat shoes by
using a plastic or brass brush soaked in alco-
hol to remove any residue that has built up on
the lip of the heat shoe.
Note: Do not use a steel bristled brush. It could
damage the heat shoes.
Remove/Replace Heat Shoes
Remove heat shoes every four months and inspect and clean them. Replace if necessary.
1. Ensure the heater is off and has cooled completely.
2. Remove the outer heat sealer guard as described above.
3. Use a 5/64 inch hex wrench to release the shoe from the heat sealer assembly.
4. Use a 5/64 inch hex wrench to unscrew the set screws on both ends of the heat shoe so
the heater and the thermocouple can be removed.
5. Insert the heater and the thermocouple in a new heat shoe, aligning them so their ends
are flush with the end of the heat shoe. Tighten the set screws to hold them in position.
6. Place the heat shoe back on the sealer assembly and tighten the set screw.
7. Replace the outer sealer guard.
Remove
Residue
Heat Shoe
8-10 TM-401 User’s Guide
General Maintenance Tasks D292105.10a.fm
Loading Track.
The Loading Track should be cleared of dust and
debris after every 40 hours of operation.
Strip the machine, remove the cover tape guide, and brush the dust and debris from the track
with a small, stiff bristled paint brush. Excessive build-up of dirt and debris can cause carrier tape
jams.
PSA Sealer
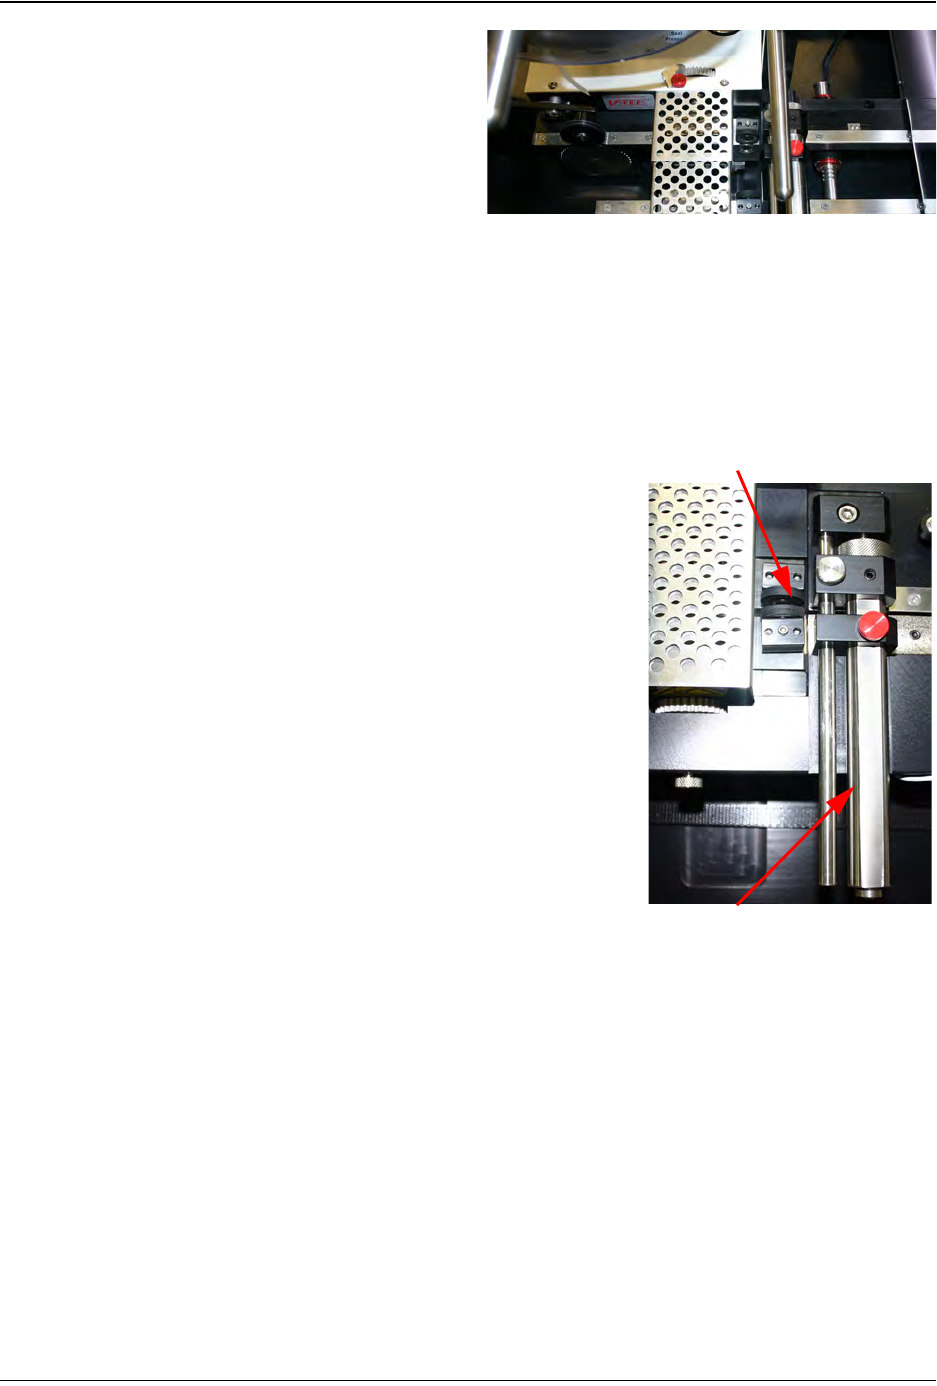
The adhesive residues should be cleaned from the sealer
assembly every 40 hours of operation.
Wipe the entire assembly using a cloth soaked in alcohol. Using
a cotton swab soaked in alcohol, clean between the sealer
wheels. Also, clean the entire surface of the black polyurethane
wheel.
Note: Do not use solvents other than alcohol when
cleaning the black polyurethane wheels.
If during the cleaning process the sealer has become com-
pletely out of adjustment, turn the small screw behind the wheel
counterclockwise approximately three turns. Slowly turn the
screw clockwise while spinning the top wheel. Stop adjusting
when the bottom wheel starts spinning with the top wheel.
Cover Tape Guide
The Cover Tape Guide may become coated with adhesive and
dirt during taping. It is important to keep the tape groove clean
for proper alignment of the cover tape.
Clean the tape groove with alcohol and a cotton swab whenever
it appears dirty. The recommended cleaning schedule is every
40 hours of operation.
Cover Tape Guide
PSA Sealer Wheels