编带机说明书-含图纸ttm402.pdf - 第193页
D292105.10a.fm General Maintenance Tasks Chapter 8: Maintenance 8- 7 Check Actuator Belt T ension The Actuator Belt tension sh ould be measured af ter its first 30-40 hours o f run time, then annu- ally after that. T o m…
8-6 TM-401 User’s Guide
General Maintenance Tasks D292105.10a.fm
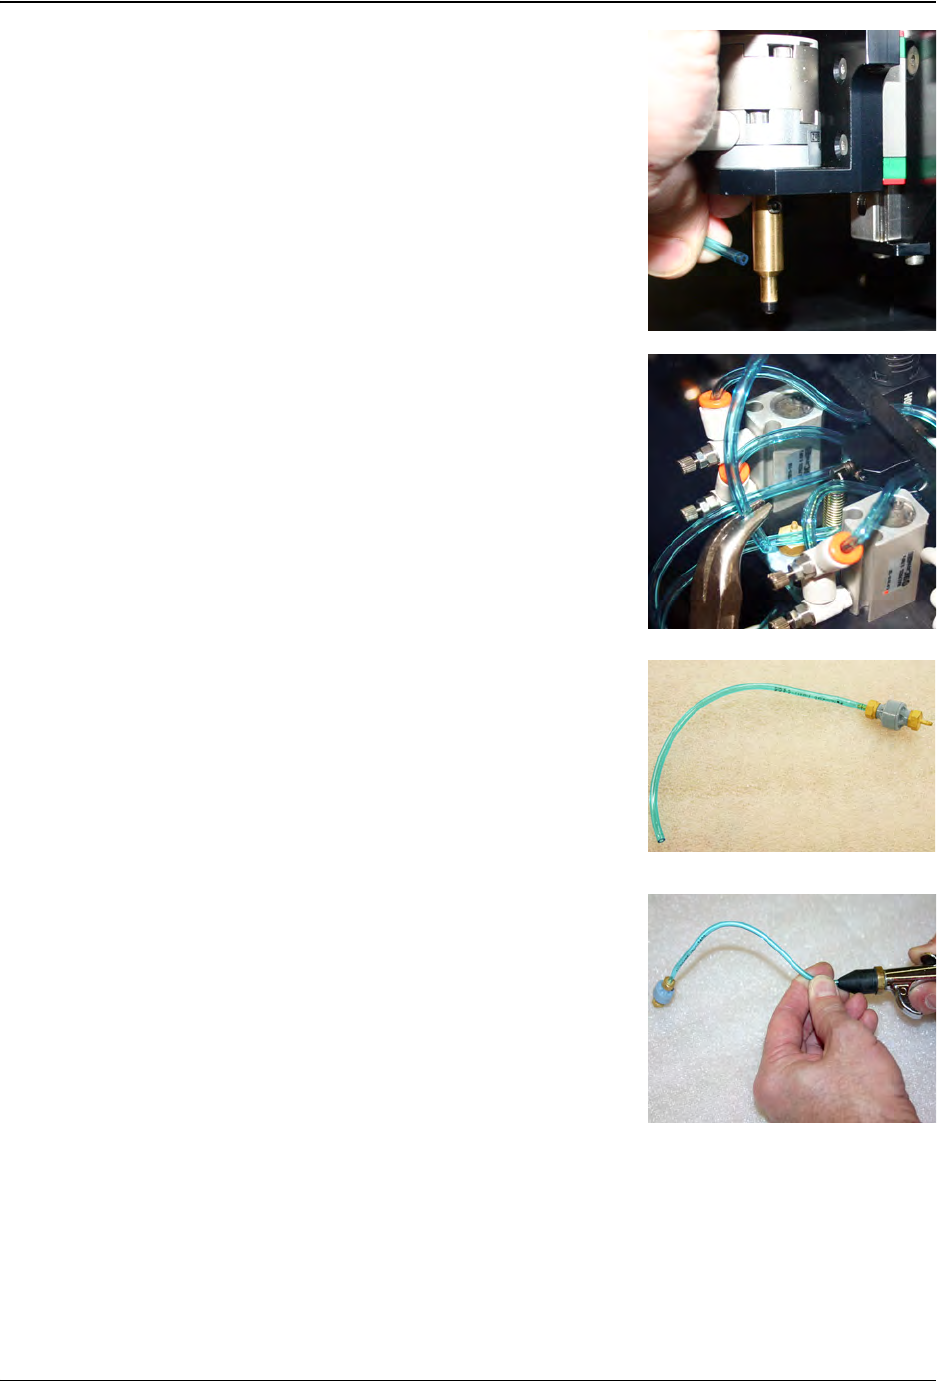
2. Remove the air line from the Nozzle Shank.
3. Use a needle-nose pliers to remove the air line from
the Upper Filter Fitting which is located at the top of
the Vacuum Filter.
4. Use a 2.5mm Hex wrench to remove the retaining
screw that holds the Filter in place.
5. Lift the Filter from the housing and remove it from the
machine.
6. Blow air through the filter to clean it or replace with a
new filter. (See Spare Parts List in the back of this
User’s Guide for order information.).
7. Replace the Filter on the Pick Head, reconnecting the
air line at the top of the Vacuum Filter and at the Noz-
zle Shank.
D292105.10a.fm General Maintenance Tasks
Chapter 8: Maintenance 8- 7
Check Actuator Belt Tension
The Actuator Belt tension should be measured after its first 30-40 hours of run time, then annu-
ally after that. To measure belt tension, follow the instructions below.
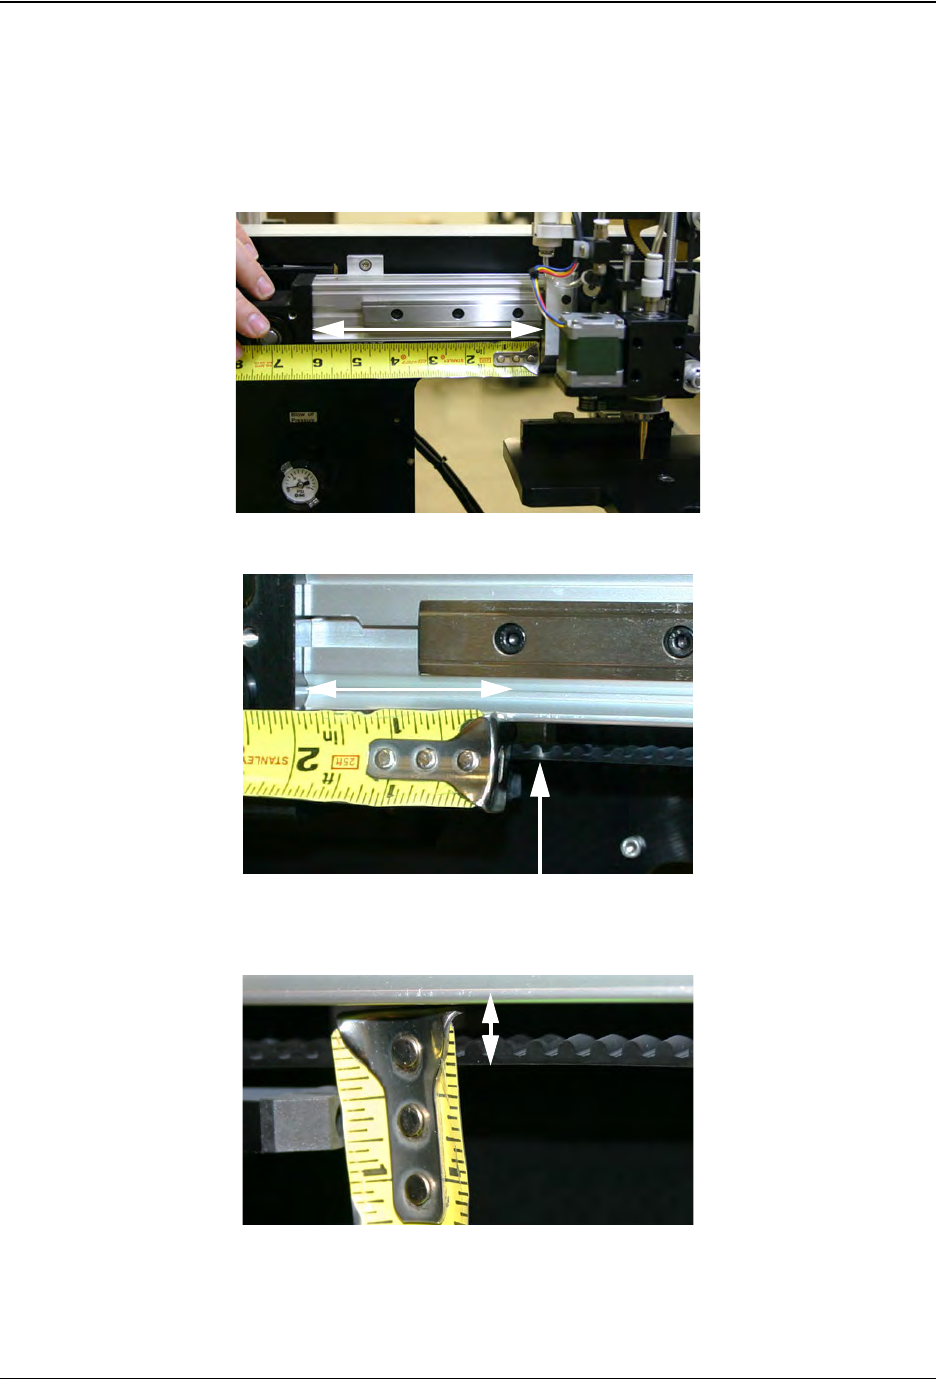
1. Position the Pick Head Carrier so the edge of the carrier is 6" from the inside end of the
Actuator Head.
2. Position a force gauge on the Belt 2” from the inside end of the Actuator Head.
3. Deflect the Belt 1/4" (6 mm) in either direction. The force gauge should read between 12
and 16 lbs. [53 - 62 N].
Note: Contact V-TEK Service for tensioning procedure if belt tension is outside tolerance.
6”
2”
Deflect 1/4”
8-8 TM-401 User’s Guide
General Maintenance Tasks D292105.10a.fm
Taping Module Maintenance
Heat Sealer
Heat sealer maintenance consists mainly of cleaning built-up debris and adhesive residues from
the heat shoes. It should be cleaned after every 120 hours of operation or as needed.
To clean the heat shoes, follow the steps below.
1. Slide the loading track all the way out.
2. If the sealer assembly is still hot, allow it to cool completely before continuing.
Note: Do not attempt to use alcohol when the sealer
is hot.
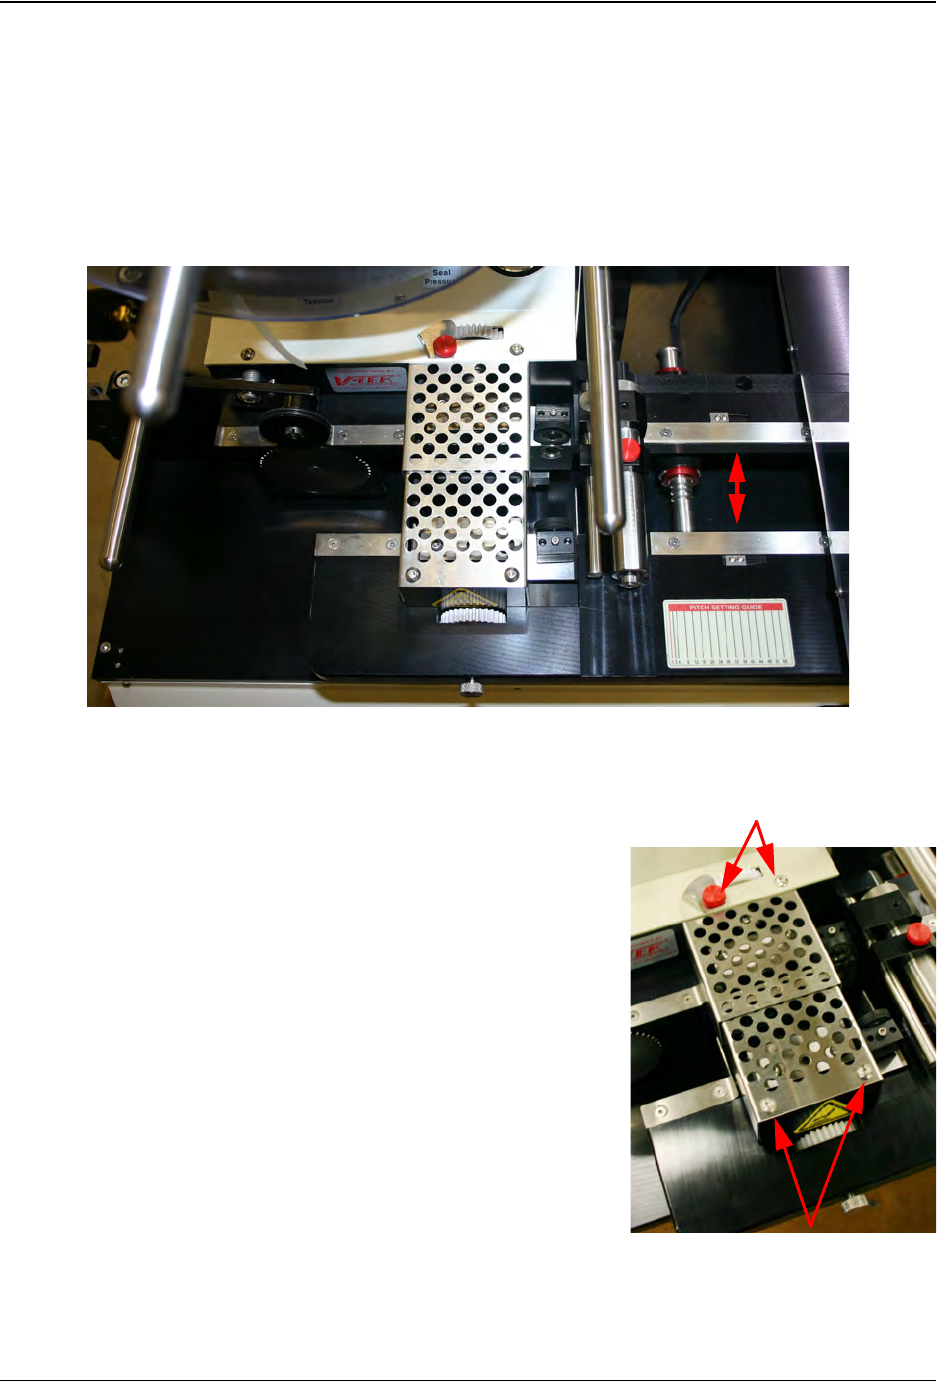
3. Using a 3/32” hex wrench, remove the (3) Button
Head Cap Screws and the red Thumb Screw from
the two sheet metal covers.
Remove
Remove