编带机说明书-含图纸ttm402.pdf - 第50页
3-8 TM-403 User’s Guide Job Tab D292105.6a.fm 2. In the second Job Wizard screen the user enters the Quantity of part s that will be run and a brief Description of the job. When the job p arameters are set, press the rig…
D292105.6a.fm Job Tab
Chapter 3: Human Machine Interface 3-7
of the Job Library are used to move through the job list five jobs at a time. The
Enter button selects and highlights a job from the Job Library list so it can be
opened or saved.
C. The Job Information section has two open fields for entering job information: Job
Quantity and Job Description. Press the field to open a keypad for data entry. The
maximum number of characters for any field is 20.
D. At the bottom of the Job Tab there are three control buttons:
• The Open button opens the currently selected job.
• The Save button is used to save current job settings for future use.
• The Job Wizard button opens the Job Wizard, allowing the user to configure job
settings.
Job Wizard
Pressing the Job Wizard button in the Job Tab opens the Job Wizard. The Job Wizard has 13
screens that lead the user through the job set-up process. Instructions at the top of each Job
Wizard screen explain each step. The Arrow buttons on the bottom of the window move the user
forward and backwards through the process. Pressing the right Arrow button opens the next Job
Wizard screen. Pressing the left Arrow opens the previous screen.
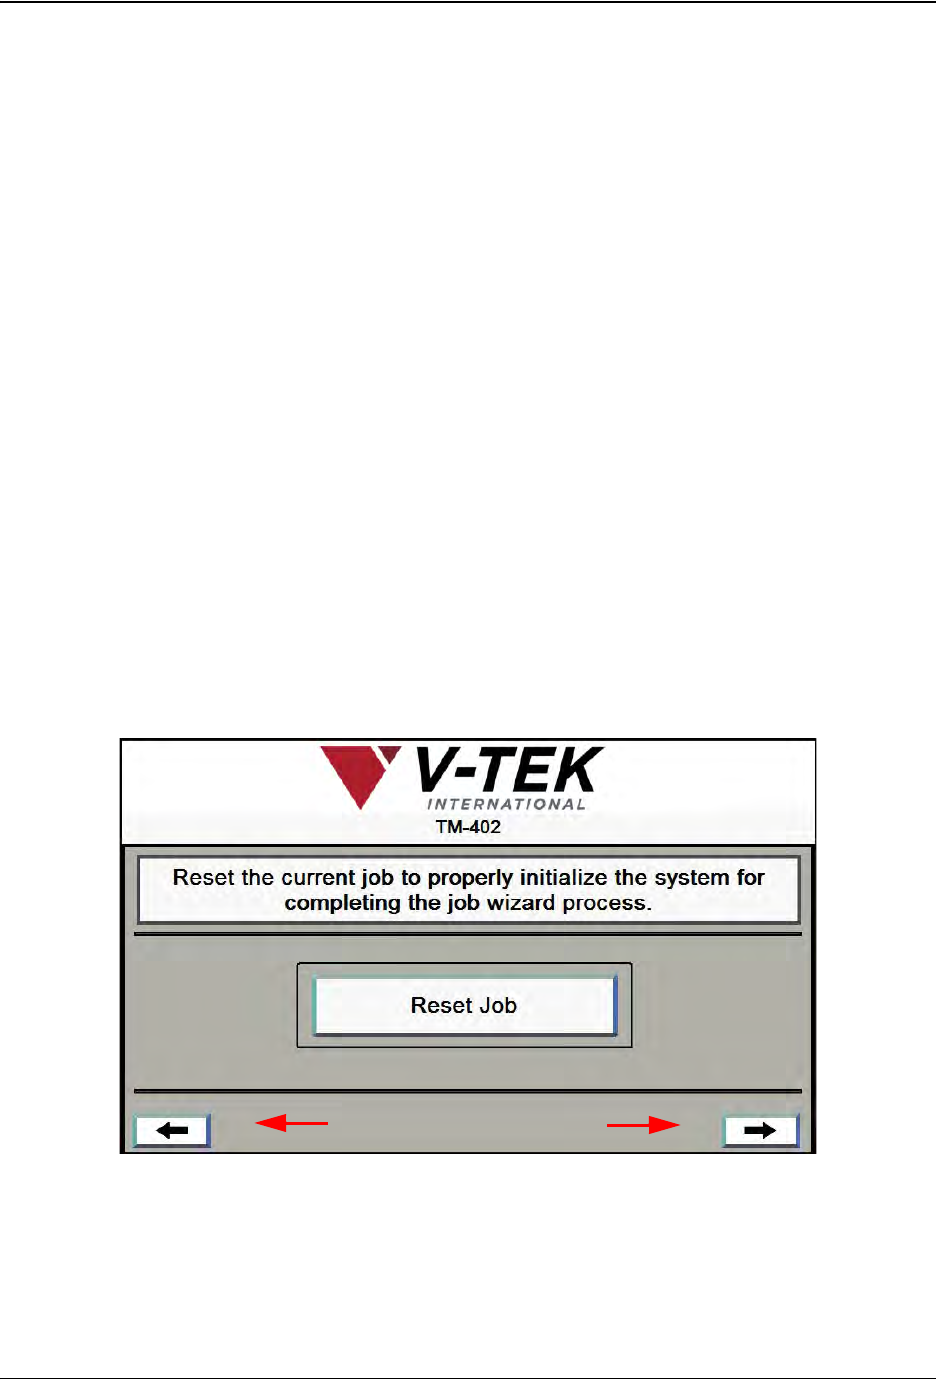
1. In the first Job Wizard screen the user resets the job to initialize the system. Press Reset
Job, then press the right Arrow key to move to the next Job Wizard screen.
Arrow Buttons
Job Wizard Step 1
3-8 TM-403 User’s Guide
Job Tab D292105.6a.fm
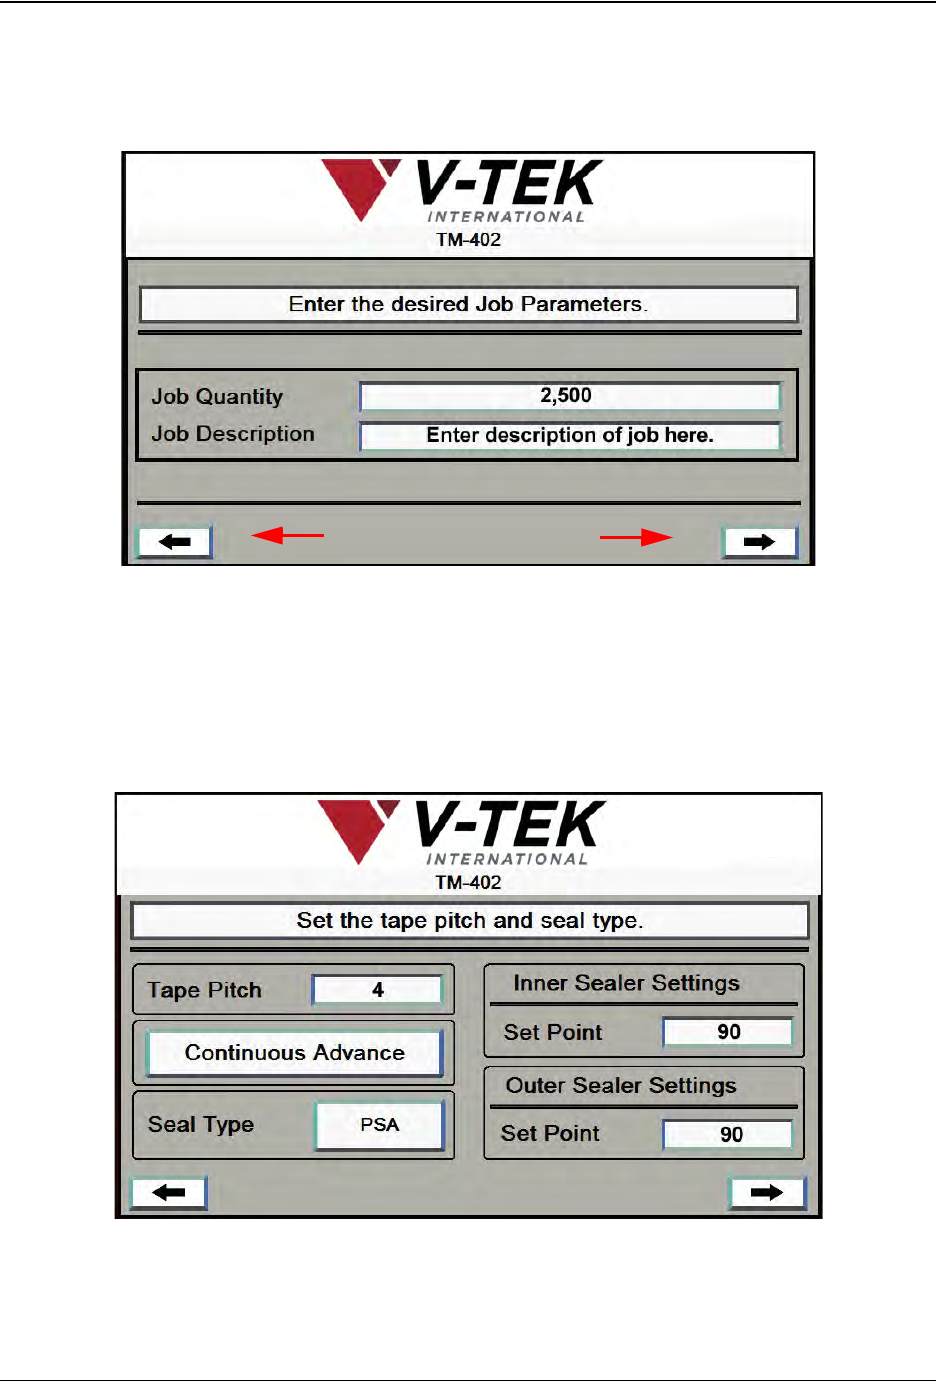
2. In the second Job Wizard screen the user enters the Quantity of parts that will be run and
a brief Description of the job. When the job parameters are set, press the right Arrow
key to move to the next Job Wizard screen.
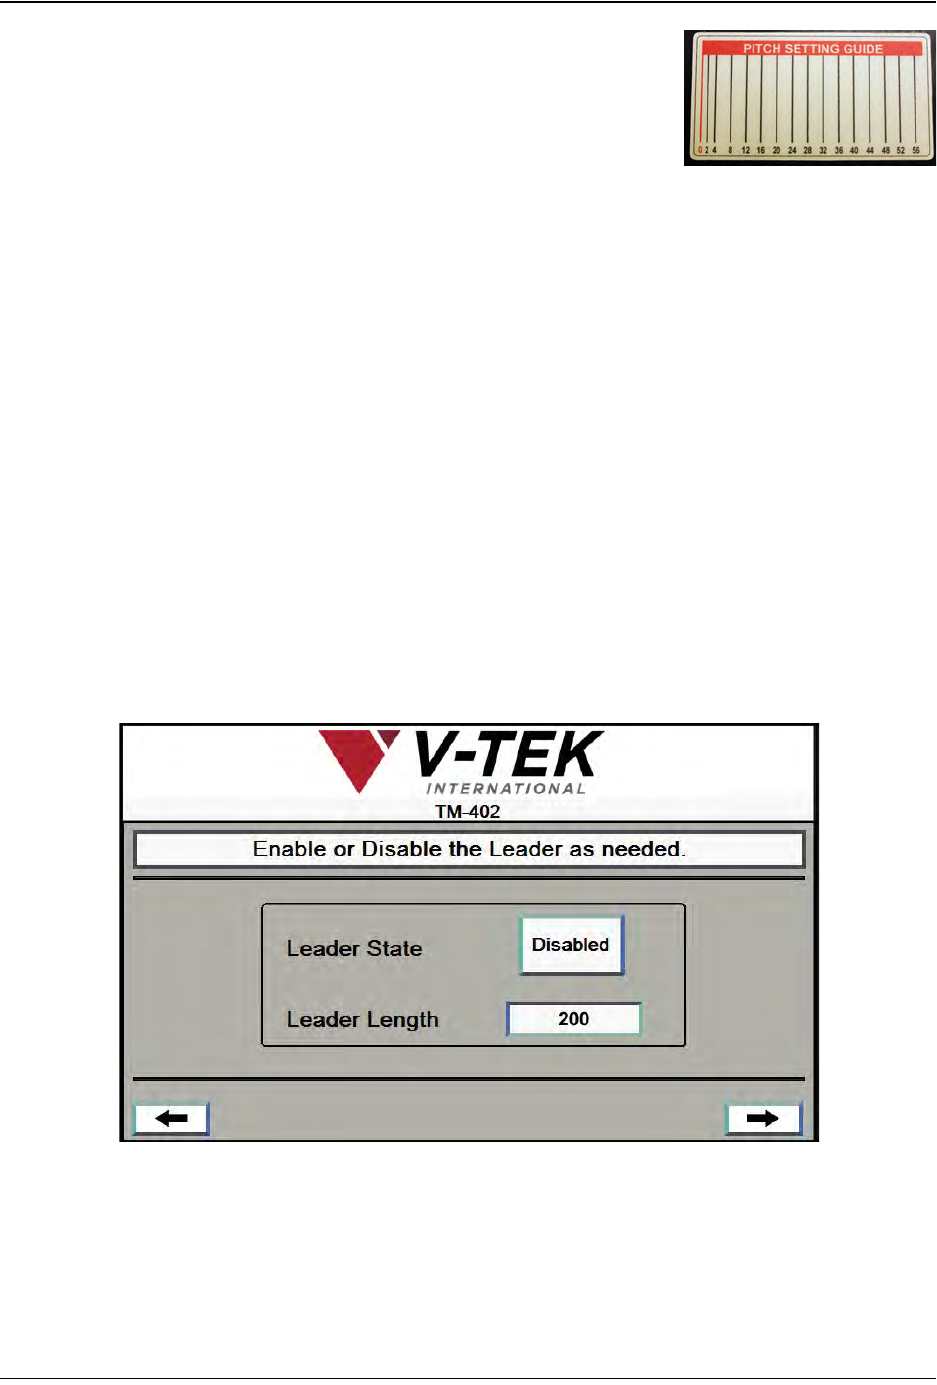
3. The third Job Wizard step sets up Taper operation.
Arrow Buttons
Job Wizard Step 2
A
C
Job Wizard Step 3
D
D
B
D292105.6a.fm Job Tab
Chapter 3: Human Machine Interface 3-9
A. Tape Pitch is determined by the carrier tape
selected. Use the Pitch Setting Guide on the taper to
determine the correct pitch. Press the Tape Pitch
field to open a keypad and type in the desired value.
B. The Continuous Advance button advances the
tape through the Taper. It will continue to advance
until Continuous Advance is pressed a second time.
C. Seal Type toggles between PSA and Heat seal, select correct seal type.
D. The Set Point fields are only active when Heat Seal is selected. These fields are
used to set the desired temperature for the Inner and Outer Sealer. Enter the cor-
rect value in both fields, then press the right Arrow Key to move to the next Job
Wizard screen.
Note: The TM-402 accommodates a wide range of carrier tapes and cover tapes. Set-
tings may vary from one tape product to another. The recommended starting point is 90°
C. The maximum recommended operating temperature is 160° C. The temperature for
each seal shoe should be increased or decreased as needed after running a peel force
test.
4. The fourth Job Wizard screen enables or disables the tape Leader.
A. Leader State toggles between Enabled and Disabled.
B. When the Leader State is set to Enabled, pressing the Leader Length field will
open a keypad. Type in the desired value, then press the right Arrow Key to
move to the next Job Wizard screen.
A
B
Job Wizard Step 4