编带机说明书-含图纸ttm402.pdf - 第53页
D292105.6a.fm Jo b Tab Chapter 3: Human Machine Interface 3-11 9. Press the right arrow key to move to th e next screen. A. Press Pick Extend t o lower the Nozzle to the Nest. The button will change to Pick Retract . Not…
3-10 TM-403 User’s Guide
Job Tab D292105.6a.fm
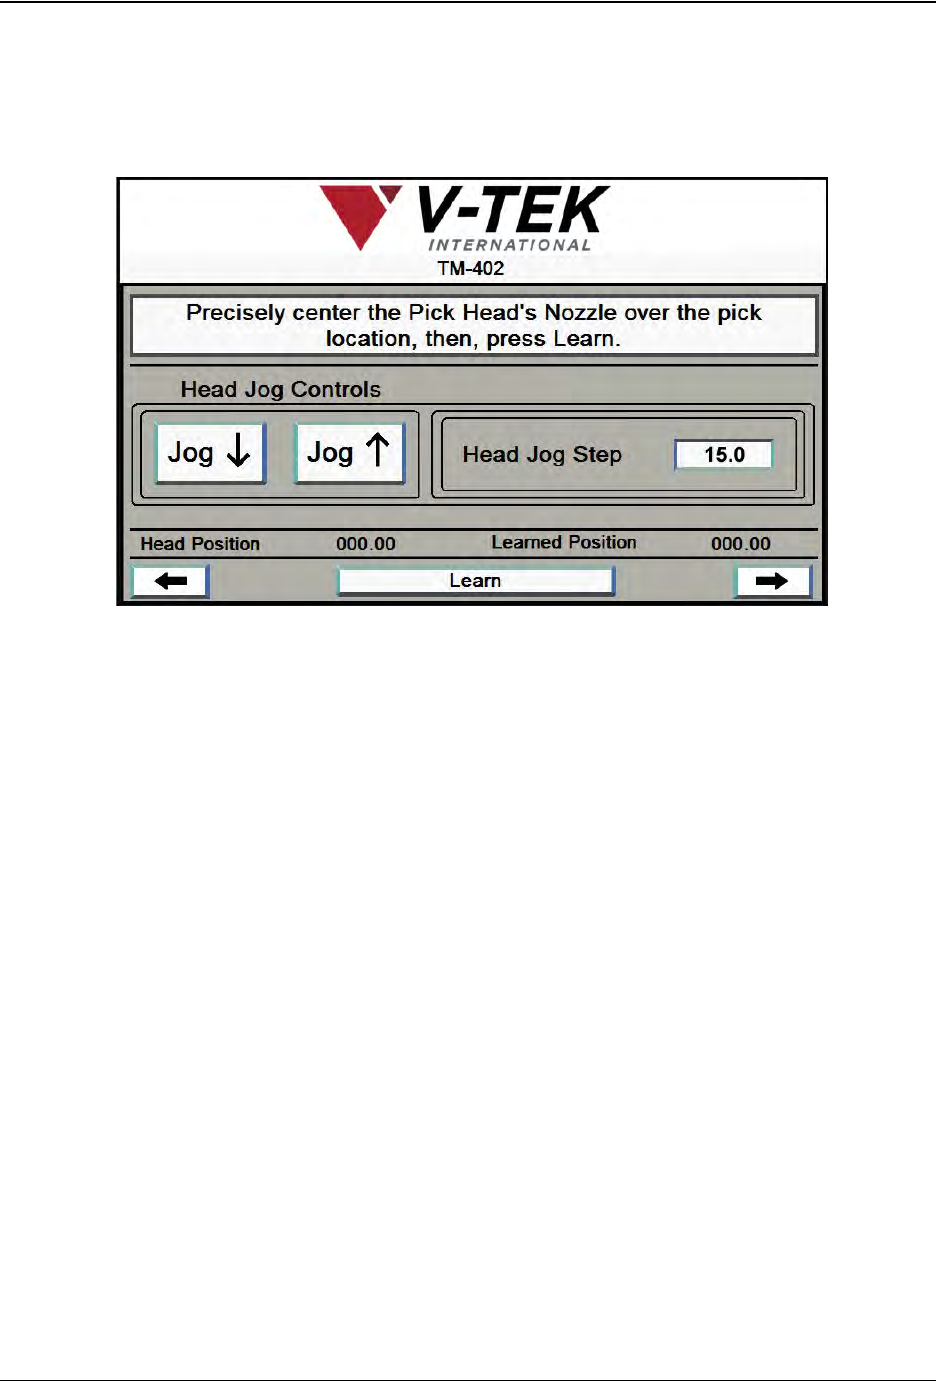
5. The next six Job Wizard screens are used to set the Nozzle positions at the Pick and
Place locations. The first is shown below.
A. Press the Jog buttons to move the Pick Head to the Bowl Feeder, centering it over
the Linear Track’s Nest in the pick position.
B. Adjust the Jog Step in the Head Jog Step field, if necessary.
C. Once the Pick Head is centered over the pick position, press Learn. The current
Nozzle position will be saved as the pick position for the current job and the
Learned Position will update to match the Current Position on the screen.
Job Wizard Step 5
A
B
C
D292105.6a.fm Job Tab
Chapter 3: Human Machine Interface 3-11
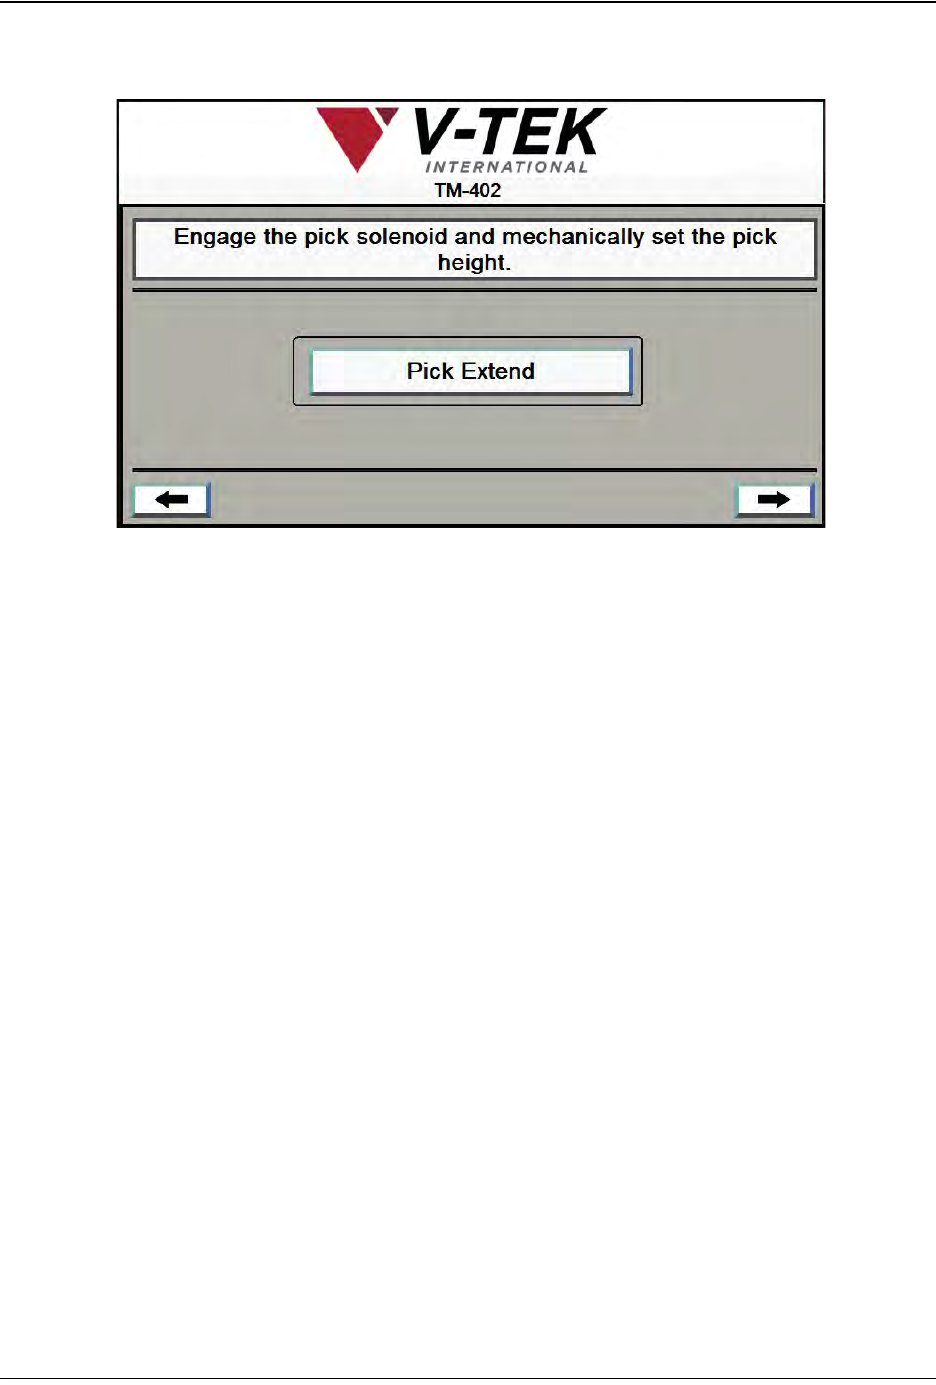
9. Press the right arrow key to move to the next screen.
A. Press Pick Extend to lower the Nozzle to the Nest. The button will change to Pick
Retract.
Note: Follow the directions in Chapter 4: Setup for manually adjusting the Pick Actuator
to set the correct Nozzle Height.
B. Once the nozzle height has been set, press Pick Retract to raise the Nozzle to its
original height. Index the Nozzle until it is once again at the origin position.
Job Wizard Step 6
3-12 TM-403 User’s Guide
Job Tab D292105.6a.fm
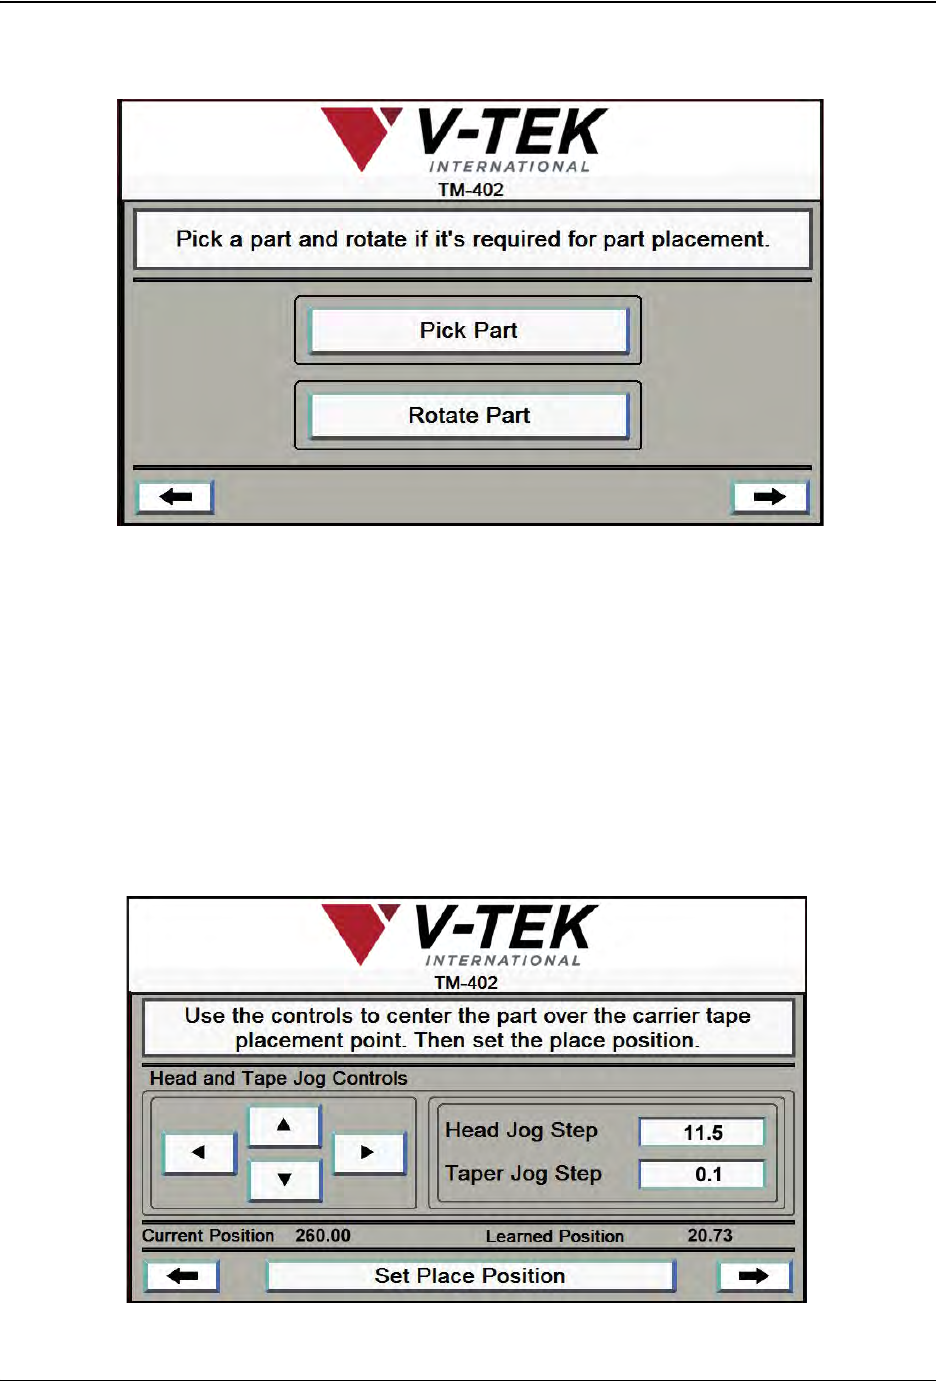
10. Press the right arrow key to move to the next screen.
A. Press Pick Part to pick a part from the nest.
B. If no rotation is required for part picking, skip this step. If part rotation is required
for picking, press Rotate Part to rotate the Nozzle 90°.
Note: Follow the directions in Chapter 4: Setup for manually adjusting the Solenoid to set
Pick Head Rotation.
11. Press the right Arrow Key to move to the next Job Wizard screen.
Job Wizard Step 7
A
B
A
C
Job Wizard Step 8
B