编带机说明书-含图纸ttm402.pdf - 第25页
D292105.4a.fm Unpacking the TM-40 2 Chapter 1: Assembly & Installation 1- 5 Unpacking the TM-402 Prior to shipment, the TM-402 is p artially disa ssembled, then shrink wra pped, placed in a crate, and strapped to the…

1-4 TM-403 User’s Guide
Preparing the Work Area D292105.4a.fm
When positioning the TM-402, choose an area that is not located below overhead gantries, walk-
ways or power lines to ensure objects or liquids cannot be dropped on the machine from over-
head.
Power Requirements
The TM-402 will also require access to a 85-110 PSI air pressure system and a 240 VAC, 50/60
Hz power supply. Locate the machine so electrical power cables can be routed away from areas
where personnel are expected to move.
Note: It is recommended that cables be routed overhead or underground. If cables must
be routed over the floor, cover them with rubber ramps.
D292105.4a.fm Unpacking the TM-402
Chapter 1: Assembly & Installation 1- 5
Unpacking the TM-402
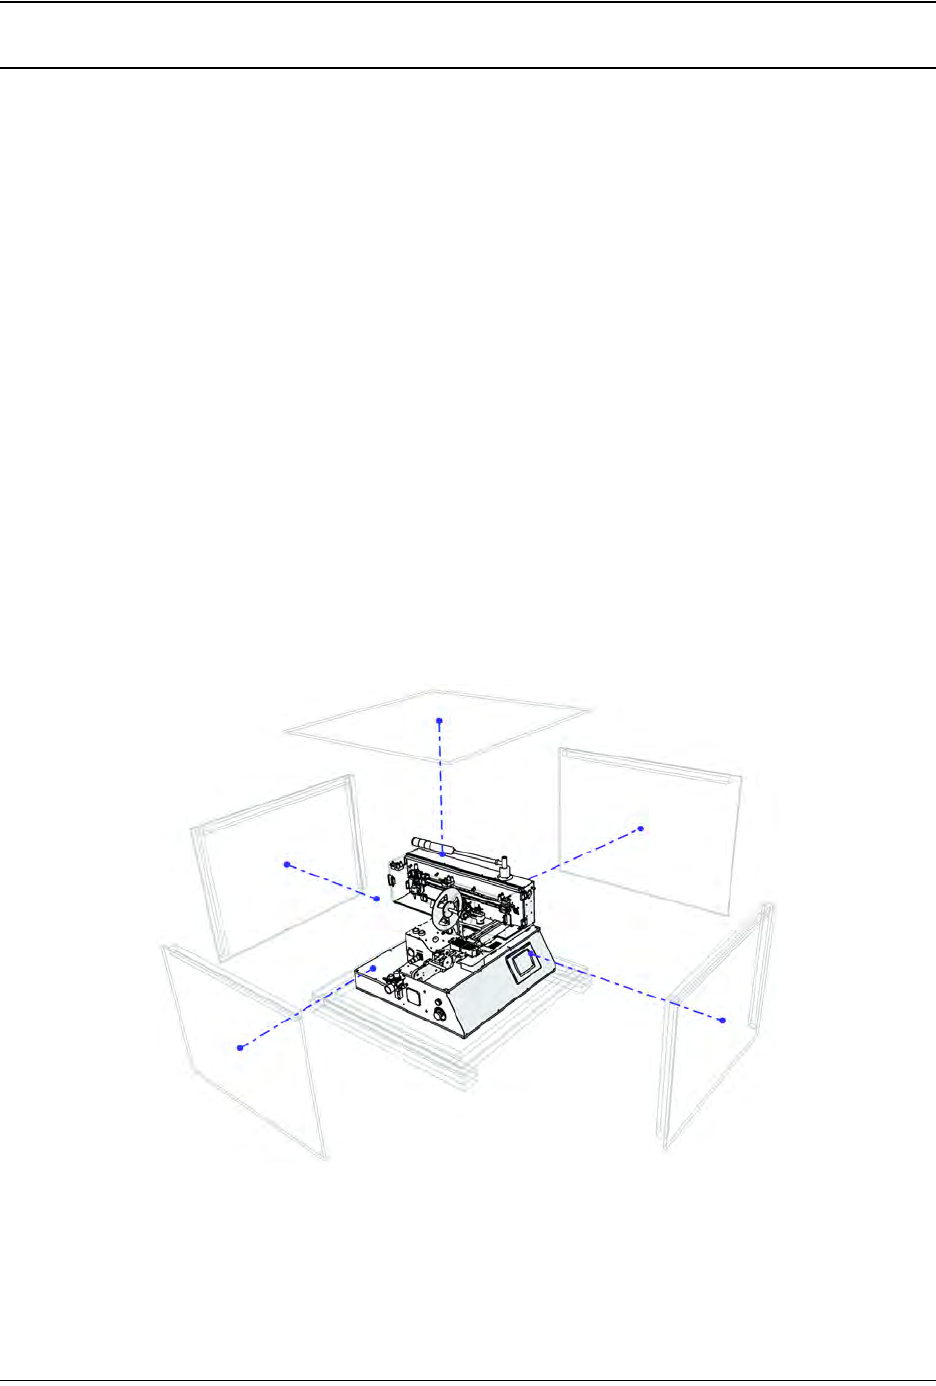
Prior to shipment, the TM-402 is partially disassembled, then shrink wrapped, placed in a crate,
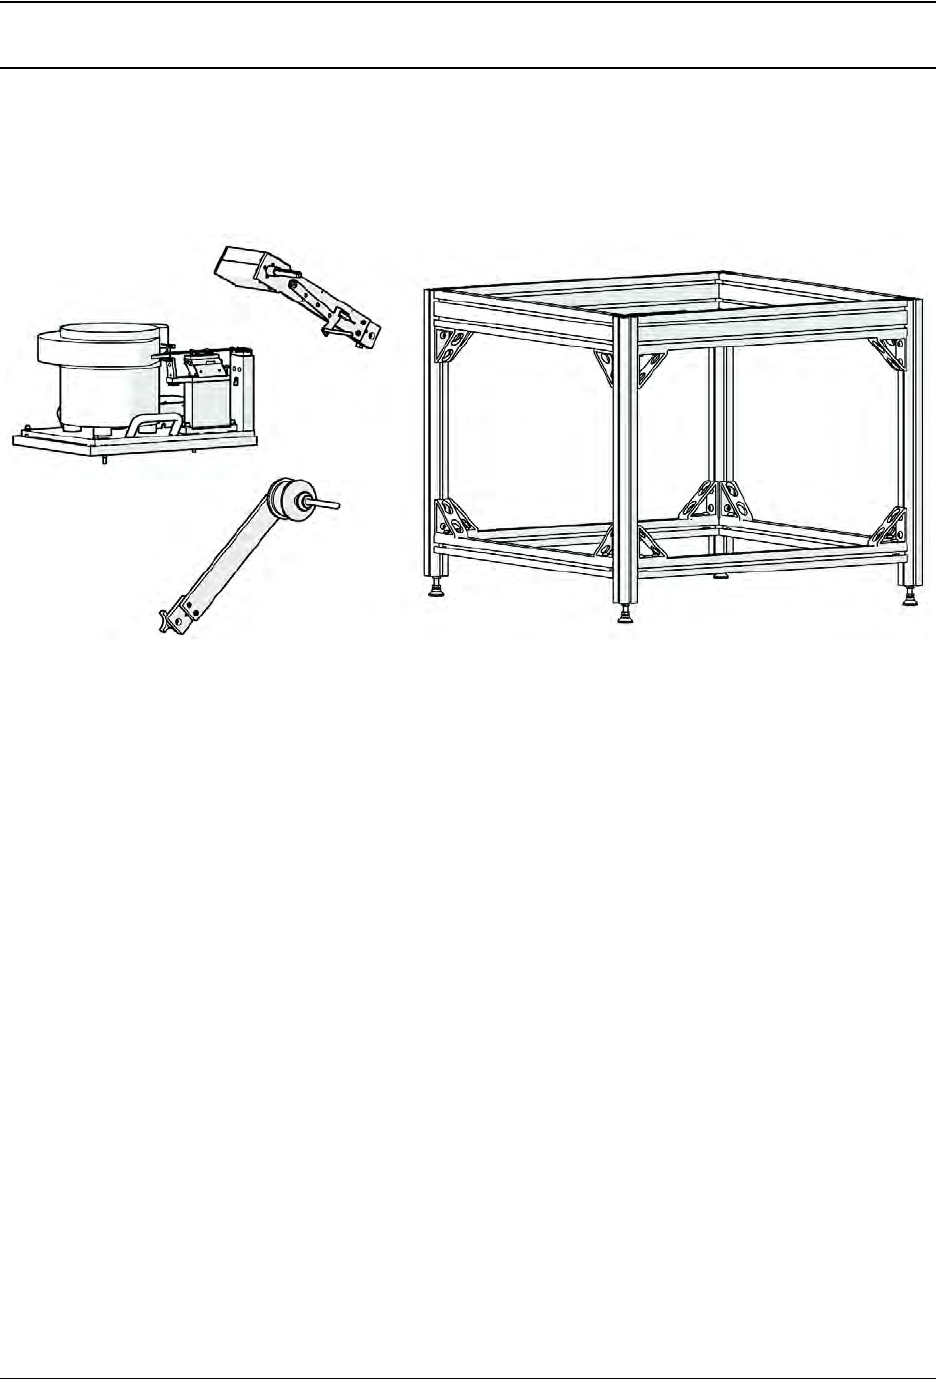
and strapped to the crate floor. The disassembled TM-402 parts, which include the Carrier Tape
Arm, the Take-up Assembly, the Bowl Feeder and the Spare Parts Kit, are individually bubble-
wrapped and packed around the base machine. The TM-402 crate should contain the base
machine along with the following items:
A. 240 Volt Bowl Feeder
B. Carrier Tape Arm
C. Take-up Arm
D. 80/20 Frame (optional, shipped disassembled)
E. Laptop Computer (optional, not pictured)
A User’s Guide, Standard and Metric Hex Wrench Sets, and a Spare Parts Kit are also
included but not pictured above.
Note: Bowl appearance will vary depending on part size to be processed and the bowl
which was selected at the time of purchase.
A
B
D
C
1-6 TM-403 User’s Guide
Assembling the TM-402 D292105.4a.fm
Assembling the TM-402
Equipment Required
• Adjustable wrench (needs to fit 1 1/16” to 1 3/32” nut)
• Standard and Metric Hex Wrench Sets (provided with machine)
• 85-110 PSI air pressure system
Note: Read the TM-402 User’s Guide before assembling the TM-402.
Unpack the TM-402 Crate
1. Move the Crate to the Work Area. Use a fork lift to move the TM-402 crate to the pre-
pared work area. Ensure the fork is centered under the crate before lifting.
Note: Use a forklift with a minimum load capacity of 300 pounds (136 kg) and a fork
length that is a minimum of 40 inches (102 cm) so the fork fully extends beyond the crate
on the other side. The forklift should only be operated by a licensed/certified operator.
2, Unpack the Crate.
a. Remove the top and sides from the TM-402 crate. Set aside.
b. The TM-402 is shipped partially disassembled, with the Bowl Feeder, Take-up Arm
and Carrier Tape/Feed Arm detached and wrapped in bubble wrap. Remove the smaller
items one at a time from the crate and place on a flat, stable surface for assembly.
c. Remove and discard the protective wrapping from each part.