00194440-10_SM_X-Series_Customer_en.pdf - 第127页
Service Work 3.4.2 Replacing the CPP Head Placement heads Service Manual SIPLACE X Series 127 3.4.2 3 . 4 . 2 R e p la c in g t h e C P P H e a d Replacing the CPP Head Parts, equipment and tools ▪ CPP placement head wit…
Service Work
Placement heads 3.4.1 Fast Head Exchange
126 Service Manual SIPLACE X Series
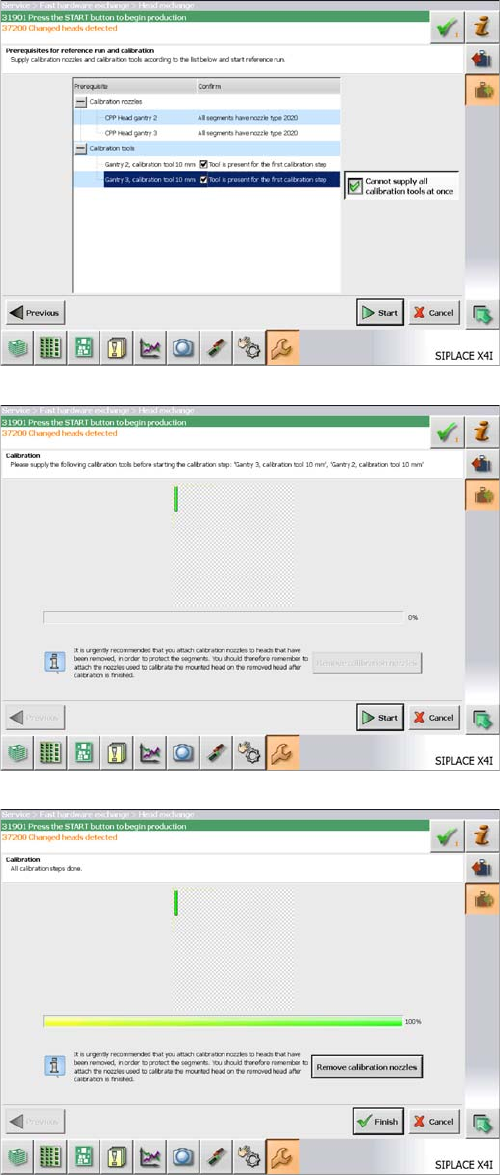
► The presence of calibration nozzles is checked here.
Make sure that the head is equipped with calibration
nozzles.
► If there is no calibration tool present for each head,
click on the "Cannot supply all calibration tools at
once button". You will be prompted to provide the cal-
ibration tool for each head individually.
► Click on "Start". A complete reference run will be car-
ried out.
► Provide the necessary calibration tools and click on
"Start". The calibration will be started.
► If there is an empty magazine in the machine after the
calibration has been completed, select the "Remove
calibration nozzles" button.
► Click on "Finish".
► If there are any problems during the reference run
(vacuum check), perform the "zero correction" for the
pressure control valve.
The Fast Head Exchange has now been completed and
production can be restarted.
Service Work
3.4.2 Replacing the CPP Head Placement heads
Service Manual SIPLACE X Series 127
3.4.2
3.4.2 Replacing the CPP Head
Replacing the CPP Head
Parts, equipment and tools
▪ CPP placement head with camera SST29 [03070108-xx] or
CPP placement head without camera [03053528-xx]
▪ Torque screwdriver 100-500 Ncm [03078400-xx]
▪ Extension/straight TX20 [03073256-xx]
▪ Bit holder for Torque Vario-S screwdriver [03078706-xx]
▪ Component sensor protective cap [03080984-xx]
▪ Torx Allen screwdriver TX8 [03080081-xx]
▪ Calibration tool version 3 [03010565-xx]
▪ Calibration tool version SST23 [03034148-xx]
▪ For additional work to the placement head:
Service manual "C&P head" [DE: 00197462-xx]. [EN: 00197463-xx]
Overview
NOTICE
Fast Head Exchange (FHE)
► Observe the instructions in section "3.4.1 Fast Head Exchange" [➙122] when exchanging
a head.
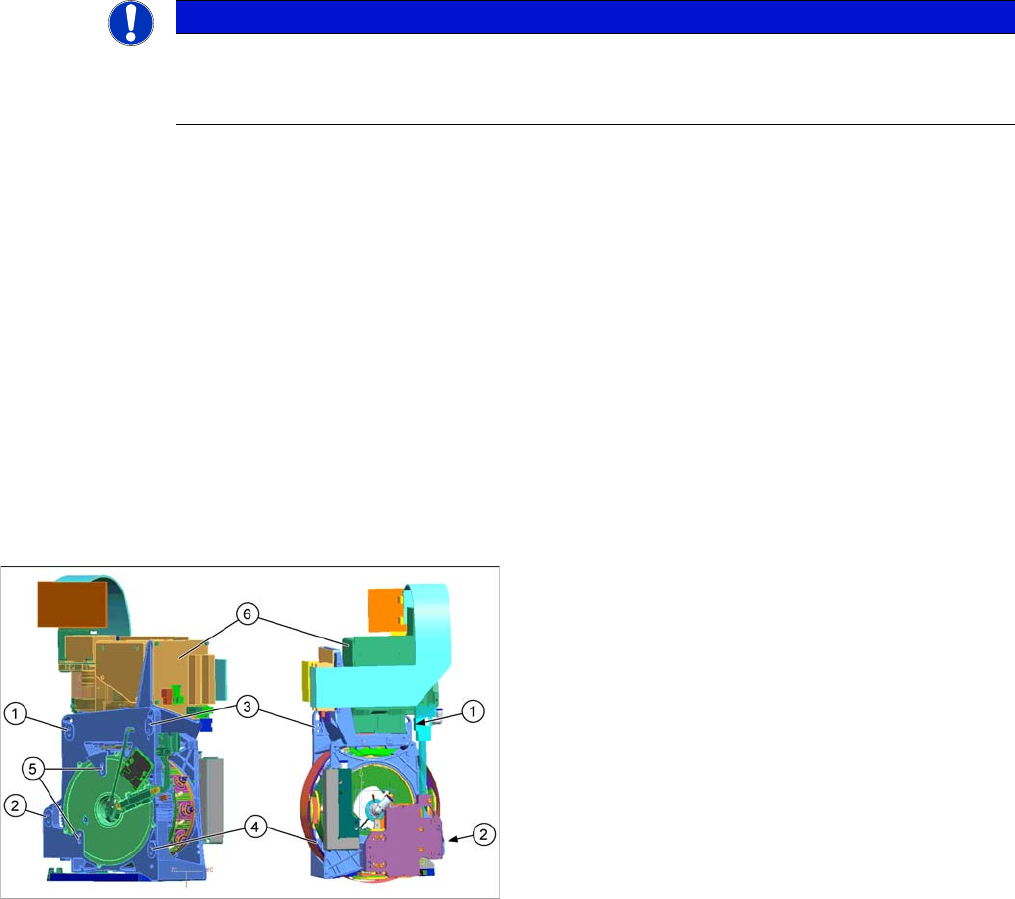
1 to 4: Fixture holes (two each, depends on installation
height).
5: Dowel holes for the index pins
6: Component camera
Service Work
Placement heads 3.4.2 Replacing the CPP Head
128 Service Manual SIPLACE X Series
Removal
► Switch off the machine, disconnect it from the power supply and secure it to prevent unauthorized
reactivation. Observe the instructions in section "1.2 Preparatory Work..." [ ➙ 15].
► Loosen all four screws fastening the head with a long Torx screwdriver.
CAUTION
Take great care when dismantling the placement head!
The component sensor prisms, underneath the placement head, could be damaged.
► Never place the CPP head down on the component sensor.
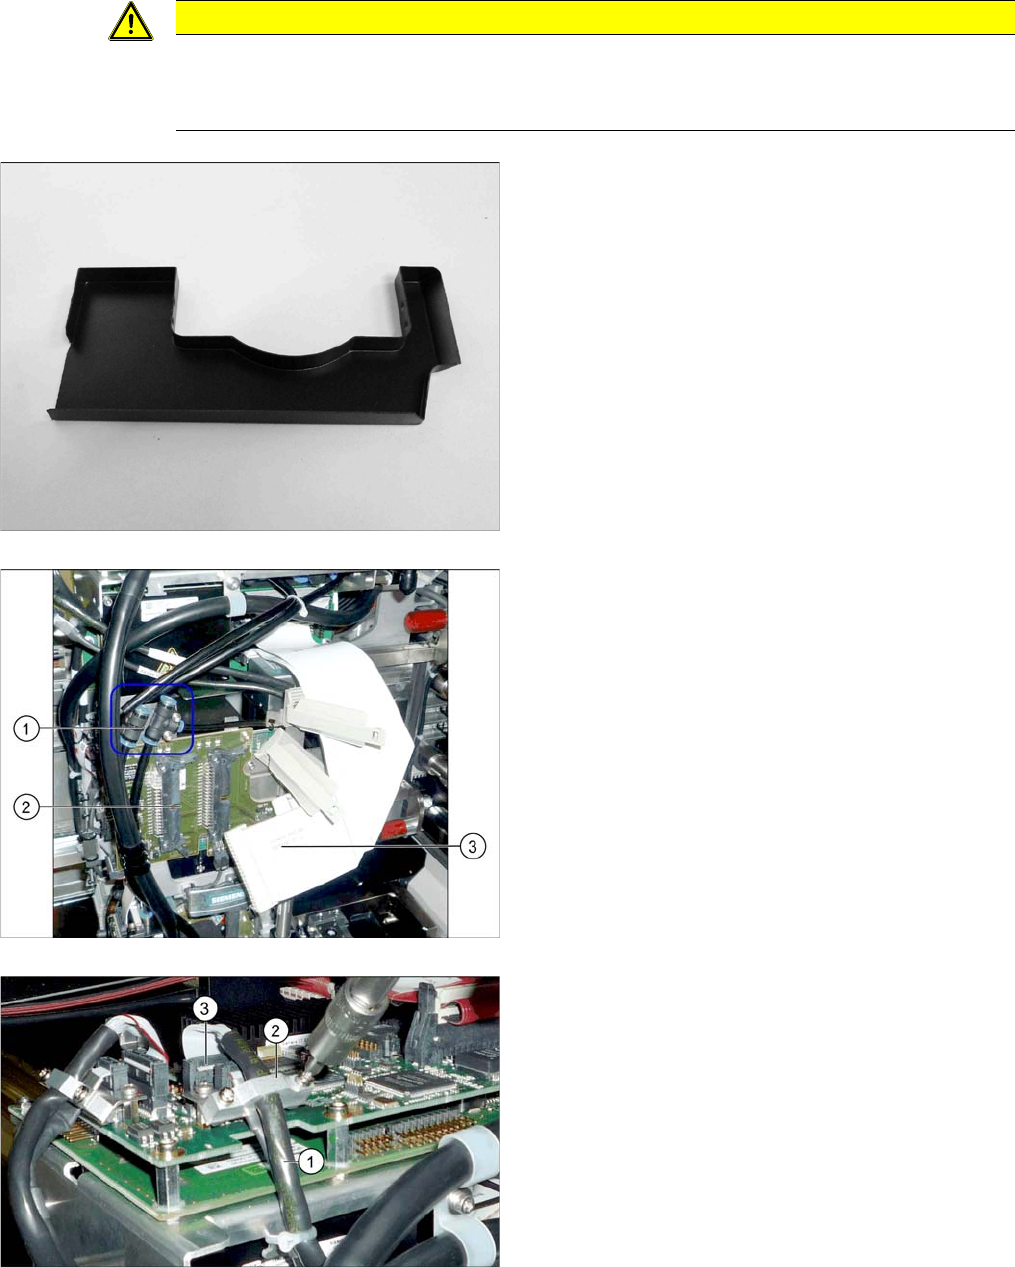
► Fit the protective cap onto the component sensor for
the placement head.
► Unplug the compressed air connections (1) from the
placement head. You may want to mark the positions,
to make clear assignment easier later on.
► Disconnect the flat ribbon cables (3) from the inter-
mediate distributor (2). You may want to mark the po-
sitions, to make clear assignment easier later on.
► Loosen the screws fastening the strain relief (2) on
the component camera cable (1) and carefully unplug
the cable. While unplugging the cable, press the
clamps on both sides of the connector (3). You may
want to mark the positions, to make clear assignment
easier later on.