00194440-10_SM_X-Series_Customer_en.pdf - 第60页
Service Work Electrics and Control 3.1.4 Replac ing the Axis Unit with Adapter Cable (X, D Series) 60 Service Manual SIPLACE X Series Installation ► Dismantle the flat ribbon cable cla mps (2) by loosen - ing the two scr…
Service Work
3.1.4 Replacing the Axis Unit with Adapter Cable (X, D Series) Electrics and Control
Service Manual SIPLACE X Series 59
Removing the old axis unit
CAUTION
Labeling the connectors
When you disconnect connectors, always label their positions to ensure correct reconnection
later!
CAUTION
Make sure you do not damage any cables.
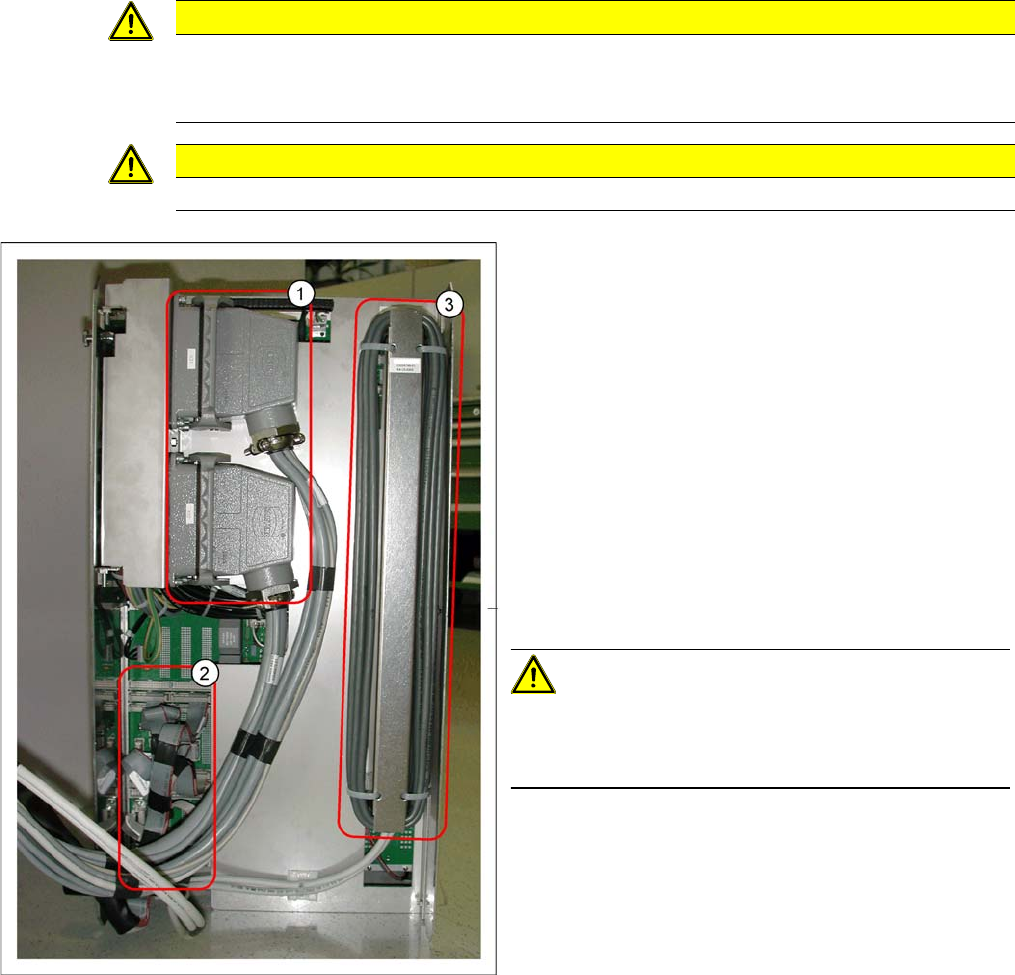
1. Harting connector
2. Flat ribbon cable
3. Ballast resistance
To remove the old axis unit, proceed as follows:
► Switch off the machine.
► Remove the protective cover above the axis unit, to
give you access to the axis unit.
► Pull the axis unit out of the machine.
► Lift the axis unit out of its guidance and place it down
on the ground.
► Unplug the Harting connector (1).
► Unplug all flat ribbon cables (2).
CAUTION!
Labeling the connectors
Label all flat ribbon cables to ensure correct reconnection
to the new axis unit, later on!
► Lift the ballast resistance (3) up and out and then un-
plug its connectors from the axis unit.
Service Work
Electrics and Control 3.1.4 Replacing the Axis Unit with Adapter Cable (X, D Series)
60 Service Manual SIPLACE X Series
Installation
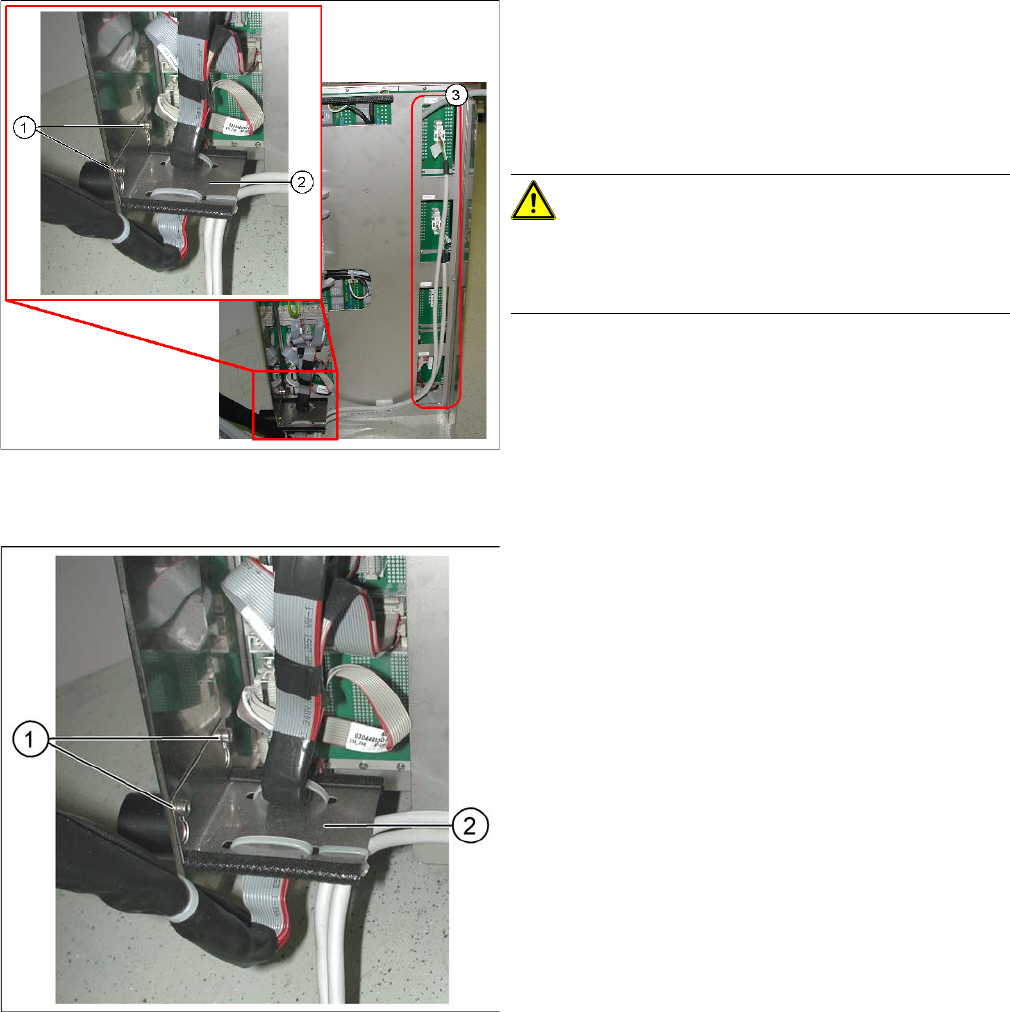
► Dismantle the flat ribbon cable clamps (2) by loosen-
ing the two screws (1) concerned.
► Unplug the two or four connectors (3). The number
depends on the machine type. If the cables are fixed
with cable clamps to the axis unit, disconnect these
as well.
CAUTION!
Labeling the connectors
Label all connectors to ensure correct reconnection to the
new axis unit connections, later on!
► Connect the flat ribbon connectors leading from the
machine to the relevant connection points on the new
axis unit. The connectors should be connected to the
same points as they were in the old axis unit.
► Fit the flat ribbon cable clamps (2) with the two
screws provided (1) to the new axis unit.
Service Work
3.1.4 Replacing the Axis Unit with Adapter Cable (X, D Series) Electrics and Control
Service Manual SIPLACE X Series 61
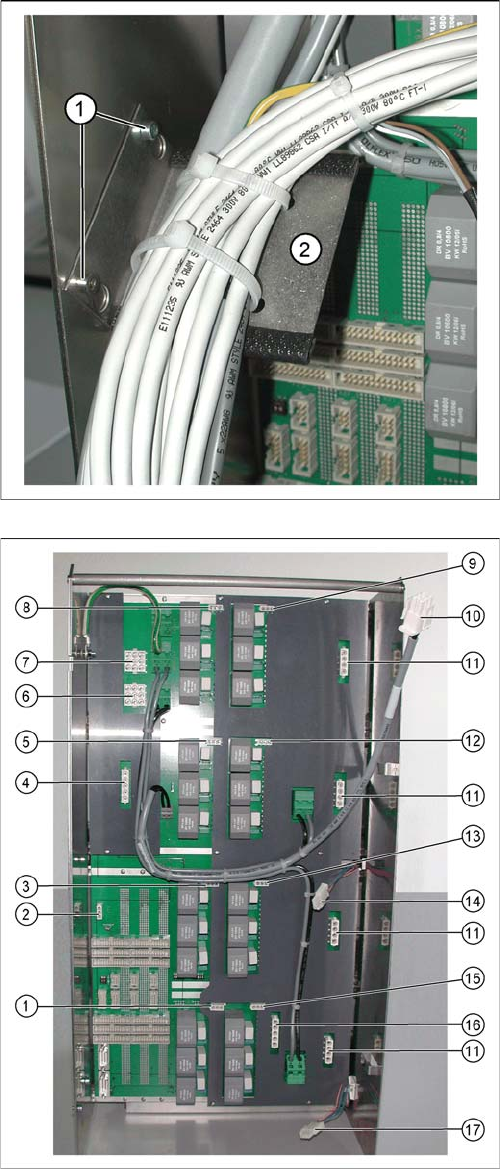
► Fit the adapter cable harness (2) holder to the left in-
side panel of the axis unit, with the two screws
provided (1).
Axis unit, new
► Connect the adapter harness connectors to the con-
nection points in the new axis unit, as follows:
1. Connection for connector X11_3*q
2. Connection for connector X47*q
3. Connection for connector X08_3*q
4. Connection for connector X46*q
5. Connection for connector X09_3*q
6. Connection for connector X42_1*q
7. Connection for connector X41_1*q
8. Connection for connector X04_3*q
9. Connection for connector X03_3*q
10. Connection for the ballast resistance
11. Four connections X and Y motors for the connectors
(from top to bottom) X4tr, X4tt, X4ur and X4ut.
Two or four connections are used, depending on the
machine type.
12. Connection for connector X10_3*q
13. Connection for connector X07_3*q
14. Connection for connector X1we
15. Connection for connector X12_3*q
16. Connection for connector X45*q
17. Connection for connector X2we
► Reconnect the cables for the X and Y motor (11) con-
nections with cable clamps, to the back of the axis
unit.