YSP20_Users_E.pdf - 第104页
4-12 4 aily operation 6. Refilling the cleaning solvent 6.1 Precautions when handling cleaning solvent w W ARNING …
4-11
4
aily operation
5
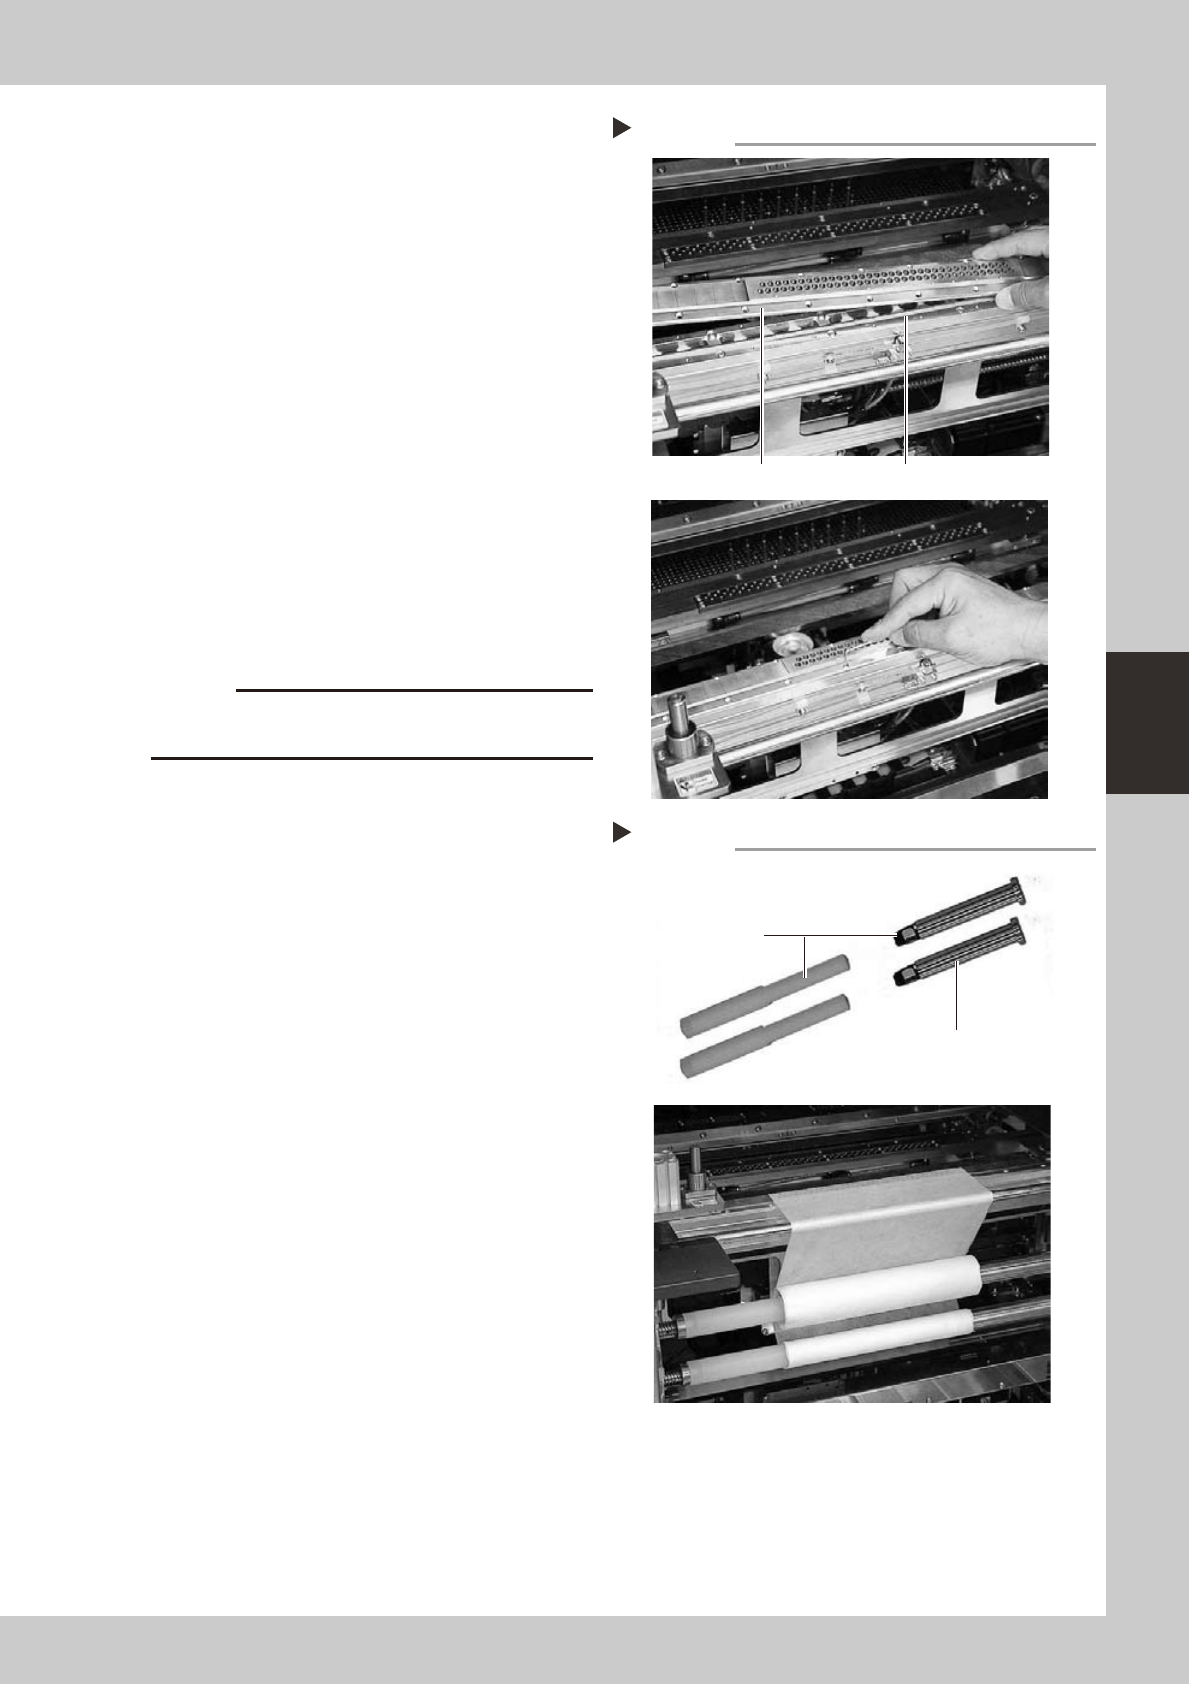
Install a new plate.
Next, install a plate suitable for the roll sheet
width to be used.
63408-N3-00
6
Insert the shaft holders into the roll
on the feed side (upper side).
Insert the shaft holders into both sides while
carefully checking the direction of the roll
sheet.
7
Install the roll on the take-up side
(lower side).
Insert the shaft holders onto the roll core in
the same manner as described for the feed
side and install the roll at the set position.
63409-N3-00
8
Feed the gauze roll through the
guides.
Feed the gauze roll through the guides while
keeping the parallelism between the left
and right.
c
gauze roll.
9
Attach the top end of the new
gauze roll onto the roll core
inserted onto the take-up shaft.
Fasten the top end of the new gauze roll
with an adhesive tape or similar item so that
both ends feed in parallel with each other.
After that, turn the take-up shaft 2 or 3
rotations to wind up the gauze roll.
0
Close the cover and press the
[READY] button.
Mounting a new plate.
Step 5
Plate (for replacement) Portion where the solvent accumulates.
Mounting the adaptor (shaft holder).
Step 7
Roll adaptor on drive side
(Shaft holder)
Insert this part onto
the roll core.
4-12
4
aily operation
6. Refilling the cleaning solvent
6.1 Precautions when handling cleaning solvent
w
WARNING
w
WARNING
w
WARNING
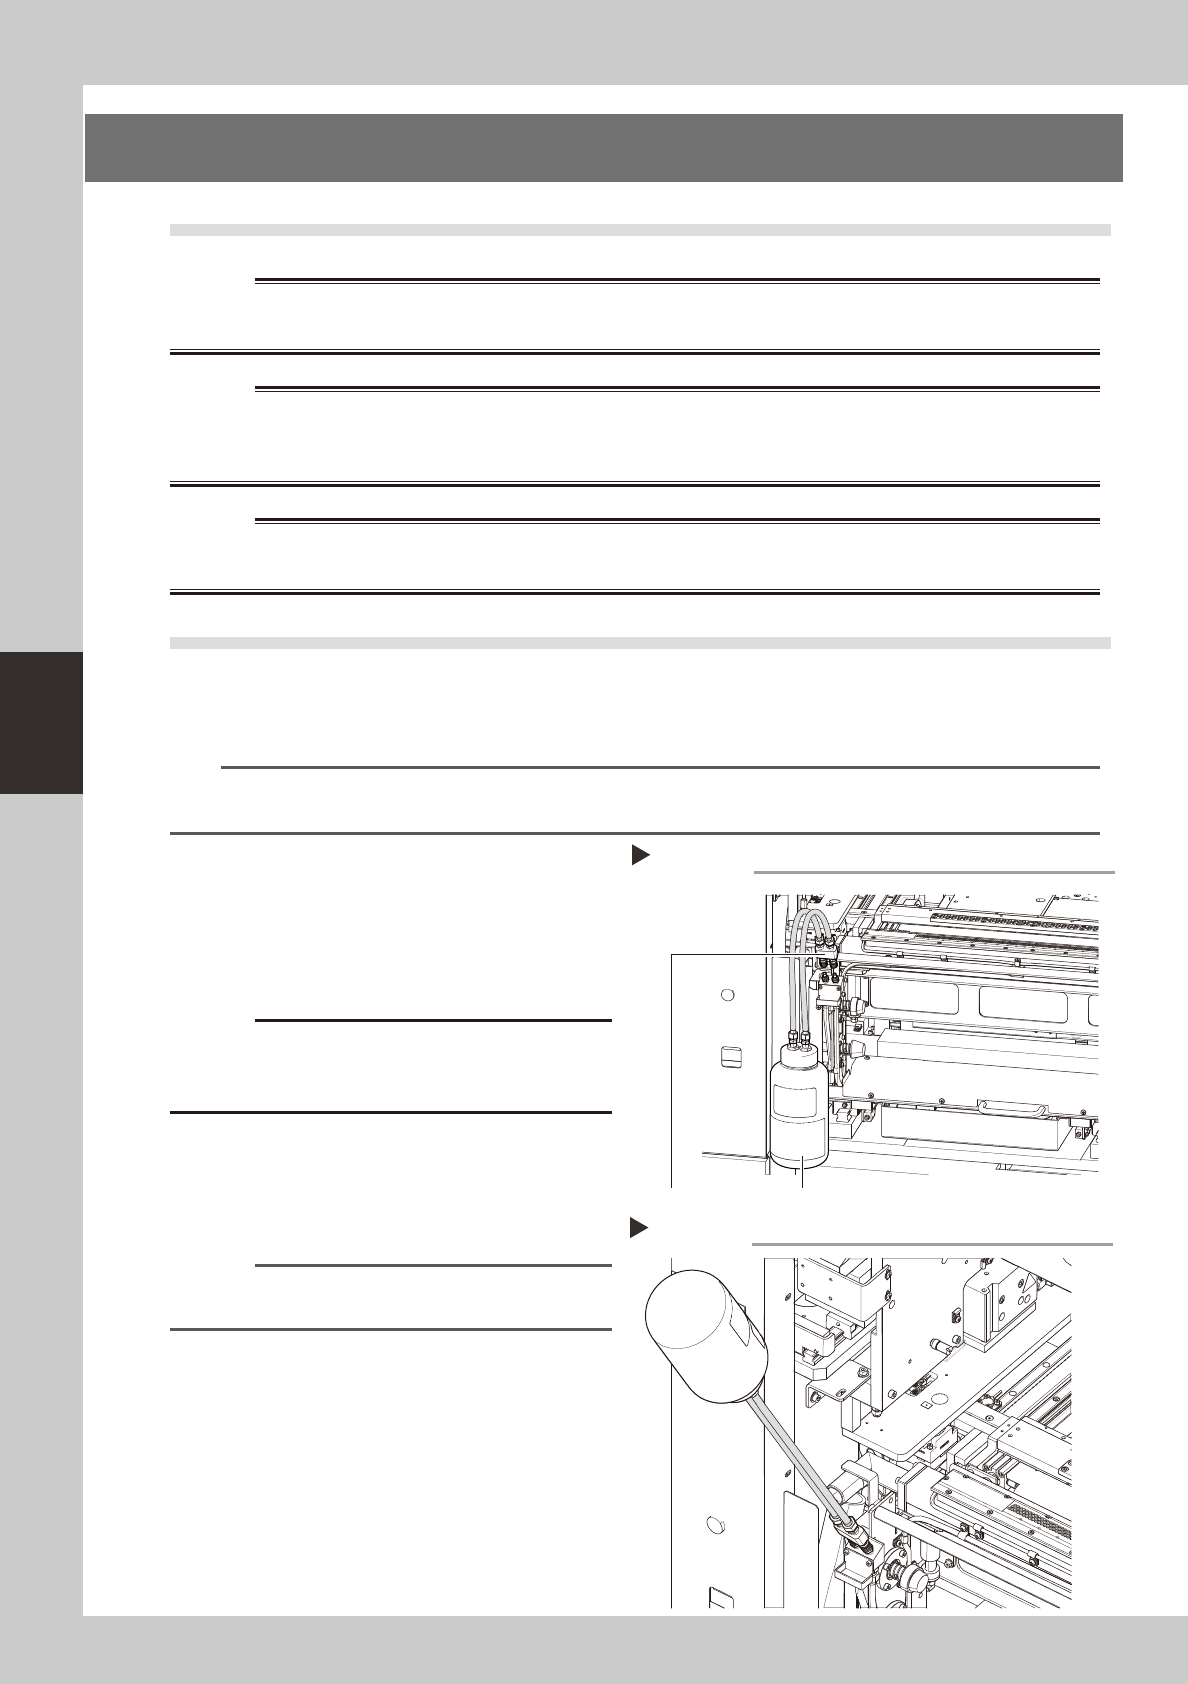
6.2 Refilling the cleaning solvent
When the remaining volume of the cleaning solvent is low, the cleaning solvent does not reach the pump. If
this happens, the error screen appears and the wet cleaning cannot be performed. Follow the steps below to
refill the cleaning solvent using the special tool.
n
NOTE
Before beginning work, fill up the solvent refilling bottle to make it easier to refill the solvent. Also make sure the bottle
cap is tightly closed.
1
Open the cover.
1. On the Setup screen, press the [SW Prod.
Position] button and select “Mask Setup”.
2. When the DOOR LOCK lamp turns off,
open the cover.
c
operation. Use it only when you want to stop the
machine immediately in case of emergency.
2
Insert the nozzle into the joint.
Insert the nozzle of the refill tool (solvent refill
bottle) filled with solvent into the refilling
joint of the solvent tank.
n
NOTE
In the case of machines of right-to-left flow, the refilling
joint is located on the front left and rear right.
64410-N3-00
3
Pour the solvent into the tank.
Pour the solvent into the tank by inverting
the bottle as shown.
63411-N3-00
Inserting the nozzle
Step 2
Bottle for refilling solventJoint
Refilling the solvent
Step 3
4-13
4
aily operation
4
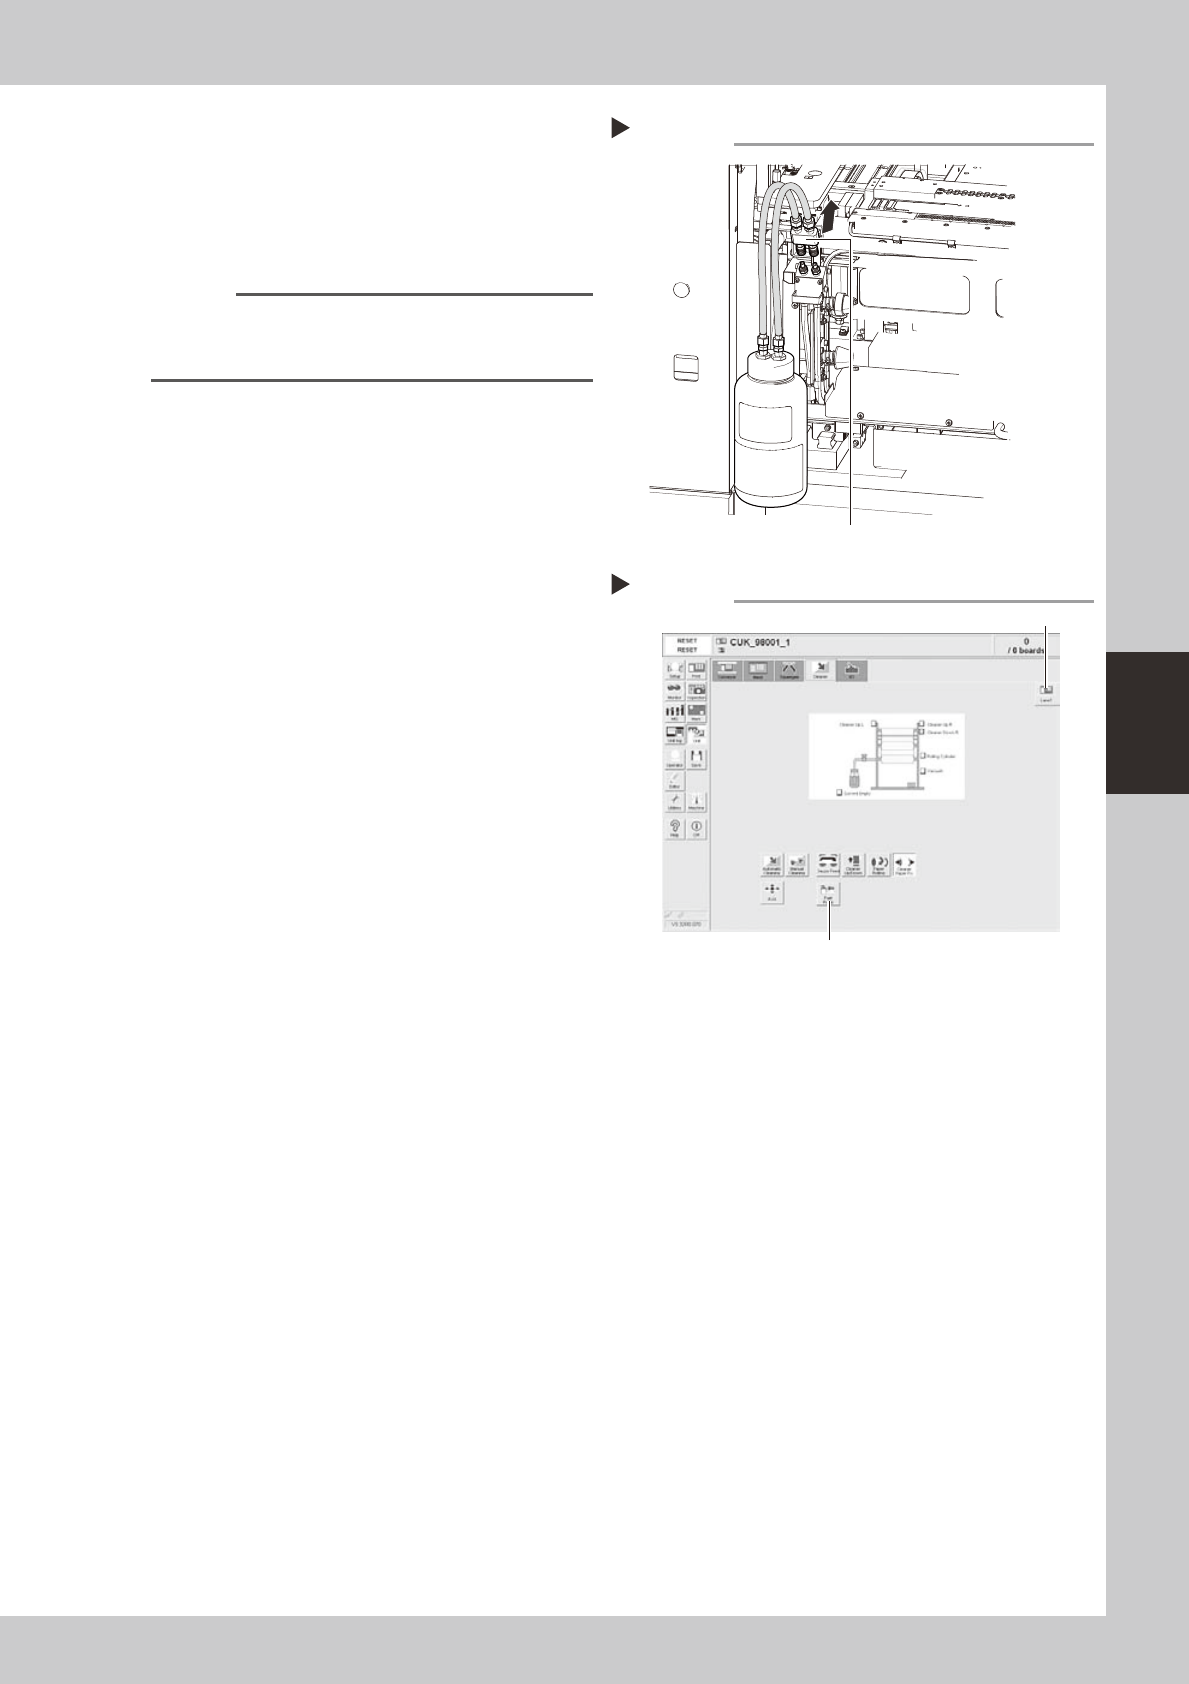
Disconnect the refill tool.
When the tank has been refilled with the
solvent completely, the solvent supply from
the refill tool is stopped automatically.
Disconnect the refill tool from the joint.
63412-N3-00
n
NOTE
When removing the refill tool, hold the bottle upright as
shown on the right so that the solvent does not leak
out.
5
Close the cover and press the
[READY] button.
6
Supply the solvent to the solvent
arrival sensor.
1. Select the [Cleaner] tab on the [Unit]
screen.
2. Press the [Solvent Pump] button to supply
the solvent to the solvent arrival sensor.
3. Stop the pump when the solvent seeps
out to the gauze roll.
64408-N3-00
7
Check the solvent supply status.
Check that the yellow signal lamp on the
top of the machine is off and the "ERROR"
sign in the status area on the operation
screen has disappeared.
Disconnecting the nozzle
Step 4
Pull and disconnect the nozzle from the joint.
Solvent pump
Step 6
Press this button.
[Lane] button