YSP20_Users_E.pdf - 第188页
6-13 6 anaging the data 5 Pr ess the [New] button and designate the database number . When the dialog box for entering a database numb er appears, enter the database number where you want to store the data and press th…
6-12
6
anaging the data
2. Creating the user database
Registering marks in the user database will prove convenient if they are not included in the YAMAHA
database or they are used very frequently.
The user database should be registered in the user area of the database. The user database area can be
from No. 1 to No. 149 for the mark database. The registered data in this area will be retained even if the
software version is upgraded.
2.1 Copying the data into the database
To copy the component or mark data you created into the user database, follow these steps.
1
Select the board data name.
Press the [Board] button on the Setup screen and select the board data.
2
Open the Mark screen.
Press the [Mark] button in the main menu button area.
3
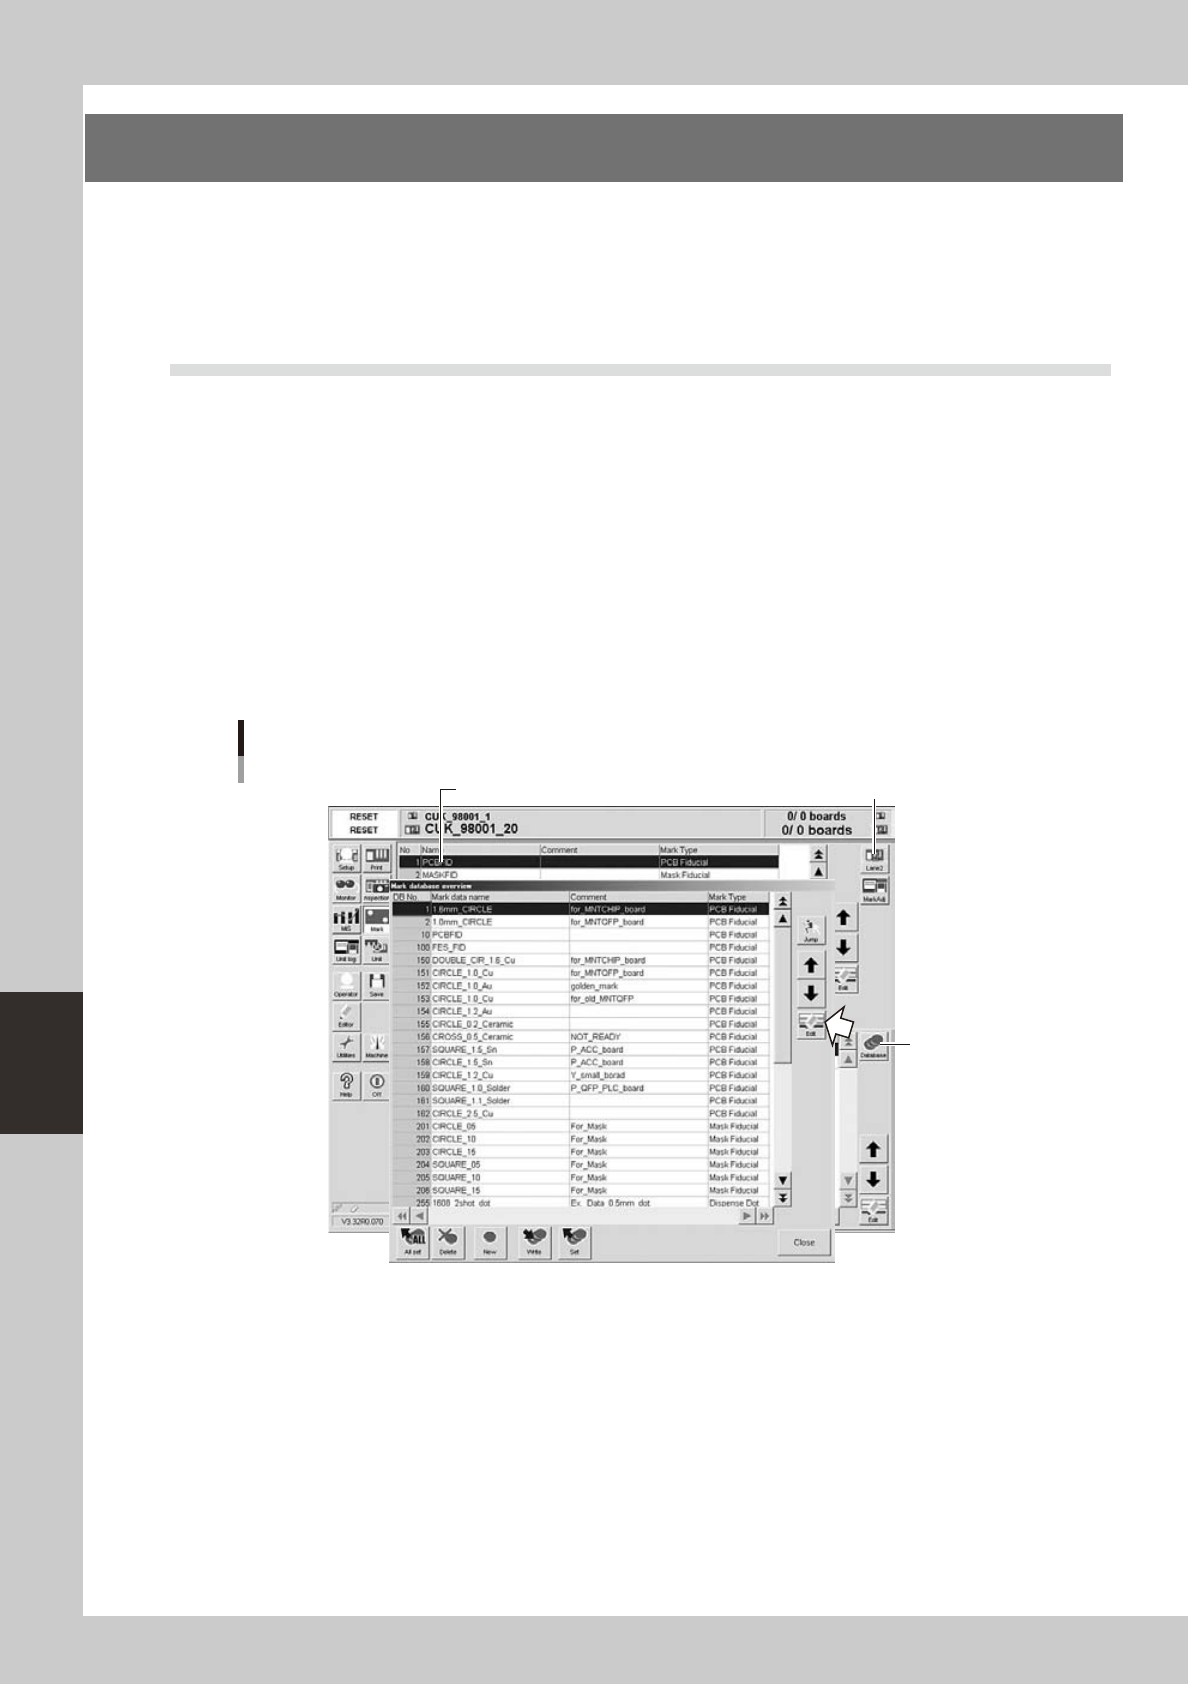
Select the copy source data.
Line up the cursor with the mark data you want to copy from.
4
Open the database list.
Press the [Database] button on the [Basic] tab. The database list appears.
Database list
Copy source
[Database] button
[Lane] button
64605-N3-10
6-13
6
anaging the data
5
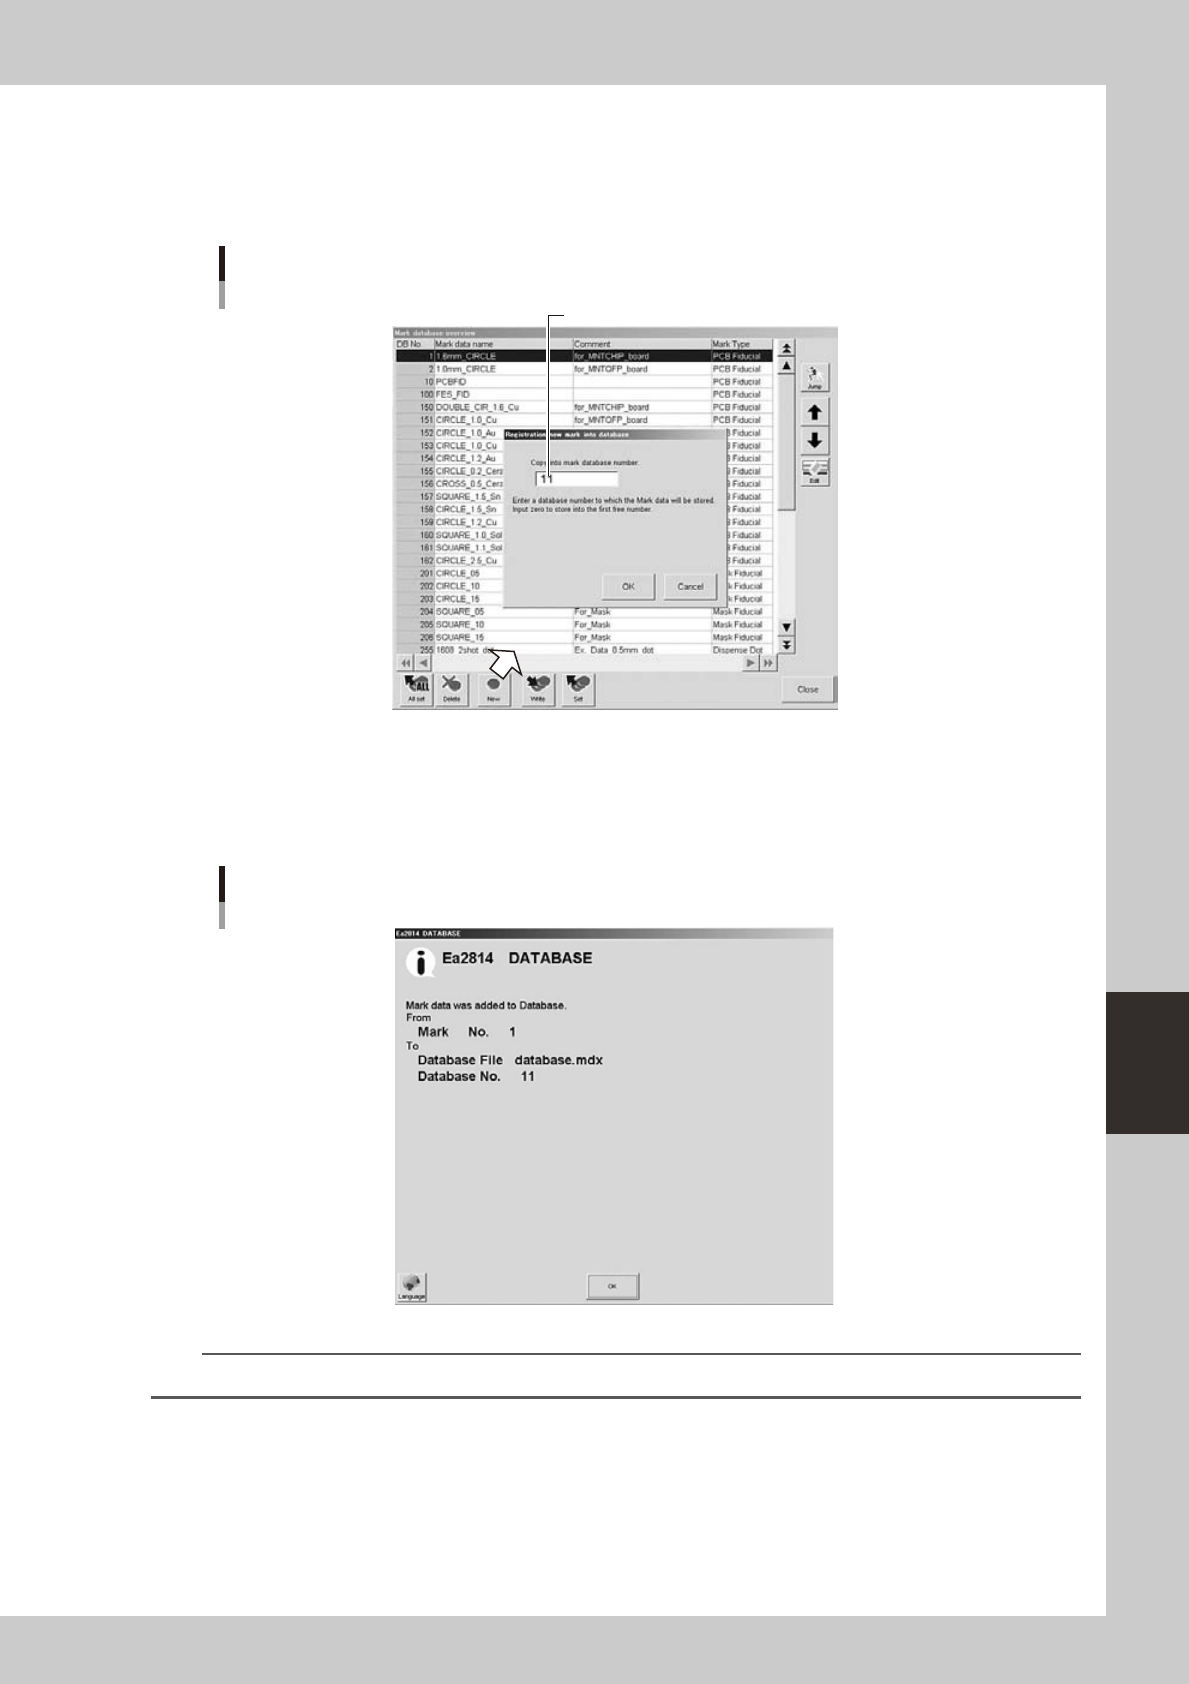
Press the [New] button and designate the database number.
When the dialog box for entering a database number appears, enter the database number where you
want to store the data and press the [OK] button.
When you enter “0” or leave it blank, the data will be stored in the first free number.
Database number input dialog box
Enter the database number where data should be copied.
64606-N3-10
6
Check the database information.
Check the message in the dialog box that appears, and press the [OK] button.
The data including the comment is stored and you will return to the database list.
Database registration message
64607-N3-00
TIP
Repeat the above procedure when you want to copy other data into the database.
7
Press the [Close] button to close the database list.
6-14
6
anaging the data
3. Production history
The YSP allows collecting, storing and displaying production history data such as various types of production
information and errors that occurred during automatic operation. This useful function allows you to evaluate
and improve daily operation conditions and also supports an automatic history data collection system using
an intra-network.
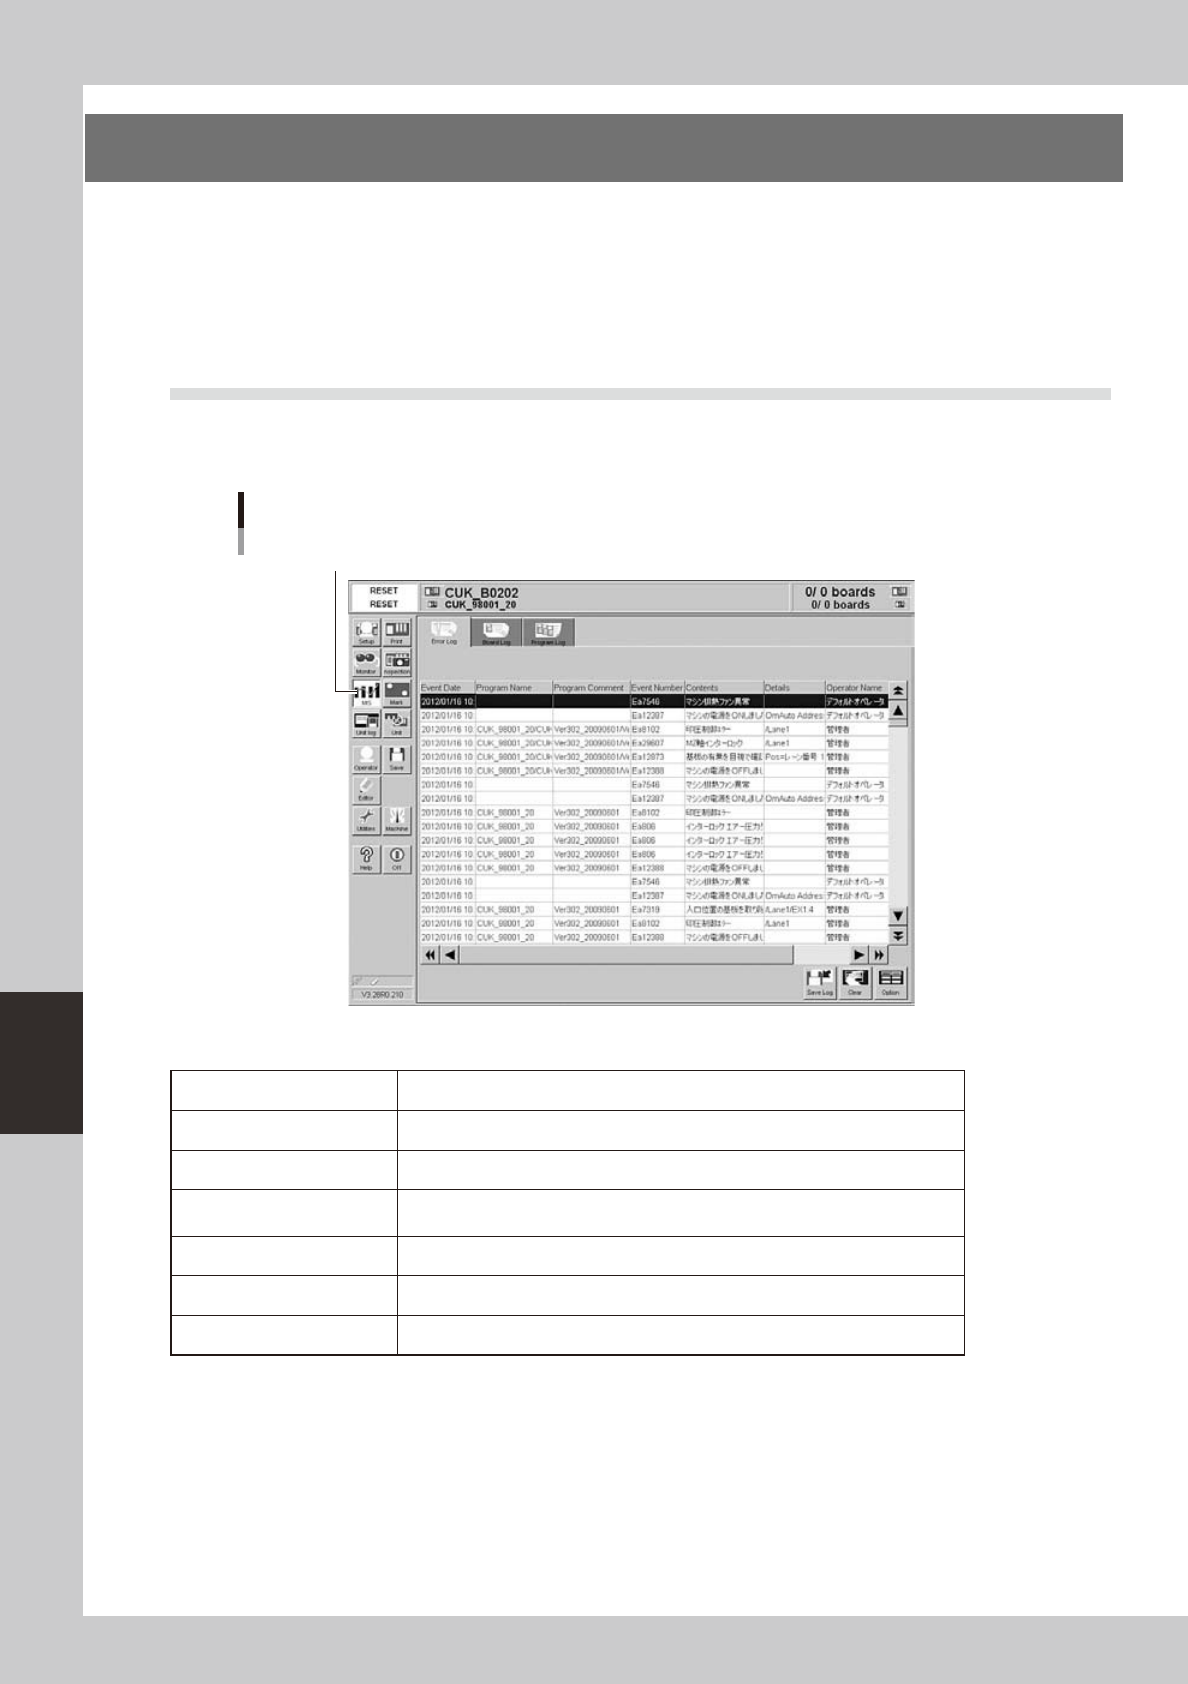
To check the production history data, press the [MIS] button on the main menu button area. Different types of
production history data are displayed by selecting the [Error Log], [Board Log] and [Program Log] tabs.
3.1 MIS: Error Log
Selecting the [Error Log] tab shows a list of errors that occurred in this machine, along with error descriptions
and operator names. One error or one operator is listed in one data row. Up to 1000 rows can be listed.
[MIS]-[Error Log] tab
[MIS] button
64608-N3-00
Each parameter item shows the following information.
Event Date Date and time when an error occurred.
Program Name Name of program being selected when an error occurred.
Program ID Comment of program being selected when an error occurred.
Event Number
Error code and number. The error code "Es" means a system error, and "Ea"
means an error relating to board data or operation.
Contents Description of error.
Details Detailed description of error such as location where error occurred.
Operator Name of operator who was operating machine when an error occurred.