YSP20_Users_E.pdf - 第226页
7-22 7 ther functions 4.3 [Unit]-[Mask] tab screen T he [Unit]-[Mask] tab screen allows you to manually operate the mask v acuum gripper and check the status of the mask sensors on the graphic view . T he function of e…
7-21
7
ther functions
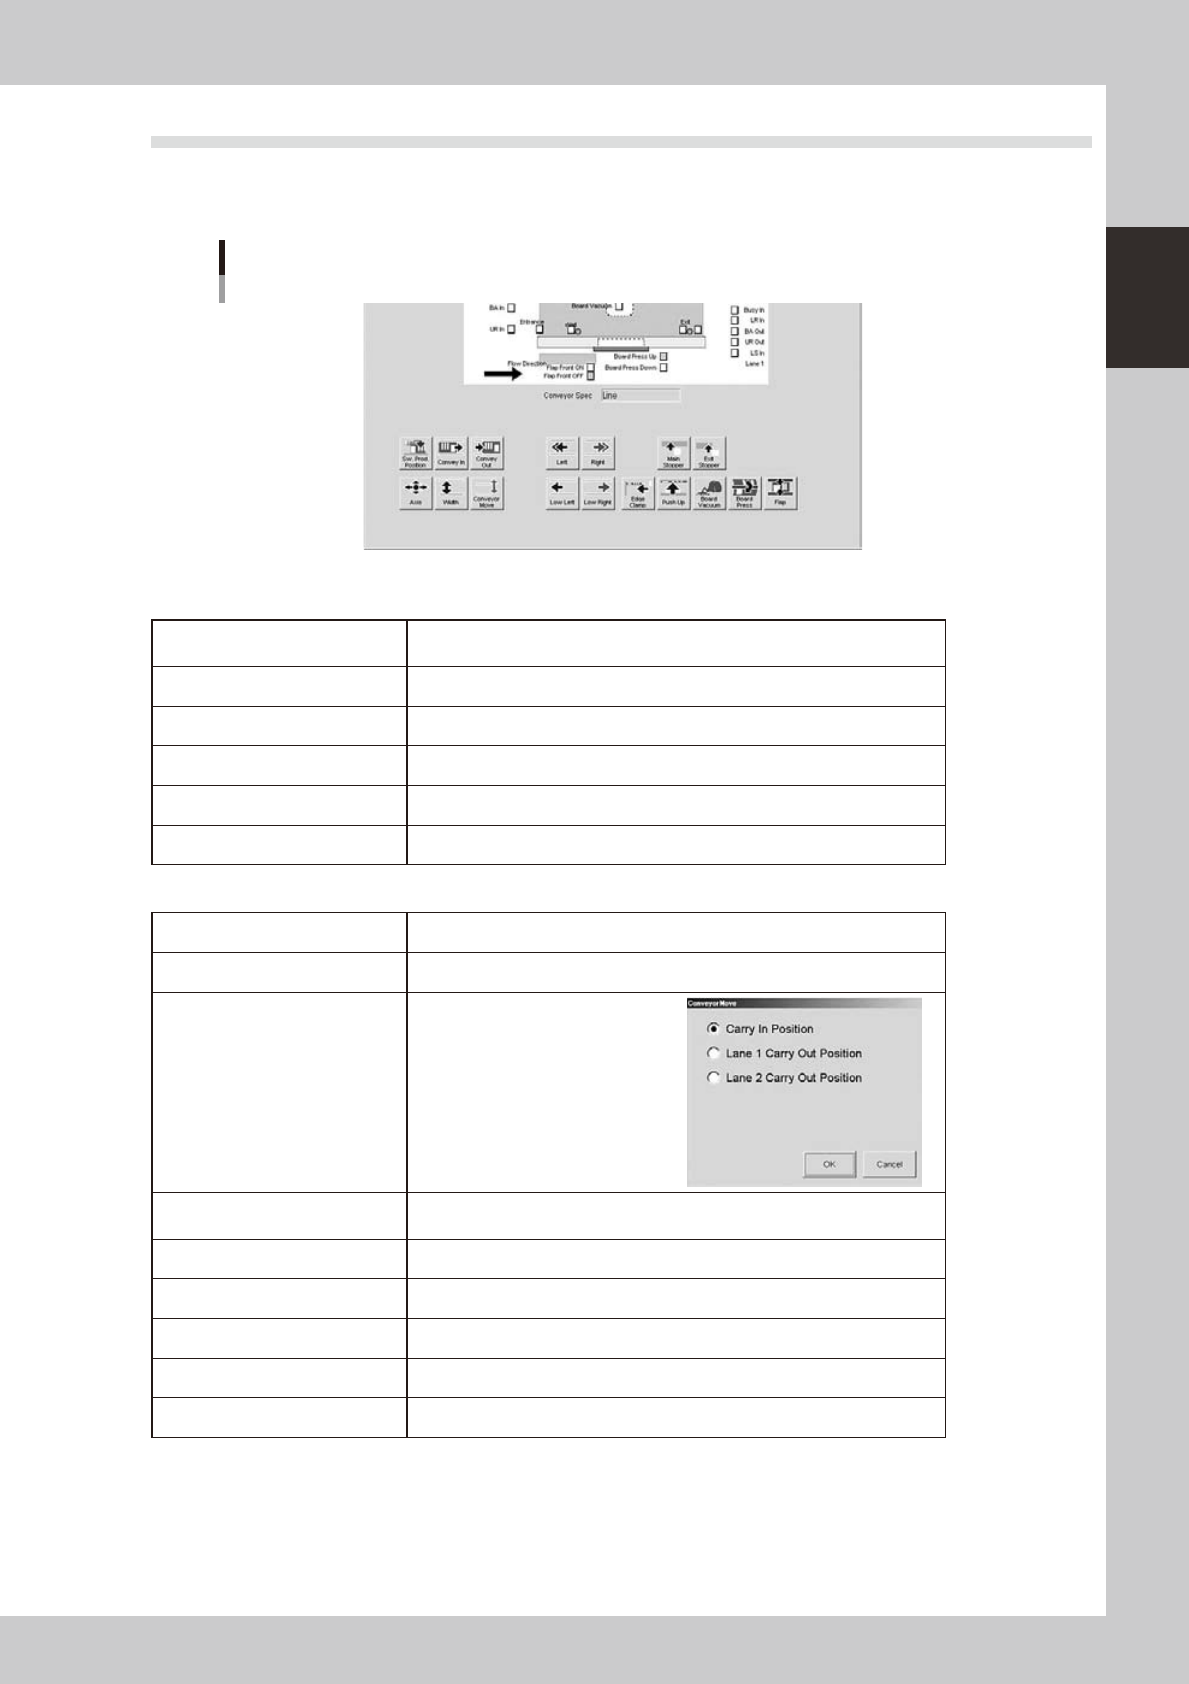
4.2 [Unit]-[Conveyor] tab screen
The [Unit]-[Conveyor] tab screen allows you to manually operate each conveyor unit and check the status of
the conveyor sensors and I/O signals on the graphic view. The function of each button is described below.
[Unit]-[Conveyor] tab screen
64719-N3-10
n
Operation buttons in upper row (from left)
[SW. Prod. Position] button
Moves the board clamp table to the front and the squeegee head to the
inner side.
[Convey-out] button Carries the board out from the board clamp table.
[Convey-in] button Carries a board in on the board clamp table.
[Left], [right] buttons Switches on the conveyor motor so the conveyor moves to the left or right.
[Main Stopper] button Raises or lowers the main stopper.
[Exit Stopper] button Stops a board at the conveyor exit when unloaded from the machine.
n
Operation buttons in lower row (from left)
[Axis] button Opens the "Move Axis" screen. (See "4.1" in this chapter.)
[Width] button Changes the conveyor width.
[Convey Move] button
Moves the conveyor to the specified
position on the Y axis.
[Low Left], [low Right] buttons
Switches on the conveyor motor so the conveyor moves at slow speed to
the left or right.
[Edge Clamp] button Turns the edge clamp on or off.
[Push Up] button Raises or lowers the push-up plate.
[Board Vacuum] button Turns the vacuum board gripper on or off. (option)
[Board Press] button Turns the board press unit on or off. (option)
[Flap] button Actuates the board flap.a
7-22
7
ther functions
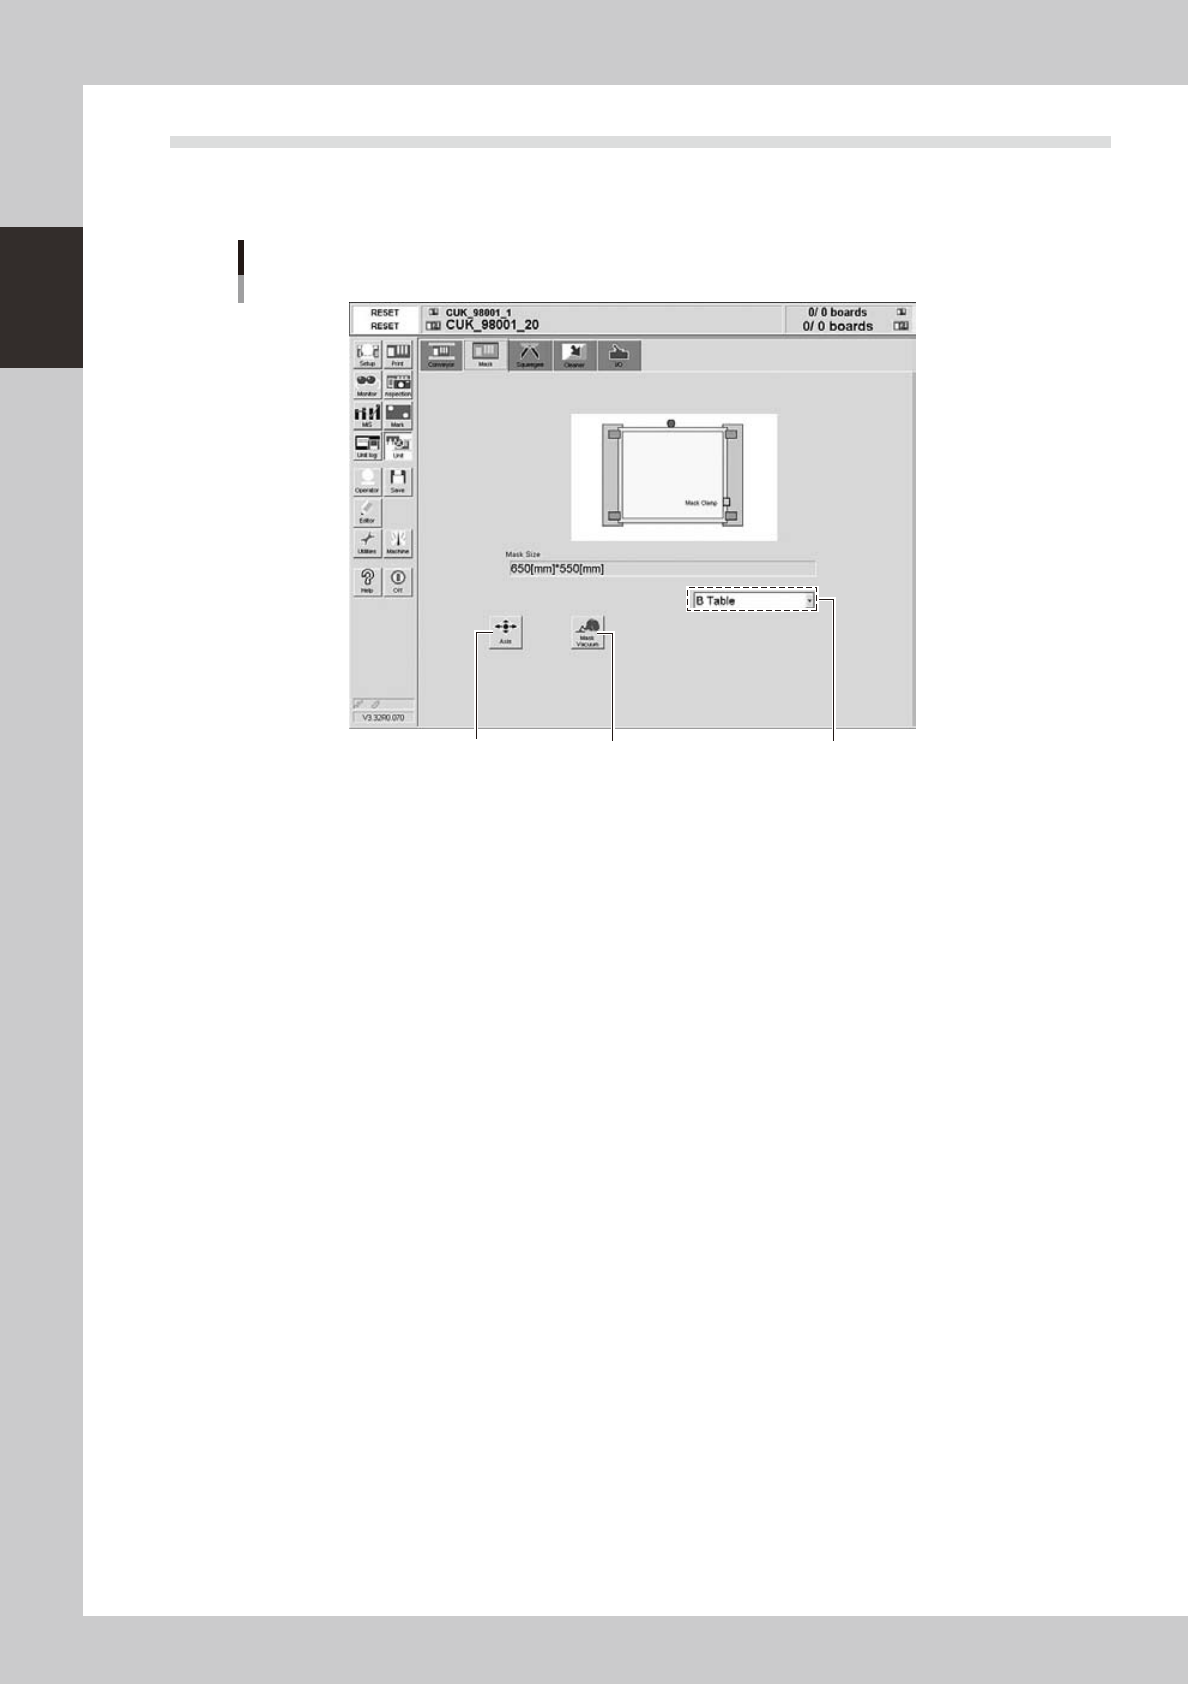
4.3 [Unit]-[Mask] tab screen
The [Unit]-[Mask] tab screen allows you to manually operate the mask vacuum gripper and check the status of
the mask sensors on the graphic view. The function of each button is described below.
[Unit]-[Mask] tab screen
1 2
Specify the table.
64720-N3-00
n
Operation buttons
1: [Axis] button
Opens the "Move Axis" screen. (See "4.1" in this chapter.)
2: [Mask Vacuum] button
Turns the mask vacuum gripper on or off.
7-23
7
ther functions
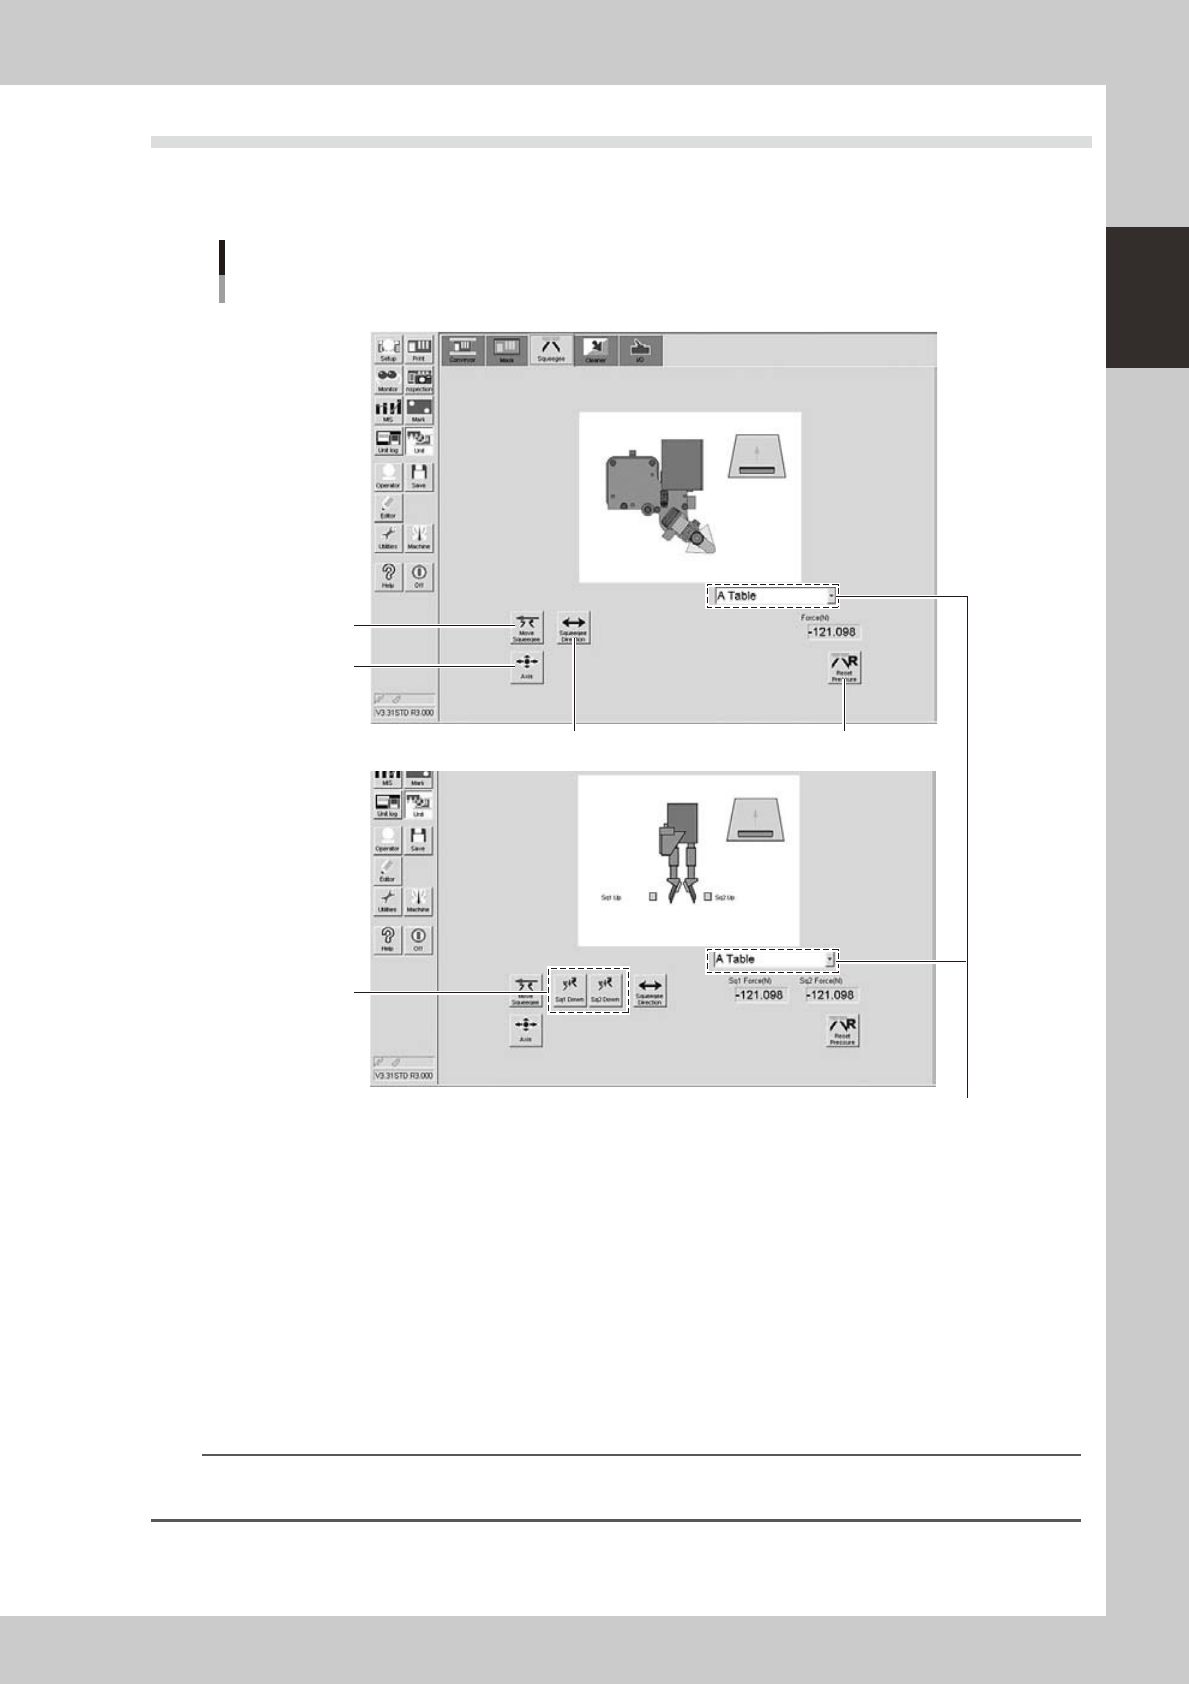
4.4 [Unit]-[Squeegee] tab screen
The [Unit]-[Squeegee] tab screen allows you to manually operate the squeegee head and check the status of
the squeegee sensors on the graphic view. The function of each button is described below.
[Unit]-[Squeegee] tab screen
<3S squeegee>
<Double squeegee>
5
4
2
3
1
Specify the table.
64721-N3-00
n
Operation buttons
1: [Axis] button
Opens the "Move Axis" screen. (See "4.1" in this chapter.)
2: [Move Squeegee] button
Moves the squeegee head to the squeegee attach/detach position (front side) or to the escape position (rear side).
3: [Sq1 Down], [Sq2 Down] buttons (Double squeegee specifications only)
Lowers and raises the squeegee 1 or squeegee 2.
4: [Squeegee Direction] button
Switches the squeegee printing direction.
TIP
The squeegee printing direction is from front to rear just after board data is loaded or the [RESET] button is pressed. The
printing direction then alternately switches.
5: [Reset Pressure] button
Pressure values currently applied to the squeegee head are displayed in the "Force (N)" boxes. Pressing the [Reset
Pressure] button clears these values to "0".