YSP20_Users_E.pdf - 第204页
Chapter 7 Other functions Contents 1. T each and trace 7- 1 1 1.2 T each screen 7- 2 1.3 Point teaching 7- 4 1.4 Cursor teaching 7- 8 1.5 T race 7-1 0 2. Pattern matching 7-1 1 2.1 Pattern regist…
6-28
6
anaging the data
5
Press the [History] button in the "Setting" dialog box.
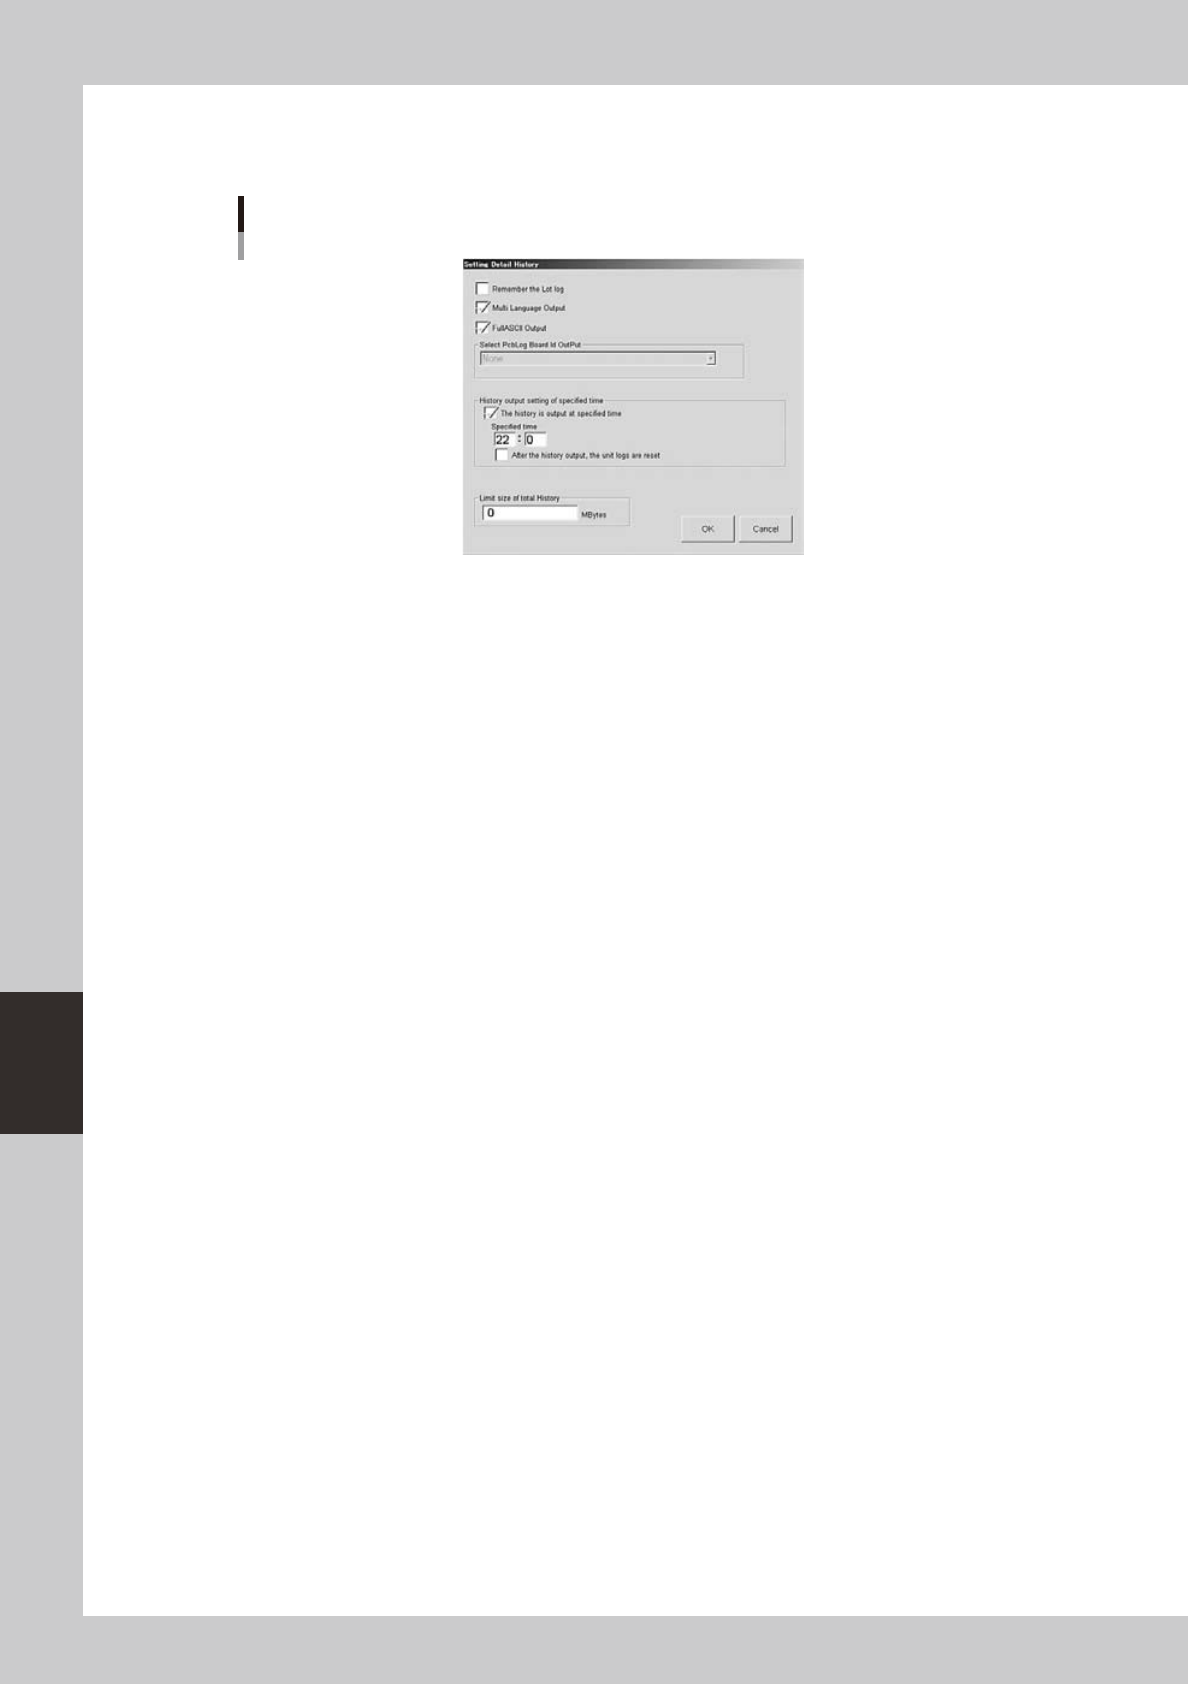
The "Setting Detail History" dialog box then appears.
"Setting Detail History" dialog box
64622-N3-00
6
Select the check boxes as needed.
• "Rememberthelotlog"checkbox
When this check box is selected, the board data that was in use when the machine power was
turned off will be loaded again the next time the power is turned on, in order to take over its
operation history data.
• "MultiLanguageOutput"checkbox
When this check box is selected, the operation history data can be saved or loaded in multi-
language mode.
• "FullASCII Output" check box
When this check box is selected, characters not applicable to this machine (illegal characters) are
converted automatically in the file read process.
Illegal characters (example): !#$%&@*<>?/, etc.
• "Historyoutputsettingofspecifiedtime"checkbox
Select this check box when you want to specify the time to output the operation history data.
After selecting this check box, enter the time in military time (24-hour clock format) in the “Specified
time” box. By making this setting, the machine automatically outputs and saves the operation history
data at the specified time every day.
When the “After the history output, the unit logs are reset” check box is selected, the “Unit log” data
will be reset after the production history data is output.
• "Limitsizeoftotalhistory"box
When you want to set a limit on the total amount of operation history data to be saved, enter it
here. An alarm will occur when the free space of the destination approaches the limit size specified
here. No limit will be placed when set to "0".

Chapter 7 Other functions
Contents
1. Teach and trace 7-1
1
1.2 Teach screen 7-2
1.3 Point teaching 7-4
1.4 Cursor teaching 7-8
1.5 Trace 7-10
2. Pattern matching 7-11
2.1 Pattern registration 7-12
2.2 Using the pattern matching 7-16
7
8
9
1
2
3
4
5
7-1
7
ther functions
1. Teach and trace
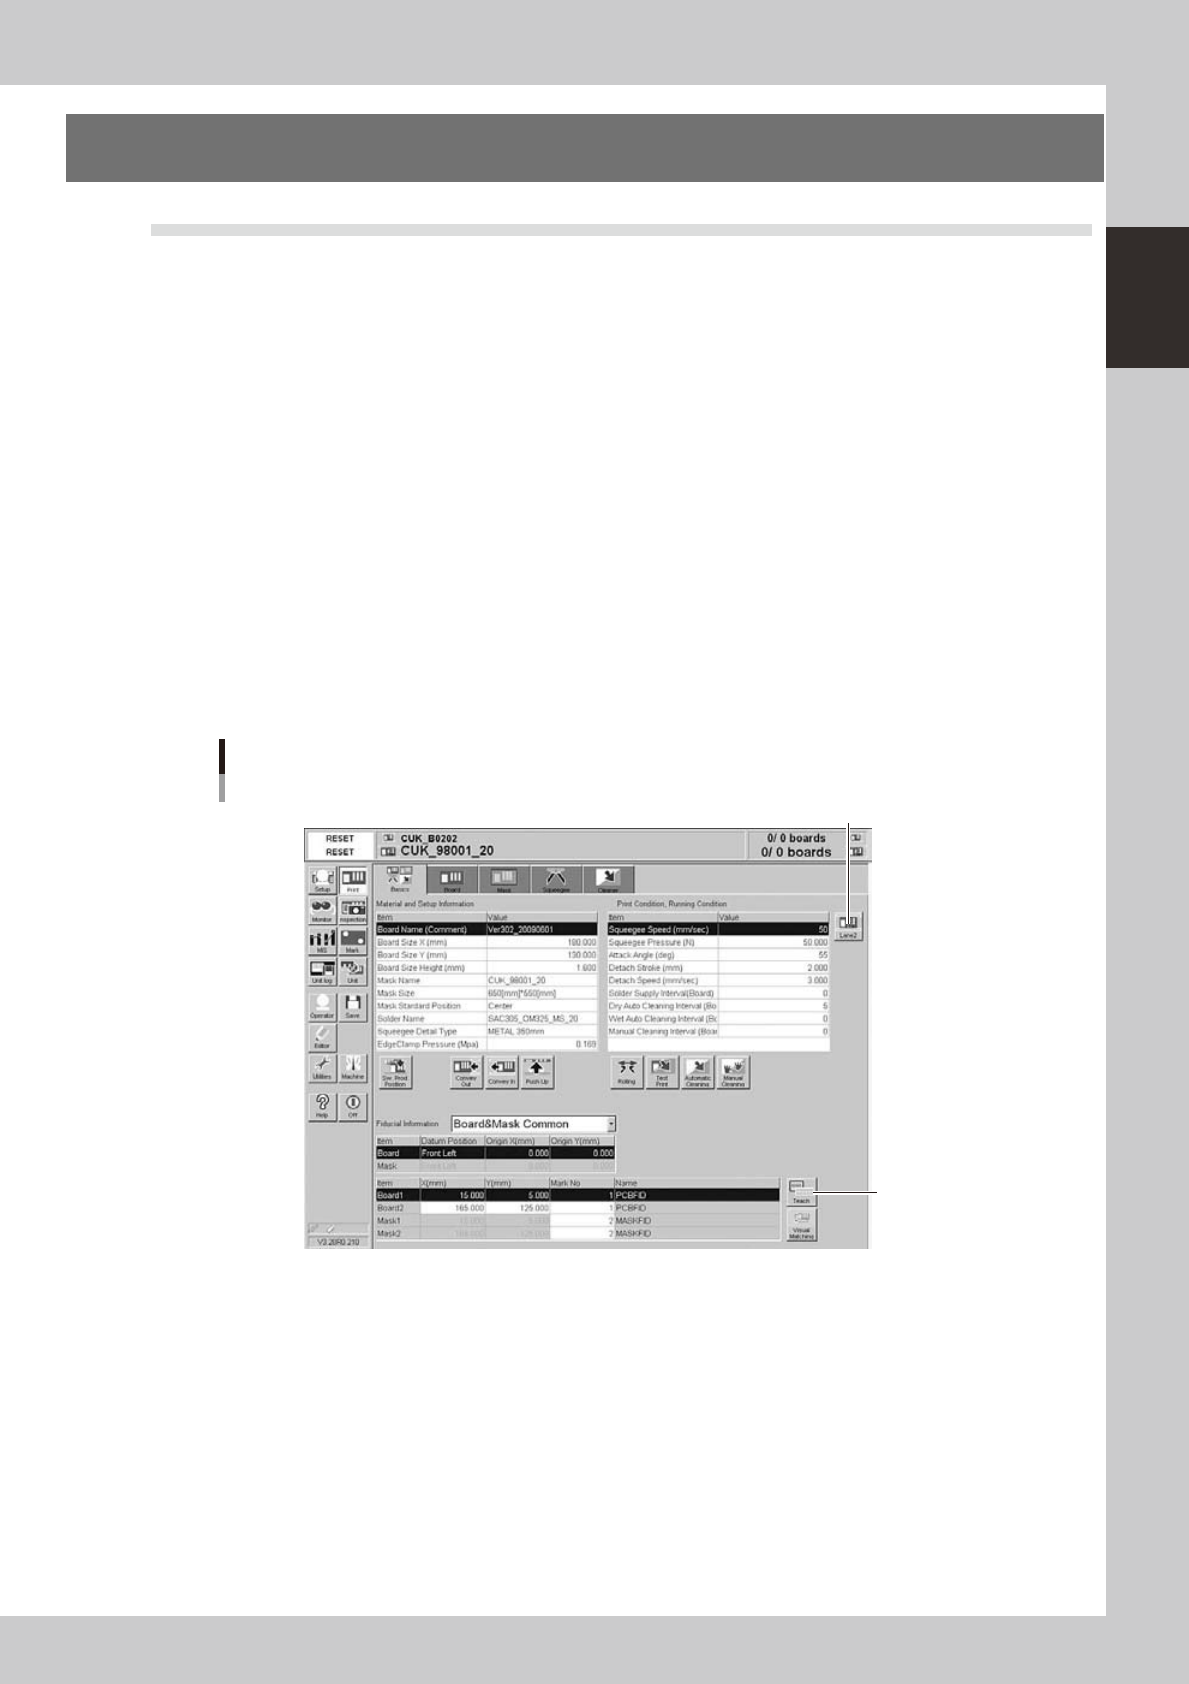
1.1 [Teach] button
The teaching function is used to teach the machine position such as XY coordinate values using a teaching unit
such as a vision camera. To perform teaching, use the [Teach] button to open the Teach screen. There are five
[Teach] buttons at the following locations. Select a [Teach] button suitable for your purpose.
1. [Print]-[Basics] tab:
Press this [Teach] button to perform teaching on the board coordinates.
2. [Print]-[Board] tab:
Press this [Teach] button to perform teaching on the board coordinates.
3. Board inspection coordinate dialog box:
This dialog box appears when the [Detail Condition] button on the [Print]-[Board] tab screen is pressed.
Use the [Teach] button in this dialog box to teach the machine a board inspection position or move the machine to a
specified position.
4. [Print]-[Mask] tab:
Press this [Teach] button to teach the machine the mask coordinates.
5. Mask inspection coordinate dialog box:
This dialog box appears when the [Detail] button on the [Print]-[Mask] tab is pressed. Use the [Teach] button in this
dialog box to teach the machine a mask inspection position or move the machine to a specified position.
[Teach] button
Example of [Basics] tab
[Teach] button
[Lane] button
64701-N3-00