YSP20_Users_E.pdf - 第251页
2-7 2 Inspection and maintenance 2.3 Adjusting the conveyor belt tension T he conveyor mo ves by belt dri ve to load boards ready for printing and to unload the finished boards. If the convey or belts are too loose, they…

2-6
2
Inspection and maintenance
Section Check item Checkpoint Contents of inspection/work
Weekly (Date) Monthly
/ / / / /
Cleaning Lubrication
Cleaner
Cleaner main
unit
Up/down
operation
Roll sheet wind-
up
• Check that the up/down operation timing
is correct.
• Check that the roll sheet is wound up
correctly.
Cleaner head
Contamination
inside head
Solvent dispense
status
Check the cleaning solvent dispense
status or the head for contamination.
Suction unit
hose
Crack,
deterioration
* Check the hose for crack. If the hose
deteriorates, replace it.
• Check that the swing unit beside the
cleaner head functions smoothly.
Suction unit
Filter inside
suction unit
Operation
* Clean the contamination of the filter.
Replace the filter if necessary.
Others
Each sensor
Contamination
on sensor
Operation
* Check the senor or dog for foreign
matter or solder sticking.
Clean the sensor or dog if necessary.
Air supply part
Air filter
Mist filter
* Clean the contamination of the filter.
Replace the filter if necessary.
2.2 Parts recommended for periodic replacement
For parts listed in the table below, it may be predicted that the service life of the part is expired or the part
deteriorates even though no trouble is found through the visual check during the periodic inspection.
To maintain the performance of the machine at its optimal operating level, it is recommended to periodically
replace these parts.
n
Periodic replacement parts
Part No. Part name Q'ty Location used Replacement interval
KKX-M3674-0XX
TUBE 25
2
ø25-suction hose connected from
the side of the cleaner unit to the
rear of the machine.
Replace the part when the
total number of produced
boards per lane reaches 3
millions.
KHU-M3756-0XX PUMP 2 Solvent pump
Replace every time the
number of suction unit
operation cycles reaches
1,440 thousand cycles.
Check the operation records
on the [Unit log]-[Cleaner] tab
screen.
KKX-M3667-00X FILTER, SOLVENT 2 Filter for solvent pump
Replace these parts at the
same time the solvent pump
is replaced.
90200-31J320 O-RING 2 Filter for solvent pump
90200-31J420 O-RING 2 Packing for solvent filter
c
CAUTION
Parts (Part No.) listed above is current as of the issue date of this manual. When ordering a replacement part, please
check for the latest information.
c
CAUTION
Part Nos. are subject to change without prior notice. When ordering a replacement part, contact your local sales
dealer to check its part No.
2-7
2
Inspection and maintenance
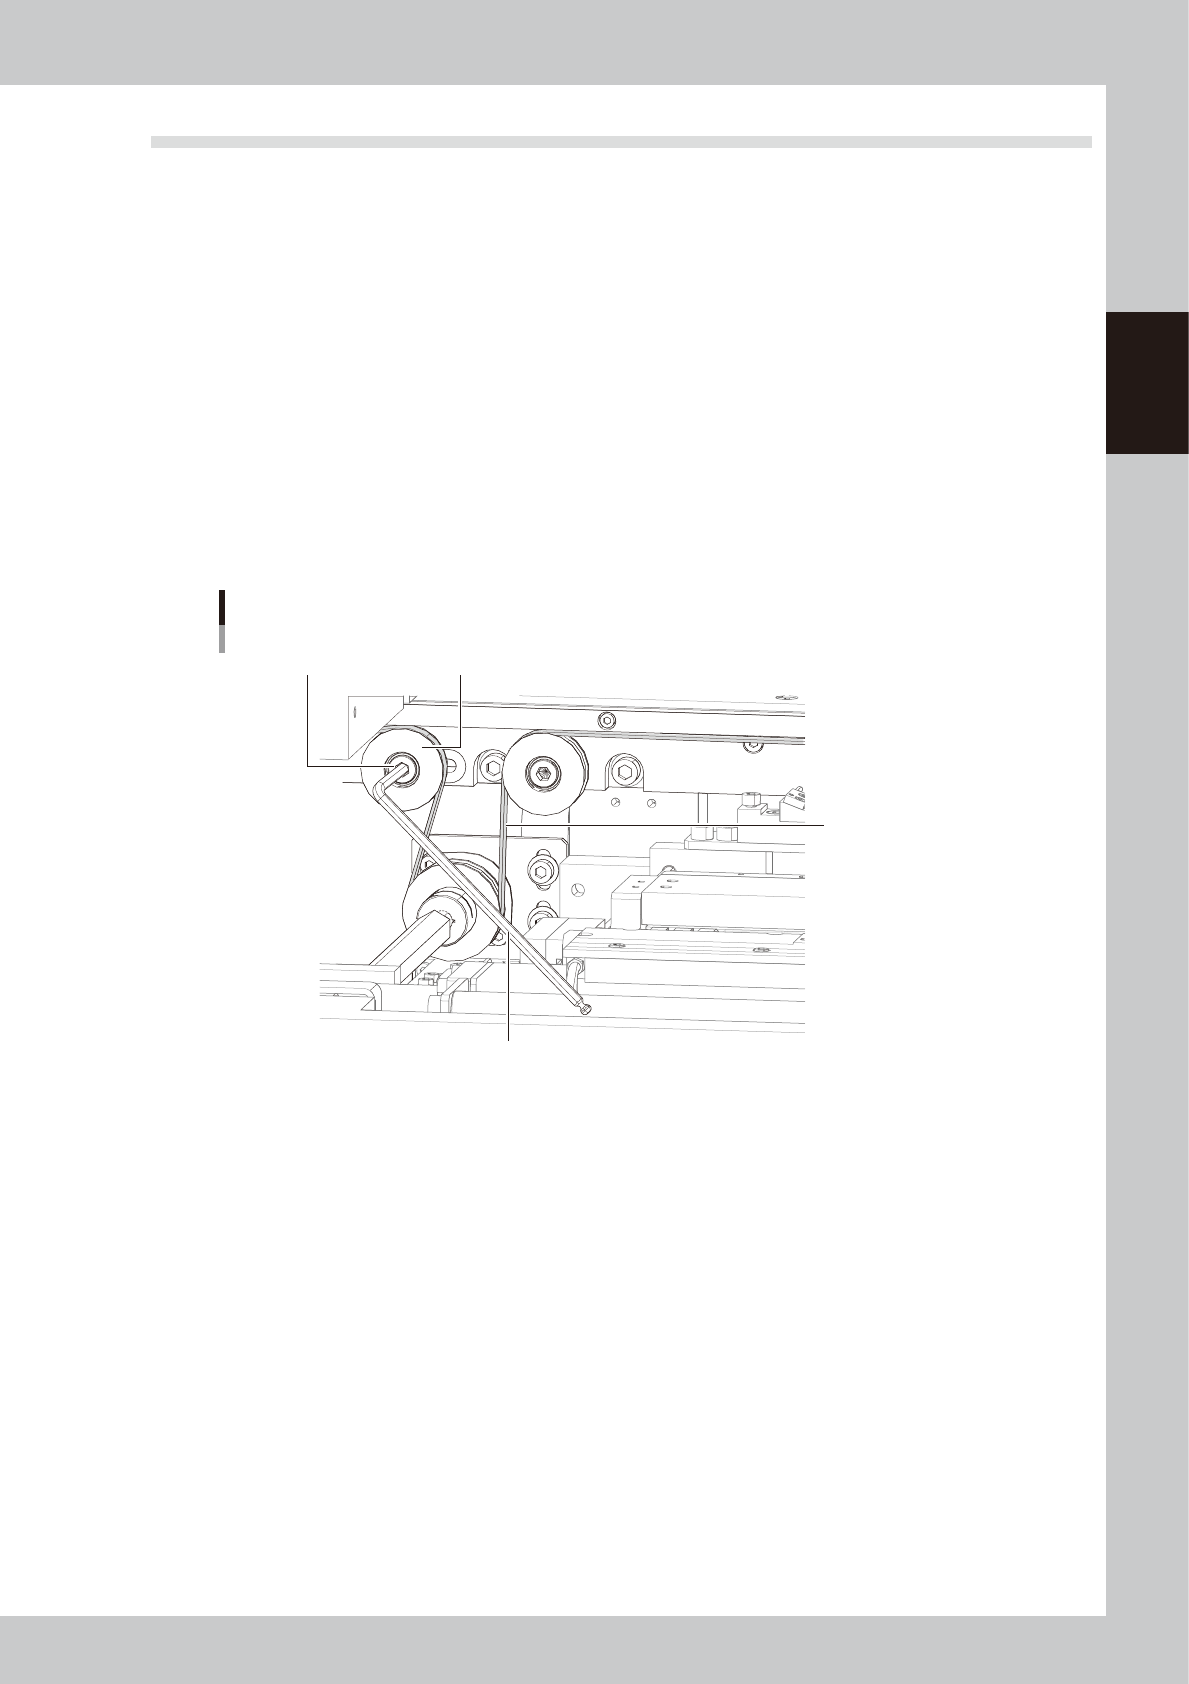
2.3 Adjusting the conveyor belt tension
The conveyor moves by belt drive to load boards ready for printing and to unload the finished boards. If the
conveyor belts are too loose, they may slip on the pulleys causing unstable board transfer. If the belts are too
tight, they may break or wear excessively. The tension of each belt on the fixed and movable rails should be
adjusted evenly. If necessary, adjust the tension as follows:
n
Items to be prepared
• Hex wrench (5mm)
e
1
Press the emergency stop button.
2
Loosen the tension adjusting bolt.
The tension adjusting bolt is located on the right side of the conveyor and linked to the idler on the belt
side. Loosen the bolt (but do not remove it) using hex wrenches (5mm).
3
Adjust the belt tension.
Slide the tension adjusting bolt towards the outer or inner side of the machine to adjust the tension.
Adjusting the conveyor belt tension
Tension adjustment bolt
Drive pulley
Hex wrench (5mm)
Conveyor belt
53203-N3-00
4
Retighten the tension adjustment bolt.
Check the tension by hand, then run the conveyor belt and check that the drive pulley does not slip.
2-8
2
Inspection and maintenance
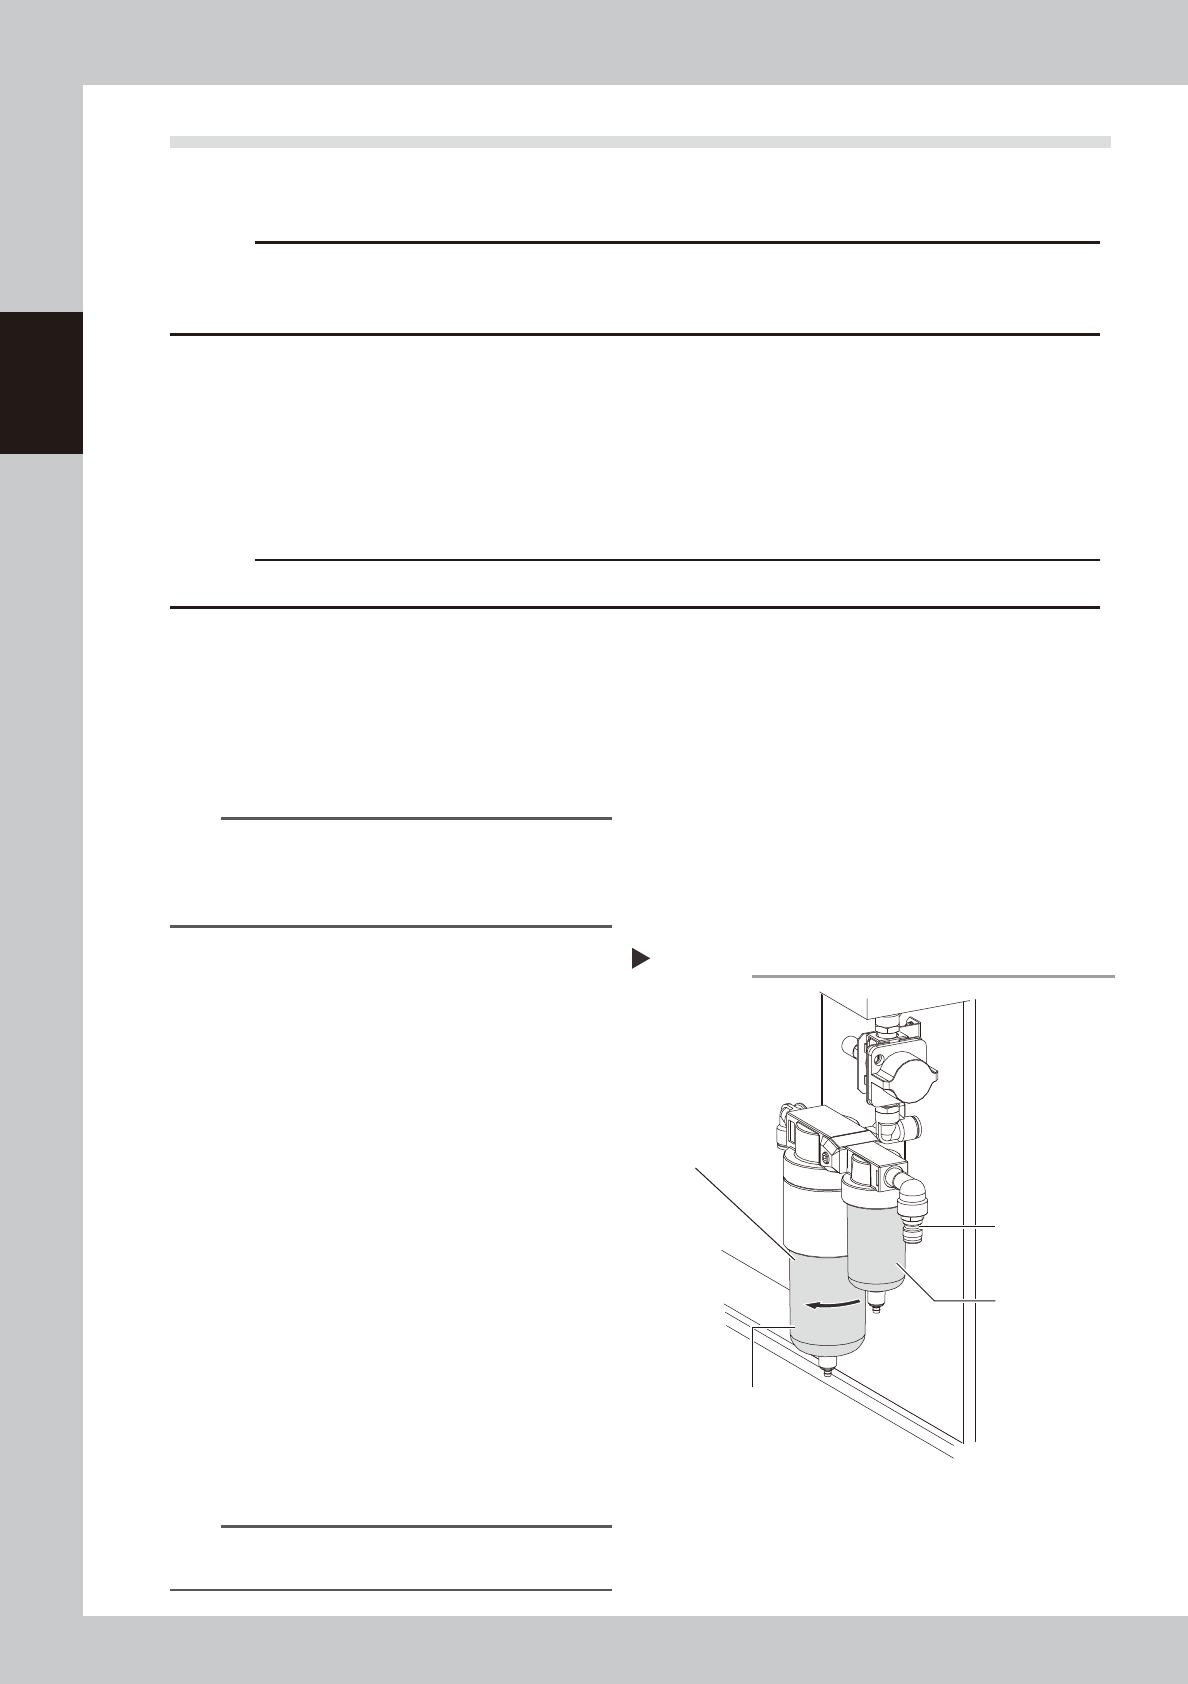
2.4 Inspecting and cleaning the air/mist filters
Air/mist filters are used to prevent oil, mist and other impurities in the air compressor from penetrating into the
machine. These filters should be inspected and cleaned periodically as instructed below.
c
CAUTION
The air coupler should be disconnected to safely perform the work. When disconnecting it, be careful not to allow oil,
water, or impurities to splash outward. Also take care since a large air exhaust sound is produced when disconnecting
the air coupler.
n
Required tools
• Neutral detergent
• Air blow tool (option)
• Cleaning rag
• Replacement air filter (KG7-M8501-40X FILTER ELEMENT)
• Replacement mist filter (KV8-M8502-40X MIST FILTER ELEMENT)
c
CAUTION
When performing air blow, wear dust-proof goggles and mask to protect your face from blown dust, etc.
n
Cleaning the filter cup
1
Check the inside of the filer cup.
Check for oil or water deposits in the filter
cup through the window. If the window is
dirty, follow the steps below to clean the
filter cup.
TIP
The drain cock at the bottom of the filter cup is an
auto-drain type. It automatically drains the oil or water
when deposited in the cup. We recommend
connecting a hose to this drain cock.
2
Remove the filter cup.
While pressing the button on the side of the
filter cup, turn it clockwise, and pull the filter
cup downwards. The cup you have removed
has a double structure. The inner transparent
cup should be cleaned.
53204-N3-00
3
Clean the inside of the filter cup.
1. Lightly clean the filter cup with water.
2. Then, pour water-diluted neutral
detergent into the filter cup and clean
the inside while shaking it.
3. Air blow the filter cup and wipe away
any moisture with clean cloth or paper.
4
Reattach the filter cup.
1. Align the button on the side of the cup
with the attach/detach position and
push the cup upwards.
2. Turn the cup counterclockwise until you
hear a click.
n
NOTE
Leave the filter cup removed to clean the air filter as
explained in the next procedure.
Removing the filter cup
Step 2
Filter cup
Disconnect the
air coupler.
Air filer
Oil mist filter