YSP20_Users_E.pdf - 第174页
5-48 5 Creating and setting the data Mask Offset R Printed solder Land pattern Q 63530-N3-00 Printed state Offset entry When shifted counterclockwise Enter a plus error ( q ) in Offset R. When shifted clockwise Enter a …
5-47
5
Creating and setting the data
6
Adjust the print position errors.
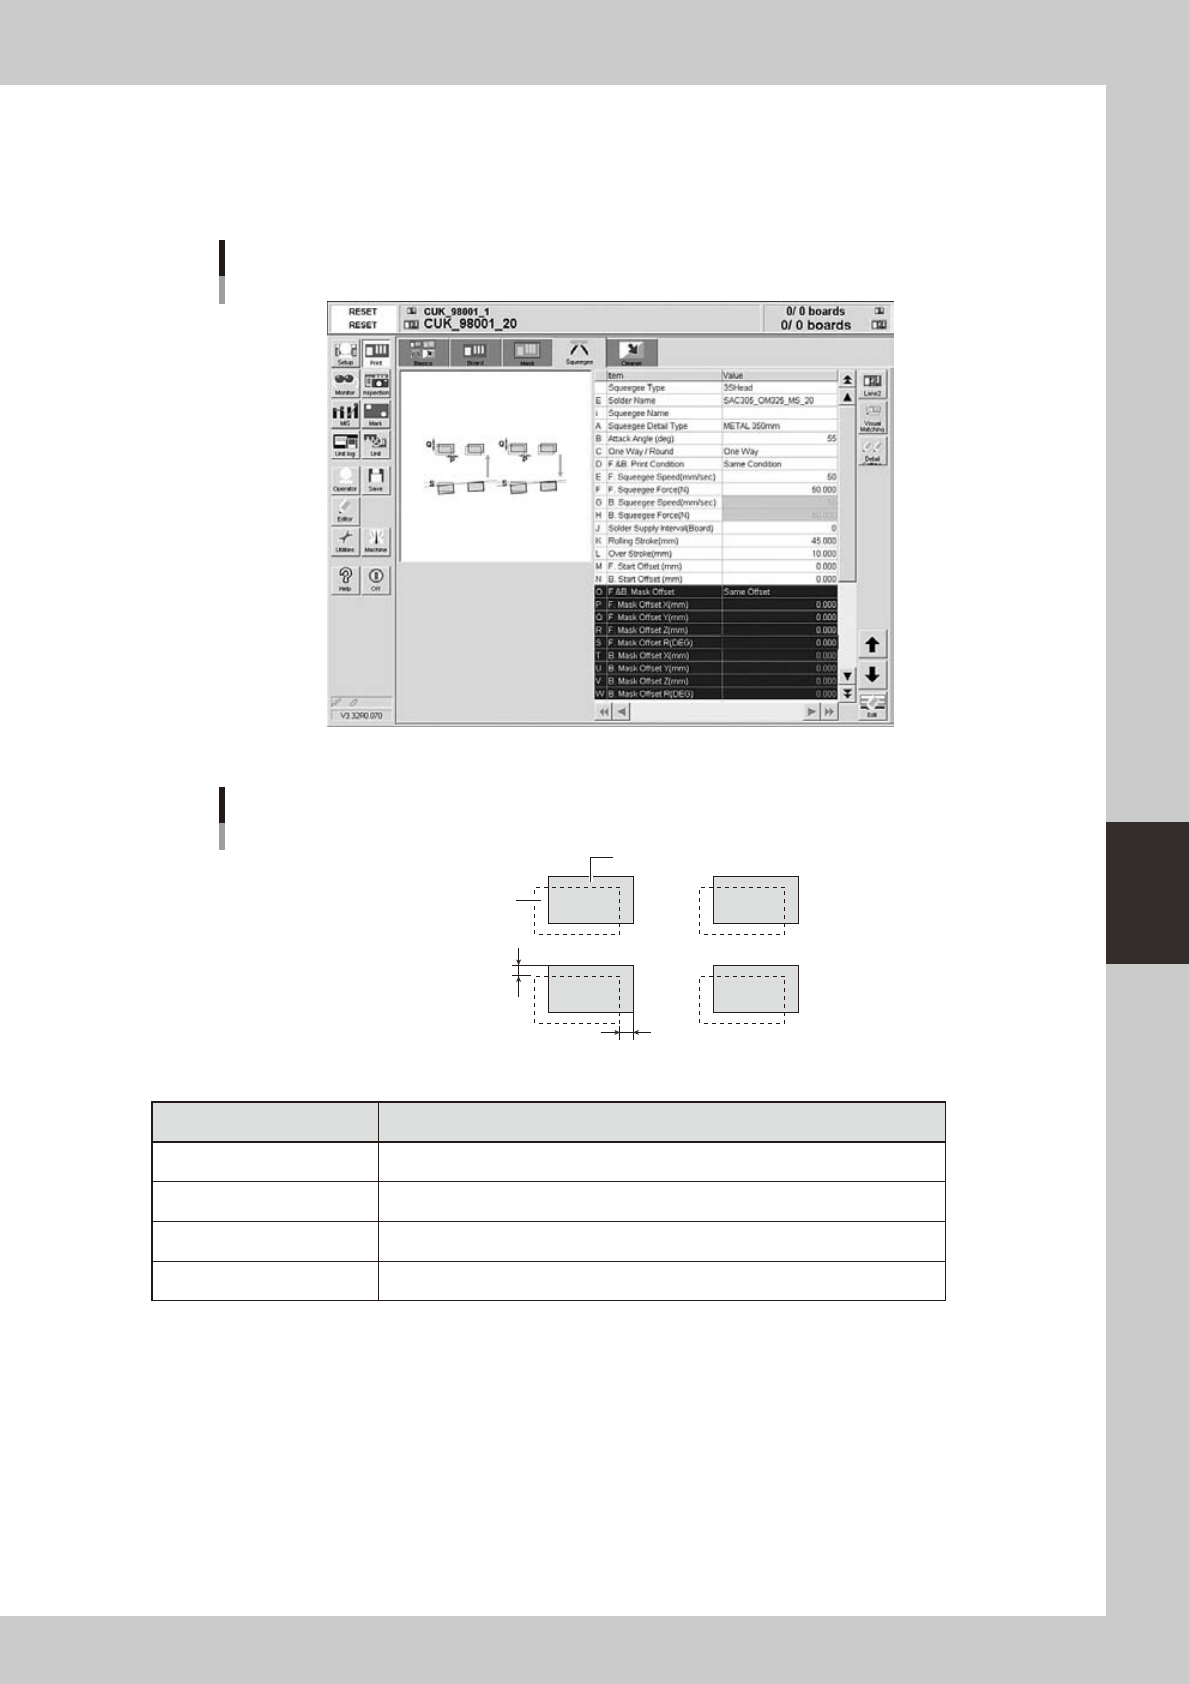
Open the [Print]-[Squeegee] tab and adjust the following parameters.
Enter the positional offsets in the Mask Offset X, Y and R parameters according to the position errors.
(Mask Offset Z adjustment is not necessary here.)
[Print]-[Squeegee] tab
64551-N3-10
Mask Offset XY
Printed solder
Land pattern
Offset X
Offset Y
63529-N3-00
Printed state Offset entry
When shifted to right In Offset X, enter the position error (mm).
When shifted to left In Offset X, enter the position error (mm) with a minus sign.
When shifted to upper side In Offset Y, enter the position error (mm).
When shifted to lower side In Offset Y, enter the position error (mm) with a minus sign.
5-48
5
Creating and setting the data
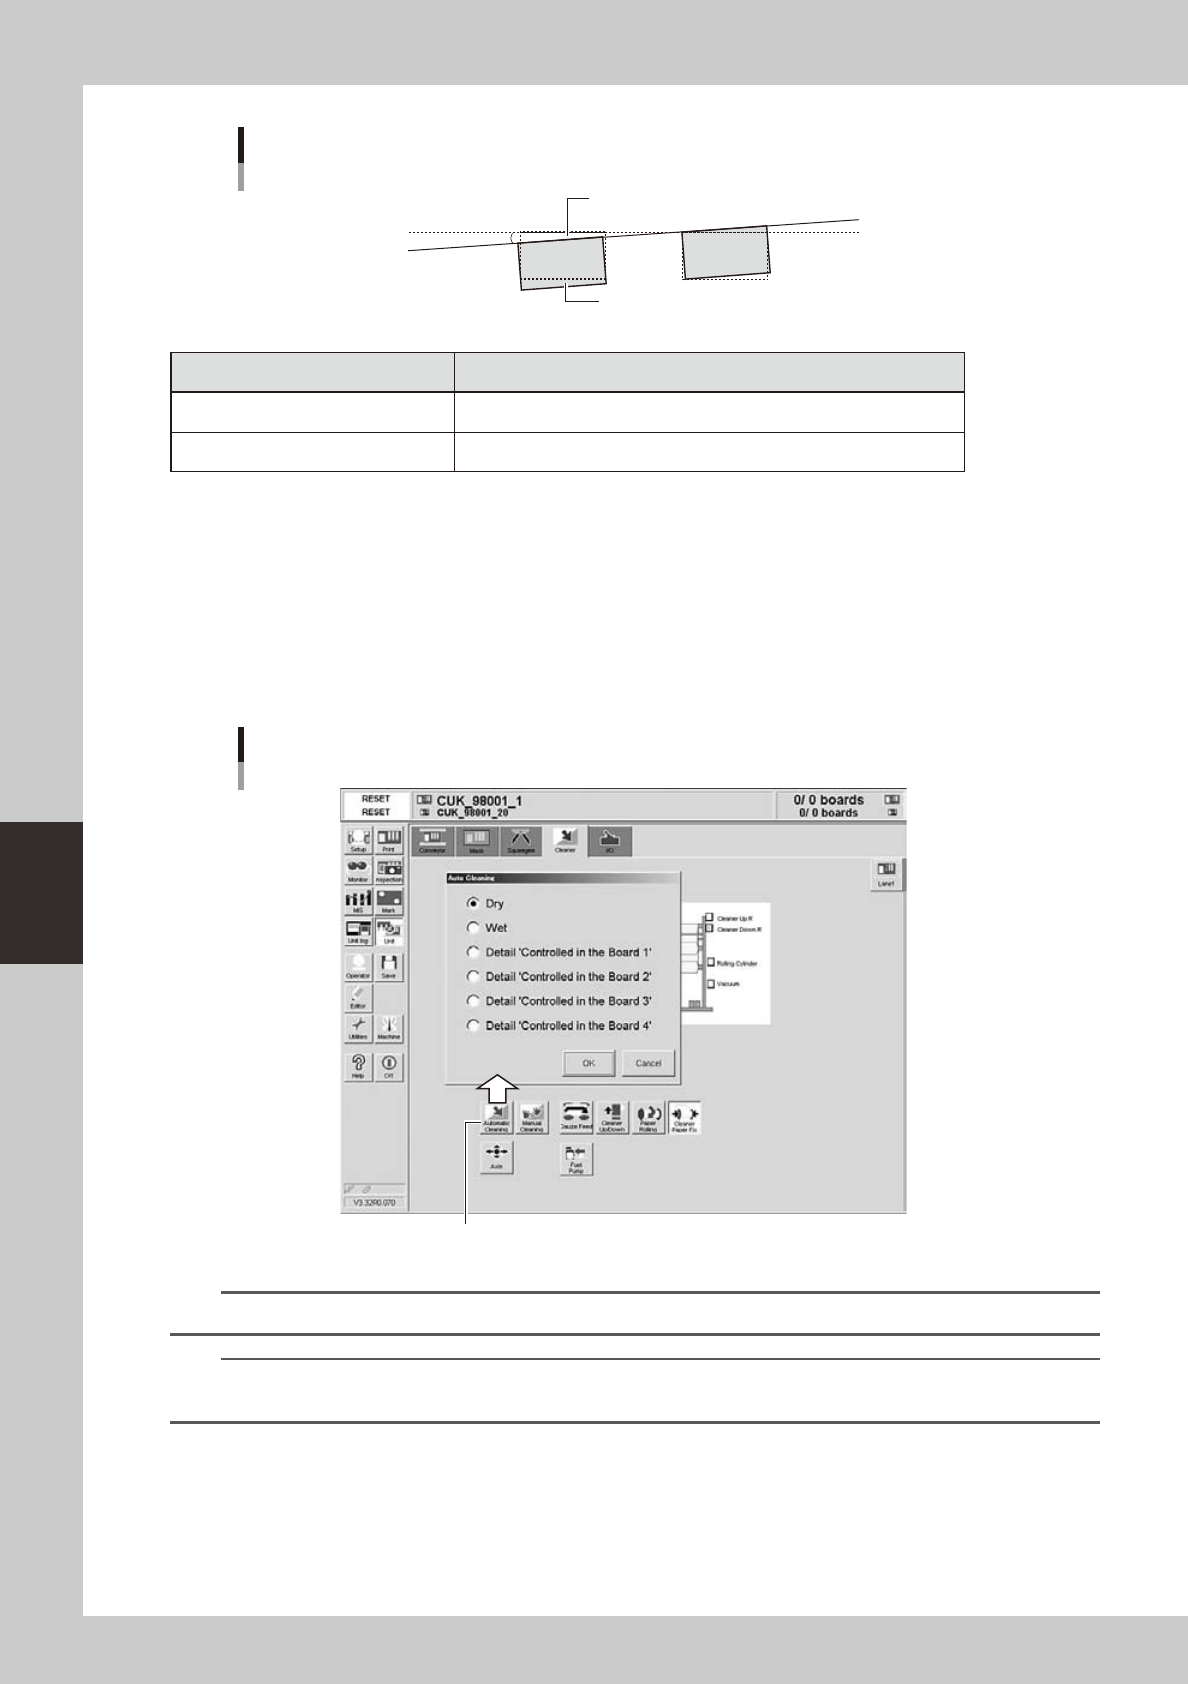
Mask Offset R
Printed solder
Land pattern
Q
63530-N3-00
Printed state Offset entry
When shifted counterclockwise Enter a plus error (
q
) in Offset R.
When shifted clockwise Enter a minus error (-
q
) in Offset R.
7
Repeat the above procedure until an optimum printed result is obtained.
8
Clean the mask.
When the test print is complete, clean the mask.
1. Open the [Unit]-[Cleaner] tab and press the [Auto Cleaning] button.
A dialog box appears asking you to select the cleaning method.
2. Select the cleaning method ("Dry" or "Wet" or “Detail …1 to 4”) and press the OK button.
The cleaning unit begins moving to clean the backside of the mask automatically.
[Auto Cleaning] button
[Auto Cleaning] button
64555-N3-00
TIP
For information on the “Detail …1” to “Detail …4” settings, see "6. Cleaner data setting" in this chapter.
TIP
When you want to perform manual cleaning, press the [Manual Cleaning] button and follow the message that
appears.

Chapter 6 Managing the data
This chapter explains how to back up board data and make a user database, as well as how to view and save the production
and machine operation logs.
Contents
1
1
5
8
1.3.1 Manipulating the files in the USB memory device 6-8
1.3.2 Removing the USB memory device 6-10
2. Creating the user database 6-12
2.1 Copying the data into the database 6-12
3. Production history 6-14
4
6
8
3.4
Specifying the destination to save the production history data
6-21
3
3
5
5
6
4.5
Specifying the destination to save the operation history data
6-27