YSP20_Users_E.pdf - 第210页
7-6 7 ther functions 8 Pr ess the [ T each] button to perform teaching input. There are two ways to perfor m teaching input: "one-point input" and "multi-point input". l One-point input After checki…
7-5
7
ther functions
7
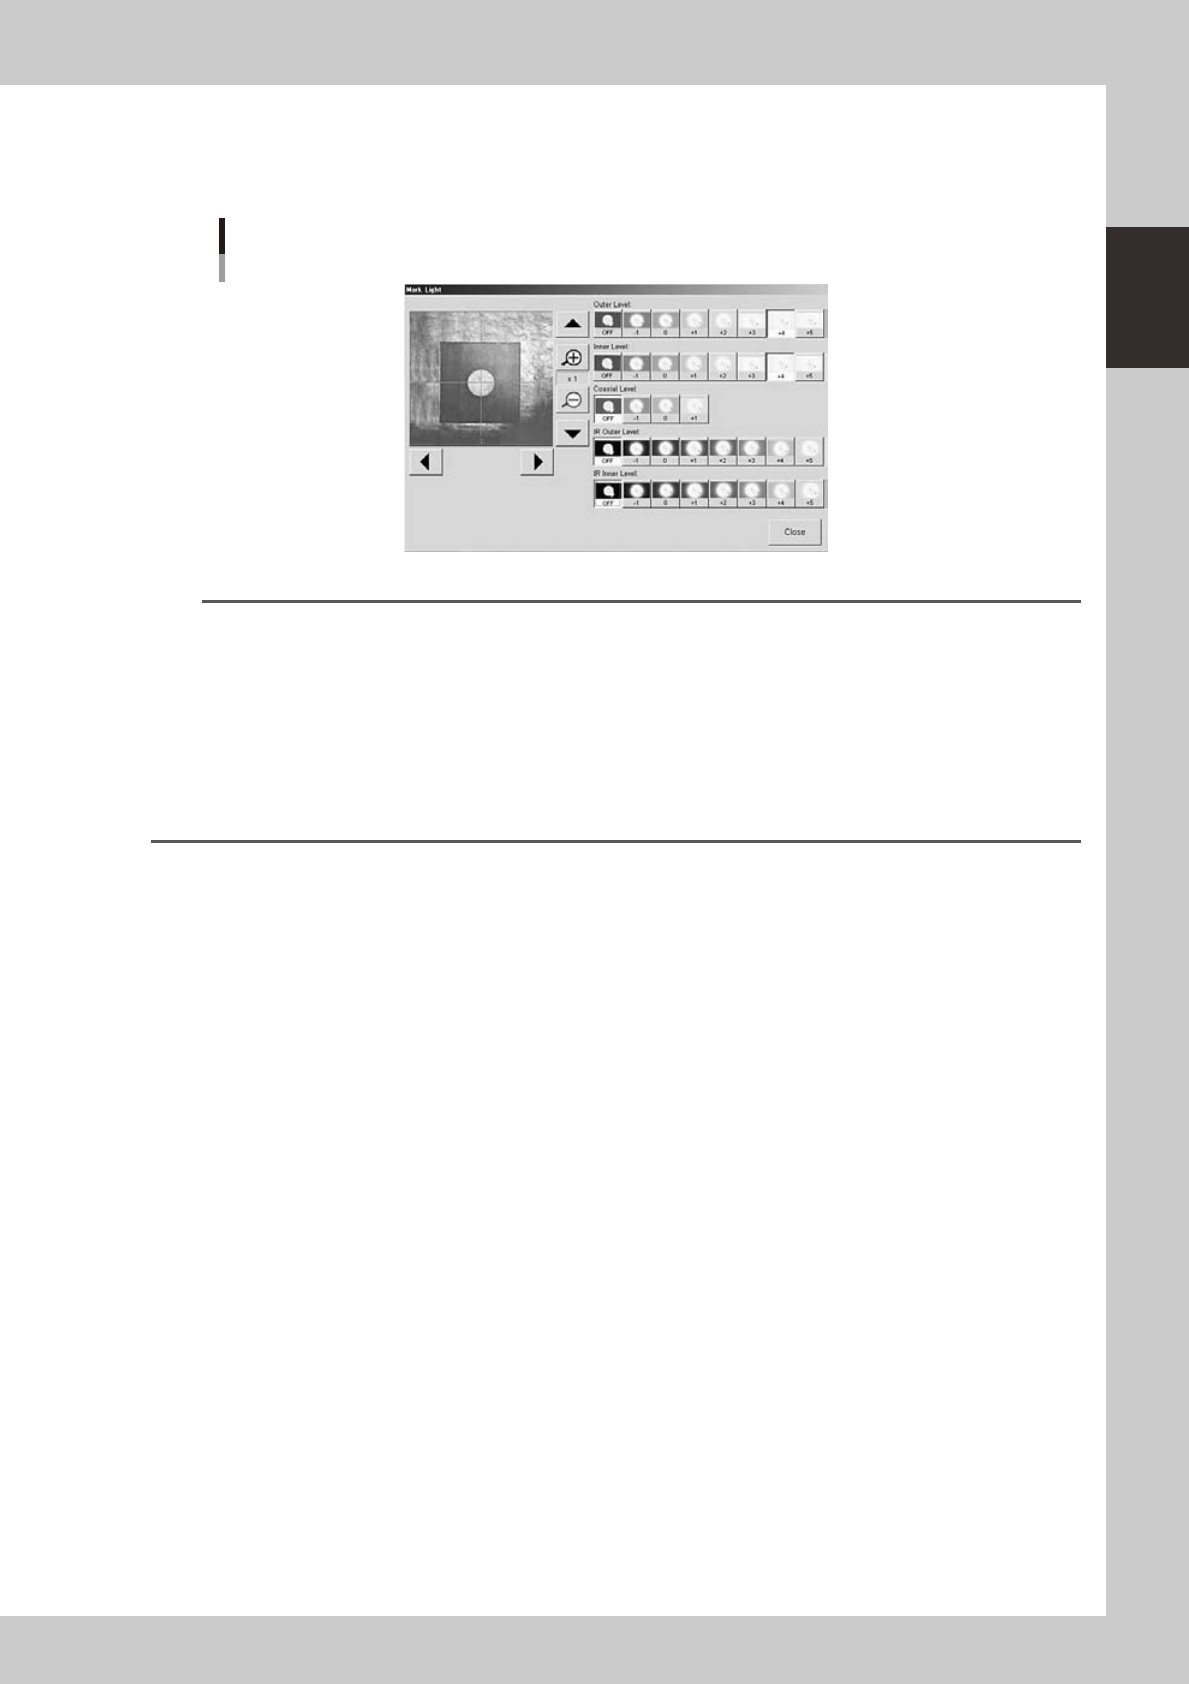
Adjust the lighting levels as needed.
If the target image is not clearly displayed on the vision monitor, press the [Light] button and adjust the
lighting levels. After adjusting, press the [Close] button to return to the Teach screen.
Light level adjustment
64704-N3-00
TIP
Optimum light levels depend on the materials of the board, mask frame and mark. Use the following method to find
optimum light levels.
1. Turn off all light units.
2. Turn on, one at a time, "Outer Light", "Inner Light", "Coaxial Light, "IR Outer Light" and "IR Inner Light" at the
maximum level, to see how clearly the mark can be seen.
3. Combine the light units that were effective, and adjust their light levels.
As a general guide for adjusting board mark lighting, try these suggestions.
•Flatsurfacemarksreectinglight :"CoaxialLight"iseffective.
•Flatsurfacemarksmadeofcopperoxide :"IRInnerLight"iseffective.
•Markswithunevensurfacediffusinglight :"IROuterLight"iseffective.
7-6
7
ther functions
8
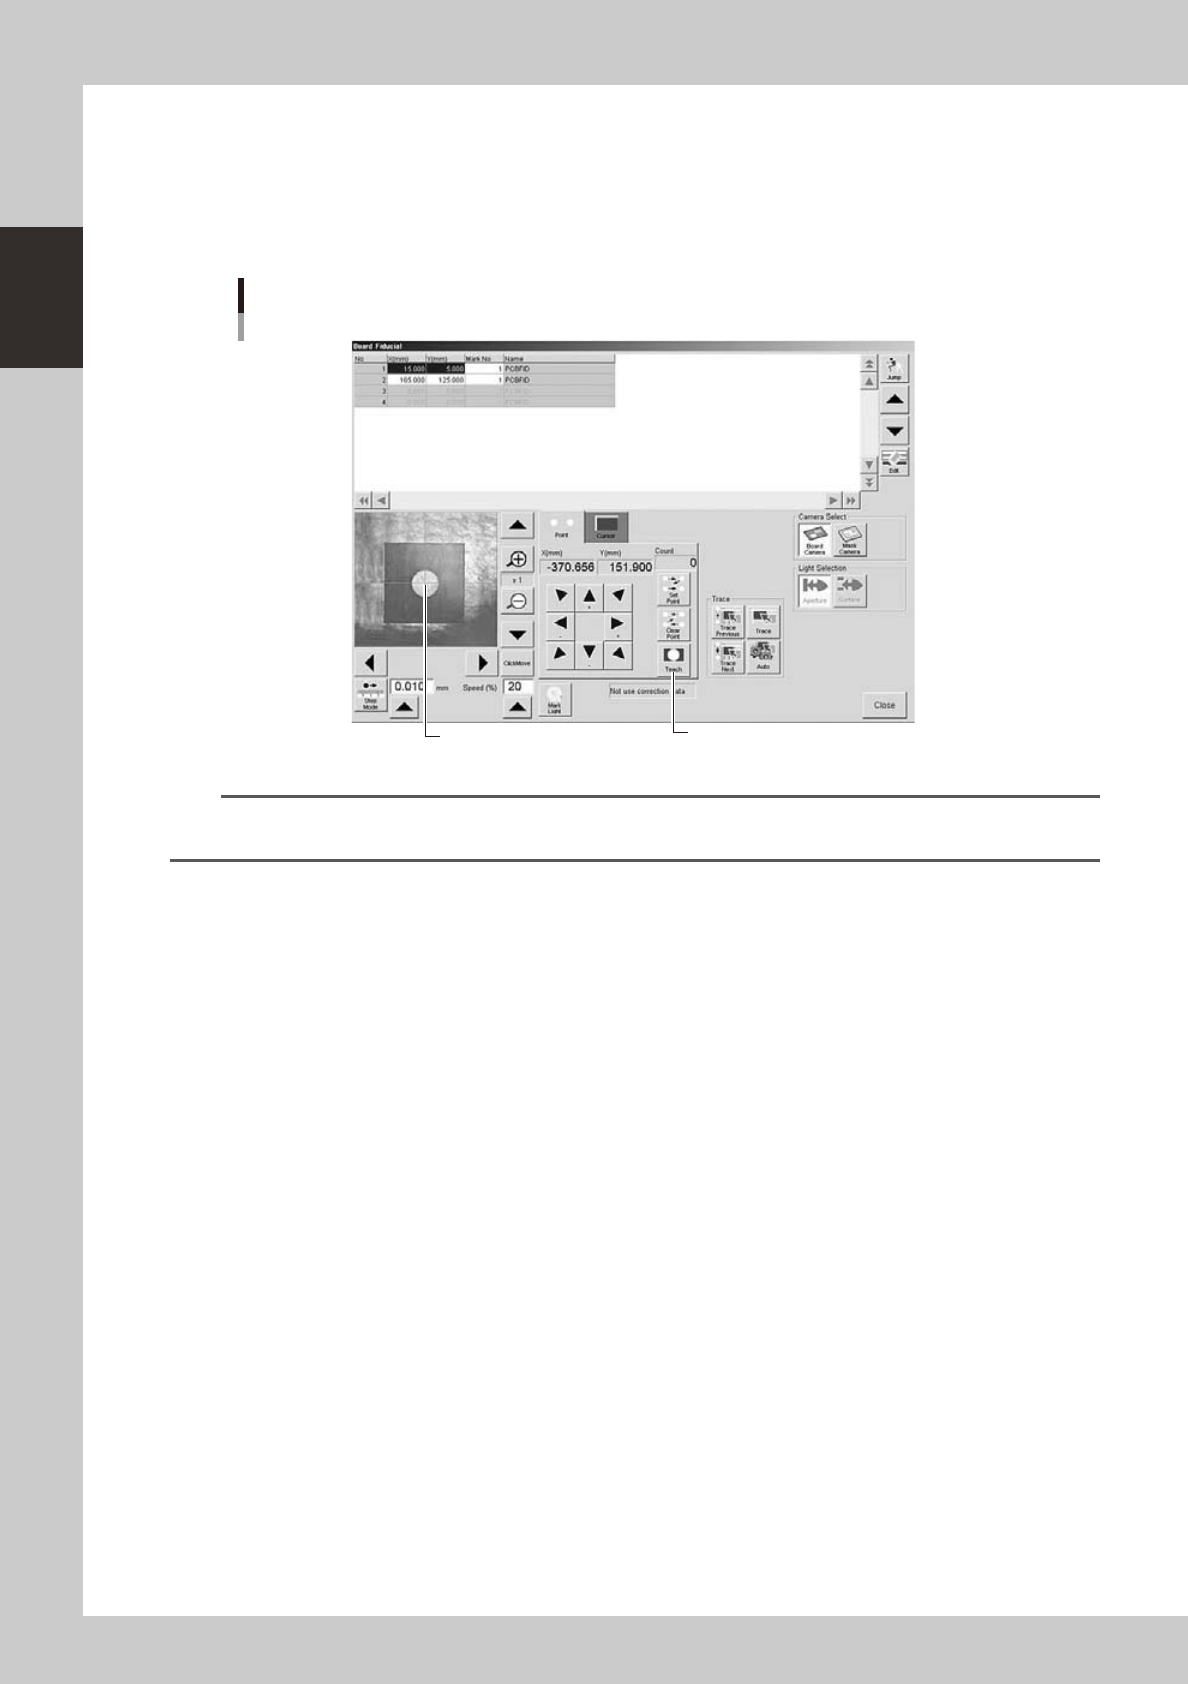
Press the [Teach] button to perform teaching input.
There are two ways to perform teaching input: "one-point input" and "multi-point input".
l
One-point input
After checking that the center of the target point is aligned with the center of the vision monitor,
press the [Teach] button.
One-point input
Center position data is input. [Teach] button
64705-N3-10
TIP
When the [Click Move] button is turned on (pressed), clicking the mouse at the target point where you want to
perform teaching makes it easier to align the target point with the center of the vision monitor.
7-7
7
ther functions
l
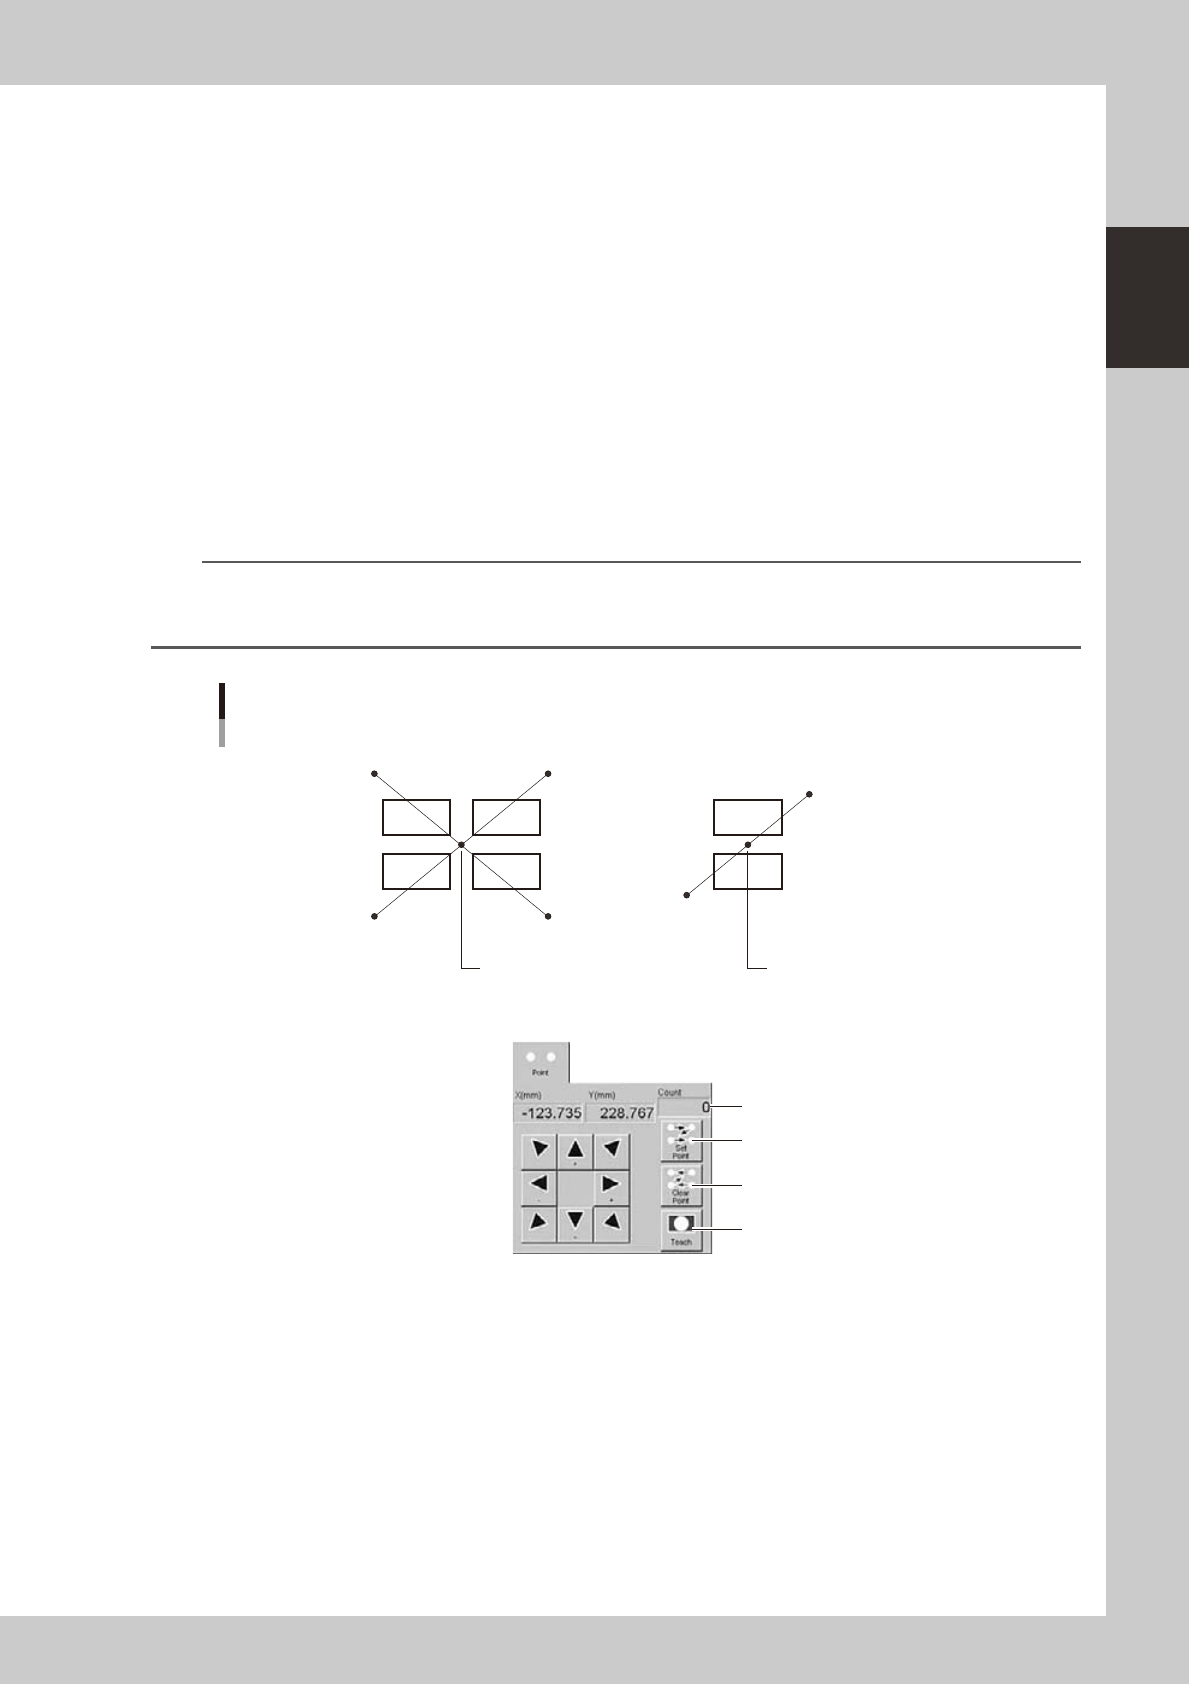
Multi-point input
The following steps explain the teaching method when the [Click Move] button is pressed. (If not using click movement,
use the [Axis movement] buttons to move the teaching unit to each target point.)
1. Click the mouse button at the first point.
The teaching unit moves to the first point and the first point is displayed at the center of the vision monitor.
2. Press the [Set Point] button.
3. Click the mouse button at the second point.
The teaching unit moves to the second point and the second point is displayed at the center of the vision monitor.
4. Press the [Set Point] button.
5. Click the mouse button at the third point.
The teaching unit moves to the third point and the third point is displayed at the center of the vision monitor.
6. Press the [Set Point] button.
7. Click the mouse button at the fourth point.
The teaching unit moves to the fourth point and the fourth point is displayed at the center of the vision monitor.
8. Press the [Teach] button.
The center position of the four points is input as the teaching position.
n
NOTE
For two-point input, perform teaching at two points as shown below. The center coordinates of the two points are
input as the teaching position. The number of teaching points (2 in this case) is shown in the "Count" box. To cancel
the previous point, press the [Clear Point] button.
Multi-point teaching
Center coordinates of
4 points are input.
4th point 3rd point
1st point
4-point input teaching 2-point input teaching
Center coordinates of
2 points are input.
Number of input points
[Set Point] button
[Clear Point] button
[Teach] button
2nd point
1st point
2nd point
63701-N3-00