YSP20_Users_E.pdf - 第180页
6-5 6 anaging the data 1.2 Making a back of system data T he following sections explain how to make a backup of VGOS system data including machine data. Usually , a backup copy of system should be stored on a USB memor…
6-4
6
anaging the data
7
Make a backup copy.
1. Press the [Copy] button.
A confirmation dialog box appears.
2. Press the [Yes] button to make a copy.
TIP
If you press the [Move] button, the selected data stored in the machine is transferred to the USB memory device.
8
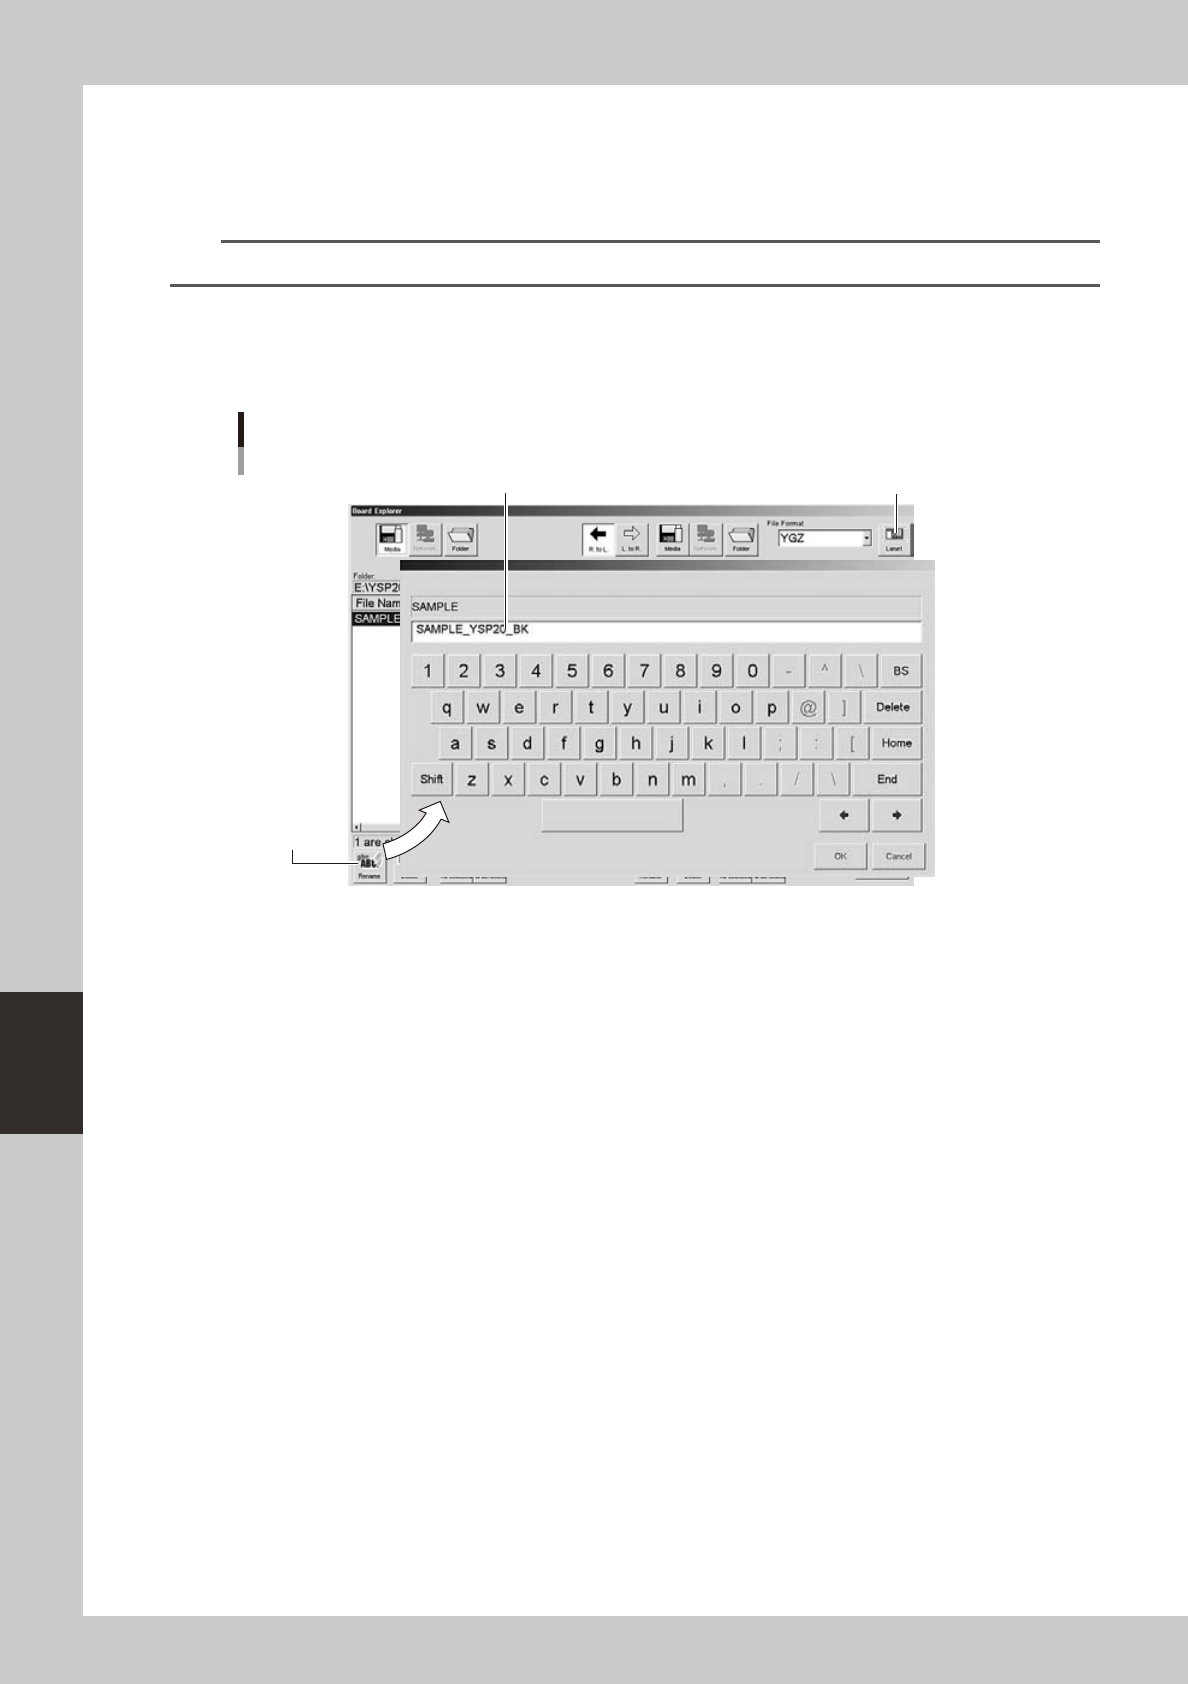
Rename the board data as needed.
To change the board data name so that you can easily identify it as backup data, press the [Rename]
button. When the keyboard dialog box appears, enter a new name and press the [OK] button.
Renaming the board data
Enter a new name for backup data
[Rename] button
[Lane] button
64604-N3-10
9
Press the [Close] button to close the Board Explorer.
6-5
6
anaging the data
1.2 Making a back of system data
The following sections explain how to make a backup of VGOS system data including machine data.
Usually, a backup copy of system should be stored on a USB memory or network drive.
c
c
c
n
NOTE
•Torestoresystemdata:
If for some reason the data in the flash memory disk is destroyed, insert the media (USB memory device) that contains
the system backup data after reinstalling the system and application software. Then press the [System Backup] button
on the Setup screen and then the [Restore] button in the "System backup" dialog box that appears.
1
Insert a USB memory device into the USB port.
The USB port is located behind the media access door on the front left of the machine.
2
Check the USB memory device connection.
The indicator on the lower left of the operation screen shows the connection status.
The connection is complete when the USB memory device icon appears red.
The connection is incomplete if the USB memory device icon is grayed out.
If so, retry to insert the USB memory again.
6-6
6
anaging the data
3
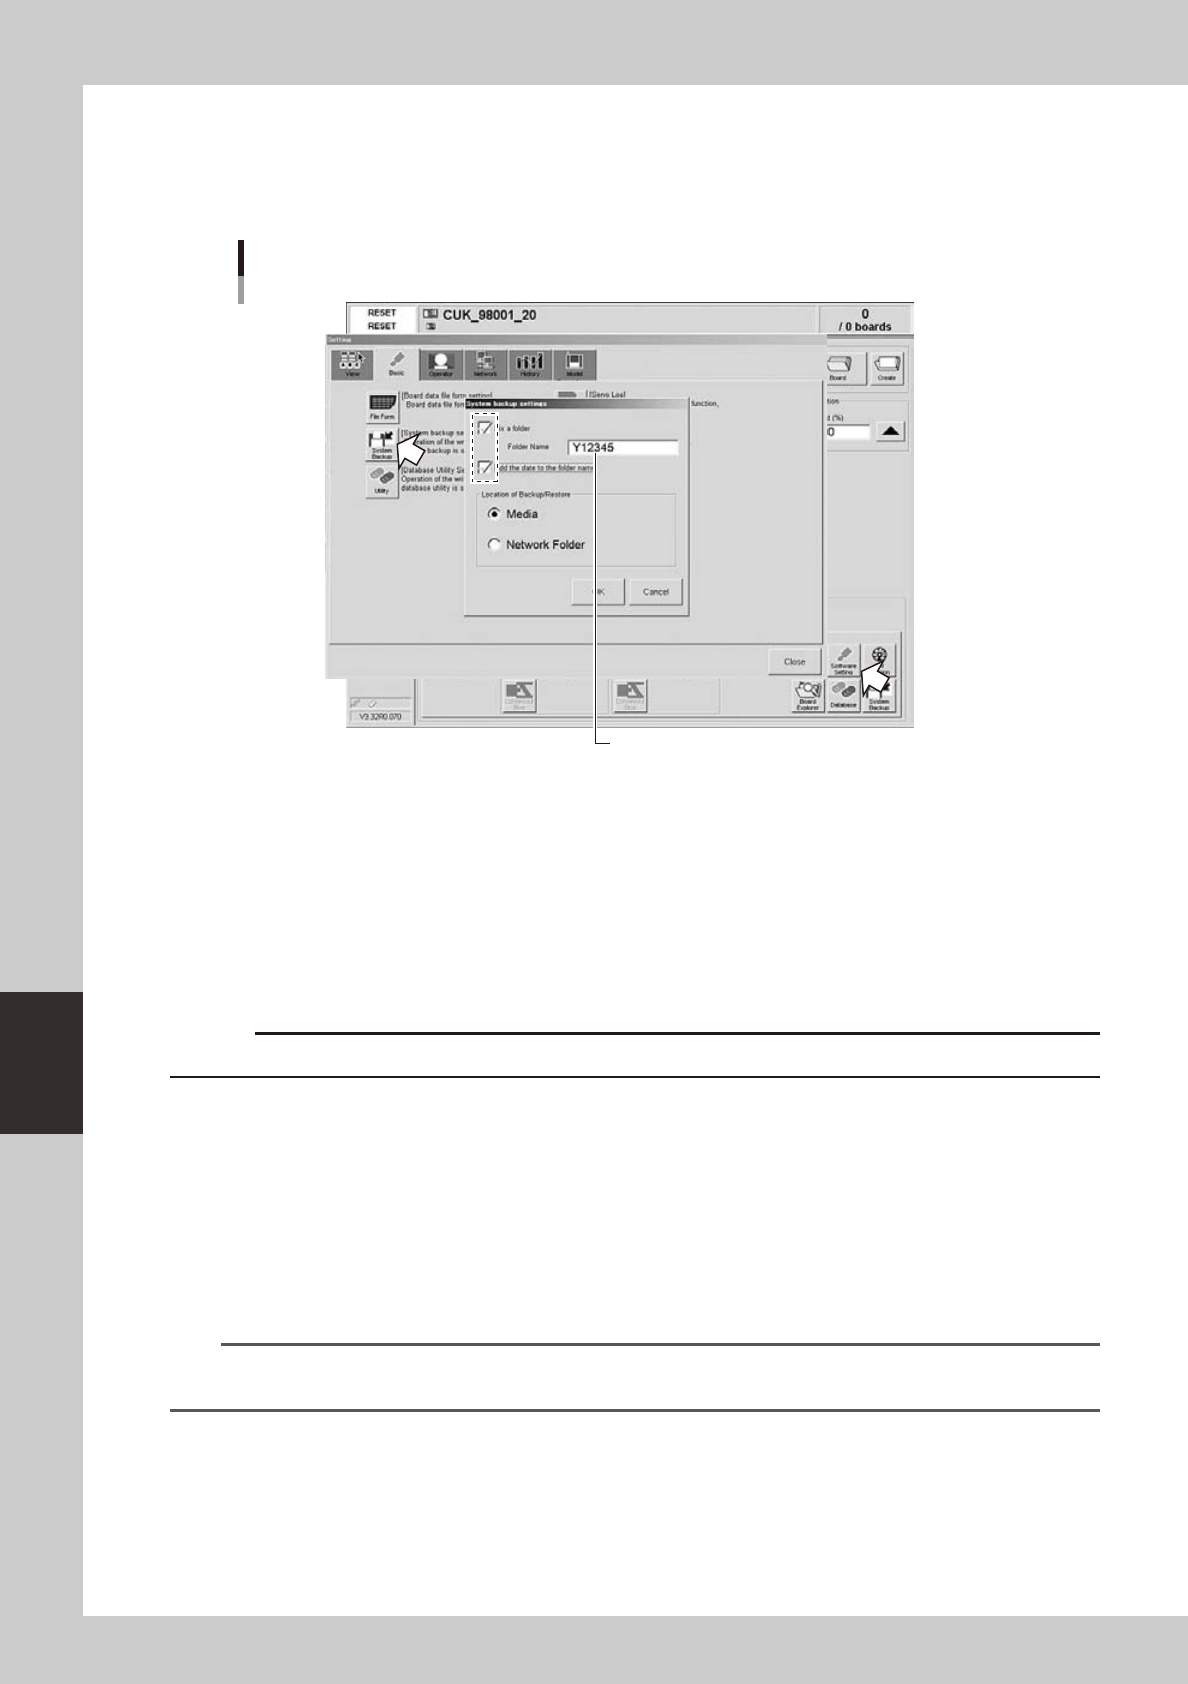
Make the system backup settings.
Press the [Software Setting] button on the [Utility] tab of the Setup screen to open the "Setting" screen,
and press the [System Backup] button on the [Basic] tab. The "System backup setting" dialog box then
appears. Make the necessary settings and press the [OK] button.
Enter the folder name.
Making the system backup settings
64624-N3-10
"Folder is fixed"
• Selectthischeckboxtoautomaticallycreateafolderunderthenameyouhaveenteredinthe
"Folder Name" text box and back up the system data into that folder.
• Ifthischeckboxiscleared,adialogboxwillappearwhenyoubackupthesystemdata,andallow
you to select the folder to store the system data.
"Folder Name"
Enter the folder name to store the system backup data. This is used only when the "Folder is fixed"
check box is selected.
c
"The date is attached to the name of a folder"
When this check box is selected, the system data will be backed up in the folder whose name
includes the date.
"Path setting for saving and restoring"
• When“Media”isselected
Saves the system backup data in the USB memory.
• When“Network”isselected
Allows setting the path to a storage device on the network.
n
NOTE
If you back up the system data twice or more a day, a number (2), (3) ... will be added to the end of each folder
name.