TR7500_Series_Software_v29_En.pdf - 第272页
Test Research Inc. 250 TR7500 Series User Guid e –Softwa re v.2.9.0 Figure 417 : Show Pin Direc tion [Show Box’s W eigh ting Image in Con t rol Box] – T his allows the control box to have the same weighting as the sele…
Test Research Inc.
TR7500 Series User Guide –Software v.2.9.0 249
11.6.1 View
Figure 414: View Menu
[Hide All Boxes] – Select this to hide all boxes in an FOV image.
[Search Range] – Select to show the search range of an inspection box that is a
kind of model image box.
[Link] – Select to show the links between inspection boxes.
[Other Box] – Select to see the inspection boxes which are in other FOVs to inspect.
Figure 415: View Other Boxes
Right click on the blue box to move the inspection box to the current FOV.
Click both right and left mouse buttons at the same time on the object
component to move all inspection boxes of the component to the FOV.
Figure 416: Move Inspection Boxes
[Box Side] – Show directionality of the pins with small circles. The correct direction
is shown in the following figure. If the direction is wrong, select [Edit/Rotate Side] to
change the direction.
Test Research Inc.
250 TR7500 Series User Guide –Software v.2.9.0
Figure 417: Show Pin Direction
[Show Box’s Weighting Image in Control Box] – This allows the control box to have
the same weighting as the selected inspection box. Only in TR7500 series.
[Show Panel Defect Map] – A defect map will appear in the top-left corner after
each inspection.
[White Balance] – FOV will show with white balance enhancement. Only in TR7500
series.
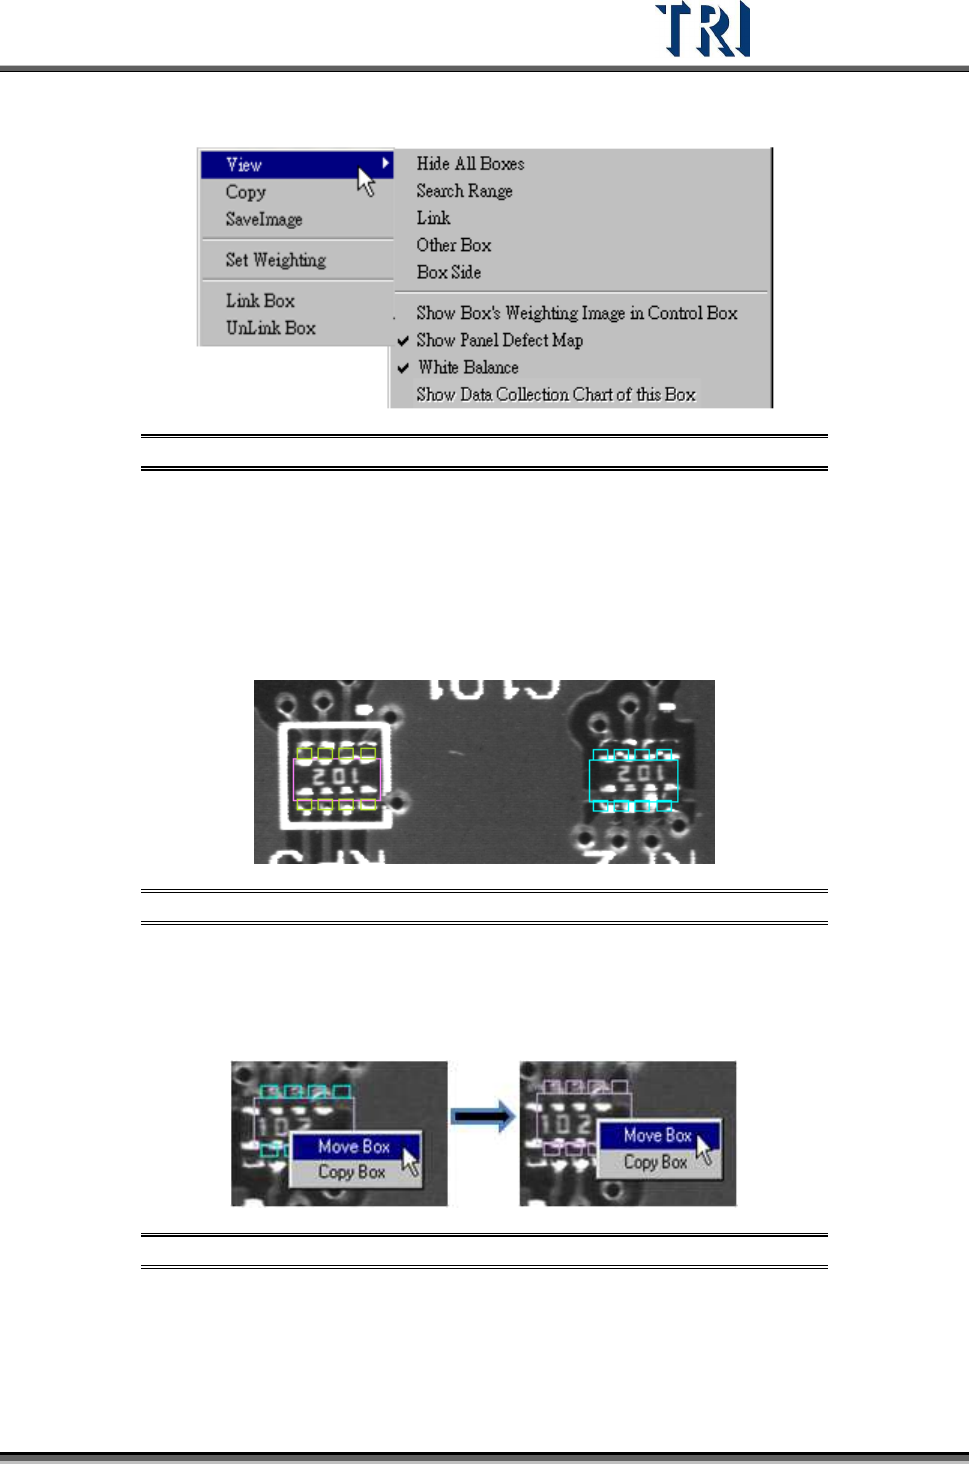
[Show Data Collection Chart of this Box] is enabled only when [P
ROGRAM
>
A
UTO
P
ASS
L
EVEL
S
ETTING
>
I
NLINE
D
ATA
C
OLLECTION
] is selected. It will show the most
recent 30 data. Click on a data point to show the result. Drag the yellow line to
change the pass level (see following two figures).
Figure 418: Data Collection Chart 1 – Selecting Data Point
Test Research Inc.
TR7500 Series User Guide –Software v.2.9.0 251
Figure 419: Data Collection Chart 2 –Change Pass Level
11.6.2 Copy
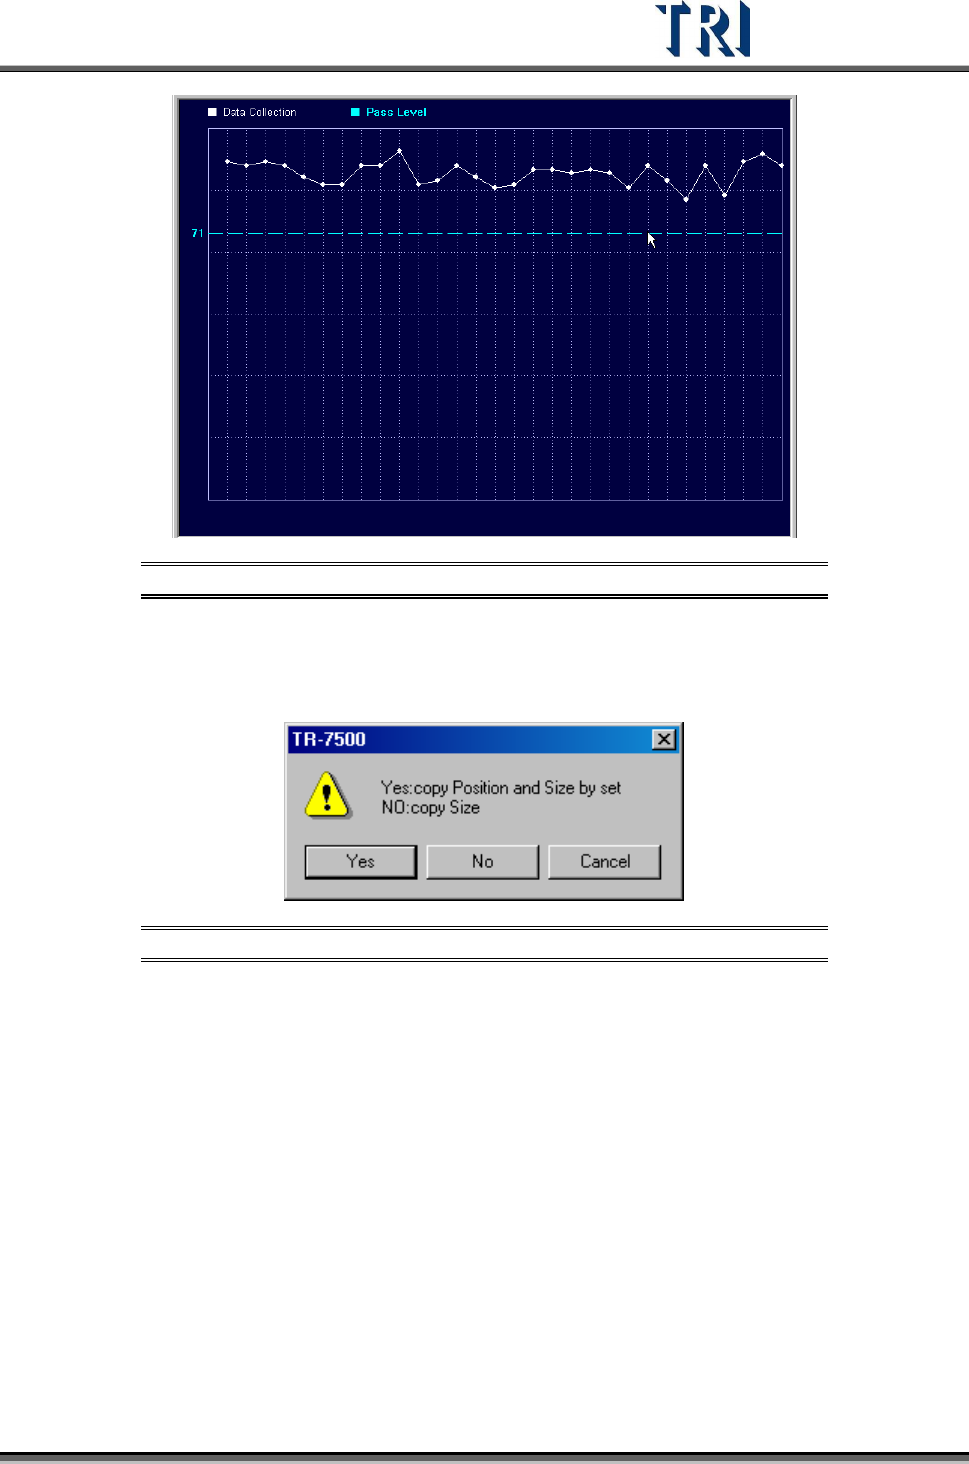
Copy the size or position to the other components with same type.
Figure 420: Confirm Copy Size and/or Position
[Yes] – Copy the size and position to the related components on other boards in a
multi-board panel. If the inspection box is trained the setting can’t be changed.
[No] – Copy just the size to the other components.
11.6.3 Save Image
Save the FOV to the folder that the SOL file is saved in. The file name is composed by date
and time.
11.6.4 Set Fail String
Users can redefine the fail string of each inspection box. This is the same method used in
[Library].