TR7500_Series_Software_v29_En.pdf - 第50页
Test Research Inc. 28 TR7500 Series User Guide – Software v.2.9.0 Figure 45: Grab bed Image Used as Stand ard Image 8. Press [Set Fiducial M ark ] icon to set the second f iducial mark. Figure 46: Set Sec ond Fiduc ial M…
Test Research Inc.
TR7500 Series User Guide –Software v.2.9.0 27
Figure 42: Standard Fiducial Mark Image Implemented
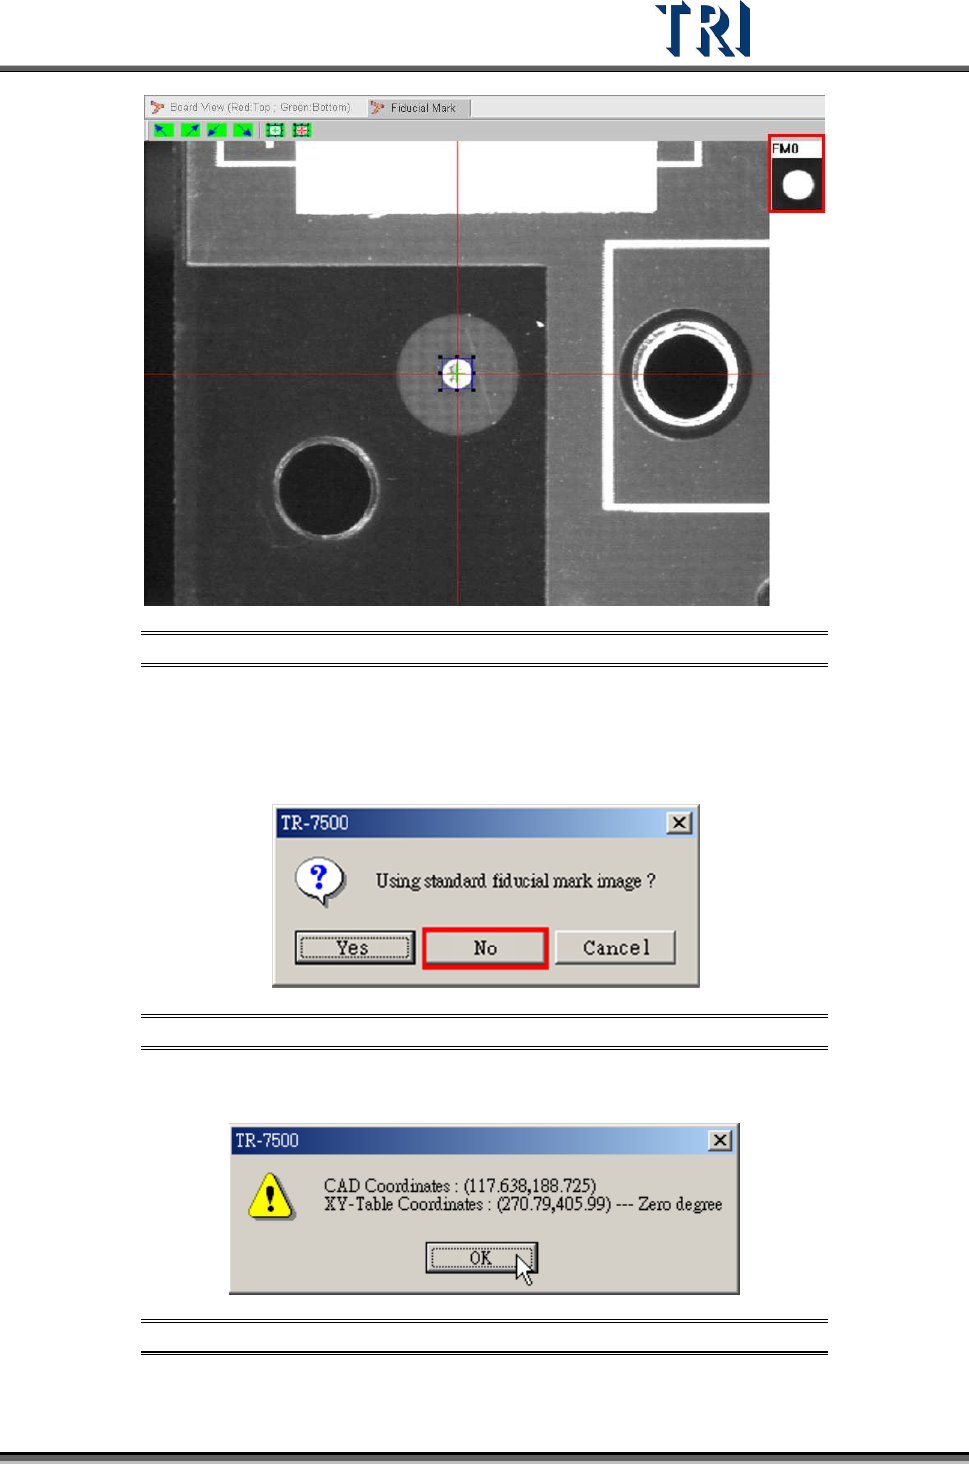
Not Using the Standard Fiducial Mark Image.
Step1. When the [Confirm Using Standard Fiducial Mark Image] window is
displayed, select [No].
Figure 43: Not Using Standard Fiducial Mark Image
Step2. A window appears showing the coordinates of fiducial mark. Press [OK].
Figure 44: Confirm Fiducial Mark Coordinates
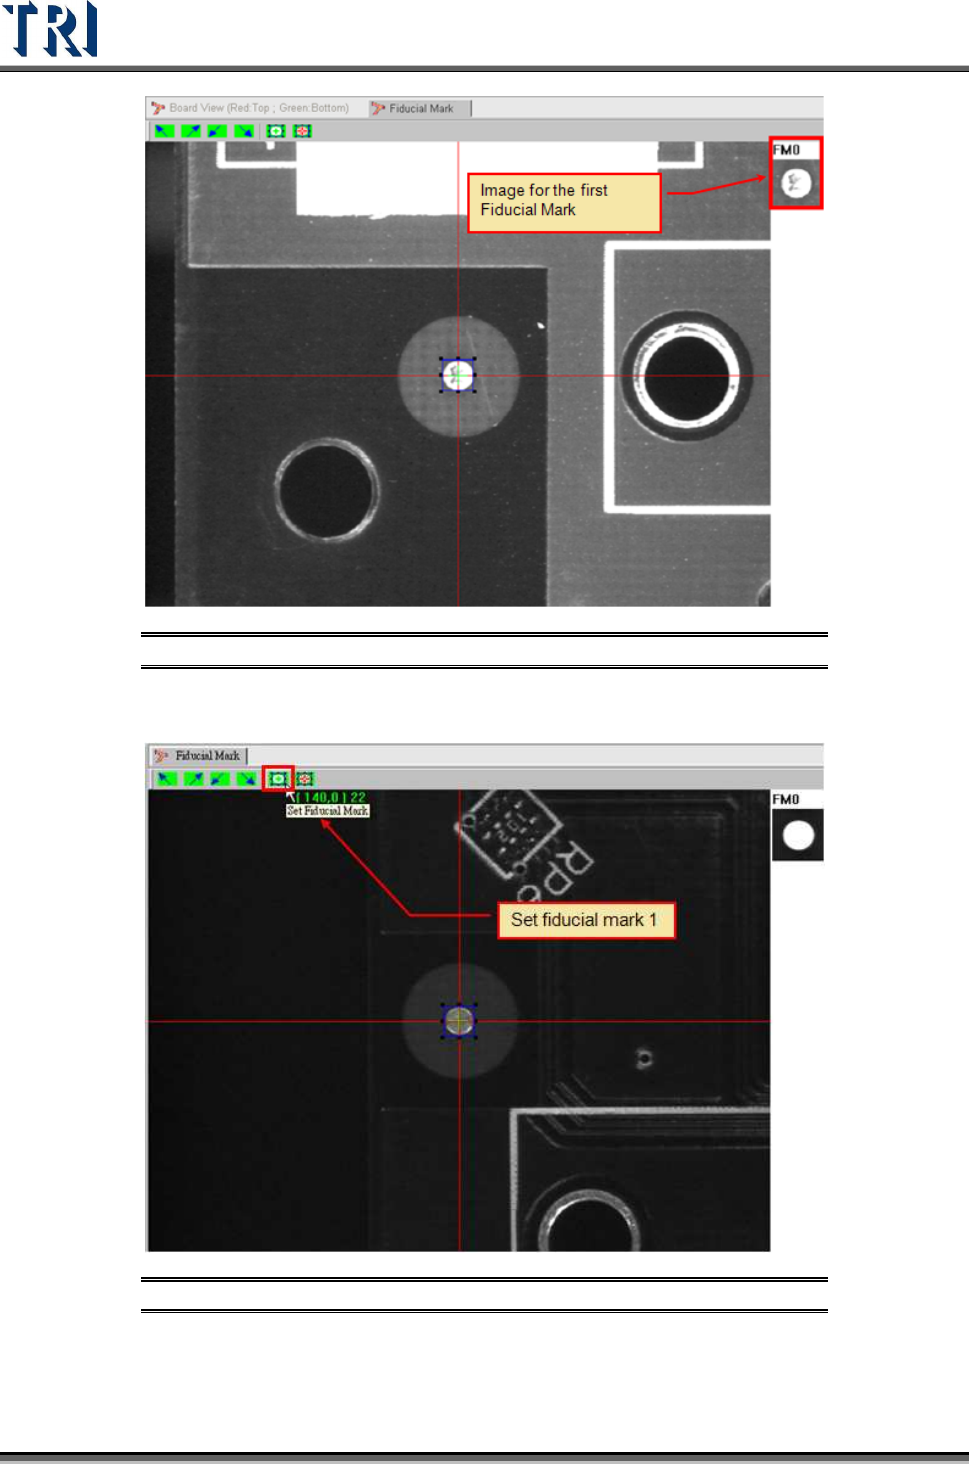
Step3. System will use the grabbed image as the standard matching image.
Test Research Inc.
28 TR7500 Series User Guide –Software v.2.9.0
Figure 45: Grabbed Image Used as Standard Image
8. Press [Set Fiducial Mark] icon to set the second fiducial mark.
Figure 46: Set Second Fiducial Mark
9. Input fiducial component name or choose “No CAD”.

Test Research Inc.
TR7500 Series User Guide –Software v.2.9.0 29
Figure 47: Input Second Fiducial Mark Name
10. Set the lighting for the second fiducial mark. When the shape of fiducial mark is not
clear under the current lighting, you can adjust the lighting manually. Press the [Light]
button then the [Lighting Control Editor] window appears. Select the [Fiducial1] item
and adjust the lighting then press [Save] to finish the setting.
11. Press [Get Fiducial Mark] icon to get the second fiducial mark coordinates.
12. Choose if you want to use the standard fiducial mark image.
13. Display second fiducial mark coordinates.
Figure 48: Display Second Fiducial Mark Coordinates
14. The finished images of two fiducial marks are shown at the right side of the active
window. If you are not satisfied with the images, press
[Set Fiducial Mark] to train
the images again.