TR7500_Series_Software_v29_En.pdf - 第31页
Test Research Inc. TR7500 Series User Guide – Software v.2.9.0 9 3. Pre-find component posit ion f or board ali gnment. Figure 14: Bo ard View -- Fi nd Component Position 4. Click on [Next] to go to nex t step. Figure 15…
Test Research Inc.
8 TR7500 Series User Guide –Software v.2.9.0
2.4 Edit Component Data
Edit the AOI file to meet the position of components in the upper left corner board of a multi-
board panel.
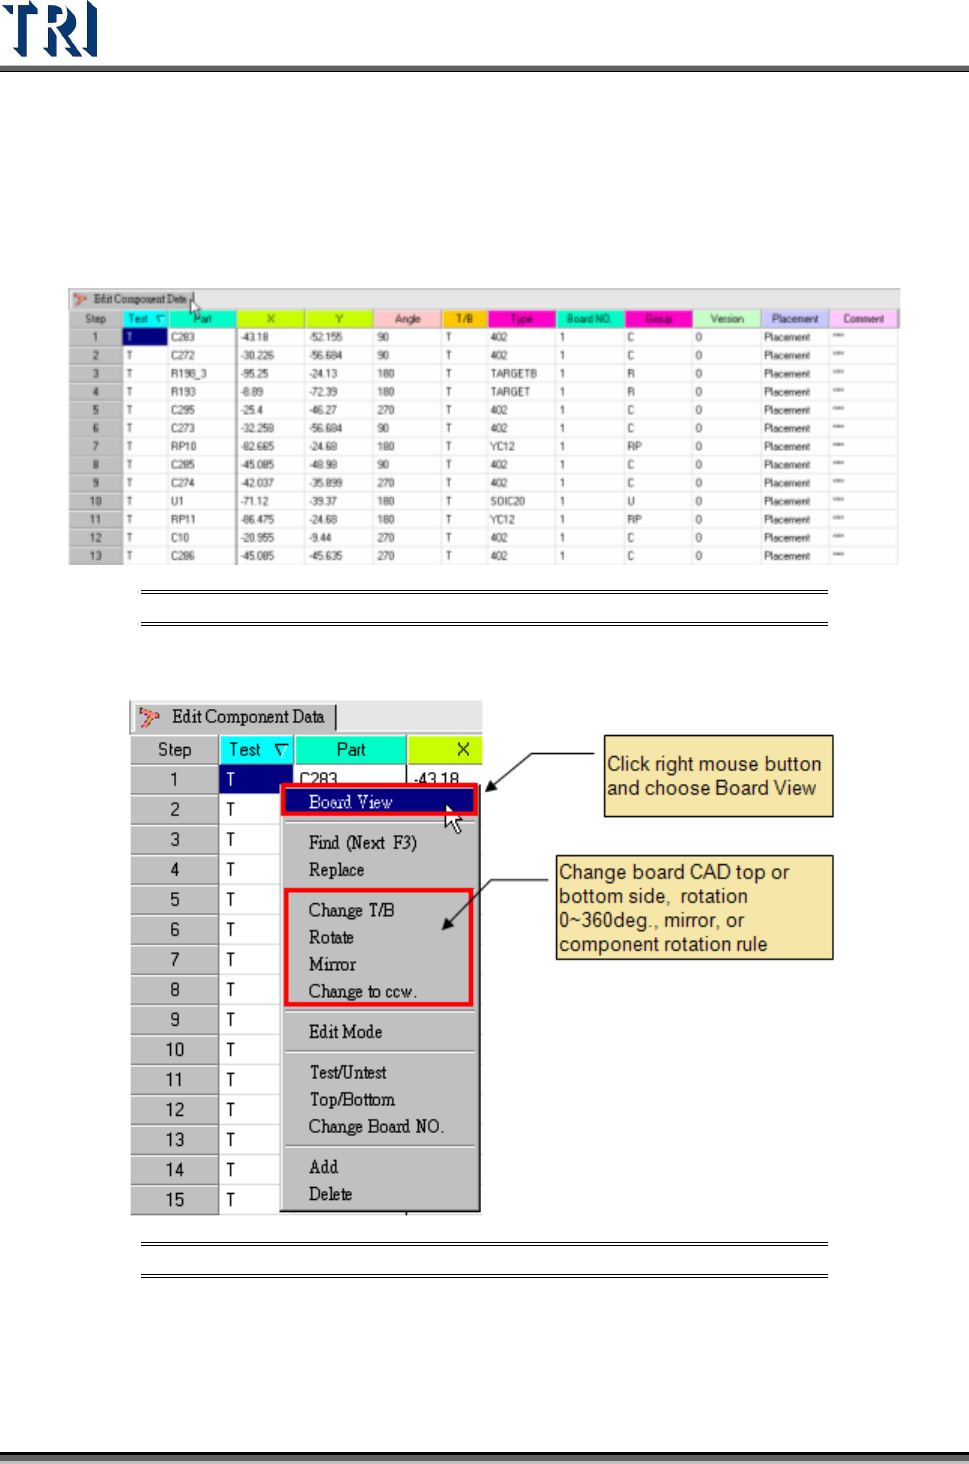
1. [Component Data List]
Figure 12: Component Data List
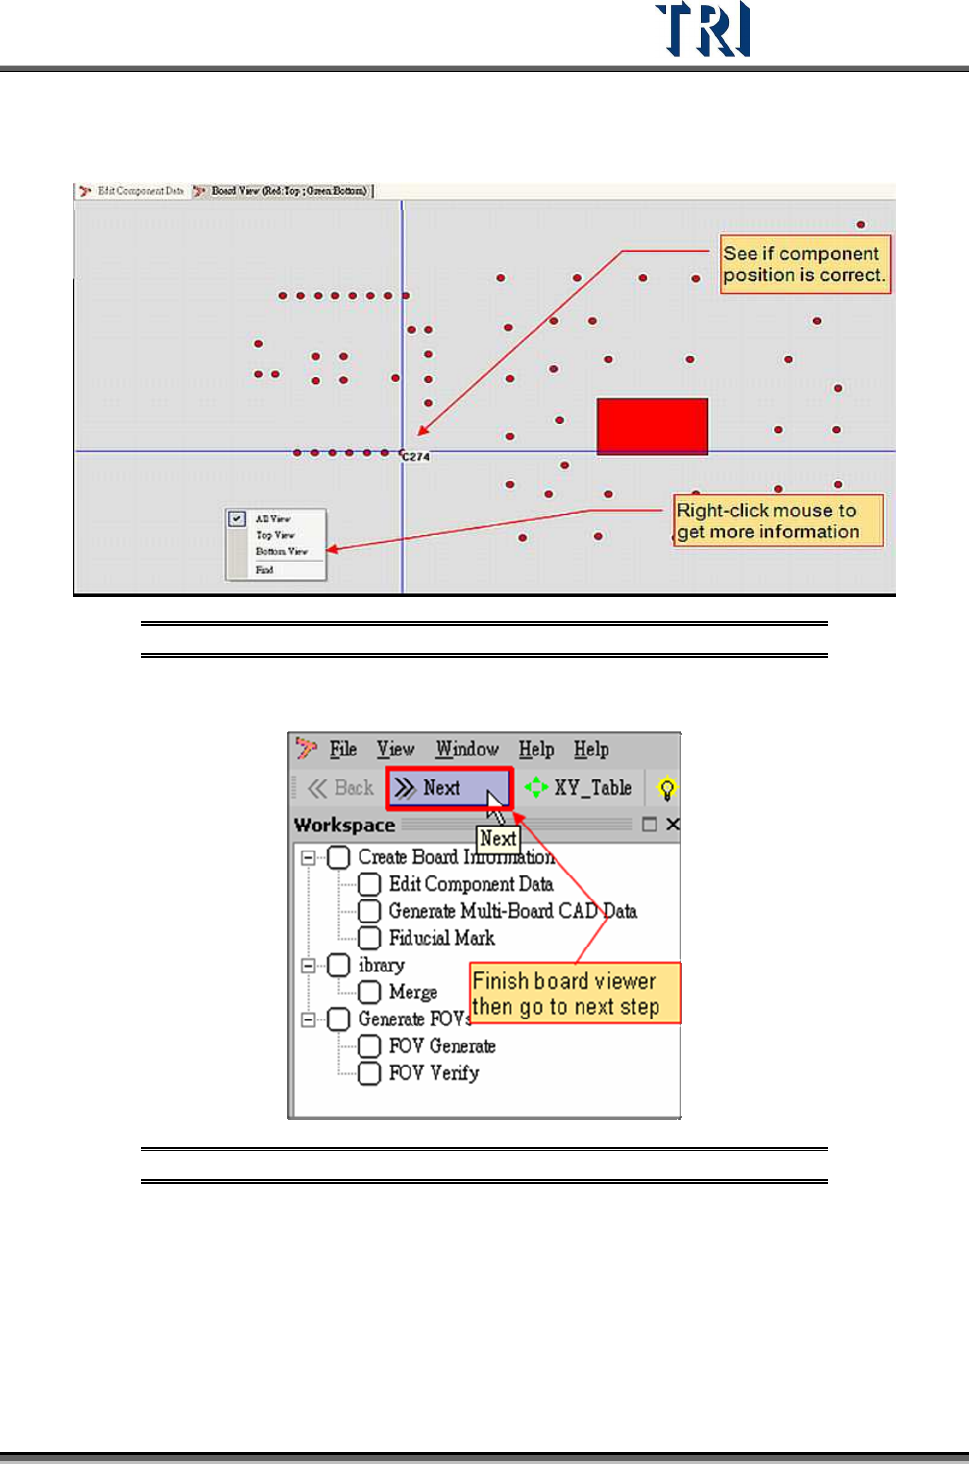
2. Board pad Viewer.
Figure 13: Select Board View
Test Research Inc.
TR7500 Series User Guide –Software v.2.9.0 9
3. Pre-find component position for board alignment.
Figure 14: Board View -- Find Component Position
4. Click on [Next] to go to next step.
Figure 15: Going to Next Step in ATPG Process
5. System confirm dialog window.
Test Research Inc.
10 TR7500 Series User Guide –Software v.2.9.0
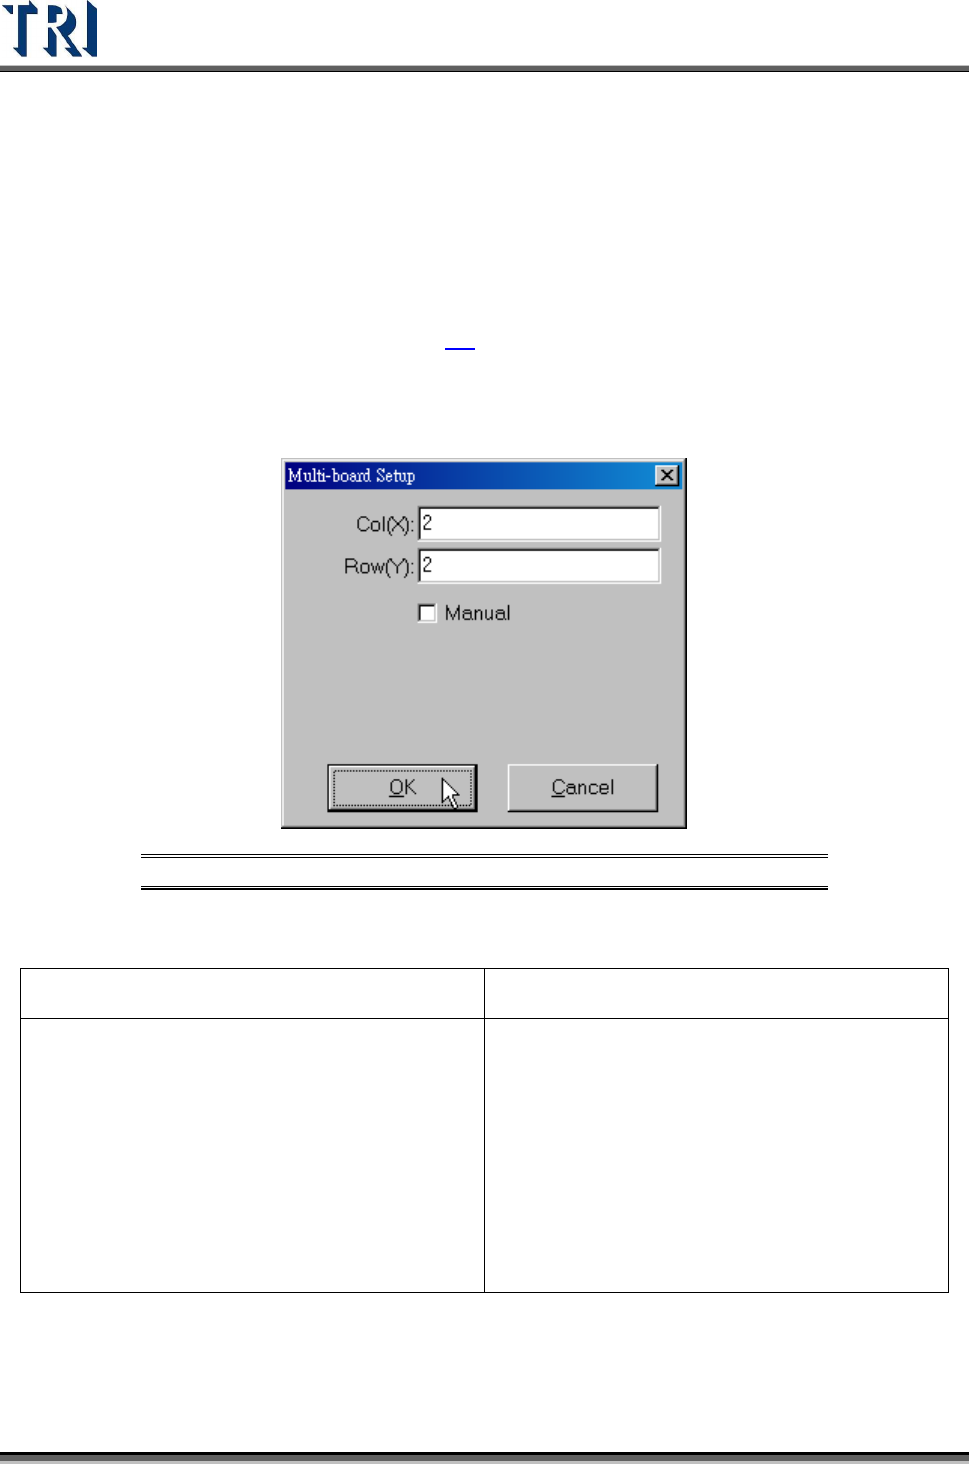
2.5 Generate Multi-Board CAD Data
The CAD file collected is for a single board, if testing is for a multi-board panel multi-board
data must be created..
If the PCB is a single board, input ‘1’ in column and row field separately and press [Next] to
enter the next step, Fiducial Mark Setting (
2.6).
2.5.1 Set Multi-Board Arrangement Data
1. Set Multi-Board matrix (X direction & Y direction board counting).
Figure 16: Multi-Board Setup
Manual-When selected, it means the regular panel; when unselected, it means the special
panel.
Regular Panel Irregular Panel
a. A panel can be mentioned by MxN boards,
Including single board
b. FOV will be arranged in multi-board.
c. Multi-board layout can be changed directly
and don’t have to program again.
a. A panel with different kinds of multi-
boards, it can’t be mentioned by MxN.
b. FOV will be arranged in a single board.
c. If the multi-board layout is changed, user
has to program again.
d. User only has to input the total number of
boards.
(1) System defines the board at upper-left corner as Board 1. In [Edit Component Data], we
have set the CAD data to cooperate with Board 1, so we only have to set the side and
angle of the other boards except Board 1. Right click on every board to set its side and
angle.
(2) The following is the finished picture.