TR7500_Series_Software_v29_En.pdf - 第301页
Test Research Inc. TR7500 Series User Guide – Software v.2.9.0 279 11.9.6 Tool 11.9.6. 1 Enhance Enhances the brigh t ness and contrast in the multi- function window . 11.9.6. 2 Enable Unselect the check box to cancel th…

Test Research Inc.
278 TR7500 Series User Guide –Software v.2.9.0
[Mask Zone] – Use 1 as an example. Next to the edge points the adjacent 1 pixel
point is masked as untest.
[Inspection Parameter] – Set the parameters for inspection. The system only
inspects the area that is in the ROI box and not masked.
[Inspect Sensitivity] – Use 60 as an example. If the difference of gray level
between neighboring pixels is larger than 40 (100-60) the two pixels will be
regarded as edges.
[Tolerance] – Use 5 as an example. If a group size of edges is more than 5 the
inspection window will be regarded as failed.
The [Train Sensitivity] value must be bigger than [Inspect Sensitivity] or it will result
in more false alarms.
11.9.5.3 Delete ROI
Press the button to delete all ROI windows in the FOV.
Test Research Inc.
TR7500 Series User Guide –Software v.2.9.0 279
11.9.6 Tool
11.9.6.1 Enhance
Enhances the brightness and contrast in the multi-function window.
11.9.6.2 Enable
Unselect the check box to cancel the [Enhance] function.
11.9.6.3 Angle
Input the angle and press [Rotate] to rotate the multi-function window.
11.9.6.4 Rotate
Press the button to rotate the multi-function window.
11.9.6.5 2X
Show a double-sized FOV image. The display area is the multi-function location and the
image is reviewed for test.
11.9.6.6 Load
Load a saved FOV image for review or test. The image is not saved in the project.
11.9.6.7 INSPECT
Inspect the current FOV and display the result.
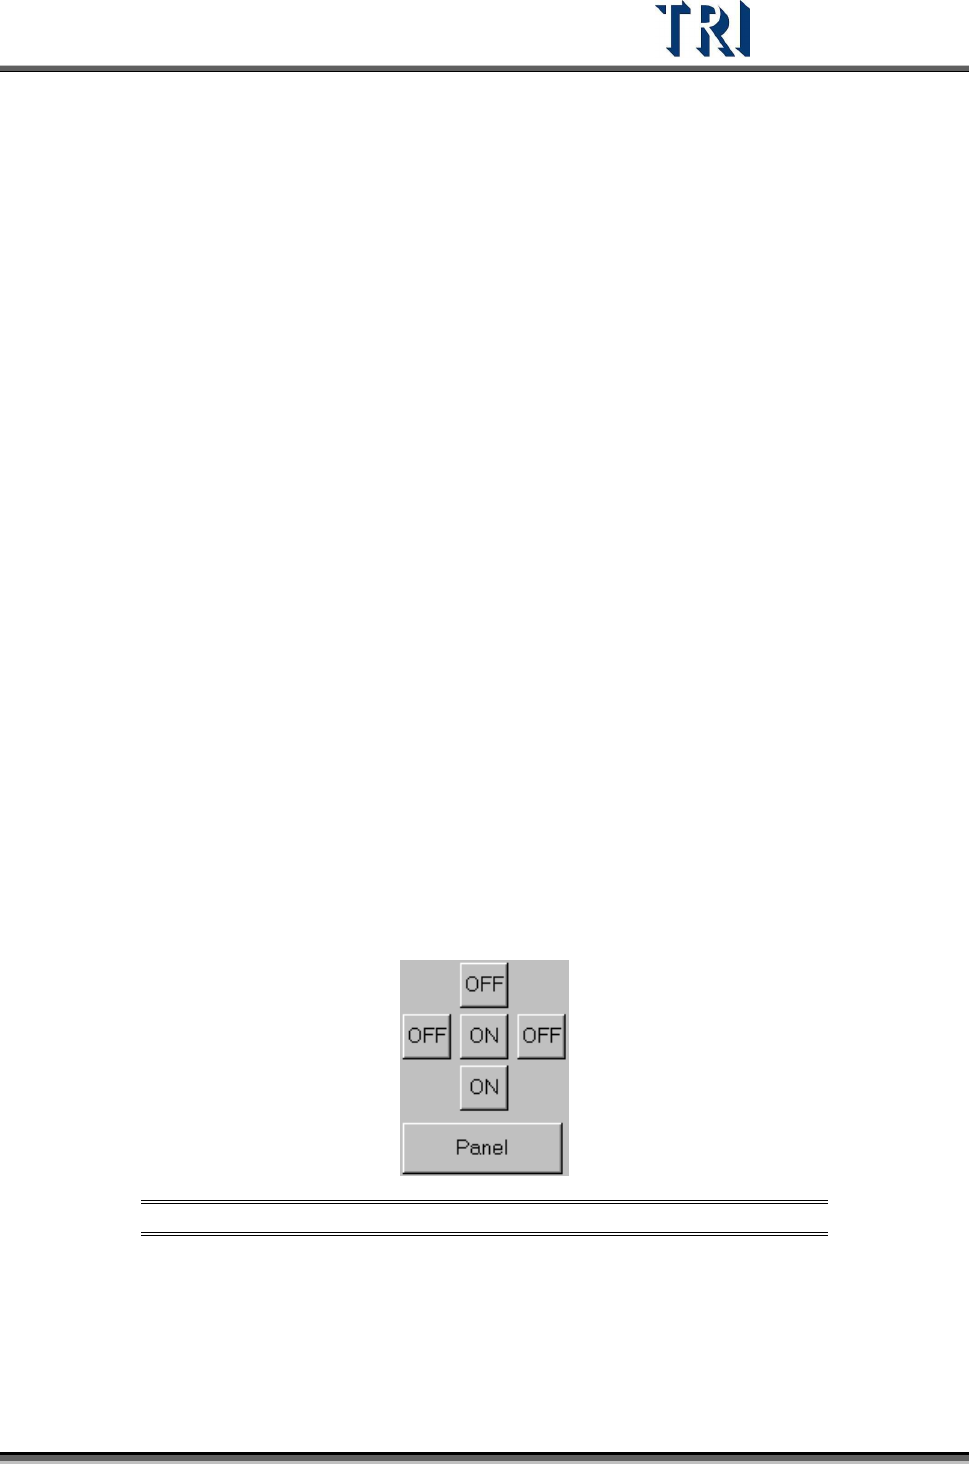
11.9.7 Switch FOV
Figure 471: Switch FOV Panel
[Panel/Set] – [Panel] means to review all the FOVs in one PCB; [Set] means to
review the set of FOVs for a multi-board panel.
Top Camera – [ON] means to review the FOVs. The FOVs display as red boxes;
[OFF] means not to review and the red boxes disappear.
Test Research Inc.
280 TR7500 Series User Guide –Software v.2.9.0
Front Camera – [ON] means to review the FOVs and the FOVs display as yellow
boxes; [OFF] means not to review and the yellow boxes disappear.
Rear Camera – [ON] means to review the FOVs and the FOVs display as orange
boxes; [OFF] means not to review and the orange boxes disappear.
Left Camera – [ON] means to review the FOVs and the FOVs display as purple
boxes; [OFF] means not to review and the purple boxes disappear.
Right Camera – [ON] means to review the FOVs and the FOVs display as blue
boxes; [OFF] means not to review and the blue boxes disappear.
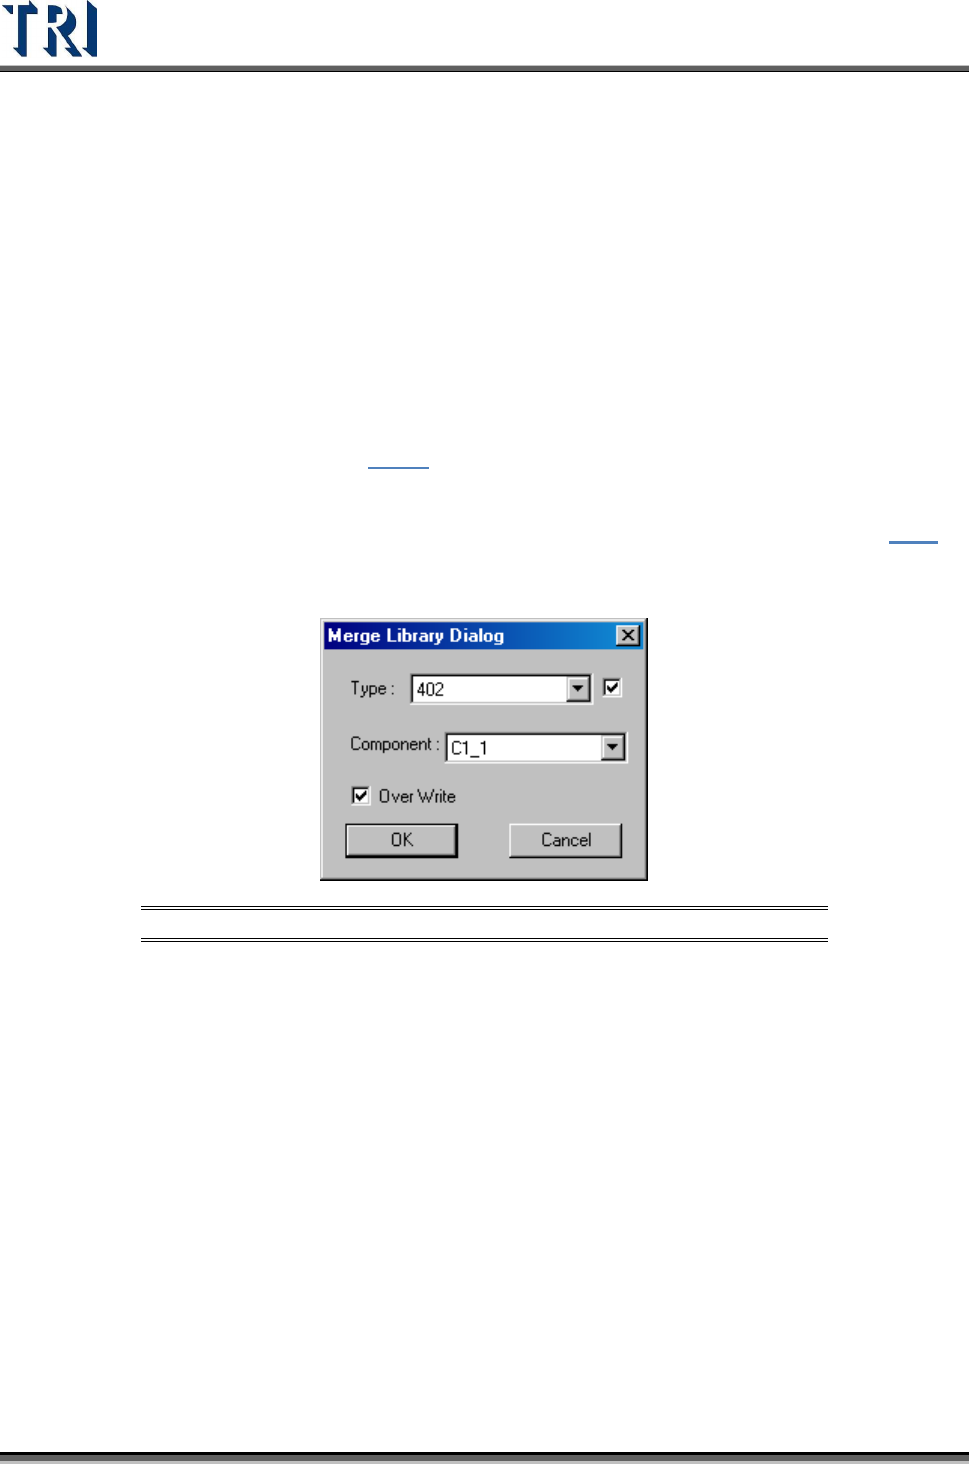
11.9.8 Merge
Click on [Merge] to merge the specific library with a component. After merging, FOV images
should be captured again (refer to
3.10.3).
Merge Steps:
Step1. Press [Merge] and a library window appears. The detailed functions are in
8.1.2.
Select a library and press [OK].
Step2. Input the object component type or name then press [OK].
Figure 472: Merge Library Dialog
[Type] – Select the object type. The check box means merge the library to all
components with the type.
[Component] – To merge the library to a single component, do not select the
check box and choose a component.
[Over Write] – Select to overwrite the data or it just merge the component don’t
have inspection boxes.
Step3. Capture FOV images again.
11.9.9 Histogram
The histogram curve displays the distribution of gray levels in the multi-function window. The
horizontal axis is the gray level; the vertical axis refers to the pixel counts. The red line
means the gray level where the mouse cursor is.