TR7500_Series_Software_v29_En.pdf - 第45页
Test Research Inc. TR7500 Series User Guide – Software v.2.9.0 23 Figure 34: Find Fiducial M ark Manuall y Steps 1 & 2 Step2. Press [OK]. Step3. Use the [Motion Control Panel] or click on the image to mov e the camer…
Test Research Inc.
22 TR7500 Series User Guide –Software v.2.9.0
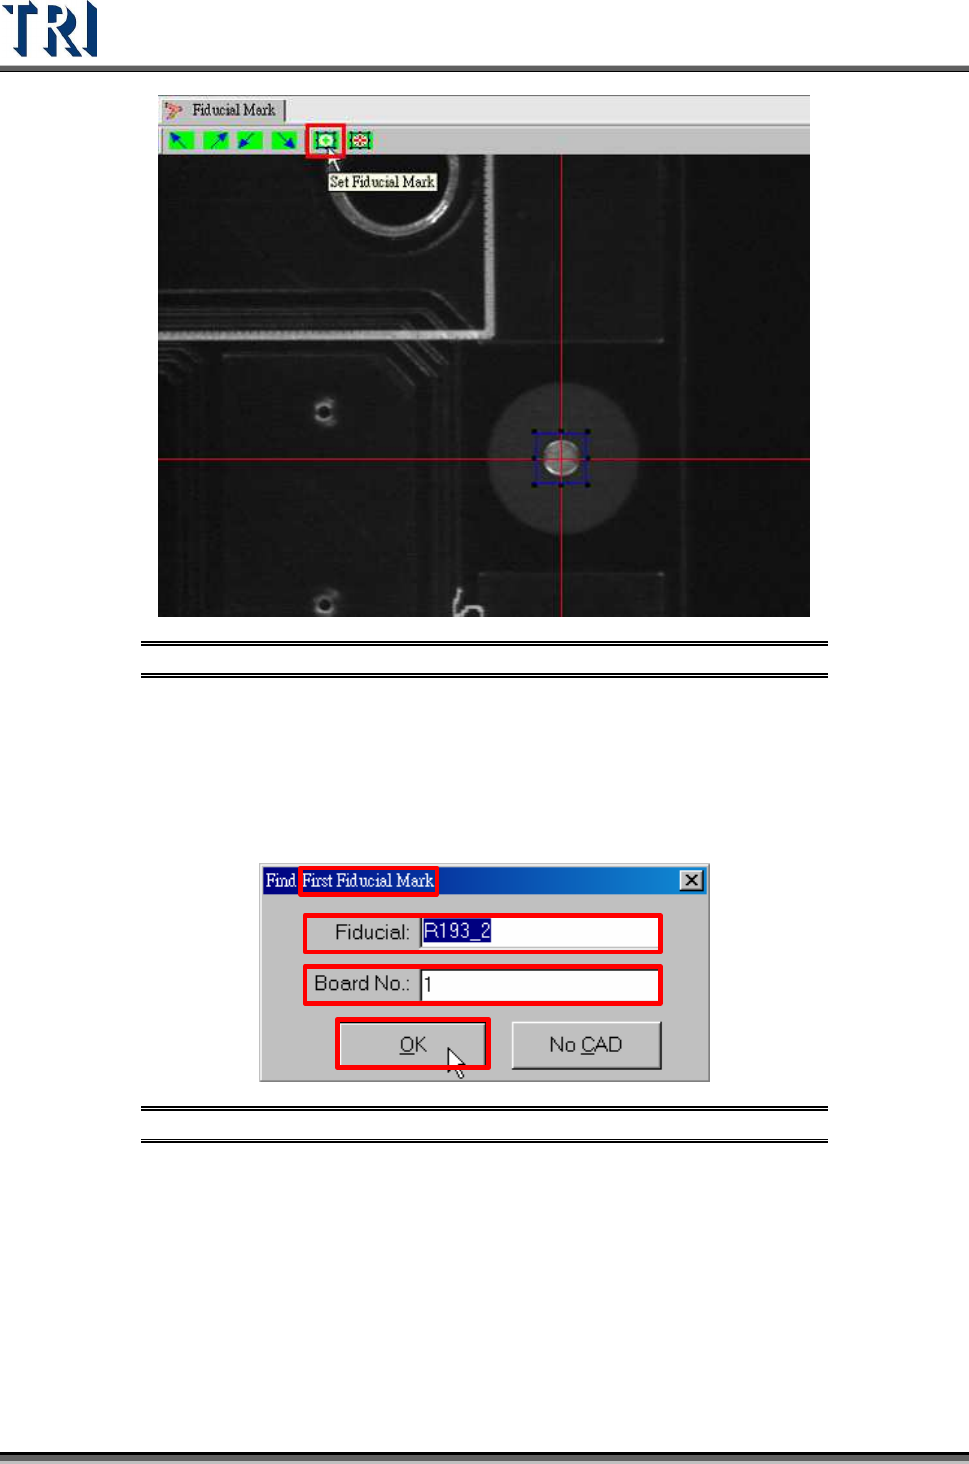
Figure 32: Set Fiducial Mark Icon
2. The first fiducial mark (Fiducial 0) must be found In the beginning. If the fiducial mark
to be set is listed in CAD file, input the name and board number directly and press
[OK]. Or press [No CAD] to find the fiducial mark manually.
3. With CAD
Step1. Input the name and the board number of fiducial mark and press [OK].
Figure 33: Using CAD to Find First Fiducial Mark
Step2. The camera moves to the position of the fiducial mark automatically
according to the CAD data.
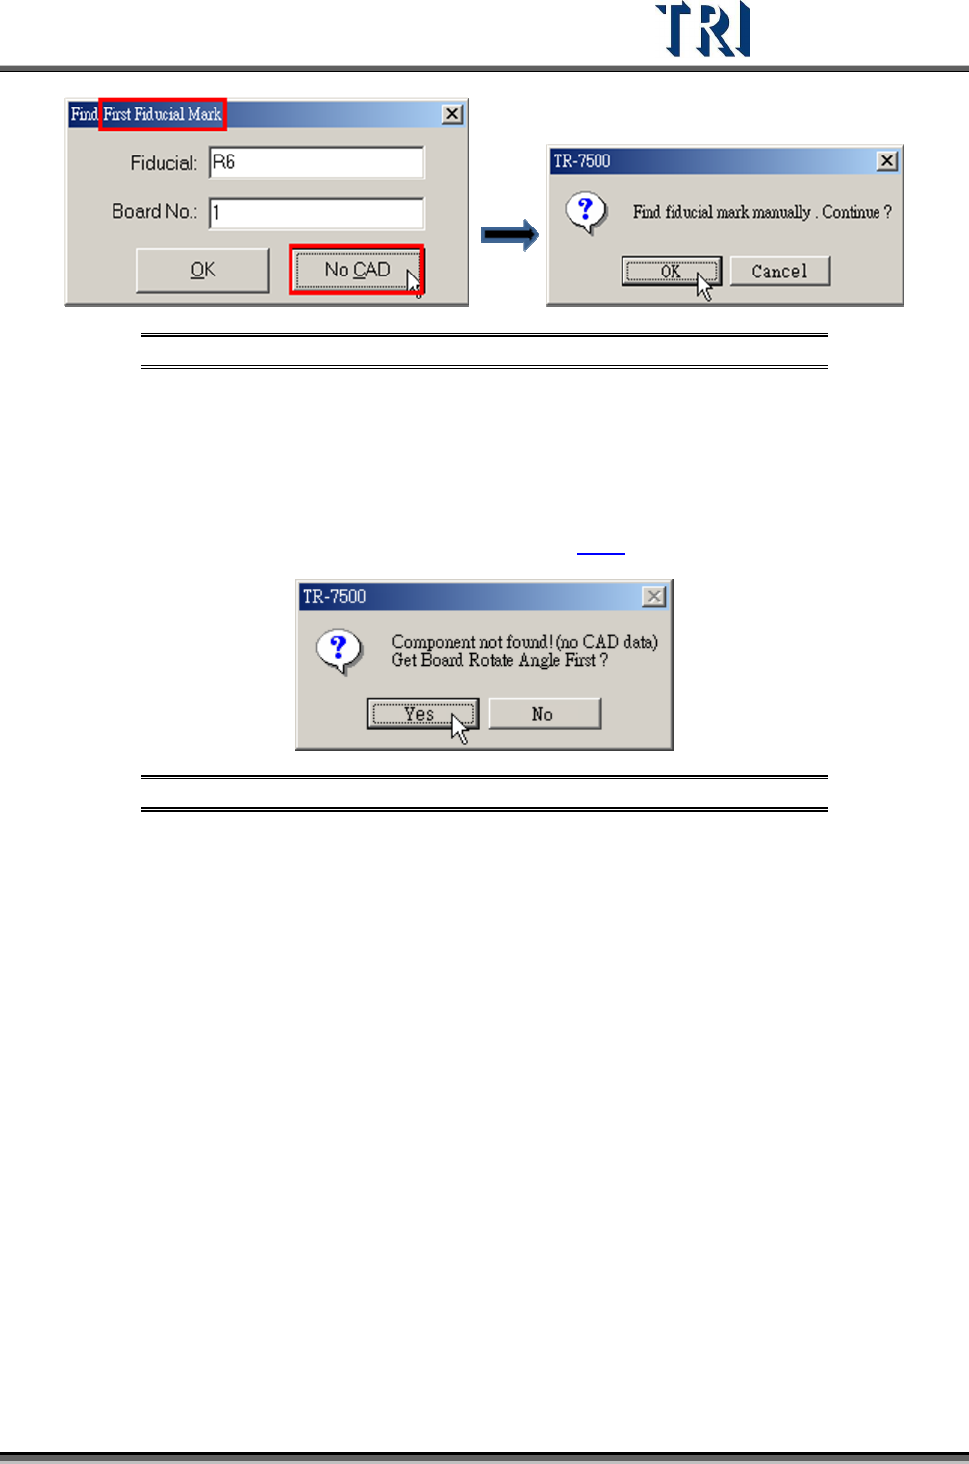
4. Without CAD
Step1. Press [No CAD].
Test Research Inc.
TR7500 Series User Guide –Software v.2.9.0 23
Figure 34: Find Fiducial Mark Manually Steps 1 & 2
Step2. Press [OK].
Step3. Use the [Motion Control Panel] or click on the image to move the camera to
the correct position.
If the PCB is a single board and [No CAD] is selected here, the system asks to find rotation
angle first. The procedure for getting rotation angle is in
2.5.2
Figure 35: Confirm Get Rotation Angle
If the PCB is a single board and [OK] is selected to use fiducial name to set fiducial mark, the
system calculates the rotation angle according to the fiducial mark coordinates. It is not
necessary to get the rotation angle.
Test Research Inc.
24 TR7500 Series User Guide –Software v.2.9.0
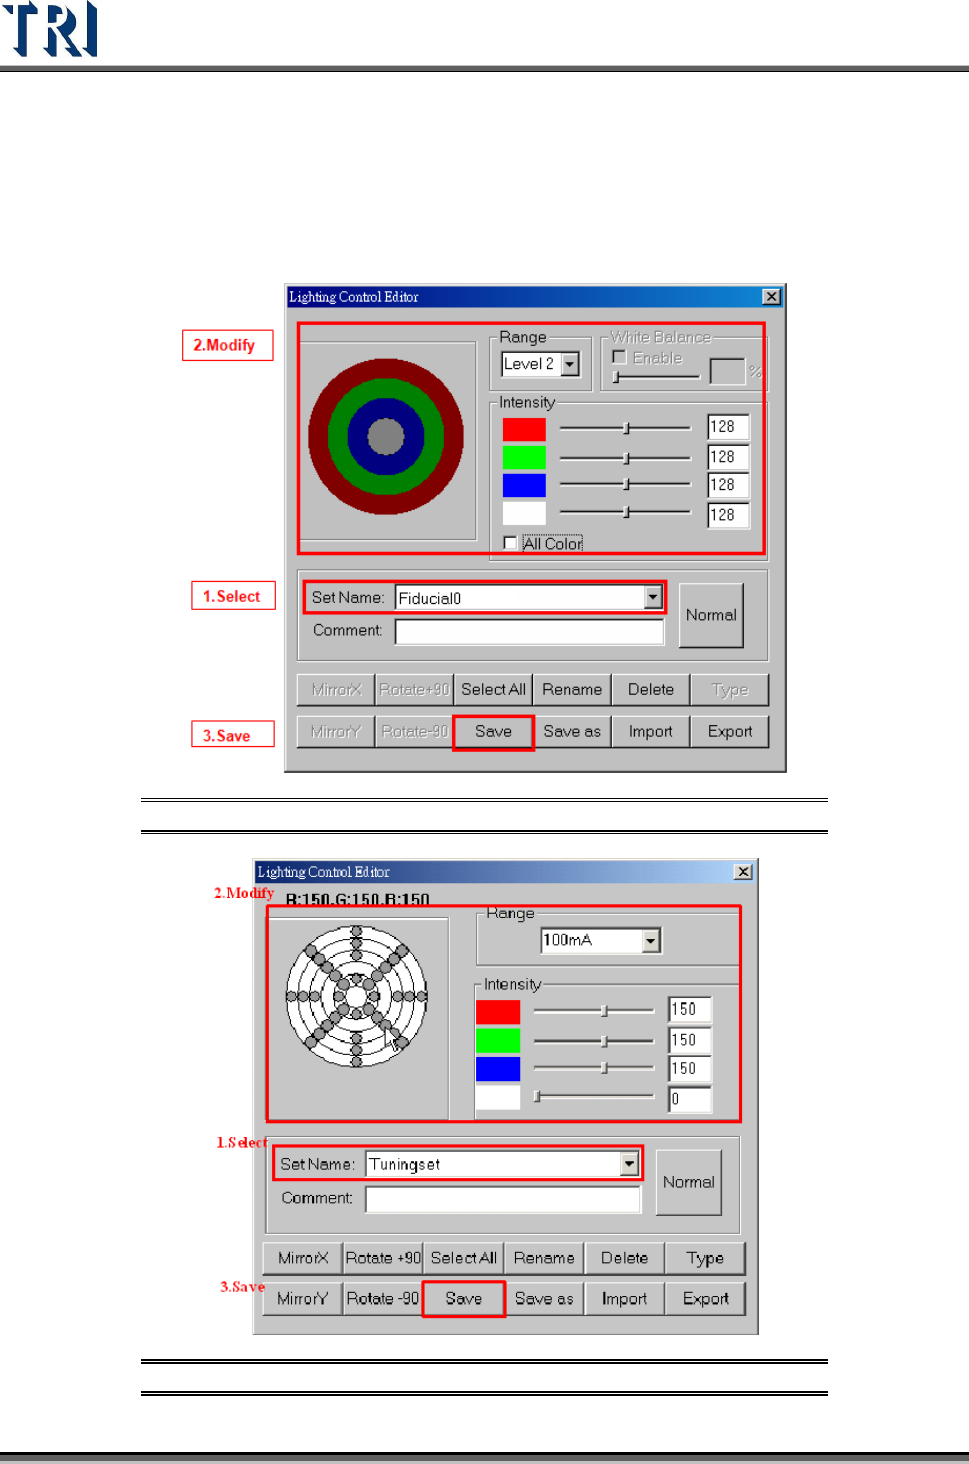
5. Set the lighting for the first fiducial mark. When the shape of fiducial mark is not clear
under the current lighting, adjust the lighting manually. Press the [Light] button, and
the [Lighting Control Editor] window appears. Select the [Fiducial0] lighting set item,
adjust the lighting, then press [Save] to finish the setting.
Figure 36: Set Lighting for First Fiducial Mark 1
Figure 37: Set Lighting for First Fiducial Mark 2