TR7500_Series_Software_v29_En.pdf - 第290页
Test Research Inc. 268 TR7500 Series User Guid e –Softwa re v.2.9.0 Figure 451 : Add 1 Box & Sel ect Algorithm Step3. Select the rules to apply t he setting. Figure 452 : Select Box Dialo g Step4. Finish adding an in…
Test Research Inc.
TR7500 Series User Guide –Software v.2.9.0 267
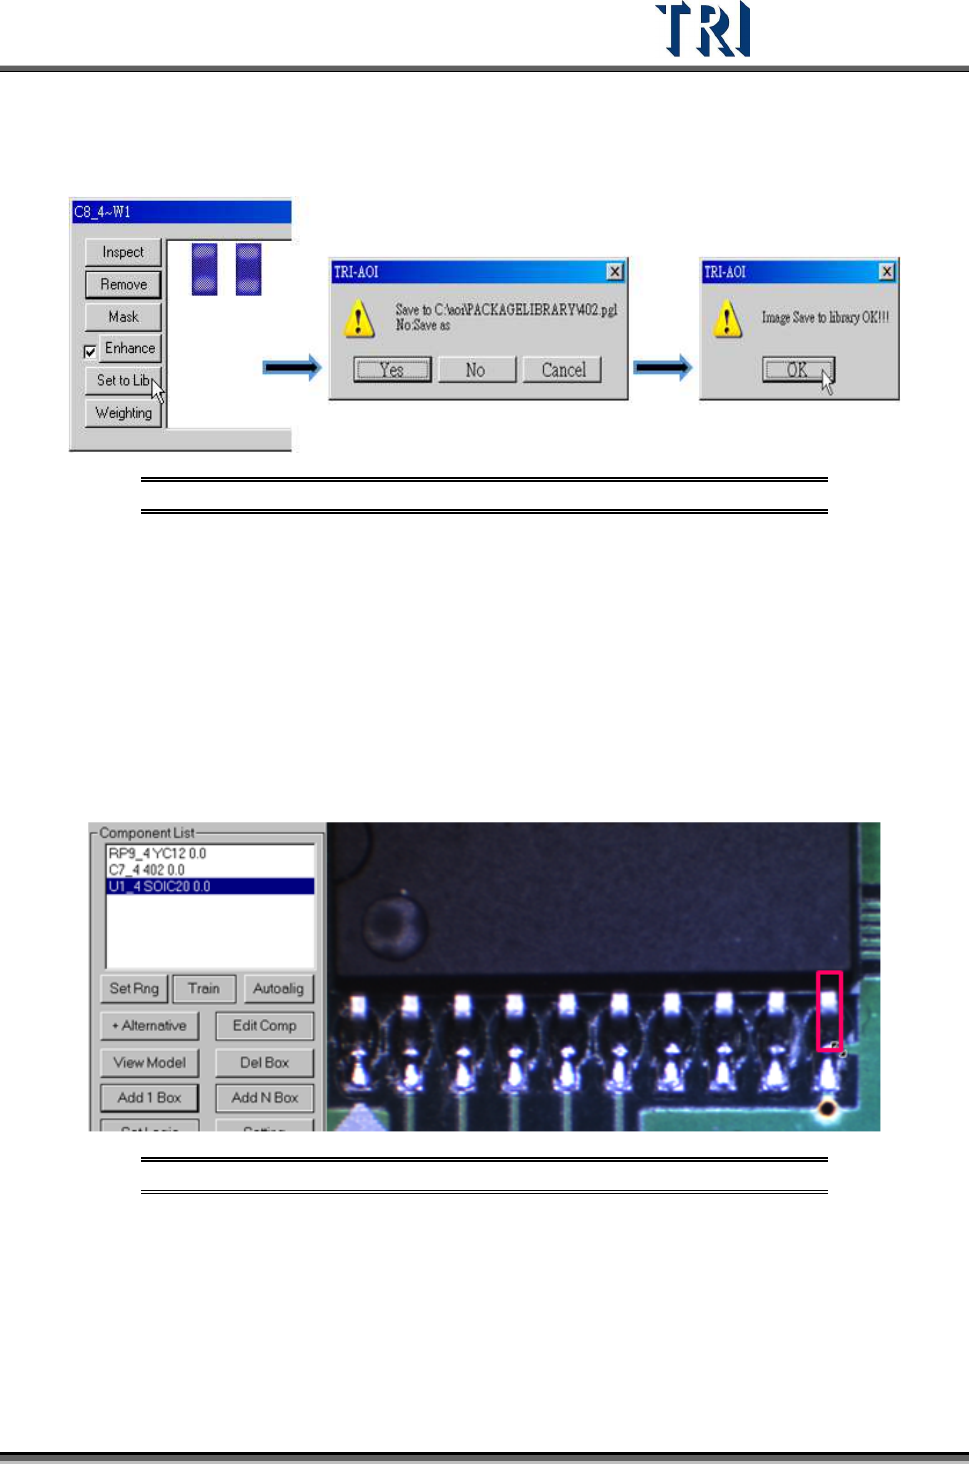
[Set to Lib] – Use this function to save the alternative image back to Package
Library and Image Library. Select an image first and press [Set to Lib]. Then input
the file name and press [Open] to finish setting.
Figure 449: Save Image to Library Process
11.9.2.7 Delete Box
Select an inspection box then press [Delete Box] to delete it.
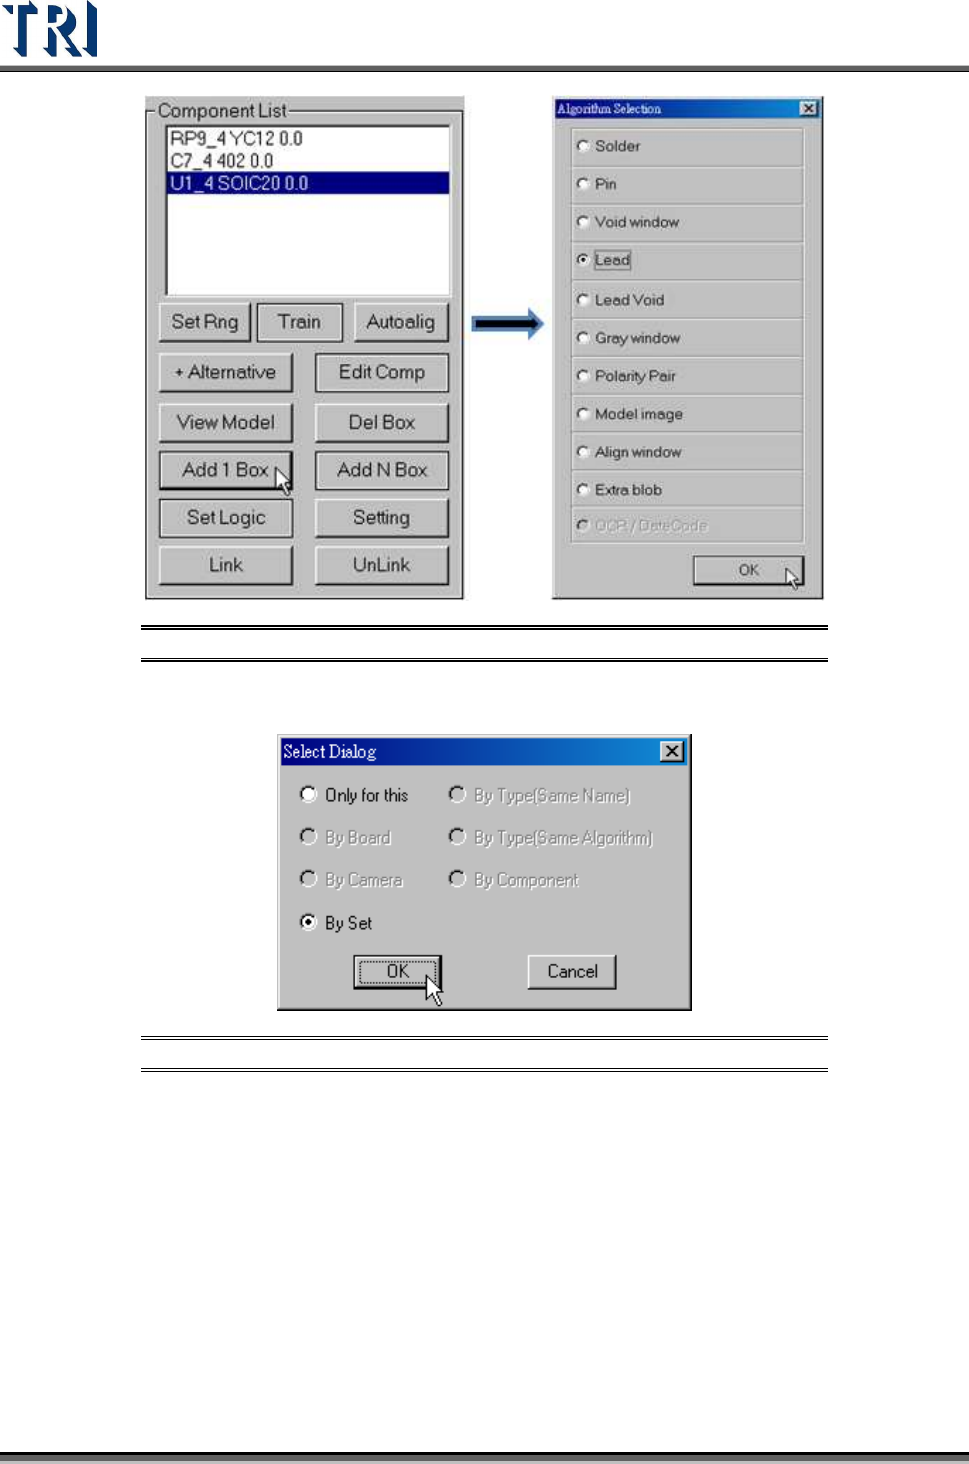
11.9.2.8 Add 1 Box
Press the button to add an inspection box for the selected component.
Setting Steps
Step1. Select a component and adjust the multi-function window to the size and
position of the inspection box to be added.
Figure 450: Adjust Multi-Function Window
Step2. Press [Add 1 Box] button and select the inspection algorithm.
Test Research Inc.
268 TR7500 Series User Guide –Software v.2.9.0
Figure 451: Add 1 Box & Select Algorithm
Step3. Select the rules to apply the setting.
Figure 452: Select Box Dialog
Step4. Finish adding an inspection box.

Test Research Inc.
TR7500 Series User Guide –Software v.2.9.0 269
11.9.2.9 Add N Box
Select a box first as the standard image and the system will search in the multi-function
window to find similar images and add inspection boxes.
Setting Steps
Step1. Select an inspection box as the standard and adjust the multi-function window
to cover the object area.
Step2. Press [Add N Box] to finish the setting.
Figure 453: Select Inspection Box (Red) & Adjust Multi-Function Window
(Purple)