2OM-1088-002.pdf - 第296页
Tg0699-PM-D2 2.3 Error IDs and Remedial Procedures 0207-001 Chapter 2 2-91 T able 4B89 Error ID Item Description 1901000 Screen Fiducial Mark #1 1901001 Screen [Camera ID] exceeds the range of setting. Fiducial Mark #1 (…
Tg0699-PM-D2
2.3 Error IDs and Remedial Procedures
0207-001 Chapter 2 2-90
Table 4B88

Tg0699-PM-D2
2.3 Error IDs and Remedial Procedures
0207-001 Chapter 2 2-91
Table 4B89
Error ID Item Description
1901000 Screen
Fiducial Mark #1
1901001 Screen [Camera ID] exceeds the range of setting.
Fiducial Mark #1
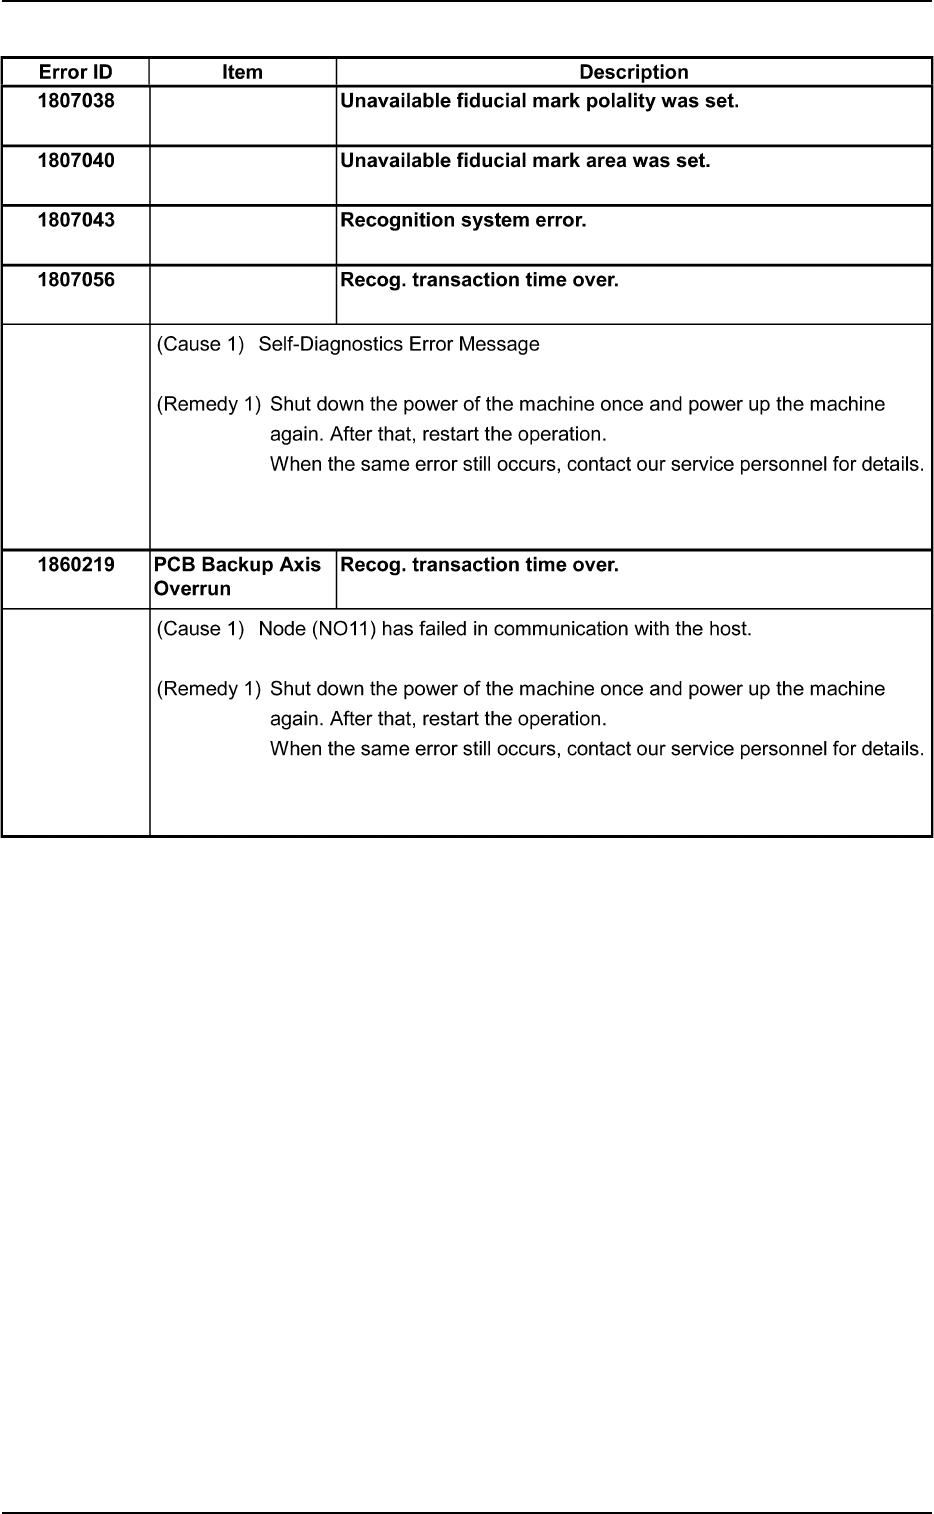
(Cause 1) Self-Diagnostics Error Message
(Remedy 1) Zero all axes and re-start the operation.
If the machine is not reset to its normal condition, shut down the power of
the machine once and power up the machine again. After that, re-start
the operation.
When the same error still occurs, contact our service personnel for de-
tails.
1901003 Screen [Camera Gain] exceeds the range of setting.
Fiducial Mark #1
1901004 Screen [Camera Level] exceeds the range of setting.
Fiducial Mark #1
1901011 Screen [Mark Size D1] exceeds the range of setting.
Fiducial Mark #1
1901012 Screen [Mark Size D2] exceeds the range of setting.
Fiducial Mark #1
1901014 Screen [Mark Judge Level] exceeds the range of setting.
Fiducial Mark #1
(Cause 1) The data has exceeded the allowable range.
(Remedy 1) Set correct parameters.
Tg0699-PM-D2
2.3 Error IDs and Remedial Procedures
0207-001 Chapter 2 2-92
Table 4B90
Error ID Item Description
1901029 Screen Image around fiducial mark was unstable.
Fiducial Mark #1
1901030 Screen Error of mark figure similitude was extensive.
Fiducial Mark #1
1901031 Screen Error of mark similitude or mark size was extensive.
Fiducial Mark #1
1901032 Screen Specified mark was not found in window of recog.monitor.
Fiducial Mark #1
(Cause 1) The fiducial marks do not conform to the coordinates X and Y of the fiducial
marks or the recognition mark data in the pattern program.
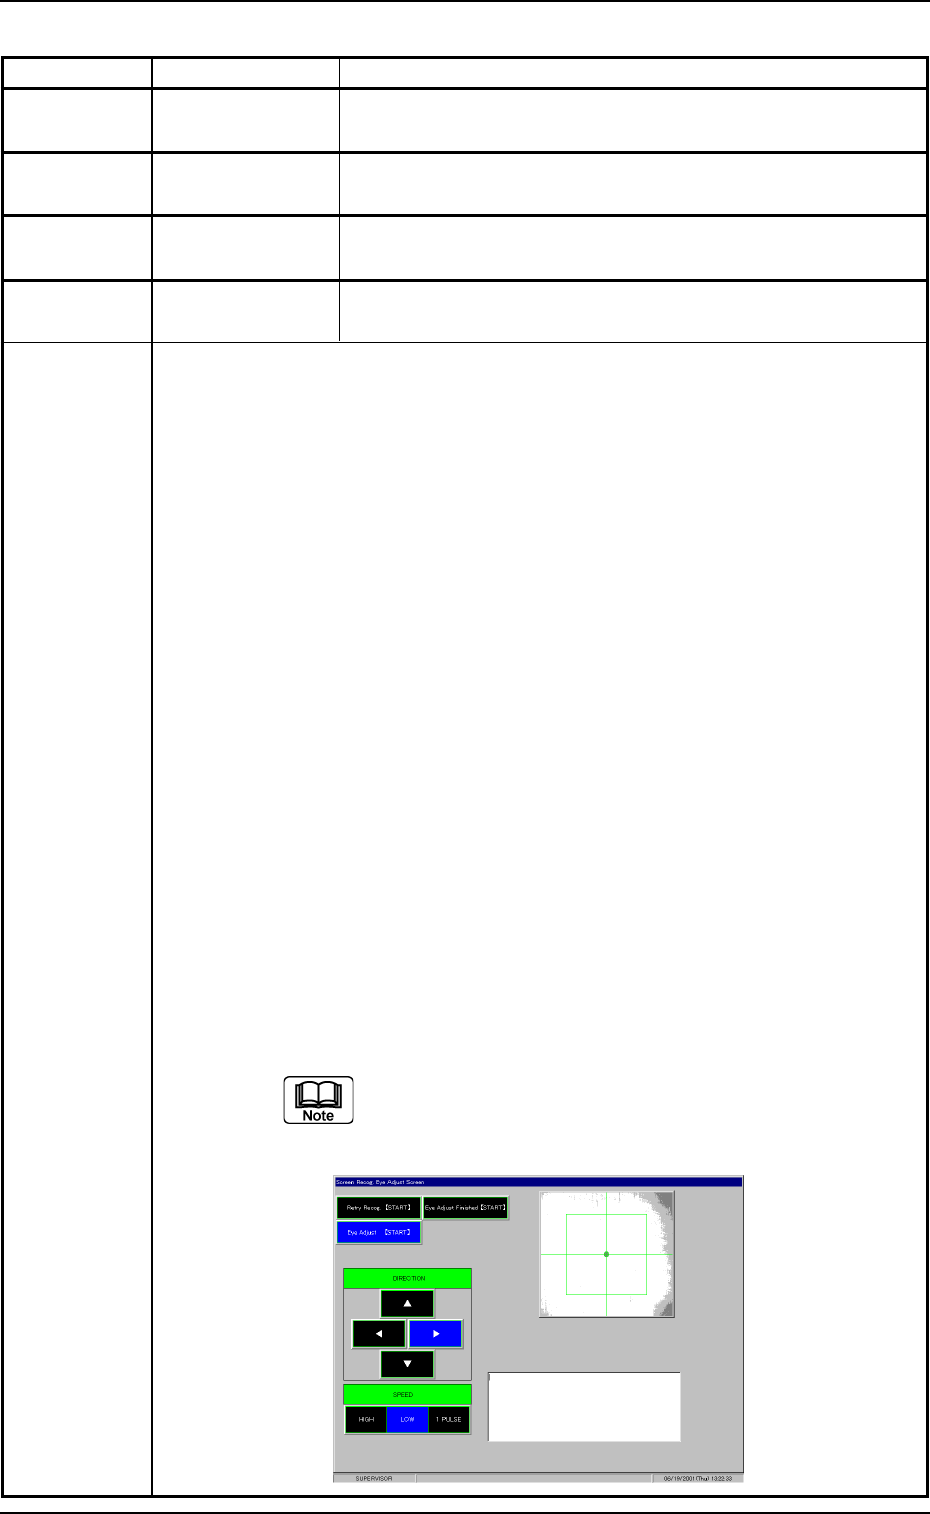
(Remedy 1) Follow the steps below to reset the machine to the normal condition.
(1) When the [RESET] button is pressed, the following window opens.
(2) When the actual fiducial mark is out of the recognition area, move
the camera such that the mark can enter the recognition area.
Select the [Eye Adjust [START]] button and press one of the arrow
buttons in the "DIRECTION" and "SPEED" boxes. While the [START]
button is being pressed, the camera keeps on moving.
(3) Select the [Retry Recog.[START]] button and press the [START] but-
ton.
When the recognition is completed successfully, this window auto-
matically closes.
(4) When the recognition still failed after the re-recognition operation,
move the camera such that the actual fiducial mark can stay at the
fiducial mark template (located at the center of the cross hair).
Note: Be sure to adjust the position of the fiducial mark as accu-
rately as possible because the printing accuracy is affected by
this adjustment.
(5) Select the [Eye Adjust Finished [START]] button and press the
[START] button.
The original window resumes.
If the [STOP] button is pressed while the "Eye Adjust" window
is active, the processing is interrupted and the original window
resumes.