2OM-1088-002.pdf - 第368页
Tg0699-PM-D2 0207-001 Chapter 3 1-49 12. Replacement of Cleaning Paper (How to change the cleaning paper width) (8) Attach the adapters to both ends of the new supply roller shaft. Press-fit the left adapter to the rolle…
Tg0699-PM-D2
0207-001 Chapter 3 1-48
12. Replacement of Cleaning Paper (How to change the cleaning paper width)
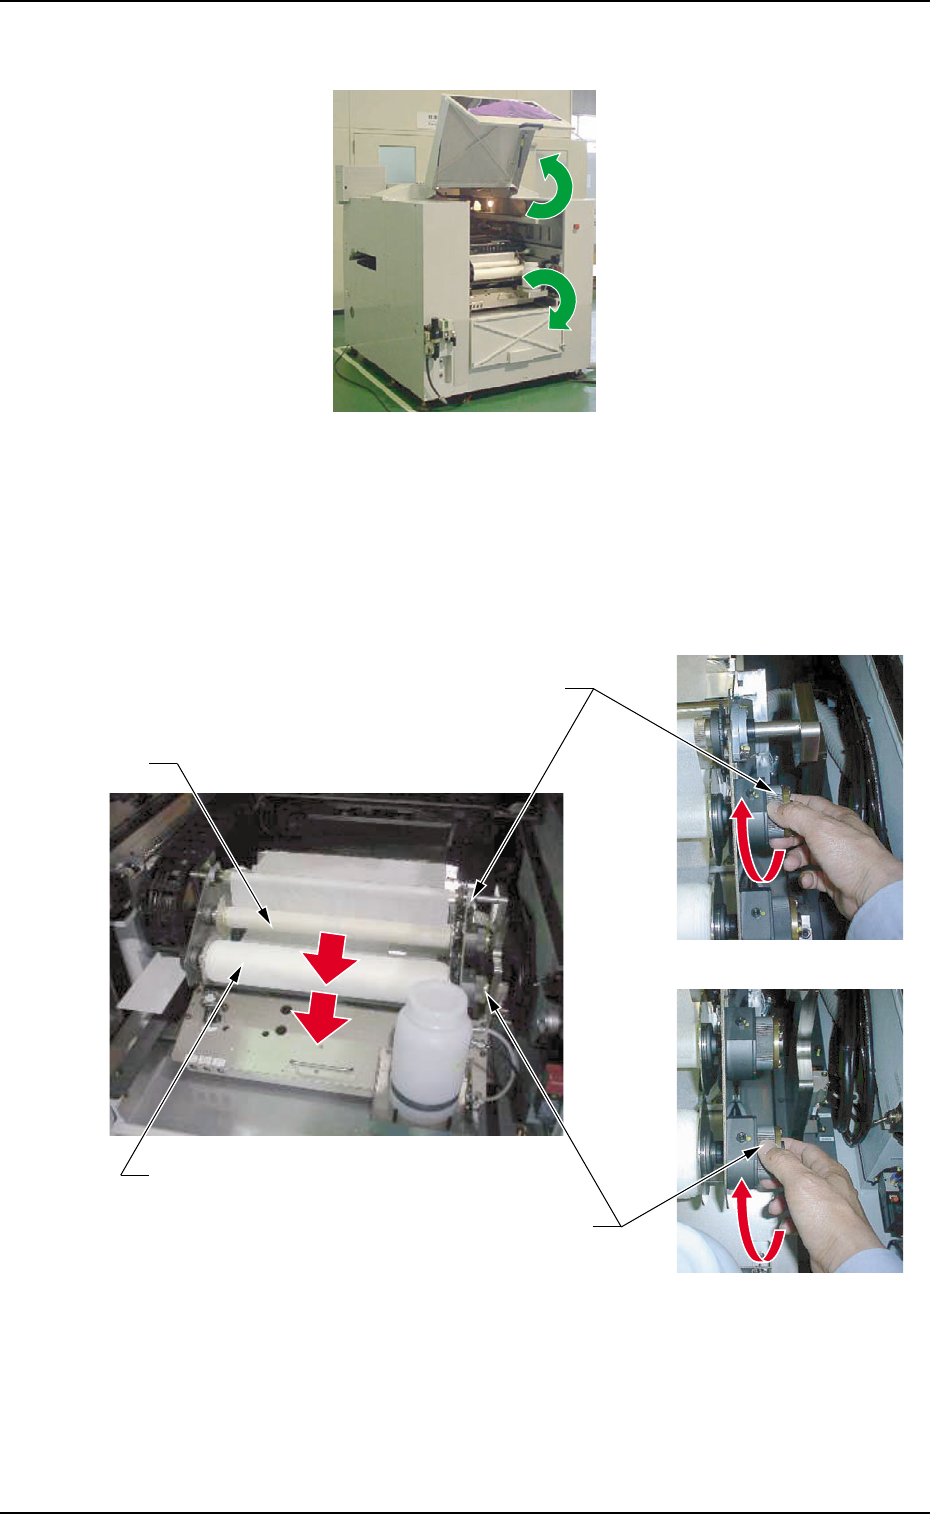
(6) Open the two safety doors on the rear side of the machine.
Fig. 5A73
(7) Turn the knobs of both take-up and supply rollers clockwise and
pull out each roller forward to detach from the cleaning unit.
Fig. 5A74
Supply Roller
Take-Up Roller
Knob
Knob

Tg0699-PM-D2
0207-001 Chapter 3 1-49
12. Replacement of Cleaning Paper (How to change the cleaning paper width)
(8) Attach the adapters to both ends of the new supply roller shaft.
Press-fit the left adapter to the roller shaft so that the end of the
shaft is held in close contact with the ring of the left adapter.
Fig. 5A75
Select the correct adapters for both ends of the shaft.
(9) Turn the knob counterclockwise with the new supply roller
supported so that the flange pin on the left side of the cleaning
unit is securely set in the cutout on the adaptor on the left and
then set the new supply roller.
Fig. 5A76
Left Adapter Right Adapter
As the adaptor on the right is easily come out from the
roll shaft, set it with the adaptor inclined to the upper
right.
Tg0699-PM-D2
0207-001 Chapter 3 1-50
12. Replacement of Cleaning Paper (How to change the cleaning paper width)
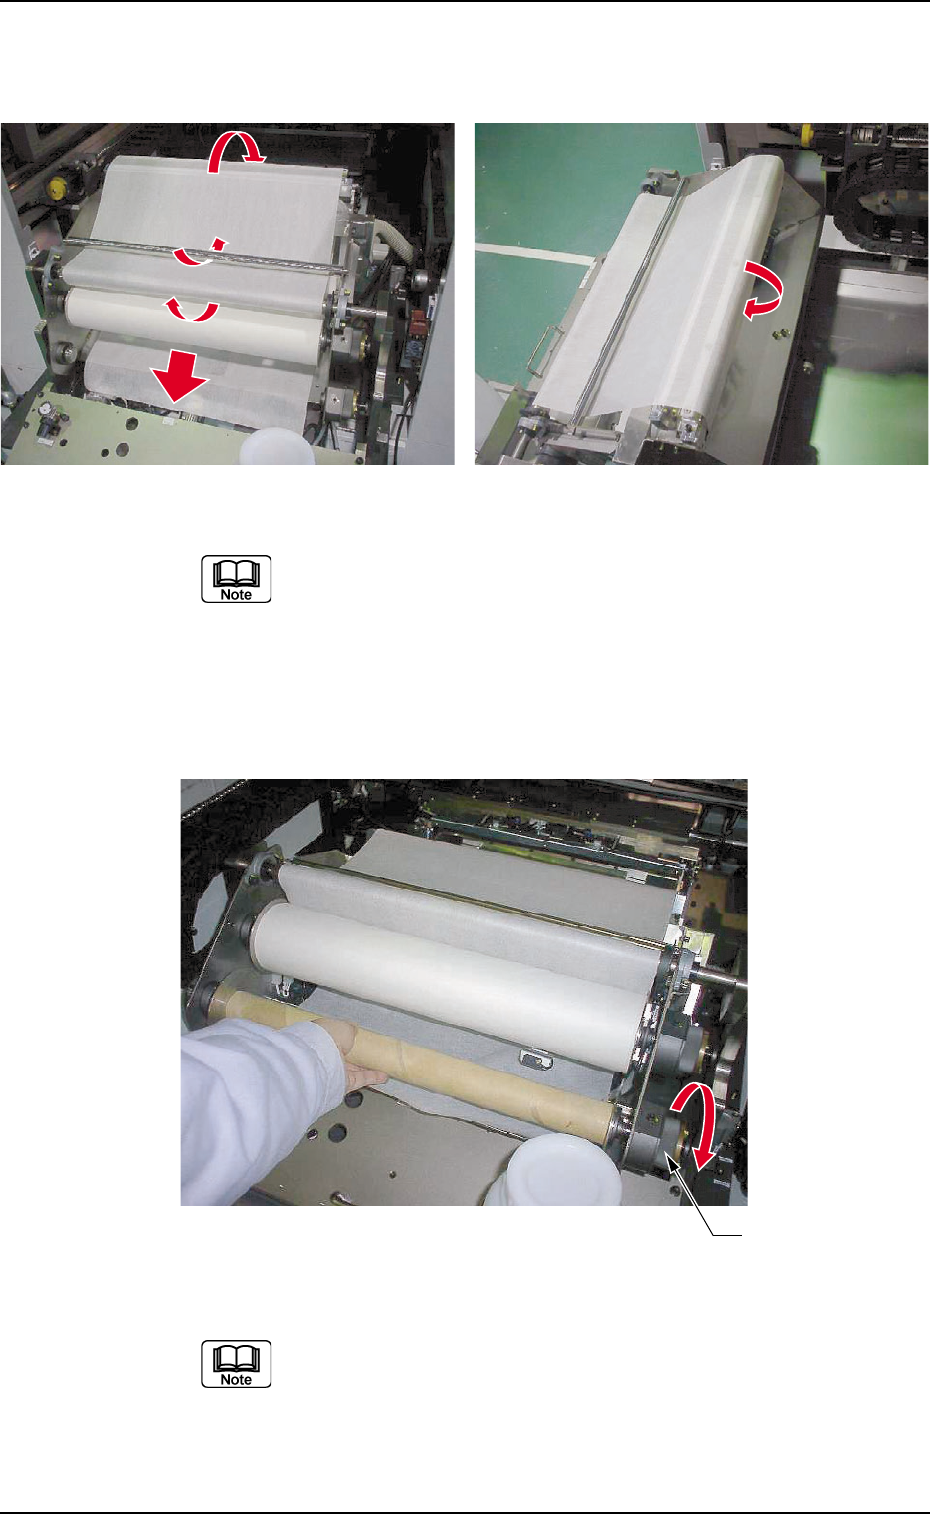
(10) Insert the end of the cleaning paper and follow the steps *1
through *4 to thread it.
Note the rolling direction of the paper.
(11) Mount the supply roller by turning the knob counterclockwise
while supporting the new supply roller such that the notch of the
left adapter is engaged with the pin of the left flange on the
cleaning unit.
Mount the roller while tilting the right side up because
the right adapter easily falls off from the roller shaft.
Fig. 5A77
Fig. 5A78
Knob