00196457-05_UM_SX12DX12_SR706_EN.pdf - 第318页
6 Station extensions User manual SIPLACE SX1/SX2/DX1/DX2 6.1 Nozzle changer From software version SC.706.xx Version 06/2012 EN 318 6 Fig. 6.1 - 1 1 Changin g the magazine (1) Lever for raising the magazine (2) Parallel p…
User manual SIPLACE SX1/SX2/DX1/DX2 6 Station extensions
From software version SC.706.xx Version 06/2012 EN 6.1 Nozzle changer
317
6.1.2.5 Notes on operation
When you fill a magazine with a certain nozzle type for the first time, attach an adhesive label
to identify the type.
PLEASE NOTE 6
Fill the magazines off the machine and always replace complete magazines. 6
Open the locking plate and place the nozzles in the nozzle holders.
Close the locking plate so that the nozzles cannot drop out of the magazines.
CAUTION 6
Before you fill magazine, make sure that all the nozzles on the Collect&Place head have
been returned to their magazines. 6
PLEASE NOTE 6
Do not allow components to drop onto the magazines. f they do, they could jam the locking
plate. You should therefore regularly clean the magazines and free locations.
Programming the nozzle changer is described in the SIPLACE Pro user manual.
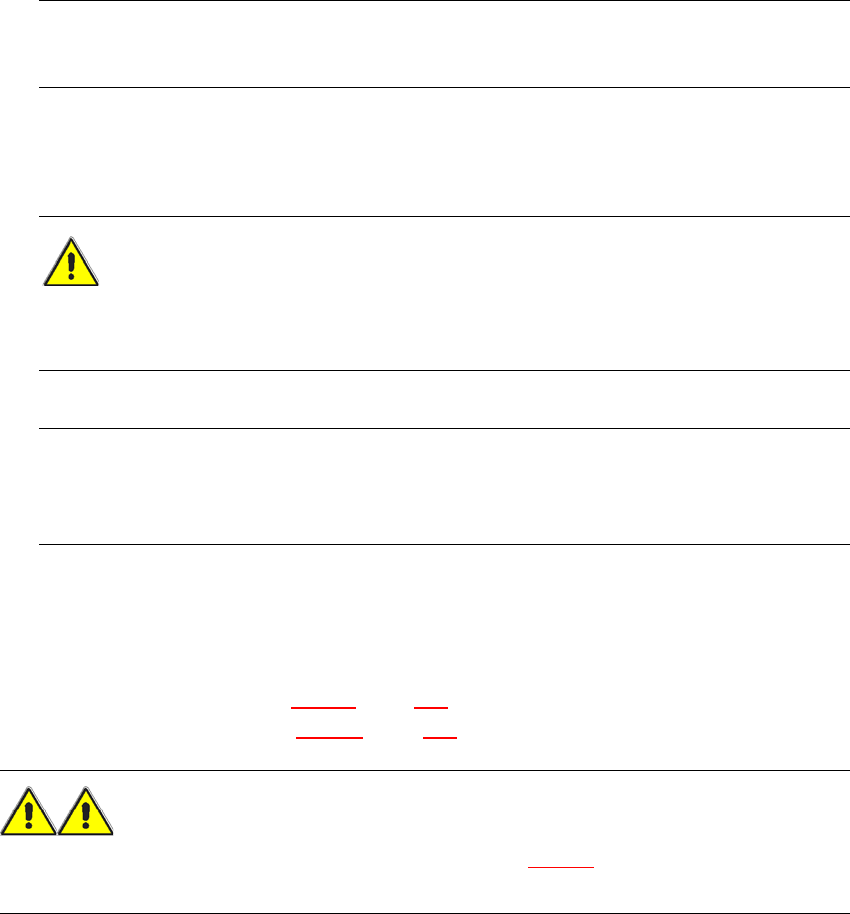
6.1.2.6 Changing the magazine
Press the lever (item 1 in fig. 6.1 - 11, page 318), to release the magazine from the balls of the
snap fasteners (item 5 in fig. 6.1 - 11
, page 318). Lift the magazine off the base.
WARNING 6
Any lever that is protruding over the magazine (item 1 in fig 6.1 - 11
) can result in a head crash.
You should therefore make sure that the lever does not protrude over the magazines.
6 Station extensions User manual SIPLACE SX1/SX2/DX1/DX2
6.1 Nozzle changer From software version SC.706.xx Version 06/2012 EN
318
6
Fig. 6.1 - 11 Changing the magazine
(1) Lever for raising the magazine
(2) Parallel pin, engages in the hole in the magazine
(3) Spring pin for triggering the microswitch for magazine recognition and the safety loop
(4) Pin of the slide mechanism, moves the locking plate
(5) Ball of snap fastener
(6) Parallel pin, engages in the slot in the magazine
(7) Locking plate in the "Magazine locked" position
PLEASE NOTE 6
– Move the locking plate into the "Magazine locked" position.
– Before inserting, align the magazine so that the centering pins (items 2 and 6 in fig. 6.1 - 11
,
page 318) slide into the centering holes and slot.
Place the magazine on the snap fastener balls (item 5 in fig. 6.1 - 11, page 318).
Press the magazine down evenly so that the snap fastener balls engage in all the snap fas-
teners at the same time.
User manual SIPLACE SX1/SX2/DX1/DX2 6 Station extensions
From software version SC.706.xx Version 06/2012 EN 6.1 Nozzle changer
319
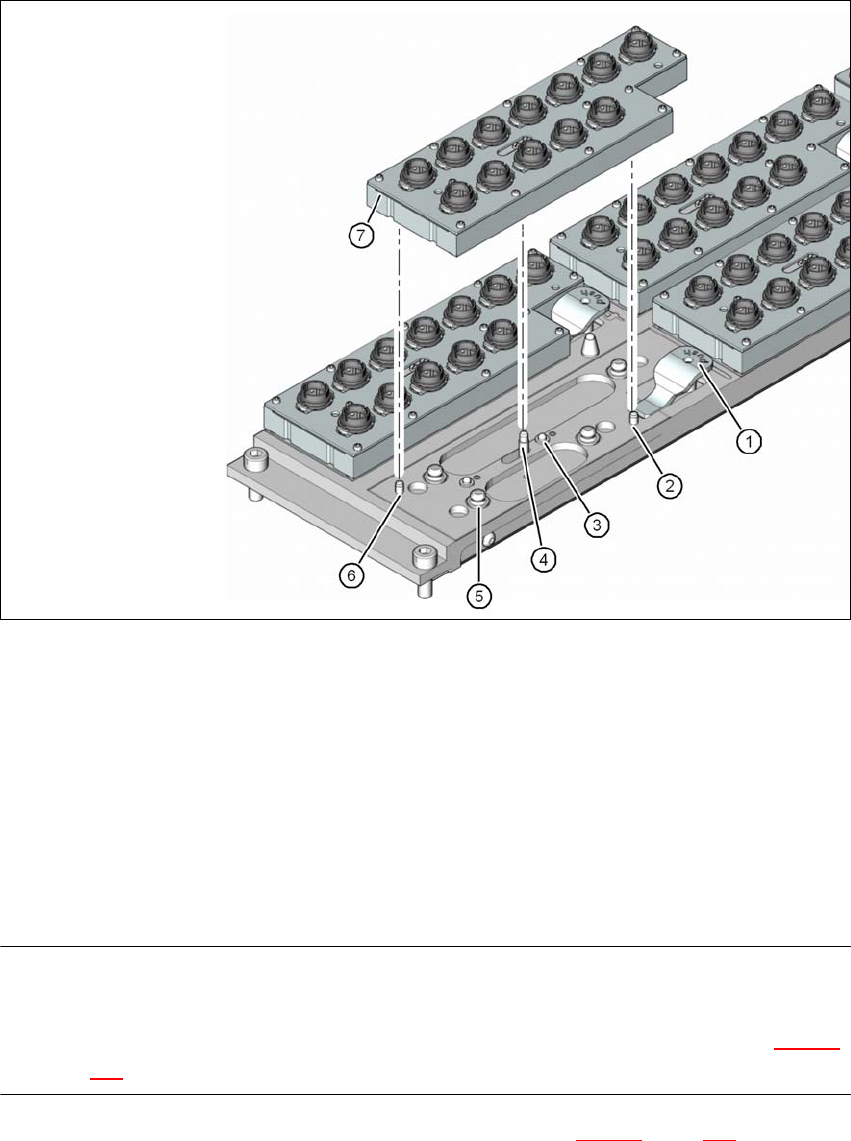
6.1.2.7 Position detection
Each magazine of the nozzle changer has two fiducials: one for determining the position and one
for determining the angular position.
6
Fig. 6.1 - 12 Nozzle magazine - fiducials for determining the position and angular position
(1) Locking plate in the "Magazine open" position
(2) Fiducial for determining the angular position
(3) Fiducial for determining the position
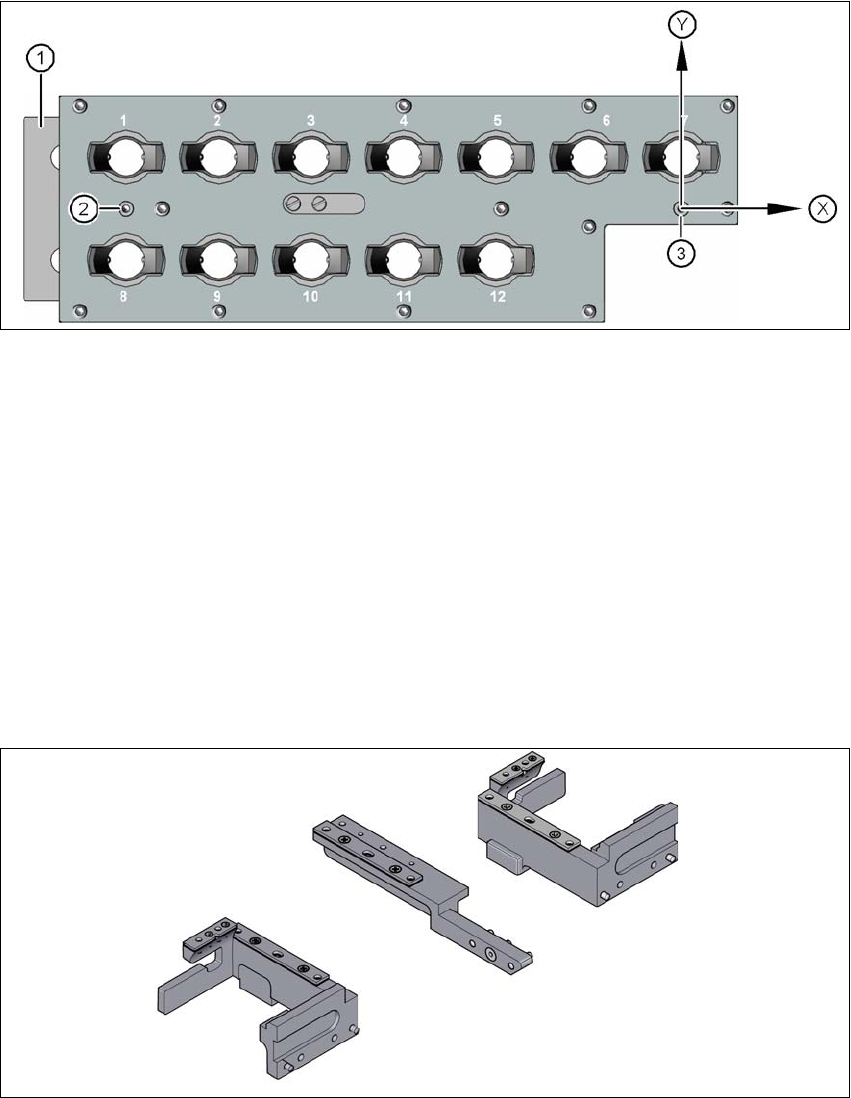
6.1.2.8 Nozzle changer "row 2" for the SIPLACE MultiStar
Item no. 00519842-xx Nozzle changer CPP for row 2 , SX
The "row 2" nozzle changer may be installed at the following locations:
SX machine: locations 1 and 2
The retrofit package contains an assembly kit.
6
Fig. 6.1 - 13 Assembly kit for the "row 2" nozzle changer