CP45-英文版培训教材.pdf - 第206页
A little vibration caused by manufacturing deviation of the gear may be occurred as shown in the r ight monitor screen. If the vibration range is allowable, secure the r atchet pawl with "screwdriver" and tight…
Operating Manual Reference Figure
CP-45/55 Operation Process
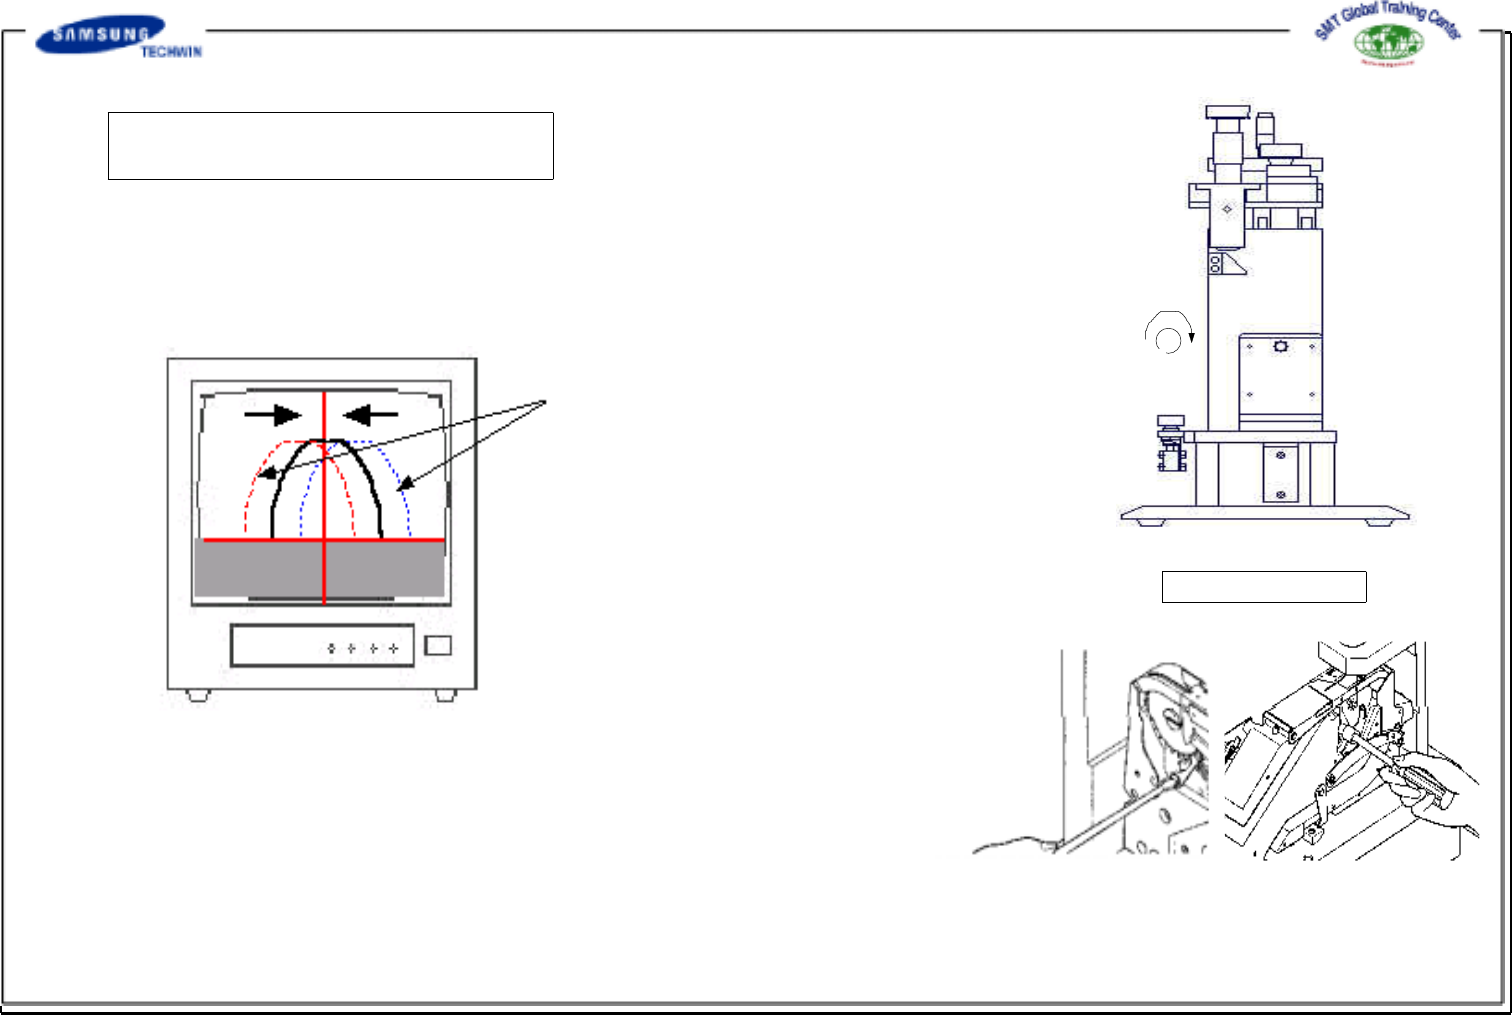
Step6 : Ratchet Pawl Adjustment
(Backlash Adjustment)
After completing the push pawl adjustment, with the cylinder push
button fixed on the left side of inspection jig pressed down, lock the
push button by turning it to clockwise as shown in (a) figure. If the
push pawl and the ratchet pawl are failed to be placed in the regular
position, backlash will be occurred as shown in the following figure.
Then, adjust the position of ratchet pawl of socket with the following
methods. Firstly, release the locked ratchet pawl by securing the screw with
"screwdriver"(from the left side) and turning the box wrench (from the right
side). And, with the right box wrench of the feeder secured, adjust the
ratchet pawl by turning it to left and right directions with "screwdriver" in
order that it can be placed in the regular position as shown in the right
figure. If the adjustment is completed, re-inspect the backlash and offset
of the gear reference position by releasing the locking of the cylinder push
button and pressing the push button. If backlash and offset of the gear
reference position are occurred, repeat step 4) and 5) to obtain the correct
adjustment.
Blacklash occurred
(a)
INSPECTION JIG
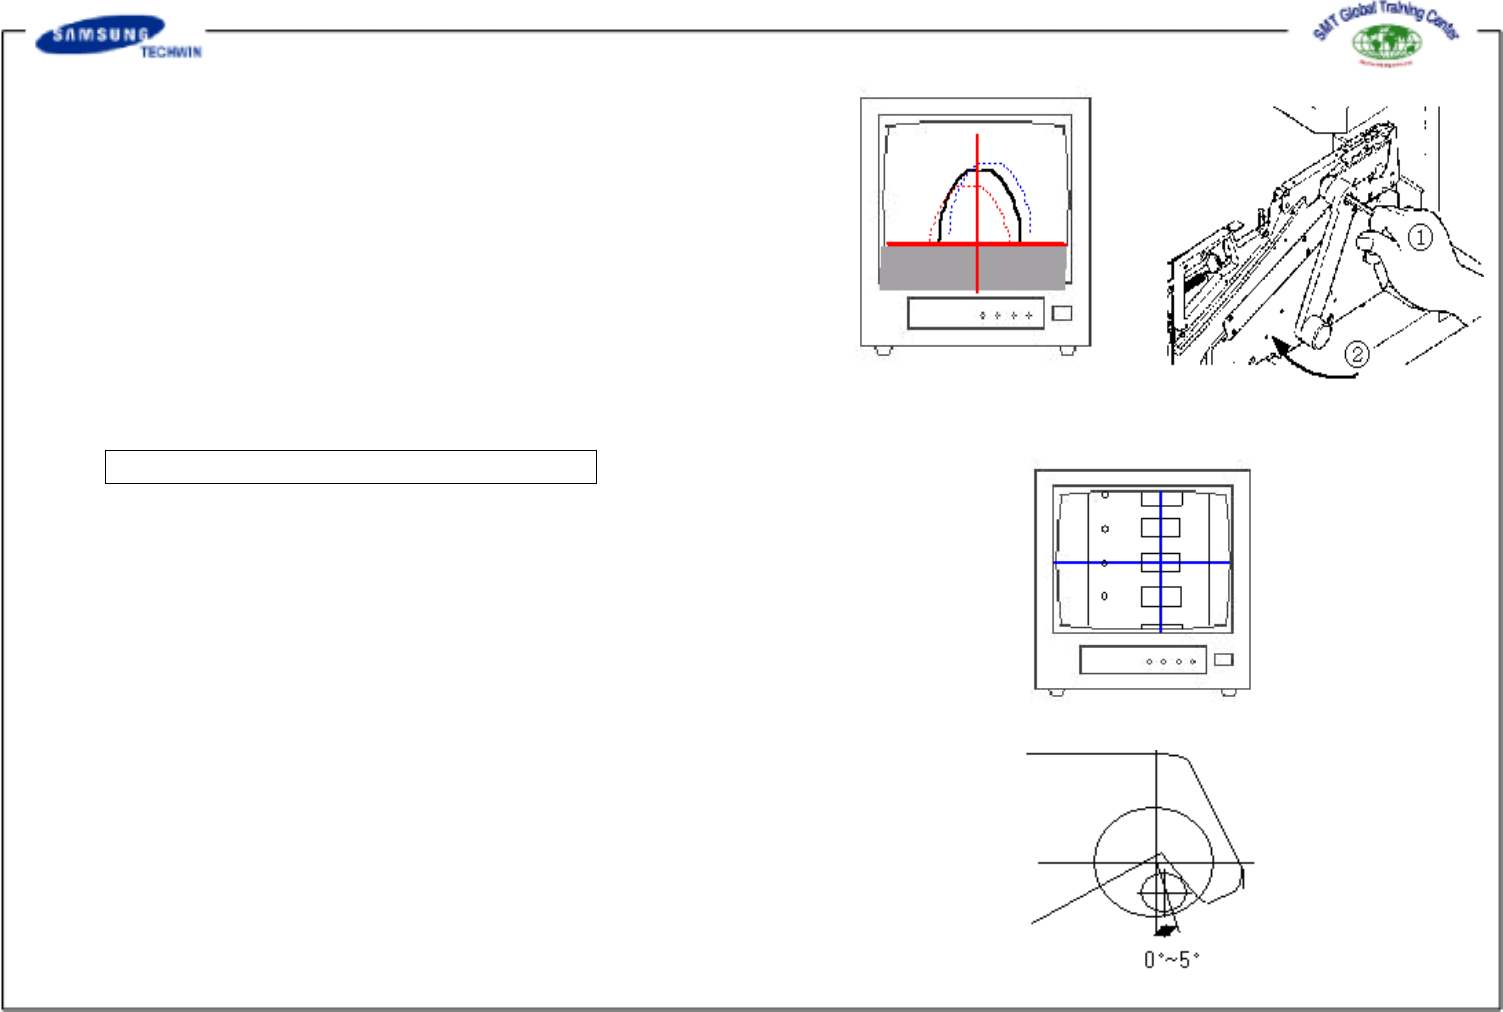
A little vibration caused by manufacturing deviation of the
gear may be occurred as shown in the right monitor screen.
If the vibration range is allowable, secure the ratchet pawl
with "screwdriver" and tighten the ratchet pawl with the right
box wrench. Then lock the push pawl with 1 T-wrench so
that it can not be moved and tighten it by turning 2 lever to
clockwise as shown in the right figure.
Step7 : Repetition Pitch Checking Step
A little vibration caused by manufacturing deviation of the
gear may be occurred as shown in the right monitor screen.
If the vibration range is allowable, secure the ratchet pawl
with "screwdriver" and tighten the ratchet pawl with the right
box wrench. Then lock the push pawl with 1 T-wrench so
that it can not be moved and tighten it by turning 2 lever to
clockwise as shown in the right figure.
NOTICE : "Counter pitch phenomenon", feeding pitch moves by
2mm respectively when carrying out the feeding test
after completing the adjustment, may occur
sometimes. This phenomenon means that the initial
position of the push pawl exceeds too much the
initial condition as shown in the right figure. Thus,
adjust the contact angle of the tail part of the
pusher pawl and the cam shaft to 0~5
o
as shown
in the right figure and then repeat step 3)~7).
CP-45/55 Operation Process

* Hardware initialize (Initialization /Motor Alarm/Head
Impossible… )
* Vision (Part Acknowledge Error, Pick Up Error… )
Trouble Shooting
Guide
CP-45/55 Operation Process