CP45-英文版培训教材.pdf - 第62页
Operating Manual MODEL Reference Figure CP-45/55 Operation Process ^ Create the Part Name. Chipr1608-0.4t) ^ Set Group to Chip Resistor 1608. ^ Enter the Part Size. Align Data - X: 1.6, Y: 0.8 Enter the thickness of Part…
Operating Manual
MODEL
Reference Figure
CP-45/55 Operation Process
V
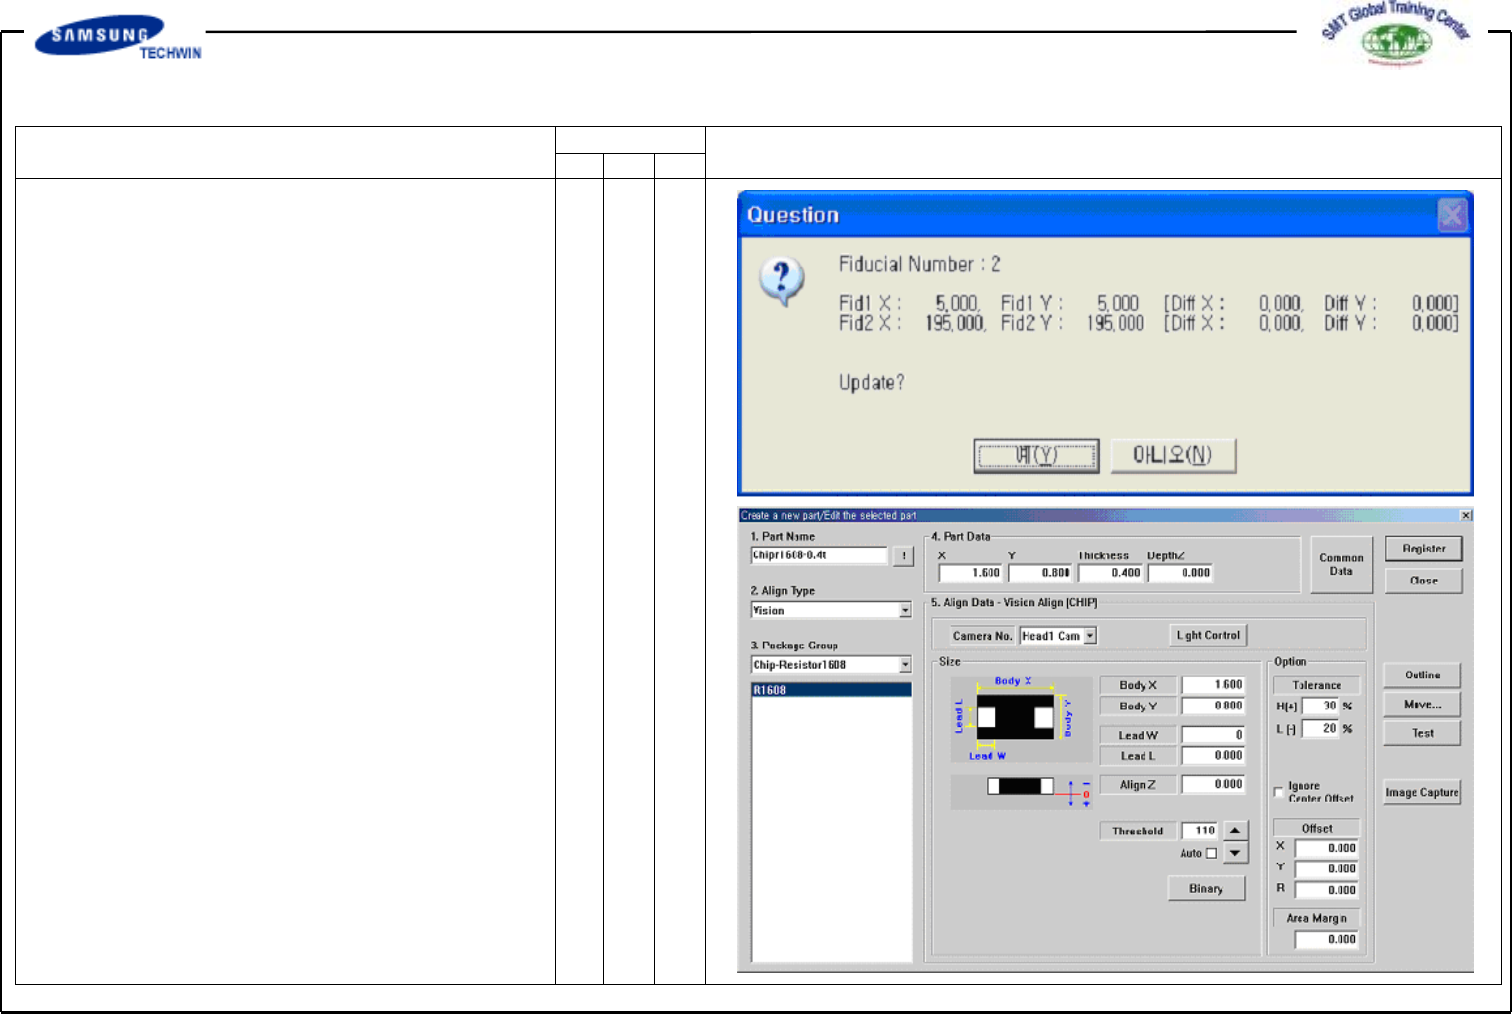
<Scan> Button
This executes the Scan Test for the
the set Fiducial Mark. By this Scan
Test, the actual Mark is tested with
the set Fiducial Mark Position and
the Mark Data and also the tested
results are shown as follows. The
position of Fiducial Mark shown in
the right Figure refers to the position
of Mark resulted from Scan Test.
Click "Yes" button to reflect this
value, if not so, click "No" button.
This is to compensate correctly the
Mark position inputted by using the
registered Mark Data. Apply the
process 2 times or more.
2.2)
Part (Work Pard Register)
2.2-1)
New Part Register
V
Chip (Resistor 1608,0.4t, 8mm,
TN05, TN08) Register
Click <New Part…>buttononthe
left of the bottom of a screen.
Operating Manual
MODEL
Reference Figure
CP-45/55 Operation Process
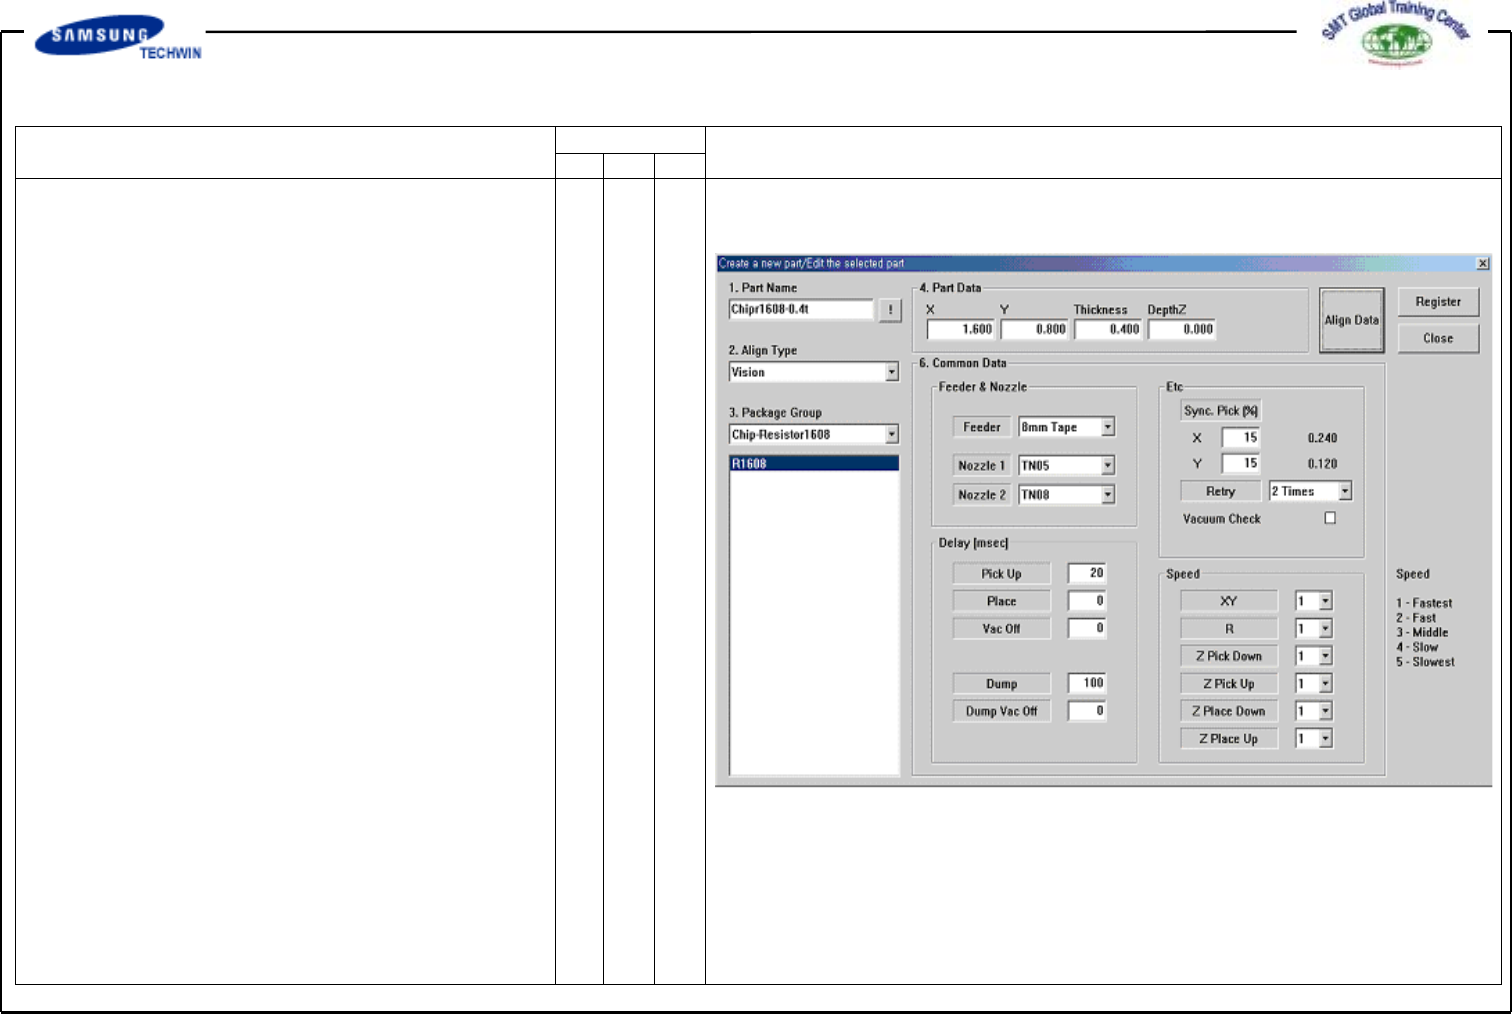
^ Create the Part Name.
Chipr1608-0.4t)
^ Set Group to Chip Resistor 1608.
^ Enter the Part Size.
Align Data - X: 1.6, Y: 0.8
Enter the thickness of Part Data.
At this time, X and Y values read
automatically the Align Data.
^
Enter the Common Data by
pressing <Common Data> button.
^ Select 8mm Tape on <Feeder>
Combo box.
^ Select TN05 and TN08 on
<Nozzle 1> and <Nozzle 2>
Combo Box separately.
Register the part by clicking the
<Register> button.
Operating Manual
MODEL
Reference Figure
CP-45/55 Operation Process
V
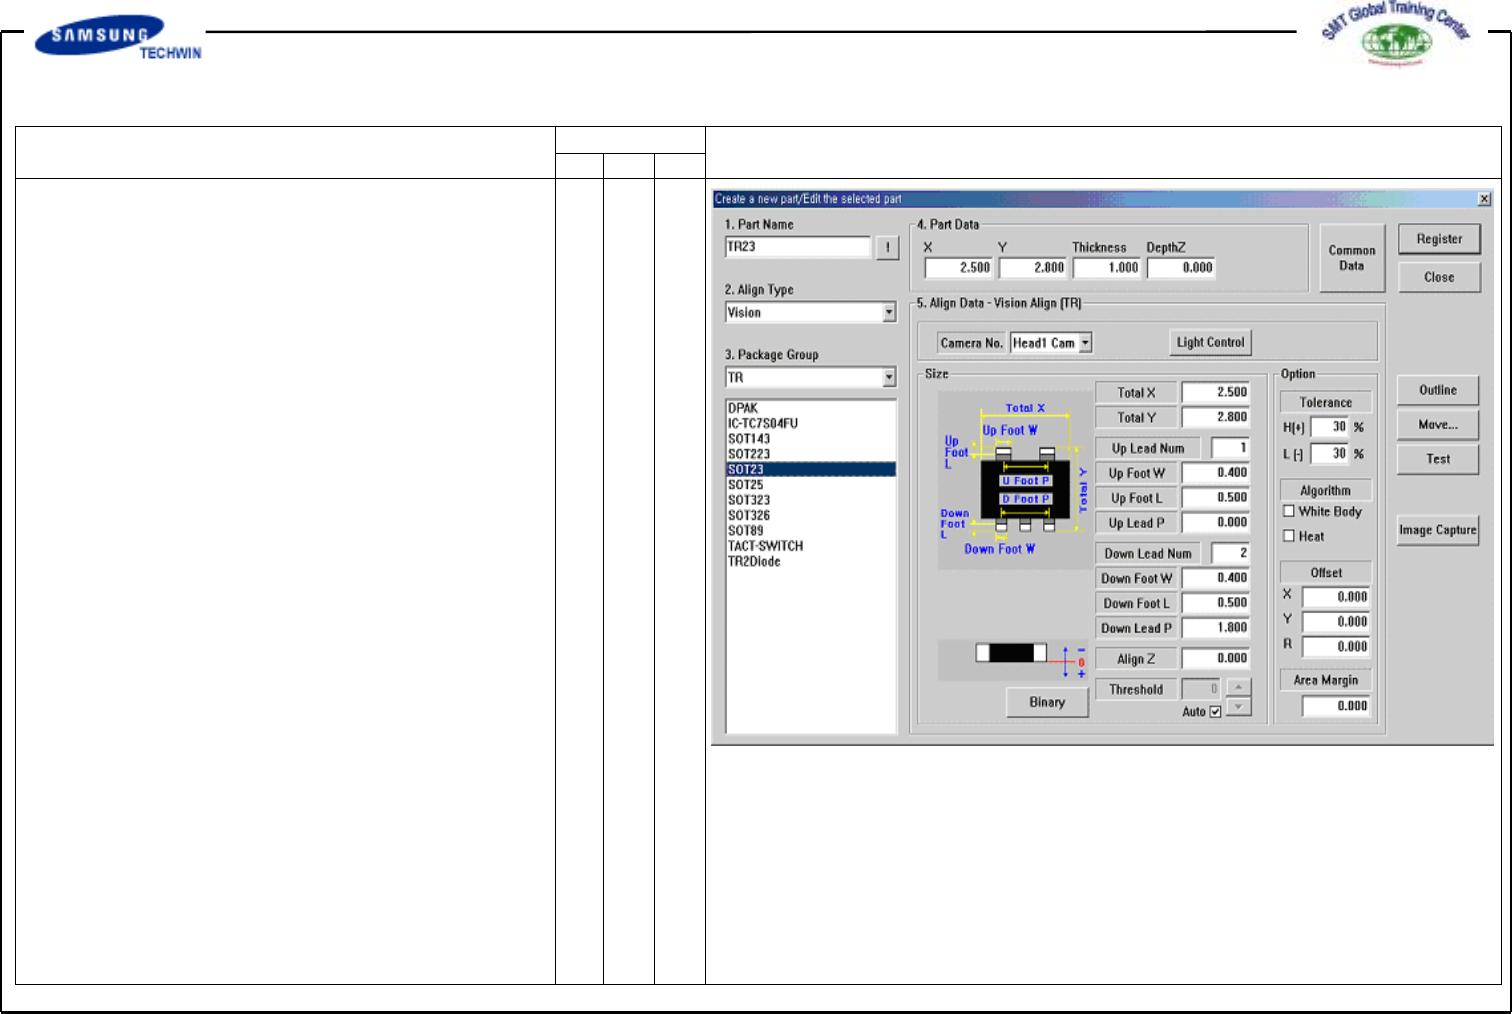
TR Register
Click the <New Part…> button
on the left of the bottom of a
screen.
^ Create the Part Name. (TR23)
^ Select the Group to TR.
^ Enter the Part Size.
Align Data Total X: 2.5, Y: 2.8
Up Group Input:
Up Lead Number 1
Foot W: 0.5
Foot L: 0.5
Foot P: 0.0
Down Group Input:
Down Lead Number 2
Foot W: 0.5
Foot L: 0.5
Foot P: 1.8
Enter the thickness of Part Data.