FUJI NXT Programming Manual QD004-18.pdf - 第181页
QD004-18 6. Editing Jobs on the Machine (MEdit) NXT Programming Manual 171 6.7.2 Testing a job using simulation mode Use this mode to perform a basic check of the part types, placing po sitions and orientation. Starting …

6. Editing Jobs on the Machine (MEdit) QD004-18
170 NXT Programming Manual
6.7 Testing Jobs (from NXT V3.10)
6.7.1 Introduction
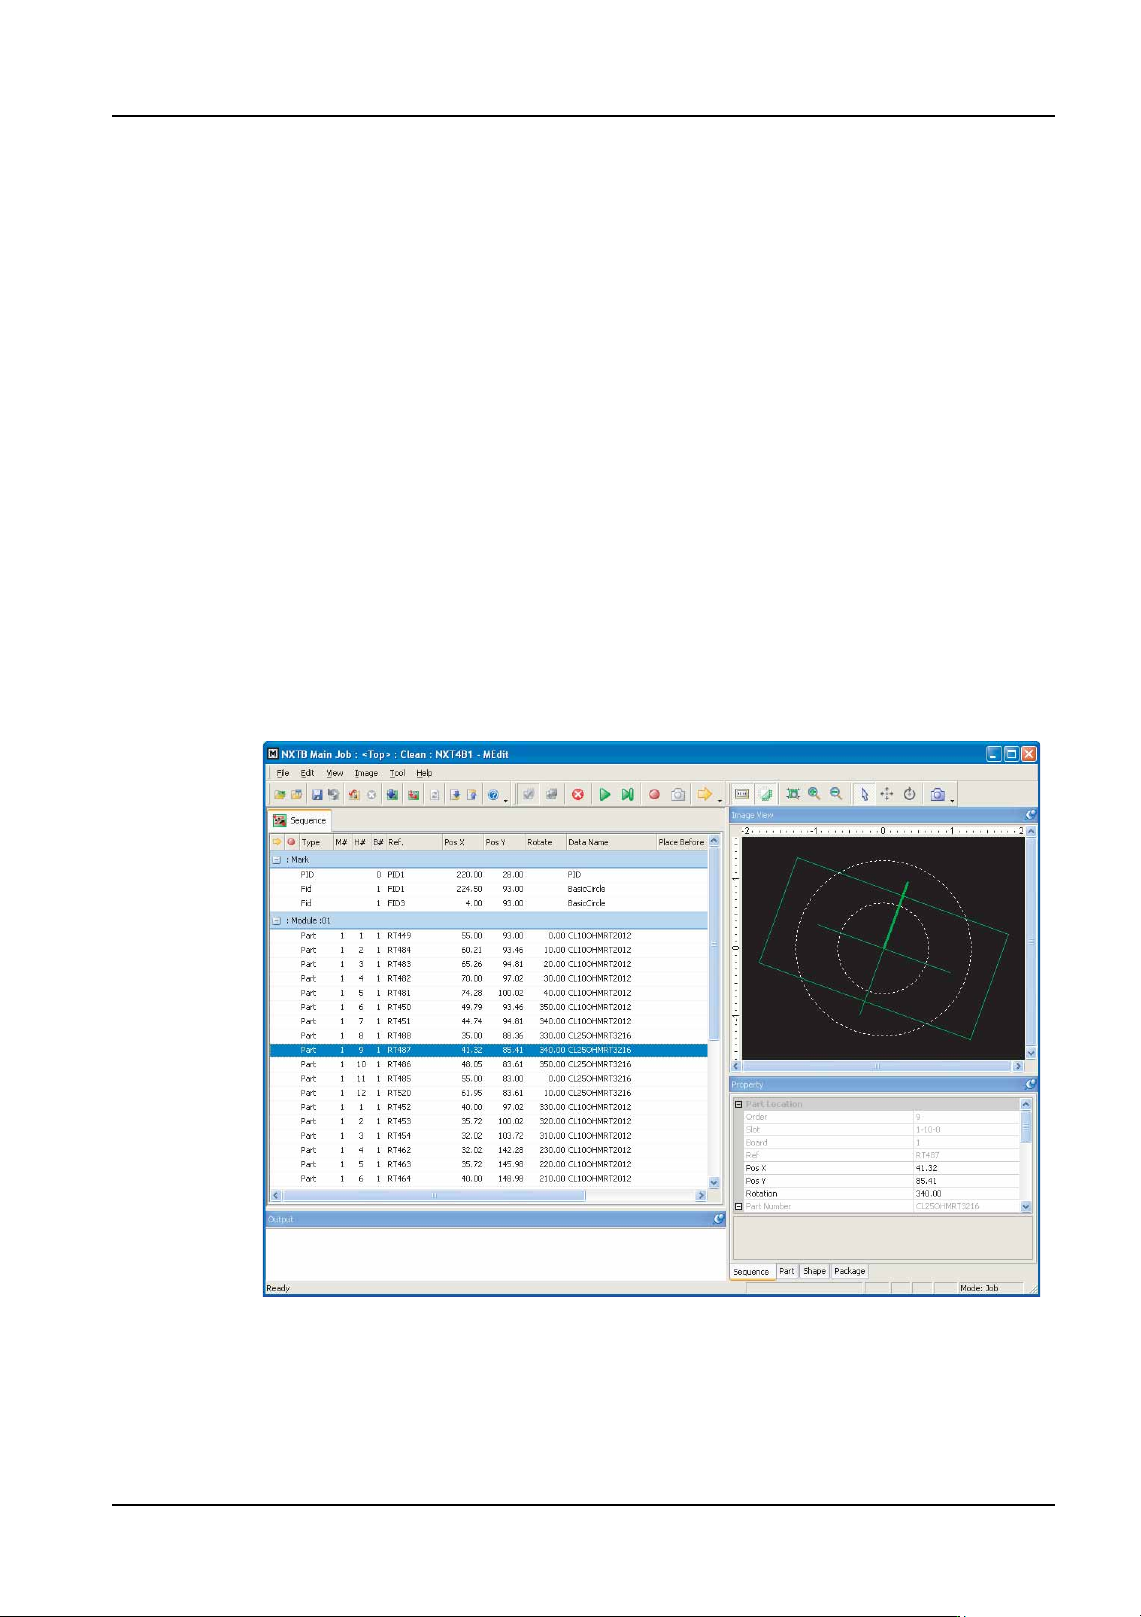
The job test function enables users to view and edit jobs on the machine prior to starting
production. By doing this, errors that occur during the beginning of production for a new job
can be greatly reduced. There are two job test modes and the items checked by each mode
are different. Information about these two modes are provided below.
Simulation
The placement position for a specified sequence is captured using the mark camera and
the panel pattern is compared graphically with the part image (wire frame) in MEdit. This
allows the operator to check for any placement position deviations and problems with the
placing angle. In addition, it is possible to confirm that the part type is roughly correct by
comparing the wire frame of the part graphic to the actual pad arrangement. If there are
any calculated placing deviations, they can be corrected easily in MEdit and be reflected
back to the job.
The main items checked by this mode are fiducials, placement position, orientation, and
part types compared to the pads. Actual parts are not required to perform this test, just an
actual panel is required. If any problems with these items are located, corrections can be
made and checked again.
Place & Check
Parts are picked, vision processed and placed on the panel. Once a part is placed, the
mark camera takes an image of the position and that image is then displayed in MEdit with
a part graphic overlay in MEdit. This allows the operator to check for pickup errors, vision
errors, actual placement position deviations and problems with the placing angle. If there
are any errors, they can be corrected in MEdit and be reflected back to the job.
The main items checked by this mode are fiducials, feeding, feeding direction, vision data,
placing data, actual placement position, and orientation. Actual parts are required to
perform this test as well as an actual panel. If any problems with these items are located,
corrections can be made and checked again.
QD004-18 6. Editing Jobs on the Machine (MEdit)
NXT Programming Manual 171
6.7.2 Testing a job using simulation mode
Use this mode to perform a basic check of the part types, placing positions and orientation.
Starting simulation mode.
1. Transmit the job to be tested to the machine and wait for the main screen to display on
all of the operation panels for the modules.
2. Start MEdit and log on if necessary.
3. Click [Open Current Job] from the [File] menu. The [Acquire current production job]
dialog box displays.
4. Double-click the line with the machine for the job to be tested and then double-click the
machine name to display the modules. Select the module on which the job is to be
tested. The name of the job in the module is automatically displayed in the [Job] group
box.
5. If necessary, select the lane on the module with the job to be tested.
6. Click [OK] and the specified data from the job is opened.
7. Select [Job Test] - [Simulation] from the [Tool] menu. The background color of the
operation panel for the module in question turns violet to indicate that that module is in
a test mode.
01PRG-0029Ea
6. Editing Jobs on the Machine (MEdit) QD004-18
172 NXT Programming Manual
Checking part positions and direction.
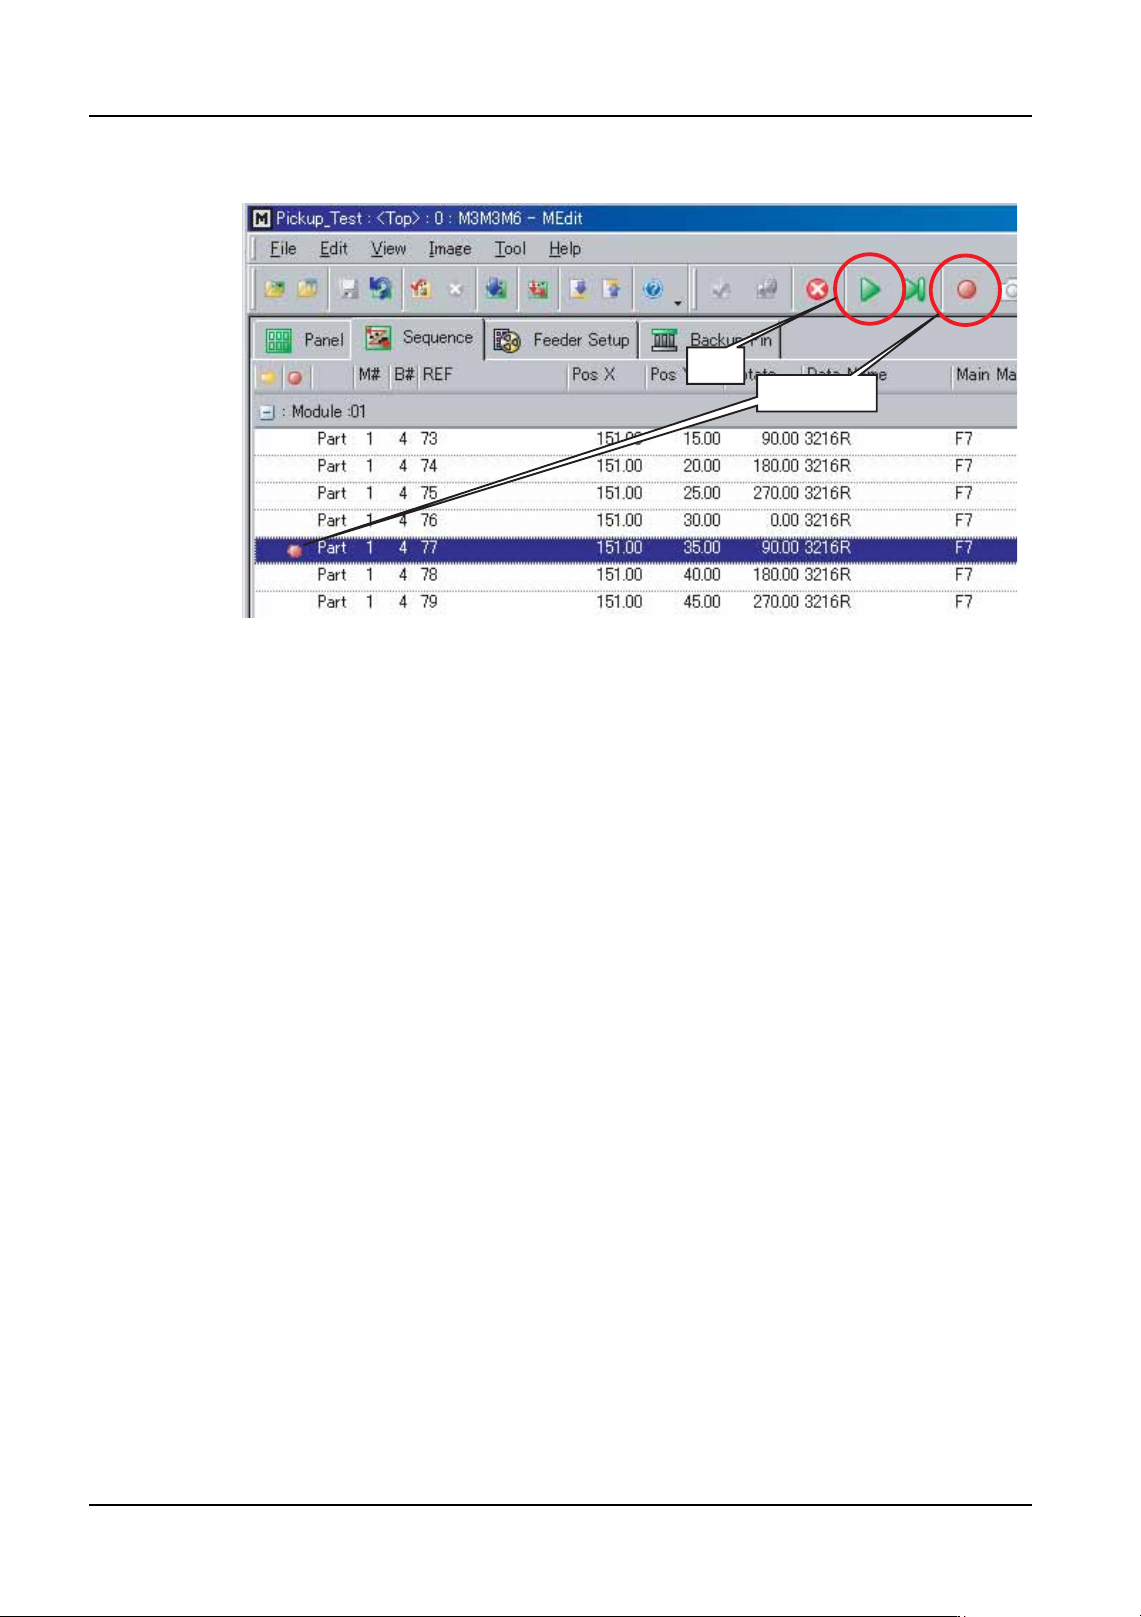
8. Select the sequence to be checked from the list in MEdit and click the break point button
(the round red button). This designates that the sequence is to be checked and the
sequence gets a red circle icon in the beginning column of that sequence.
Note: It is possible to specify multiple break points. The sequences with the break points are
stopped at and the captured image is sent to MEdit to be checked. The images for non-
break point sequences are not set to MEdit to be checked, unless the next sequence
command is being used.
9. If desired, specify a starting sequence for the check by selecting the sequence to start
the machine from and then click the start sequence button (the yellow arrow button).
When the check is started, this will be the sequence at which the check will start.
NXTEJM003E
Break point
Start